

I would like to start with giving you a quick overview of all the steps we will follow to draw our cat. At this stage don’t worry about all the details yet, because we will go in all the details for each step in the next sections of this guide.
Difficulté
Facile
Durée
5 minute(s)
Catégories
Art
Coût
0 USD ($)
Introduction
At this stage we’re going to create a “cat skeleton” drawing, a simple sketch that helps define the pose and proportions before going into details. Make sure to draw these lines lightly, to be able to erase them later, or to make them less visible once you add the final lines.
Youtube
Matériaux
Outils
Étape 1 - Draw a circle
Make sure your circle is a little bit to the left of the middle of your paper. This will become the middle part of the body of the cat, so please make sure to leave enough space on the top and the bottom of your paper.


Étape 2 - Draw a bigger circle next to it
The upper edges of both circles should be in line.

Étape 3 - Draw a horizontal line under the cat’s body
This line represents the ground level. To make sure you use the right proportions, please measure the hight of the inner circle and apply the same distance under that circle to find the perfect location for your horizontal line, as shown in the picture below.

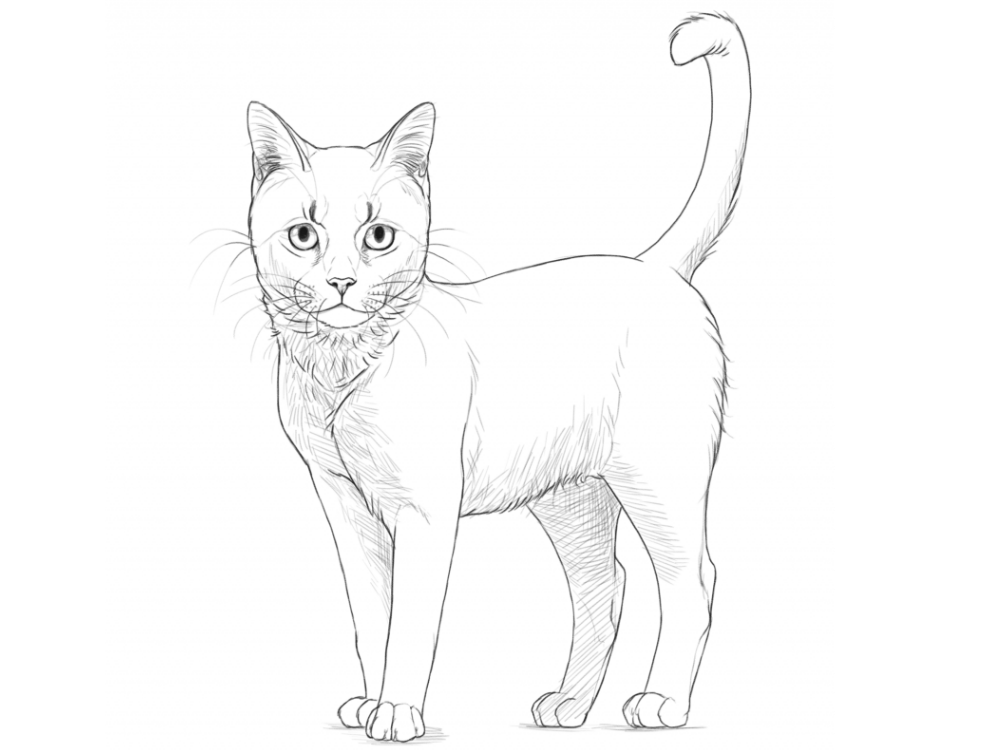
Étape 4 - Remove your guidelines and add a few shades
Our cat drawing is almost finished so it’s a good time to carefully remove the guidlines and add a few shaded. You can choose how you add shades, but the most easy way to do it is to imagine a light source shining from a certain direction on our cat. Assuming the light source is above, we get the result below.

Notes et références
You’ve just learned how to draw a cat step by step! I hope you enjoyed this tutorial. Don’t forget to come back for more easy drawing tutorials in the future.
Published
 Français
 English
 Deutsch
 Español
 Italiano
 Português