- Learn the basic concepts of 3d and 3d models, solids and slices - Learn the basic concepts of laser cutting and 3d printing
- Optional: Introduce a simple software tool for slicing 3d models (Slicer for Fusion 360 with active Autodesk account)Sommaire
Introduction
Activity Plan
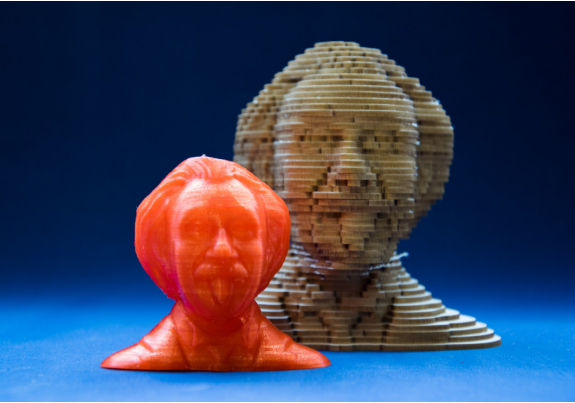
- The tutor shows a 3D model previously printed or shows it on a screen using a 3D visualizer.
[The use of static screenshots images or paper prints is not recommended, as this way of visualizing give no perception of the physical model.]
- Lasercut pieces are scattered on a table. The pieces are etched with a number, but the solution it’s not sequential! The tutor will be provided of the final solution sequence of random numbers.wi
- Set the vertical dowel with the first layer from the bottom
- Ask the participants to build the object
Hints to solve the puzzle:
As the tutor is provided with the solution of the sliced puzzle, he should place the first pieces in order to encourage and give a clue to kids.
The numbers and symbols engraved on the pieces should always face up.
Parts of similar dimensions will go together.
As the slices are regular, there won’t be large differences from one slice to the next one.
Kids have to look with attention to 3d model and understand when the model goes from large to narrow and the opposite.
A suggestion is to start from easy, recognizable parts and then connect the parts together with the remaining slices. Just like is common to solve a jigsaw puzzle, when you start from the corners and/or from a clear area of the image.
Matériaux
Lasercut puzzle parts, 3d printed model
Outils
Optional: computer with Slicer for Fusion 360
- Slicer for Fusion 360 download link
- Original 3D model on Thingiverse
- Model for Slicer (resized and with parameters set)
- Files for laser cutting with encrypted numbers
- Number sequence solution
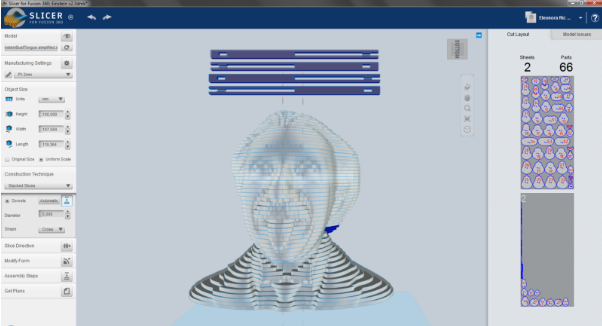
Étape 1 - How to slice the 3d model with Slicer for Fusion 360.
Steps:
- Download an install Slicer for Fusion 360.
- We prepared a smaller and easier to process 3d model. Import the Einstein simplified model or:
- Download the 3D model Einstein bust from Thingiverse . Just the file “EinsteinBustTongue.stl” is needed. The file is quite big, it will probably need a powerful computer
- Import the 3d model EinsteinBustTongue.stl in Slicer
- Set the units to mm
- Set the desired size for the model. We suggest minimum 10cm height
- Choose the desired sheet format in Manufacturing Settings
- Choose the Construction Technique Stacked slices
- In manufacturing settings click on the small gear icon in order to see the advanced options at the bottom of the screen:
- Set the material thickness to the one you wish to use. Slot offset is usually 0.010 for most laser cutters.
- Set the dowels, choose “cross”: setting two dowels makes the puzzle easier, as the slices will be unable to rotate and their orientation will be defined by the dowels.
Étape 2 - How to design a stacked puzzle with Slic3r or Sketchup
As a reference, here are some information on how to create a stacked slice puzzle from a 3D model with other free softwares, namely Slic3r and Sketchup.
With Slic3r
Slic3r is an open source slicing software commonly used for 3D print.
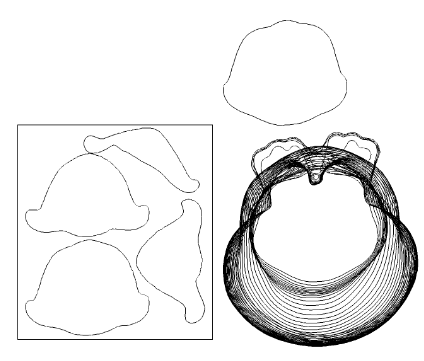
Here a quick guide on how to slice a 3D model to laser cut it as a puzzle.
- Modify the printer settings and as nozzle diameter set a very large size, for example 10 mm.
- In the print settings tab set a layer eight that is the same of the material you wish to use, for example 2 mm.
- From the FILE menu select SLICE TO SVG
- Select the 3D model you wish to use and choose a location and name for the file.
An .svg file with the chosen name will be saved in the chosen location.
Modify the .svg file with inkscape
Open the svg file with Inkscape.
The generated slices will be white, so they won’t be visible. Change the line color.
Select every slice and move it. Arrange the slices one by one next to each other, in order to cover the sheet format you wish to use for the laser cutter.
Save the file as required from your laser software.
Sketchup
Sketchup is a free 3D software.
Choose a model from the Sketchup library 3D warehouse or import one.
- Make a group of your model.
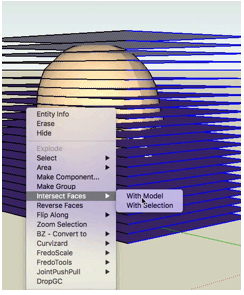
- Create a cutting plane and make copies at the depth of the material to be cut.
- Lap them over your model.
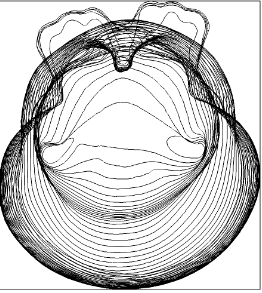
- Select all and intersect with model.
- Delete extra lines and organize your slices for export:
Notes et références
This tutorial has been developed as part of the FabEdu project, co-financed by the Erasmus+ Programme of the European Union.
Project number: 2017-1-FR02-KA205-012767
The content of this publication does not reflect the official opinion of the European Union. Responsibility for the information and views expressed in the therein lies entirely with the author(s).
For more details, contact info@digijeunes.com
Published


 Français
 English
 Deutsch
 Español
 Italiano
 Português