Will show you how to use the 3.5-inch PC state display.

Difficulté
Facile
Durée
1 heure(s)
Catégories
Électronique
Coût
20 USD ($)
Sommaire
- 1 Étape 1 - Story
- 2 Étape 2 - Get PCBs for Your Projects Manufactured
- 3 Étape 3 - Installing the Display on the PC Case
- 4 Étape 4 - Connecting the Display to the Motherboard or USB Port
- 5 Étape 5 - Downloading and Running the Software
- 6 Étape 6 - Changing the Theme, Orientation, and Information
- 7 Étape 7 - Conclusion
- 8 Commentaires
Matériaux
Outils
Étape 1 - Story
If you are a PC enthusiast, you might want to monitor the performance and status of your PC components, such as CPU, GPU, RAM, SSD, HDD, temperature, fan speed, etc. However, opening the task manager or third-party software every time you want to check this information can be inconvenient and distracting.
Moreover, you might not be able to see this information when you are gaming or doing other full-screen activities.
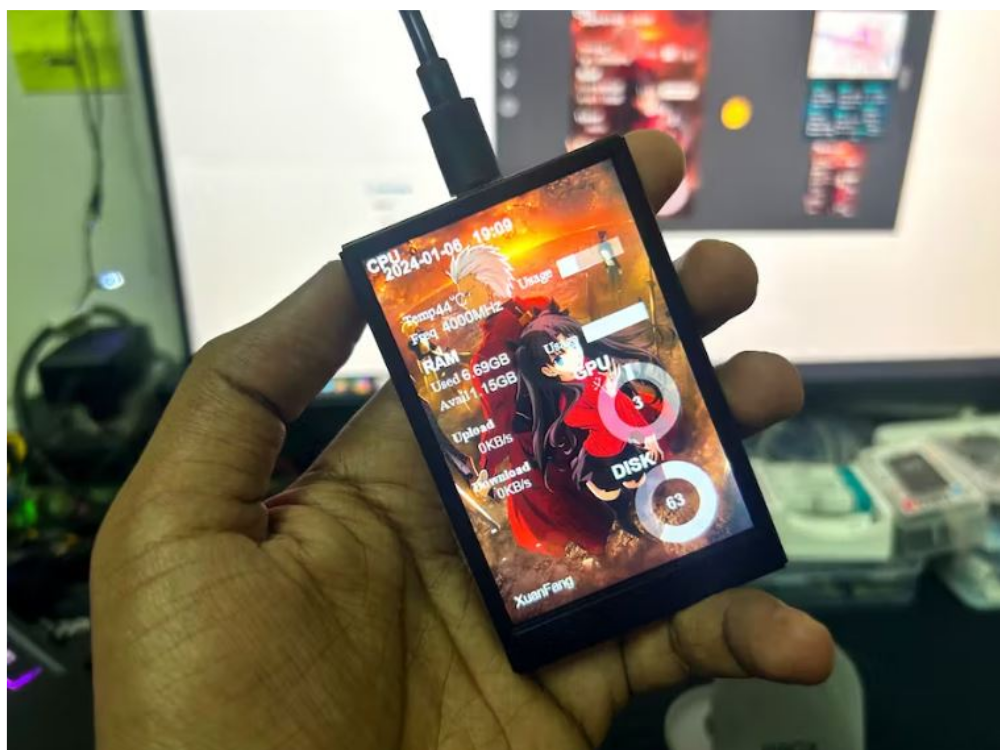
That’s why a 3.5-inch PC state display can be a great addition to your PC setup. A 3.5-inch PC state display is a small screen that can be mounted on your PC case and display various information about your PC state. It can show you the CPU model, usage, frequency, temperature, fan speed, GPU model, usage, frequency, temperature, fan speed, RAM usage, SSD/HDD usage, network speed, IP address, weather forecast, and custom information. You can also choose from different themes and orientations to suit your preferences.
A 3.5-inch PC state display can help you monitor your PC state at a glance, without interrupting your workflow or gaming experience. It can also enhance the aesthetics and functionality of your PC case, making it more personalized and attractive. Whether you are a gamer, a streamer, a content creator, or a professional, a 3.5-inch PC state display can be a useful and fun tool for your PC.
In this article, I will show you how to get started with a 3.5-inch PC state display, how to install it, how to customize it, and how to use it. Let’s begin!


Étape 2 - Get PCBs for Your Projects Manufactured
You must check out PCBWAY for ordering PCBs online for cheap!
You get 10 good-quality PCBs manufactured and shipped to your doorstep for cheap. You will also get a discount on shipping on your first order. Upload your Gerber files onto PCBWAY to get them manufactured with good quality and quick turnaround time. PCBWay now could provide a complete product solution, from design to enclosure production. Check out their online Gerber viewer function. With reward points, you can get free stuff from their gift shop. Also, check out this useful blog on PCBWay Plugin for KiCad from here. Using this plugin, you can directly order PCBs in just one click after completing your design in KiCad.

Étape 3 - Installing the Display on the PC Case
The 3.5-inch PC state display comes with a metal bracket that can be attached to your PC case using screws. The bracket has four holes that match the standard 3.5-inch drive bay size. You can use the screws that came with your PC case or the display to secure the bracket to the case. Make sure the display is facing the right direction and is aligned with the bracket.
Alternatively, you can use double-sided tape or Velcro to stick the display to your PC case, if you don’t want to use screws or if your case doesn’t have a 3.5-inch drive bay. You can also use a 3D-printed enclosure or a custom-made frame to mount the display on your PC case if you want to be more creative.

Étape 4 - Connecting the Display to the Motherboard or USB Port
The 3.5-inch PC state display has two cables: a power cable and a data cable. The power cable has a 5-pin connector that can be plugged into the motherboard’s USB 2.0 header. The data cable has a 9-pin connector that can be plugged into the motherboard’s COM port or serial port. If your motherboard doesn’t have a COM port or serial port, you can use a 9-pin USB adapter cable to connect the data cable to a USB port.
The power cable provides the power supply for the display, while the data cable provides communication between the display and the software. You need to connect both cables for the display to work properly.


Étape 5 - Downloading and Running the Software
You can download the latest version of the software from the official website or the link provided in the user manual.
To install the software, you need to download the software package and unzip it. Then, you need to run the setup.exe file and follow the instructions on the screen. The software will install the driver and the application for the display, and create a shortcut on your desktop.
To run the software, you need to double-click the shortcut on your desktop or find the application in the start menu. The software will automatically detect the display and show the information on the screen.
You can also access the settings and customization options from the software interface.


Étape 6 - Changing the Theme, Orientation, and Information
The 3.5-inch PC state display comes with several themes that you can choose from to suit your preferences. You can also change the orientation of the display to portrait or landscape mode, depending on how you mount the display on your PC case. Moreover, you can customize the information that you want to see on the display, such as the CPU model, the GPU model, the network speed, etc.
To change the theme, orientation, and information of the display, you need to open the software interface and click on the “Settings” button. You will see a window with different tabs and options. On the “Theme” tab, you can select the theme from the drop-down menu. You can also adjust the screen flip angle from 0 to 180 degrees. On the “Information” tab, you can check or uncheck the items that you want to display on the screen. You can also enter some custom information, such as your name or your PC name. On the “Other” tab, you can change the language, the font size, the refresh rate, and the brightness of the display. After you make your changes, you need to click on the “Save” button and restart the software for the changes to take effect


Étape 7 - Conclusion

Published
 Français
 English
 Deutsch
 Español
 Italiano
 Português