Introduction
The Open Source Beehives project is a collaboration between Fab Lab Barcelona and the Open Tech Collaborative. The project aims to build a global community of experienced and beginner beekeepers to share data and collectively study the disappearance of our bees. Around this data we hope to find evidence of the factors causing the problem, prove what they are, and adjust them.
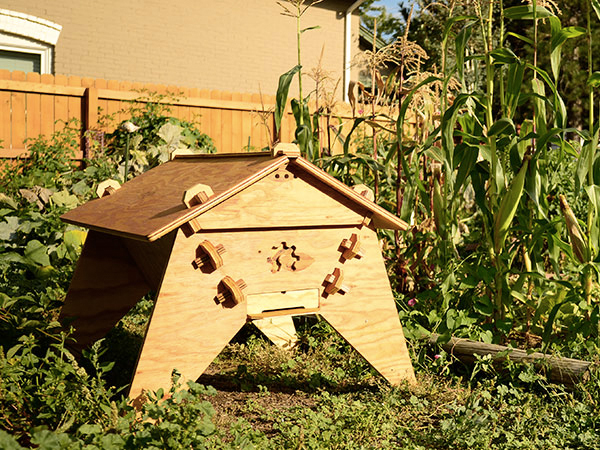
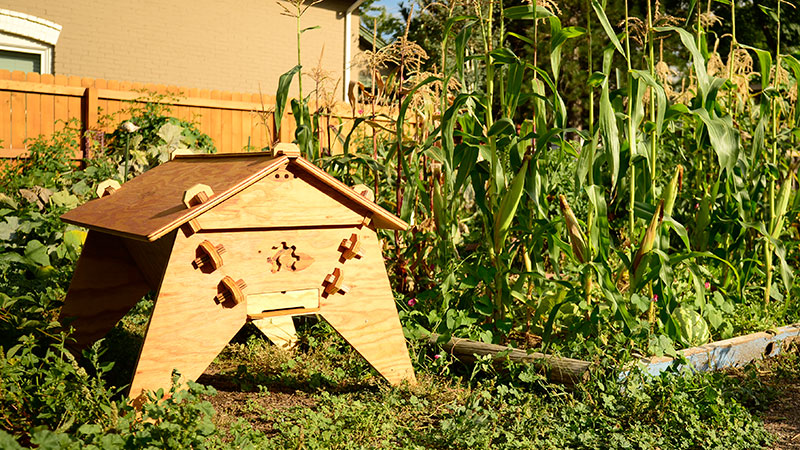
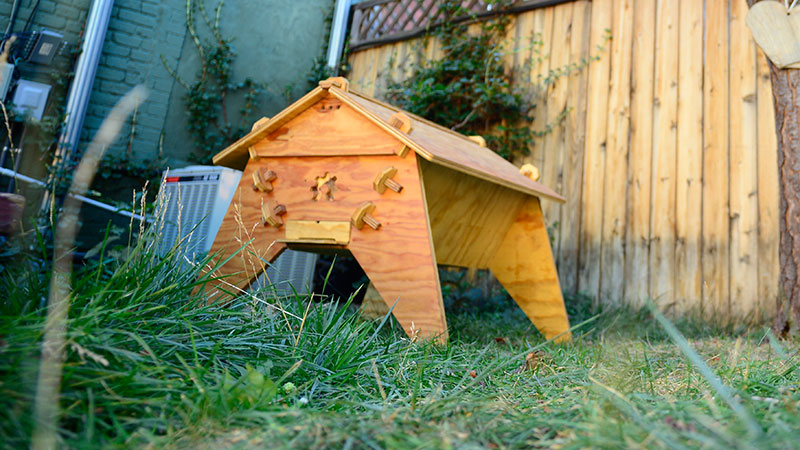
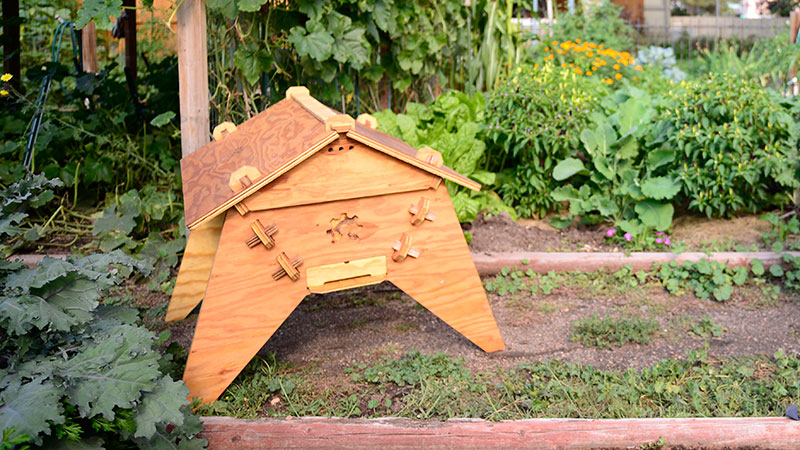
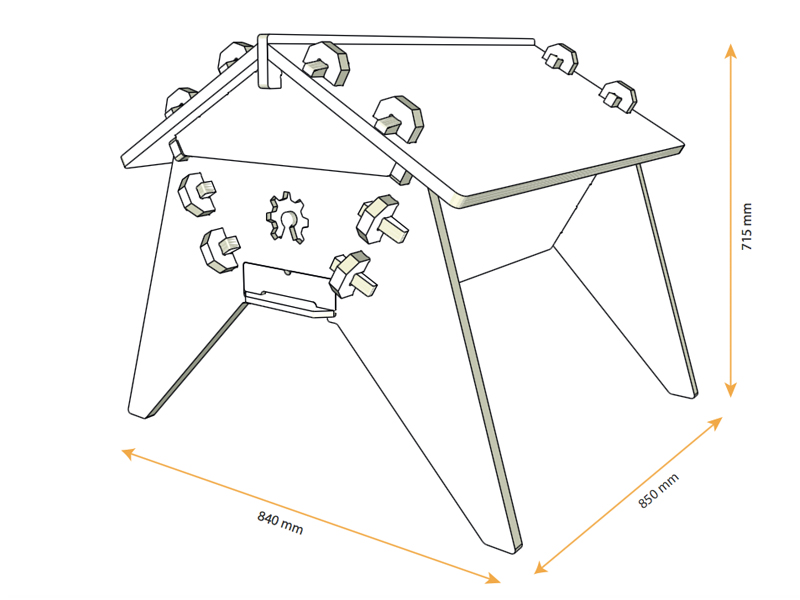
This tutorial contains the information you will need to purchase, fabricate, and assemble your new Colorado Top Bar hive.
Matériaux
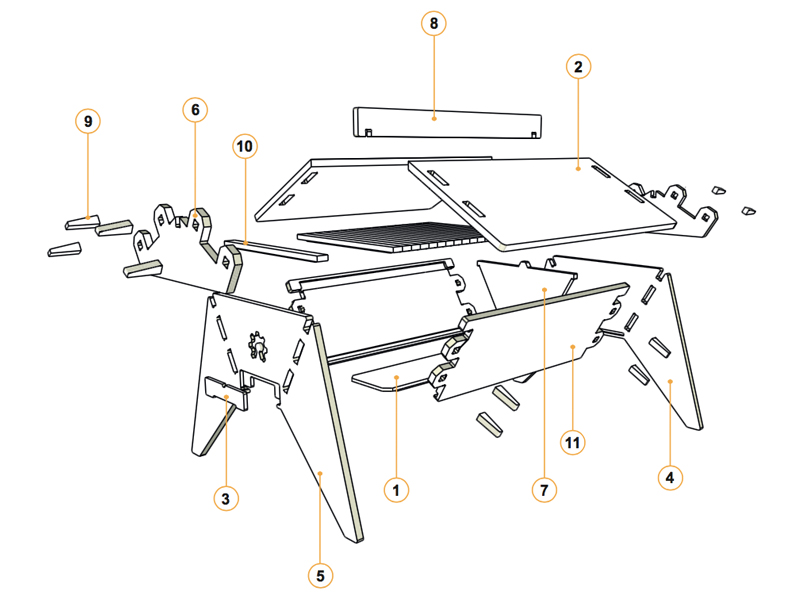
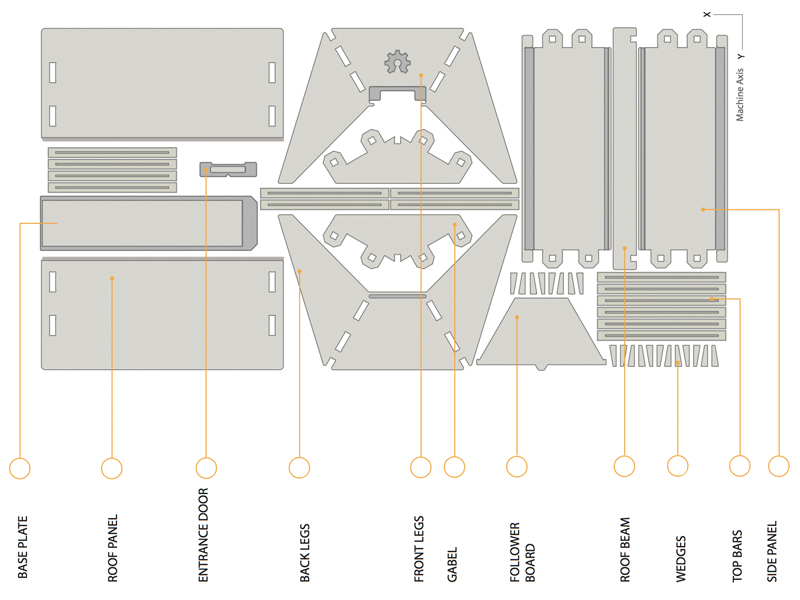
- 01. Base Plate x1
- 02. Roof Panel x2
- 03. Entrance Door x1
- 04. Back Legs x1
- 05. Front Legs x1
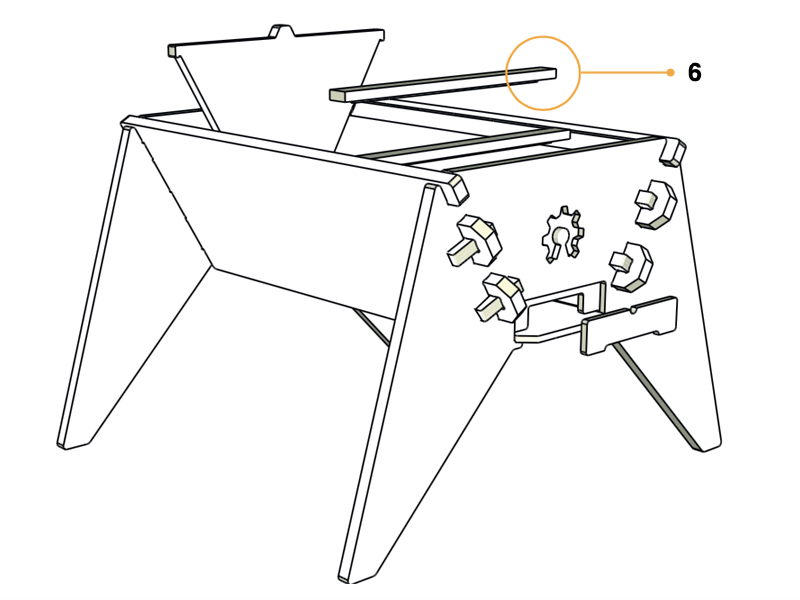
- 06. Gabel x2
- 07. Follower Board x1
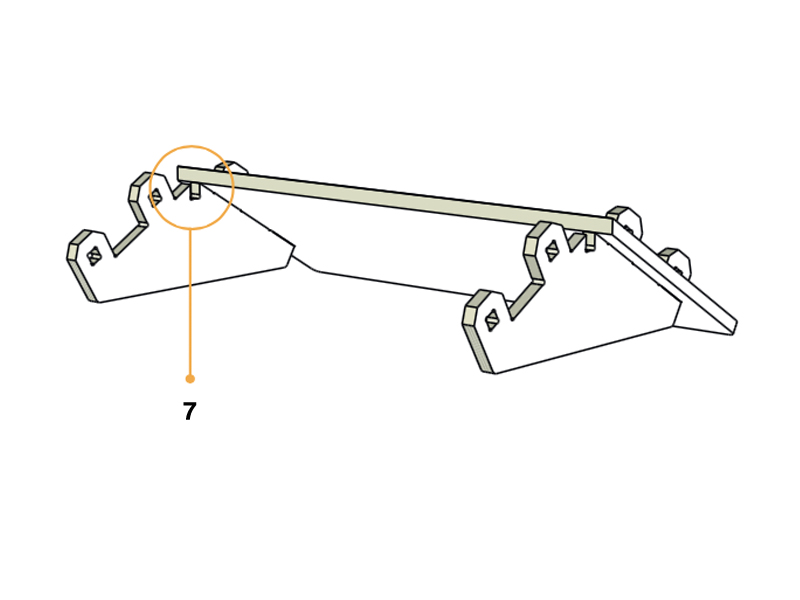
- 08. Roof Beam x1
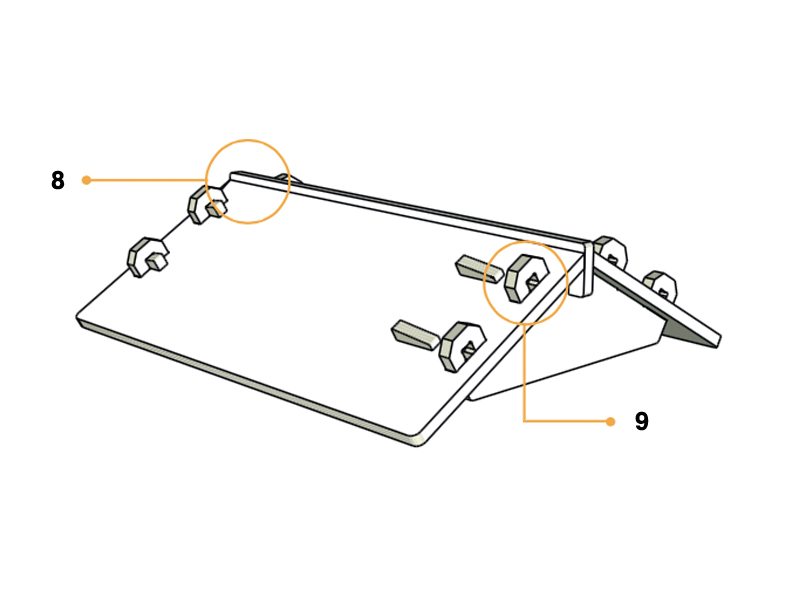
- 09. Wedges x16
- 10. Top Bars x16
- 11. Side Panel x2
Download the design files on Github.
Outils
A CNC router is a computer-controlled milling machine. They are often used to manufacture custom cabinetry and are available in most metropolitan areas.
Check out the Maker Map to locate one in your city.
Étape 1 - CNC milling and cut strategies
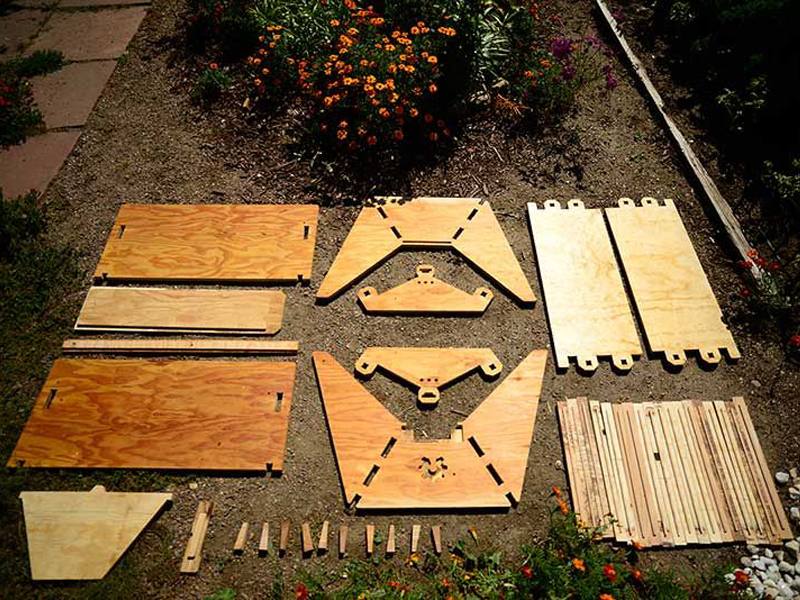
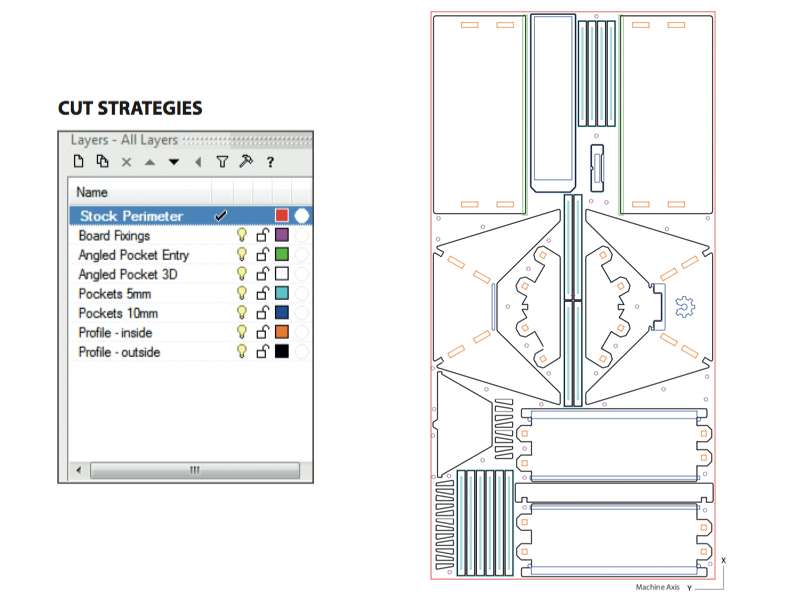
The hives have been designed to be cut using one standard size plywood board of 1220mm x 2440mm or 4 x 8 feet. This drawing shows the Cut Strategies that a machine operator will need to use with their own CAM software, (Computer Aided Manufacture). To help in the creation of the machine tool paths we have split the strategies into color coded layers and named them according to the strategy required.
See the ‘Nesting’ and ‘Cut Strategy’ files on Github.
Étape 2 - Hive body
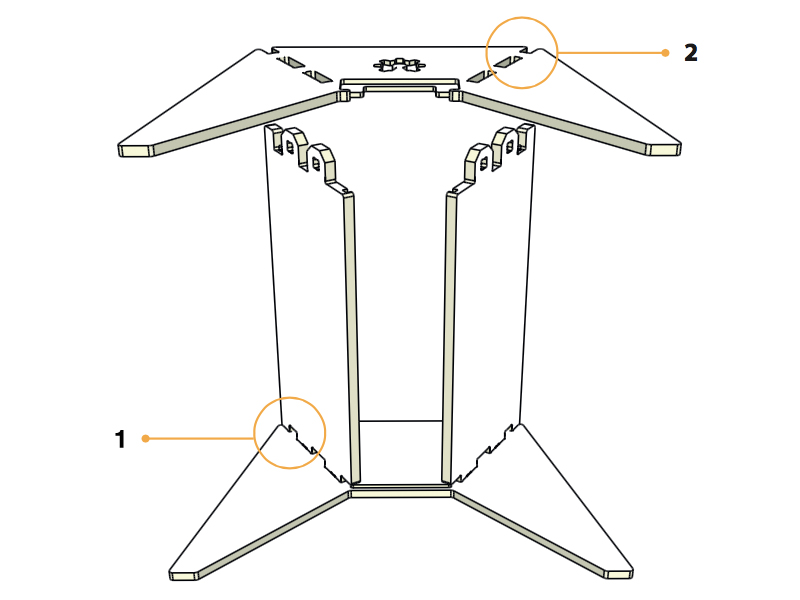
1. Lay the Back Legs flat on the floor and then place the two side panels into the corresponding slots.
2. Place the front legs into place
Étape 3 - Wedges
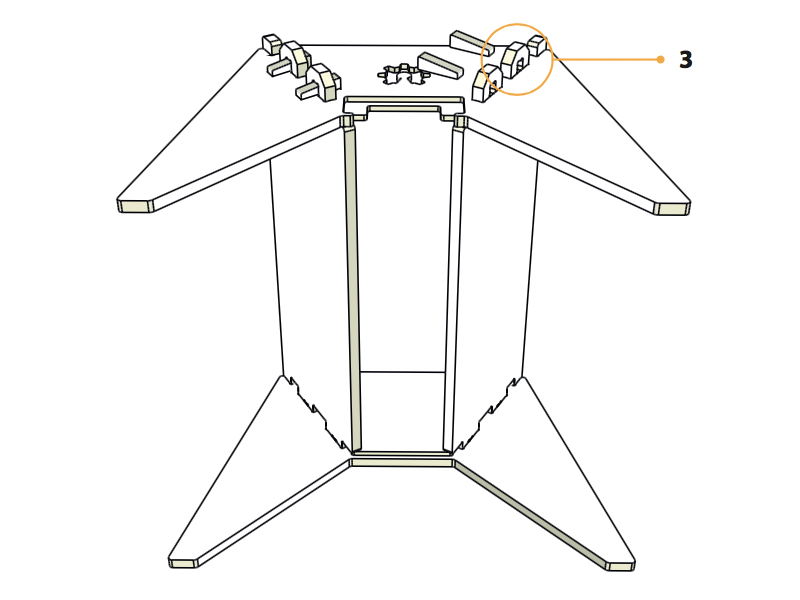
3. Whilst still resting on the floor add the wedges to the lock joints of side panels. Leave them loose for now.
Étape 4 - Base plate
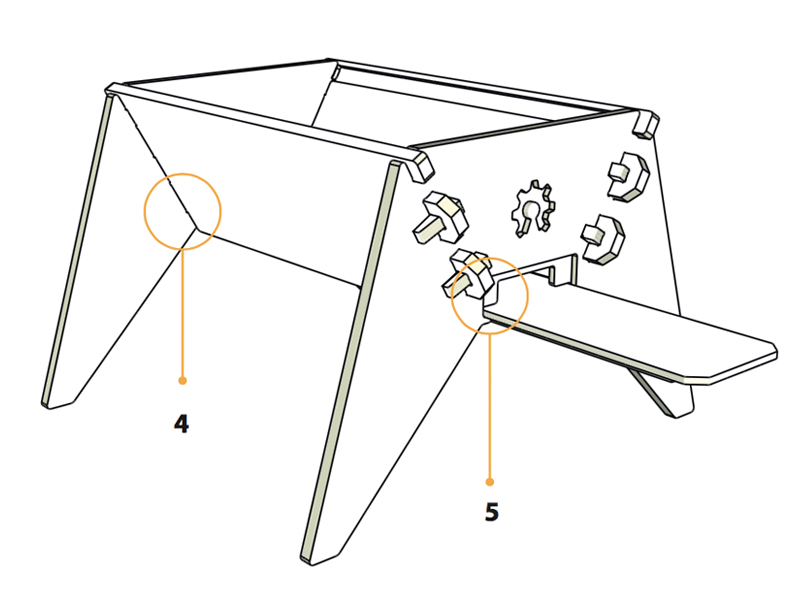
4. Place the hive body in a horizontal position and add the wedges to the back feet panel.
5.Carefully push the Base plate in through the front entrance and be sure that it locates along the groves and into the slot on the inside of the back feet panel.
Étape 5 - Moveable pieces
6. Add the Follower Board. Add as many top bars as needed for you colony size with the protrusion facing down.
Étape 7 - Roof beam
8. Add the Roof Beam. Add the wedges.
9. Give all the wedges a few taps with a hammer untill the Roof panels grip the Beam enough to create a compression fit.
Étape 8 -
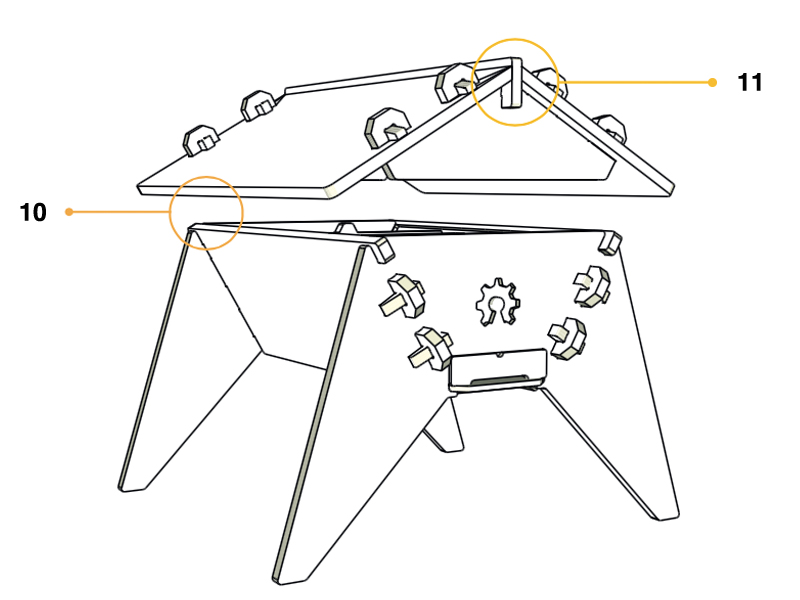
10. Place the roof onto the hive body by locating the Gable ends to the Feet. Locate one side first and then drop the next into place.
11. Use a table saw to cut 30 degree angles in each roof panel where they intersect the roof beam (measure the angle to doublecheck before cutting).
Étape 9 -
The beehive is ideal for backyards, rooftops and large balconies. It can also be used in larger rural spaces. It is important that users consider the availability of forage (pollinating plants that honeybees can eat) and plant additional bee friendly plants if only a small amount is available. Keep in mind that bees patrol several miles outwards in each direction while foraging.
Notes et références
- See also our Open Source beehives project, we're building a global network of citizen scientists to discover the reason bee populations are declining throughout the world.
Published

 Français
 English
 Deutsch
 Español
 Italiano
 Português