(Page créée avec « AI file with all informations and content on different layers ») |
(update property name) |
||
| (44 révisions intermédiaires par 3 utilisateurs non affichées) | |||
| Ligne 1 : | Ligne 1 : | ||
| − | {{ | + | {{Tuto Details |
| + | |Main_Picture=8bits_&_Chocolate_-_distributeur_décoratif_de_friandises_anim.gif | ||
| + | |Licences=Attribution-ShareAlike (CC BY-SA) | ||
| + | |Description=Decorative candy dispenser in retro-gaming style. | ||
| + | |Area=Art, Decoration, Food and Agriculture, Furniture, House, Play and Hobbies | ||
|Type=Creation | |Type=Creation | ||
| − | |||
| − | |||
| − | |||
|Difficulty=Easy | |Difficulty=Easy | ||
| + | |Duration=6 | ||
| + | |Duration-type=hour(s) | ||
|Cost=50 | |Cost=50 | ||
|Currency=EUR (€) | |Currency=EUR (€) | ||
| − | | | + | |Tags=distributeur, retro games, décoration, construction, decoupe laser, Découpe laser, Laser |
| − | |||
| − | |||
| − | |||
|SourceLanguage=fr | |SourceLanguage=fr | ||
|Language=en | |Language=en | ||
|IsTranslation=1 | |IsTranslation=1 | ||
}} | }} | ||
| − | {{ | + | {{Introduction |
|Introduction=You like peanuts covered with chocolate and retro video games? | |Introduction=You like peanuts covered with chocolate and retro video games? | ||
| Ligne 24 : | Ligne 24 : | ||
It's a completely customizable project, you'll be able to build the level of your dreams for your candies. Indeed the course you will create is made of modules that you can assemble as you want in almost any order as in a building game. | It's a completely customizable project, you'll be able to build the level of your dreams for your candies. Indeed the course you will create is made of modules that you can assemble as you want in almost any order as in a building game. | ||
| − | This project is made using only laser cutting (well, there's a few bolts and some glue and paint involved in the process ...) | + | This project is made using only laser cutting (well, there's a few bolts and some glue and paint involved in the process...) |
I hope you'll get the feeling of my project and create new modules, or imagine other themes for the decorations. It's up to you ! | I hope you'll get the feeling of my project and create new modules, or imagine other themes for the decorations. It's up to you ! | ||
}} | }} | ||
| − | {{ | + | {{TutoVideo |
|TutoVideoService=youtube | |TutoVideoService=youtube | ||
|TutoVideoURL=https://www.youtube.com/watch?v=yY_PxbHDH6Q&feature=youtu.be | |TutoVideoURL=https://www.youtube.com/watch?v=yY_PxbHDH6Q&feature=youtu.be | ||
}} | }} | ||
| − | {{ | + | {{Materials |
|Step_Picture_00=8bits_&_Chocolate_-_distributeur_mural_de_friandises_20171221_173322.jpg | |Step_Picture_00=8bits_&_Chocolate_-_distributeur_mural_de_friandises_20171221_173322.jpg | ||
|Step_Picture_01=8bits_&_Chocolate_-_distributeur_mural_de_friandises_20171221_173308.jpg | |Step_Picture_01=8bits_&_Chocolate_-_distributeur_mural_de_friandises_20171221_173308.jpg | ||
| Ligne 59 : | Ligne 59 : | ||
* Candle (or wax) | * Candle (or wax) | ||
| − | |Tuto_Attachments={{ | + | |Tuto_Attachments={{Tuto Attachments |
|Attachment=Virage PMMA.svg | |Attachment=Virage PMMA.svg | ||
| − | }}{{ | + | }}{{Tuto Attachments |
|Attachment=Virage CP.svg | |Attachment=Virage CP.svg | ||
| − | }}{{ | + | }}{{Tuto Attachments |
|Attachment=Virage.ai | |Attachment=Virage.ai | ||
| − | }}{{ | + | }}{{Tuto Attachments |
|Attachment=Aide virage.pdf | |Attachment=Aide virage.pdf | ||
| − | }}{{ | + | }}{{Tuto Attachments |
|Attachment=Petit couloir.ai | |Attachment=Petit couloir.ai | ||
| − | }}{{ | + | }}{{Tuto Attachments |
|Attachment=Petit couloir PMMA.svg | |Attachment=Petit couloir PMMA.svg | ||
| − | }}{{ | + | }}{{Tuto Attachments |
|Attachment=Petit couloir CP.svg | |Attachment=Petit couloir CP.svg | ||
| − | }}{{ | + | }}{{Tuto Attachments |
|Attachment=Aide petit couloir.pdf | |Attachment=Aide petit couloir.pdf | ||
| − | }}{{ | + | }}{{Tuto Attachments |
|Attachment=Grand couloir PMMA.svg | |Attachment=Grand couloir PMMA.svg | ||
| − | }}{{ | + | }}{{Tuto Attachments |
|Attachment=Grand couloir CP.svg | |Attachment=Grand couloir CP.svg | ||
| − | }}{{ | + | }}{{Tuto Attachments |
|Attachment=Grand couloir.ai | |Attachment=Grand couloir.ai | ||
| − | }}{{ | + | }}{{Tuto Attachments |
|Attachment=Aide grand couloir.pdf | |Attachment=Aide grand couloir.pdf | ||
| − | }}{{ | + | }}{{Tuto Attachments |
|Attachment=Systeme de distribution.ai | |Attachment=Systeme de distribution.ai | ||
| − | }}{{ | + | }}{{Tuto Attachments |
|Attachment=Systeme distribution CP.svg | |Attachment=Systeme distribution CP.svg | ||
| − | }}{{ | + | }}{{Tuto Attachments |
|Attachment=Aide systeme distribution.pdf | |Attachment=Aide systeme distribution.pdf | ||
| − | }}{{ | + | }}{{Tuto Attachments |
|Attachment=Arrivee PMMA.svg | |Attachment=Arrivee PMMA.svg | ||
| − | }}{{ | + | }}{{Tuto Attachments |
|Attachment=Arrivee CP.svg | |Attachment=Arrivee CP.svg | ||
| − | }}{{ | + | }}{{Tuto Attachments |
|Attachment=Arrivee.ai | |Attachment=Arrivee.ai | ||
| − | }}{{ | + | }}{{Tuto Attachments |
|Attachment=Aide arrivee.pdf | |Attachment=Aide arrivee.pdf | ||
| − | }}{{ | + | }}{{Tuto Attachments |
|Attachment=Conteneur coeur.ai | |Attachment=Conteneur coeur.ai | ||
| − | }}{{ | + | }}{{Tuto Attachments |
|Attachment=Conteneur coeur CP.svg | |Attachment=Conteneur coeur CP.svg | ||
| − | }}{{ | + | }}{{Tuto Attachments |
|Attachment=Conteneur coeur PMMA.svg | |Attachment=Conteneur coeur PMMA.svg | ||
| − | }}{{ | + | }}{{Tuto Attachments |
|Attachment=Aide conteneur coeur.pdf | |Attachment=Aide conteneur coeur.pdf | ||
}} | }} | ||
}} | }} | ||
| − | {{ | + | {{Separator}} |
| − | {{ | + | {{Tuto Step |
| − | |||
| − | |||
| − | |||
|Step_Title=Starting with a cardboard prototype | |Step_Title=Starting with a cardboard prototype | ||
|Step_Content=This step is only required if you start from scratch as I did (for example if you want to create new modules or a new theme) | |Step_Content=This step is only required if you start from scratch as I did (for example if you want to create new modules or a new theme) | ||
| Ligne 118 : | Ligne 115 : | ||
This way you'll be able to quickly see what can and can not work and not waste wood unnecessarily. A file is very rarely perfect on the first run (or even the second!) | This way you'll be able to quickly see what can and can not work and not waste wood unnecessarily. A file is very rarely perfect on the first run (or even the second!) | ||
| + | |Step_Picture_00=8bits_&_Chocolate_-_distributeur_mural_de_friandises_protocarton1.jpg | ||
| + | |Step_Picture_01=8bits_&_Chocolate_-_distributeur_décoratif_de_friandises_vircarton.jpg | ||
| + | |Step_Picture_02=8bits_&_Chocolate_-_distributeur_mural_de_friandises_protocarton3.jpg | ||
}} | }} | ||
| − | {{ | + | {{Tuto Step |
| − | |||
|Step_Title=Making about 25 prototypes (or close to) to get it running | |Step_Title=Making about 25 prototypes (or close to) to get it running | ||
| − | |Step_Content=Well, I may be exaggerating a little bit. After the first cardboard prototype I thought it would be nice to make the course completely modular (sometimes we have ideas like that ... which we almost regret!). | + | |Step_Content=Well, I may be exaggerating a little bit. After the first cardboard prototype I thought it would be nice to make the course completely modular (sometimes we have ideas like that... which we almost regret!). |
Easy idea ... harder to get it done. Iterate. Test after test I ended up with something satisfactory. | Easy idea ... harder to get it done. Iterate. Test after test I ended up with something satisfactory. | ||
| − | The course making me think of [https://upload.wikimedia.org/wikipedia/en/f/fd/Donkey_Kong_Gameplay.png Mario vs Donkey Kong] I decided to make a retro gaming theme inspired by the beautiful era of 8bits ... | + | The course making me think of [https://upload.wikimedia.org/wikipedia/en/f/fd/Donkey_Kong_Gameplay.png Mario vs Donkey Kong] I decided to make a retro gaming theme inspired by the beautiful era of 8bits... |
What's nice is that you can keep the modules plugging system and only change the theme, to adapt it as you wish. | What's nice is that you can keep the modules plugging system and only change the theme, to adapt it as you wish. | ||
| + | |Step_Picture_00=8bits_&_Chocolate_-_distributeur_mural_de_friandises_protobazar.jpg | ||
}} | }} | ||
| − | {{ | + | {{Tuto Step |
| − | |||
| − | |||
| − | |||
|Step_Title=If you only want to reproduce, start here! | |Step_Title=If you only want to reproduce, start here! | ||
|Step_Content=As previously explained (admit that you jumped directly to this one), the principle of this distributor is that it is flexible! Simply put, if you want to make a journey 2 meters high it's possible. Just cut out the modules you need and assemble them in whatever order you want. For the moment I realized 6 modules: | |Step_Content=As previously explained (admit that you jumped directly to this one), the principle of this distributor is that it is flexible! Simply put, if you want to make a journey 2 meters high it's possible. Just cut out the modules you need and assemble them in whatever order you want. For the moment I realized 6 modules: | ||
| Ligne 147 : | Ligne 144 : | ||
* And a terminating cup (with a nice end of level flag!) | * And a terminating cup (with a nice end of level flag!) | ||
| − | In the future I'm counting on you to help me to make other nice modules (motorized distribution system, continuous distribution for kibble for example cat, waterfall, jump ... looping ... good ok I'm going too far .) | + | In the future I'm counting on you to help me to make other nice modules (motorized distribution system, continuous distribution for kibble for example cat, waterfall, jump... looping... good ok I'm going too far.) |
For these 6 modules you will find a corresponding file that will allow you to do it independently. For each module you need plywood and pmma with the exception of the rotary system which is all plywood. | For these 6 modules you will find a corresponding file that will allow you to do it independently. For each module you need plywood and pmma with the exception of the rotary system which is all plywood. | ||
I advise you to think ahead of the course you want to achieve and group several modules on a single cutting board depending on the size of your boards and laser cutting. By default each module can be cut on a board of 610 x 305 mm. | I advise you to think ahead of the course you want to achieve and group several modules on a single cutting board depending on the size of your boards and laser cutting. By default each module can be cut on a board of 610 x 305 mm. | ||
| + | |Step_Picture_00=8bits_&_Chocolate_-_distributeur_mural_de_friandises_dansLaTrotec.jpg | ||
| + | |Step_Picture_01=8bits_&_Chocolate_-_distributeur_mural_de_friandises_tablePieces.jpg | ||
| + | |Step_Picture_02=8bits_&_Chocolate_-_distributeur_mural_de_friandises_finalBois.jpg | ||
}} | }} | ||
| − | {{ | + | {{Tuto Step |
| − | |||
| − | |||
|Step_Title=Setup of the laser cutting machine | |Step_Title=Setup of the laser cutting machine | ||
|Step_Content=The material parameters for Trotec Speedy 300 laser cutting are as follows: | |Step_Content=The material parameters for Trotec Speedy 300 laser cutting are as follows: | ||
| Ligne 163 : | Ligne 161 : | ||
- Power: '' '100' '' Speed: '' '1' '' for 3 mm transparent PMMA | - Power: '' '100' '' Speed: '' '1' '' for 3 mm transparent PMMA | ||
| − | These settings are to be applied to the colors red, blue and green to allow the cutting of the interior parts before the exteriors ... Written like that it may seem a little complicated, but if you look at the files you will understand better what I want to talk about . | + | These settings are to be applied to the colors red, blue and green to allow the cutting of the interior parts before the exteriors... Written like that it may seem a little complicated, but if you look at the files you will understand better what I want to talk about. |
| + | |Step_Picture_00=8bits_&_Chocolate_-_distributeur_décoratif_de_friandises_info_cp.JPG | ||
| + | |Step_Picture_01=8bits_&_Chocolate_-_distributeur_décoratif_de_friandises_info_pmma.JPG | ||
}} | }} | ||
| − | {{ | + | {{Tuto Step |
| − | |||
| − | |||
| − | |||
|Step_Title=Tank module in the shape of a pixelated heart | |Step_Title=Tank module in the shape of a pixelated heart | ||
|Step_Content=Laser cutting time for this module: | |Step_Content=Laser cutting time for this module: | ||
| Ligne 181 : | Ligne 178 : | ||
[[:Fichier:Conteneur coeur.ai|AI file with all informations and content on different layers]] | [[:Fichier:Conteneur coeur.ai|AI file with all informations and content on different layers]] | ||
| + | |Step_Picture_00=8bits_&_Chocolate_-_distributeur_décoratif_de_friandises_HLD_6552.jpg | ||
| + | |Step_Picture_00_annotation={"objects":[{"type":"wfrect","originX":"center","originY":"center","left":294.14,"top":67.55,"width":100,"height":100,"fill":"rgba(255,0,0,0)","stroke":"white","strokeWidth":2.54,"strokeDashArray":null,"strokeLineCap":"butt","strokeLineJoin":"miter","strokeMiterLimit":10,"scaleX":1.29,"scaleY":1.07,"angle":0,"flipX":false,"flipY":false,"opacity":1,"shadow":null,"visible":true,"clipTo":null,"backgroundColor":"","fillRule":"nonzero","globalCompositeOperation":"source-over","transformMatrix":null,"skewX":0,"skewY":0,"rx":0,"ry":0}],"height":"399","width":"600"} | ||
| + | |Step_Picture_01=8bits_&_Chocolate_-_distributeur_décoratif_de_friandises_coeur_montage.jpg | ||
}} | }} | ||
| − | {{ | + | {{Tuto Step |
| − | |||
| − | |||
| − | |||
| − | |||
| − | |||
|Step_Title=Rotating delivery system module | |Step_Title=Rotating delivery system module | ||
|Step_Content=Laser cutting time for this module: | |Step_Content=Laser cutting time for this module: | ||
| Ligne 195 : | Ligne 190 : | ||
- no PMMA parts | - no PMMA parts | ||
| − | [[:Fichier:Systeme distribution CP.svg| | + | [[:Fichier:Systeme distribution CP.svg|SVG files]] |
| − | [[:Fichier:Aide systeme distribution.pdf|PDF | + | [[:Fichier:Aide systeme distribution.pdf|PDF manual with help to build this module]] |
| − | [[:Fichier:Systeme de distribution.ai| | + | [[:Fichier:Systeme de distribution.ai|AI file with all informations and content on different layers]] |
I advise you to sand the central rotating part (see photos) and rub a candle or some wa to improve the rotation. | I advise you to sand the central rotating part (see photos) and rub a candle or some wa to improve the rotation. | ||
| + | |Step_Picture_00=8bits_&_Chocolate_-_distributeur_décoratif_de_friandises_HLD_6552.jpg | ||
| + | |Step_Picture_00_annotation={"objects":[{"type":"wfrect","originX":"center","originY":"center","left":294.45,"top":145.45,"width":100,"height":100,"fill":"rgba(255,0,0,0)","stroke":"white","strokeWidth":3.6,"strokeDashArray":null,"strokeLineCap":"butt","strokeLineJoin":"miter","strokeMiterLimit":10,"scaleX":0.83,"scaleY":0.83,"angle":0,"flipX":false,"flipY":false,"opacity":1,"shadow":null,"visible":true,"clipTo":null,"backgroundColor":"","fillRule":"nonzero","globalCompositeOperation":"source-over","transformMatrix":null,"skewX":0,"skewY":0,"rx":0,"ry":0}],"height":"399","width":"600"} | ||
| + | |Step_Picture_01=8bits_&_Chocolate_-_distributeur_décoratif_de_friandises_distrib.jpg | ||
| + | |Step_Picture_02=8bits_&_Chocolate_-_distributeur_décoratif_de_friandises_ponce.jpg | ||
| + | |Step_Picture_03=8bits_&_Chocolate_-_distributeur_décoratif_de_friandises_bougie.jpg | ||
}} | }} | ||
| − | {{ | + | {{Tuto Step |
| − | |||
| − | |||
| − | |||
| − | |||
| − | |||
|Step_Title="Turn" module | |Step_Title="Turn" module | ||
|Step_Content=Laser cutting time for 1 module: | |Step_Content=Laser cutting time for 1 module: | ||
| Ligne 216 : | Ligne 211 : | ||
- for 3mm transparent PMMA pieces: 14 seconds | - for 3mm transparent PMMA pieces: 14 seconds | ||
| − | + | SVG files : [[:Fichier:Virage CP.svg|for plywood]], [[:Fichier:Virage PMMA.svg|for PMMA]] | |
| − | [[:Fichier:Aide virage.pdf|PDF | + | [[:Fichier:Aide virage.pdf|PDF manual with help to build this module]] |
| − | [[:Fichier:Virage.ai| | + | [[:Fichier:Virage.ai|AI file with all informations and content on different layers]] |
| + | |Step_Picture_00=8bits_&_Chocolate_-_distributeur_décoratif_de_friandises_HLD_6552.jpg | ||
| + | |Step_Picture_00_annotation={"objects":[{"type":"wfrect","originX":"center","originY":"center","left":290.22,"top":185.22,"width":100,"height":100,"fill":"rgba(255,0,0,0)","stroke":"white","strokeWidth":5.88,"strokeDashArray":null,"strokeLineCap":"butt","strokeLineJoin":"miter","strokeMiterLimit":10,"scaleX":0.51,"scaleY":0.51,"angle":0,"flipX":false,"flipY":false,"opacity":1,"shadow":null,"visible":true,"clipTo":null,"backgroundColor":"","fillRule":"nonzero","globalCompositeOperation":"source-over","transformMatrix":null,"skewX":0,"skewY":0,"rx":0,"ry":0},{"type":"wfrect","originX":"center","originY":"center","left":353.31,"top":214.31,"width":100,"height":100,"fill":"rgba(255,0,0,0)","stroke":"white","strokeWidth":5.63,"strokeDashArray":null,"strokeLineCap":"butt","strokeLineJoin":"miter","strokeMiterLimit":10,"scaleX":0.53,"scaleY":0.53,"angle":0,"flipX":false,"flipY":false,"opacity":1,"shadow":null,"visible":true,"clipTo":null,"backgroundColor":"","fillRule":"nonzero","globalCompositeOperation":"source-over","transformMatrix":null,"skewX":0,"skewY":0,"rx":0,"ry":0},{"type":"wfrect","originX":"center","originY":"center","left":349.57,"top":245.57,"width":100,"height":100,"fill":"rgba(255,0,0,0)","stroke":"white","strokeWidth":5.69,"strokeDashArray":null,"strokeLineCap":"butt","strokeLineJoin":"miter","strokeMiterLimit":10,"scaleX":0.53,"scaleY":0.53,"angle":0,"flipX":false,"flipY":false,"opacity":1,"shadow":null,"visible":true,"clipTo":null,"backgroundColor":"","fillRule":"nonzero","globalCompositeOperation":"source-over","transformMatrix":null,"skewX":0,"skewY":0,"rx":0,"ry":0},{"type":"wfrect","originX":"center","originY":"center","left":232.84,"top":288.84,"width":100,"height":100,"fill":"rgba(255,0,0,0)","stroke":"white","strokeWidth":5.96,"strokeDashArray":null,"strokeLineCap":"butt","strokeLineJoin":"miter","strokeMiterLimit":10,"scaleX":0.5,"scaleY":0.5,"angle":0,"flipX":false,"flipY":false,"opacity":1,"shadow":null,"visible":true,"clipTo":null,"backgroundColor":"","fillRule":"nonzero","globalCompositeOperation":"source-over","transformMatrix":null,"skewX":0,"skewY":0,"rx":0,"ry":0},{"type":"wfrect","originX":"center","originY":"center","left":235.6,"top":318.6,"width":100,"height":100,"fill":"rgba(255,0,0,0)","stroke":"white","strokeWidth":5.9,"strokeDashArray":null,"strokeLineCap":"butt","strokeLineJoin":"miter","strokeMiterLimit":10,"scaleX":0.51,"scaleY":0.51,"angle":0,"flipX":false,"flipY":false,"opacity":1,"shadow":null,"visible":true,"clipTo":null,"backgroundColor":"","fillRule":"nonzero","globalCompositeOperation":"source-over","transformMatrix":null,"skewX":0,"skewY":0,"rx":0,"ry":0}],"height":"399","width":"600"} | ||
| + | |Step_Picture_01=8bits_&_Chocolate_-_distributeur_décoratif_de_friandises_virage_montage.jpg | ||
| + | |Step_Picture_01_annotation={"objects":[{"type":"wfrect","originX":"center","originY":"center","left":282.8,"top":434.8,"width":100,"height":100,"fill":"rgba(255,0,0,0)","stroke":"white","strokeWidth":2.79,"strokeDashArray":null,"strokeLineCap":"butt","strokeLineJoin":"miter","strokeMiterLimit":10,"scaleX":1.07,"scaleY":1.07,"angle":0,"flipX":false,"flipY":false,"opacity":1,"shadow":null,"visible":true,"clipTo":null,"backgroundColor":"","fillRule":"nonzero","globalCompositeOperation":"source-over","transformMatrix":null,"skewX":0,"skewY":0,"rx":0,"ry":0},{"type":"wfrect","originX":"center","originY":"center","left":416,"top":486,"width":100,"height":100,"fill":"rgba(255,0,0,0)","stroke":"white","strokeWidth":3,"strokeDashArray":null,"strokeLineCap":"butt","strokeLineJoin":"miter","strokeMiterLimit":10,"scaleX":1,"scaleY":1,"angle":0,"flipX":false,"flipY":false,"opacity":1,"shadow":null,"visible":true,"clipTo":null,"backgroundColor":"","fillRule":"nonzero","globalCompositeOperation":"source-over","transformMatrix":null,"skewX":0,"skewY":0,"rx":0,"ry":0},{"type":"wfrect","originX":"center","originY":"center","left":144,"top":663,"width":100,"height":100,"fill":"rgba(255,0,0,0)","stroke":"white","strokeWidth":3,"strokeDashArray":null,"strokeLineCap":"butt","strokeLineJoin":"miter","strokeMiterLimit":10,"scaleX":1,"scaleY":1,"angle":0,"flipX":false,"flipY":false,"opacity":1,"shadow":null,"visible":true,"clipTo":null,"backgroundColor":"","fillRule":"nonzero","globalCompositeOperation":"source-over","transformMatrix":null,"skewX":0,"skewY":0,"rx":0,"ry":0},{"type":"wfrect","originX":"center","originY":"center","left":405,"top":564,"width":100,"height":100,"fill":"rgba(255,0,0,0)","stroke":"white","strokeWidth":3,"strokeDashArray":null,"strokeLineCap":"butt","strokeLineJoin":"miter","strokeMiterLimit":10,"scaleX":1,"scaleY":1,"angle":0,"flipX":false,"flipY":false,"opacity":1,"shadow":null,"visible":true,"clipTo":null,"backgroundColor":"","fillRule":"nonzero","globalCompositeOperation":"source-over","transformMatrix":null,"skewX":0,"skewY":0,"rx":0,"ry":0},{"type":"wfrect","originX":"center","originY":"center","left":152,"top":733,"width":100,"height":100,"fill":"rgba(255,0,0,0)","stroke":"white","strokeWidth":3,"strokeDashArray":null,"strokeLineCap":"butt","strokeLineJoin":"miter","strokeMiterLimit":10,"scaleX":1,"scaleY":1,"angle":0,"flipX":false,"flipY":false,"opacity":1,"shadow":null,"visible":true,"clipTo":null,"backgroundColor":"","fillRule":"nonzero","globalCompositeOperation":"source-over","transformMatrix":null,"skewX":0,"skewY":0,"rx":0,"ry":0}],"height":"897","width":"600"} | ||
| + | |Step_Picture_02_annotation={"objects":[{"type":"wfrect","originX":"center","originY":"center","left":282.8,"top":434.8,"width":100,"height":100,"fill":"rgba(255,0,0,0)","stroke":"white","strokeWidth":2.79,"strokeDashArray":null,"strokeLineCap":"butt","strokeLineJoin":"miter","strokeMiterLimit":10,"scaleX":1.07,"scaleY":1.07,"angle":0,"flipX":false,"flipY":false,"opacity":1,"shadow":null,"visible":true,"clipTo":null,"backgroundColor":"","fillRule":"nonzero","globalCompositeOperation":"source-over","transformMatrix":null,"skewX":0,"skewY":0,"rx":0,"ry":0},{"type":"wfrect","originX":"center","originY":"center","left":416,"top":486,"width":100,"height":100,"fill":"rgba(255,0,0,0)","stroke":"white","strokeWidth":3,"strokeDashArray":null,"strokeLineCap":"butt","strokeLineJoin":"miter","strokeMiterLimit":10,"scaleX":1,"scaleY":1,"angle":0,"flipX":false,"flipY":false,"opacity":1,"shadow":null,"visible":true,"clipTo":null,"backgroundColor":"","fillRule":"nonzero","globalCompositeOperation":"source-over","transformMatrix":null,"skewX":0,"skewY":0,"rx":0,"ry":0},{"type":"wfrect","originX":"center","originY":"center","left":144,"top":663,"width":100,"height":100,"fill":"rgba(255,0,0,0)","stroke":"white","strokeWidth":3,"strokeDashArray":null,"strokeLineCap":"butt","strokeLineJoin":"miter","strokeMiterLimit":10,"scaleX":1,"scaleY":1,"angle":0,"flipX":false,"flipY":false,"opacity":1,"shadow":null,"visible":true,"clipTo":null,"backgroundColor":"","fillRule":"nonzero","globalCompositeOperation":"source-over","transformMatrix":null,"skewX":0,"skewY":0,"rx":0,"ry":0},{"type":"wfrect","originX":"center","originY":"center","left":405,"top":564,"width":100,"height":100,"fill":"rgba(255,0,0,0)","stroke":"white","strokeWidth":3,"strokeDashArray":null,"strokeLineCap":"butt","strokeLineJoin":"miter","strokeMiterLimit":10,"scaleX":1,"scaleY":1,"angle":0,"flipX":false,"flipY":false,"opacity":1,"shadow":null,"visible":true,"clipTo":null,"backgroundColor":"","fillRule":"nonzero","globalCompositeOperation":"source-over","transformMatrix":null,"skewX":0,"skewY":0,"rx":0,"ry":0},{"type":"wfrect","originX":"center","originY":"center","left":152,"top":733,"width":100,"height":100,"fill":"rgba(255,0,0,0)","stroke":"white","strokeWidth":3,"strokeDashArray":null,"strokeLineCap":"butt","strokeLineJoin":"miter","strokeMiterLimit":10,"scaleX":1,"scaleY":1,"angle":0,"flipX":false,"flipY":false,"opacity":1,"shadow":null,"visible":true,"clipTo":null,"backgroundColor":"","fillRule":"nonzero","globalCompositeOperation":"source-over","transformMatrix":null,"skewX":0,"skewY":0,"rx":0,"ry":0}],"height":"897","width":"600"} | ||
}} | }} | ||
| − | {{ | + | {{Tuto Step |
| − | |||
| − | |||
| − | |||
|Step_Title=Small straight section | |Step_Title=Small straight section | ||
|Step_Content=Laser cutting time for this module: | |Step_Content=Laser cutting time for this module: | ||
| Ligne 233 : | Ligne 230 : | ||
- for 3mm transparent PMMA pieces: 13 seconds | - for 3mm transparent PMMA pieces: 13 seconds | ||
| − | + | SVG files : [[:Fichier:Petit couloir CP.svg|for plywood]], [[:Fichier:Petit couloir PMMA.svg|for PMMA]] | |
| − | [[:Fichier:Aide petit couloir.pdf|PDF | + | [[:Fichier:Aide petit couloir.pdf|PDF manual with help to build this module]] |
| − | [[:Fichier:Petit couloir.ai| | + | [[:Fichier:Petit couloir.ai|AI file with all informations and content on different layers]] |
| + | |Step_Picture_00=8bits_&_Chocolate_-_distributeur_décoratif_de_friandises_HLD_6552.jpg | ||
| + | |Step_Picture_00_annotation={"objects":[{"type":"wfrect","originX":"center","originY":"center","left":323.82,"top":203.82,"width":100,"height":100,"fill":"rgba(255,0,0,0)","stroke":"white","strokeWidth":5.74,"strokeDashArray":null,"strokeLineCap":"butt","strokeLineJoin":"miter","strokeMiterLimit":10,"scaleX":0.52,"scaleY":0.52,"angle":0,"flipX":false,"flipY":false,"opacity":1,"shadow":null,"visible":true,"clipTo":null,"backgroundColor":"","fillRule":"nonzero","globalCompositeOperation":"source-over","transformMatrix":null,"skewX":0,"skewY":0,"rx":0,"ry":0}],"height":"399","width":"600"} | ||
| + | |Step_Picture_01_annotation={"objects":[{"type":"wfrect","originX":"center","originY":"center","left":353.36,"top":463.64,"width":100,"height":100,"fill":"rgba(255,0,0,0)","stroke":"white","strokeWidth":2.58,"strokeDashArray":null,"strokeLineCap":"butt","strokeLineJoin":"miter","strokeMiterLimit":10,"scaleX":1.16,"scaleY":1.16,"angle":0,"flipX":false,"flipY":false,"opacity":1,"shadow":null,"visible":true,"clipTo":null,"backgroundColor":"","fillRule":"nonzero","globalCompositeOperation":"source-over","transformMatrix":null,"skewX":0,"skewY":0,"rx":0,"ry":0}],"height":"897","width":"600"} | ||
}} | }} | ||
| − | {{ | + | {{Tuto Step |
| − | |||
| − | |||
| − | |||
|Step_Title=Long straight section | |Step_Title=Long straight section | ||
|Step_Content=Laser cutting time for one long straight section: | |Step_Content=Laser cutting time for one long straight section: | ||
| Ligne 250 : | Ligne 247 : | ||
- for 3mm transparent PMMA pieces: 27 seconds | - for 3mm transparent PMMA pieces: 27 seconds | ||
| − | + | SVG files : [[:Fichier:Grand couloir CP.svg|for plywood]], [[:Fichier:Grand couloir PMMA.svg|for PMMA]] | |
| − | [[:Fichier:Aide grand couloir.pdf|PDF | + | [[:Fichier:Aide grand couloir.pdf|PDF manual with help to build this module]] |
| − | [[:Fichier:Grand couloir.ai| | + | [[:Fichier:Grand couloir.ai|AI file with all informations and content on different layers]] |
| + | |Step_Picture_00=8bits_&_Chocolate_-_distributeur_décoratif_de_friandises_HLD_6552.jpg | ||
| + | |Step_Picture_00_annotation={"objects":[{"type":"wfrect","originX":"center","originY":"center","left":293.36,"top":267.84,"width":100,"height":100,"fill":"rgba(255,0,0,0)","stroke":"white","strokeWidth":3.45,"strokeDashArray":null,"strokeLineCap":"butt","strokeLineJoin":"miter","strokeMiterLimit":10,"scaleX":1.05,"scaleY":0.69,"angle":0,"flipX":false,"flipY":false,"opacity":1,"shadow":null,"visible":true,"clipTo":null,"backgroundColor":"","fillRule":"nonzero","globalCompositeOperation":"source-over","transformMatrix":null,"skewX":0,"skewY":0,"rx":0,"ry":0},{"type":"wfrect","originX":"center","originY":"center","left":293,"top":347.85,"width":100,"height":100,"fill":"rgba(255,0,0,0)","stroke":"white","strokeWidth":3.52,"strokeDashArray":null,"strokeLineCap":"butt","strokeLineJoin":"miter","strokeMiterLimit":10,"scaleX":1,"scaleY":0.71,"angle":0,"flipX":false,"flipY":false,"opacity":1,"shadow":null,"visible":true,"clipTo":null,"backgroundColor":"","fillRule":"nonzero","globalCompositeOperation":"source-over","transformMatrix":null,"skewX":0,"skewY":0,"rx":0,"ry":0}],"height":"399","width":"600"} | ||
| + | |Step_Picture_01=8bits_&_Chocolate_-_distributeur_décoratif_de_friandises_grancoul_montage.jpg | ||
}} | }} | ||
| − | {{ | + | {{Tuto Step |
| − | + | |Step_Title=ending module | |
| − | |||
| − | |||
| − | |Step_Title= | ||
|Step_Content=Laser cutting time for this module: | |Step_Content=Laser cutting time for this module: | ||
| Ligne 267 : | Ligne 264 : | ||
- for 3mm transparent PMMA pieces: 21 seconds | - for 3mm transparent PMMA pieces: 21 seconds | ||
| − | + | SVG files : [[:Fichier:Arrivee CP.svg|for plywood]], [[:Fichier:Arrivee PMMA.svg|for PMMA]] | |
| − | [[:Fichier:Aide arrivee.pdf|PDF | + | [[:Fichier:Aide arrivee.pdf|PDF manual with help to build this module]] |
| − | [[:Fichier:Arrivee.ai| | + | [[:Fichier:Arrivee.ai|AI file with all informations and content on different layers]] |
| + | |Step_Picture_00=8bits_&_Chocolate_-_distributeur_décoratif_de_friandises_HLD_6552.jpg | ||
| + | |Step_Picture_00_annotation={"objects":[{"type":"wfrect","originX":"center","originY":"center","left":375.8,"top":341,"width":100,"height":100,"fill":"rgba(255,0,0,0)","stroke":"white","strokeWidth":3.21,"strokeDashArray":null,"strokeLineCap":"butt","strokeLineJoin":"miter","strokeMiterLimit":10,"scaleX":0.87,"scaleY":1,"angle":0,"flipX":false,"flipY":false,"opacity":1,"shadow":null,"visible":true,"clipTo":null,"backgroundColor":"","fillRule":"nonzero","globalCompositeOperation":"source-over","transformMatrix":null,"skewX":0,"skewY":0,"rx":0,"ry":0}],"height":"399","width":"600"} | ||
| + | |Step_Picture_01=8bits_&_Chocolate_-_distributeur_décoratif_de_friandises_arrivee.jpg | ||
}} | }} | ||
| − | {{ | + | {{Tuto Step |
| − | |||
|Step_Title=Modules assembly | |Step_Title=Modules assembly | ||
|Step_Content=For the modules assembly I suggest that you refer to the PDF files. | |Step_Content=For the modules assembly I suggest that you refer to the PDF files. | ||
You'll find the pieces numbering and how to assemle them (with a few additional hints) | You'll find the pieces numbering and how to assemle them (with a few additional hints) | ||
| + | |Step_Picture_00=8bits_&_Chocolate_-_distributeur_décoratif_de_friandises_20171228_195751.gif | ||
}} | }} | ||
| − | {{ {{ | + | {{Tuto Step |
| + | |Step_Title=Adding some color (painting) | ||
| + | |Step_Content=If you want to paint your work as I did, you'll find all the color indications in the PDFs of the modules. | ||
| + | |||
| + | {{Idea|Use food grade varnish for your safety.}} | ||
|Step_Picture_00=8bits_&_Chocolate_-_distributeur_décoratif_de_friandises_couleur3.jpg | |Step_Picture_00=8bits_&_Chocolate_-_distributeur_décoratif_de_friandises_couleur3.jpg | ||
|Step_Picture_01=8bits_&_Chocolate_-_distributeur_décoratif_de_friandises_couleur2.jpg | |Step_Picture_01=8bits_&_Chocolate_-_distributeur_décoratif_de_friandises_couleur2.jpg | ||
|Step_Picture_02=8bits_&_Chocolate_-_distributeur_décoratif_de_friandises_couleur1.jpg | |Step_Picture_02=8bits_&_Chocolate_-_distributeur_décoratif_de_friandises_couleur1.jpg | ||
| − | |||
| − | |||
| − | |||
| − | |||
}} | }} | ||
| − | {{ | + | {{Tuto Step |
| + | |Step_Title=Level assembly | ||
| + | |Step_Content=Once your different modules have been made, you can assemble them together using the 4 x 50 screws. You can see this in pictures in the video presentation of the project. | ||
|Step_Picture_00=8bits_&_Chocolate_-_distributeur_décoratif_de_friandises_assemb1.jpg | |Step_Picture_00=8bits_&_Chocolate_-_distributeur_décoratif_de_friandises_assemb1.jpg | ||
|Step_Picture_01=8bits_&_Chocolate_-_distributeur_décoratif_de_friandises_assemb2.jpg | |Step_Picture_01=8bits_&_Chocolate_-_distributeur_décoratif_de_friandises_assemb2.jpg | ||
|Step_Picture_02=8bits_&_Chocolate_-_distributeur_décoratif_de_friandises_assemb3.jpg | |Step_Picture_02=8bits_&_Chocolate_-_distributeur_décoratif_de_friandises_assemb3.jpg | ||
| − | |||
| − | |||
}} | }} | ||
| − | {{ | + | {{Tuto Step |
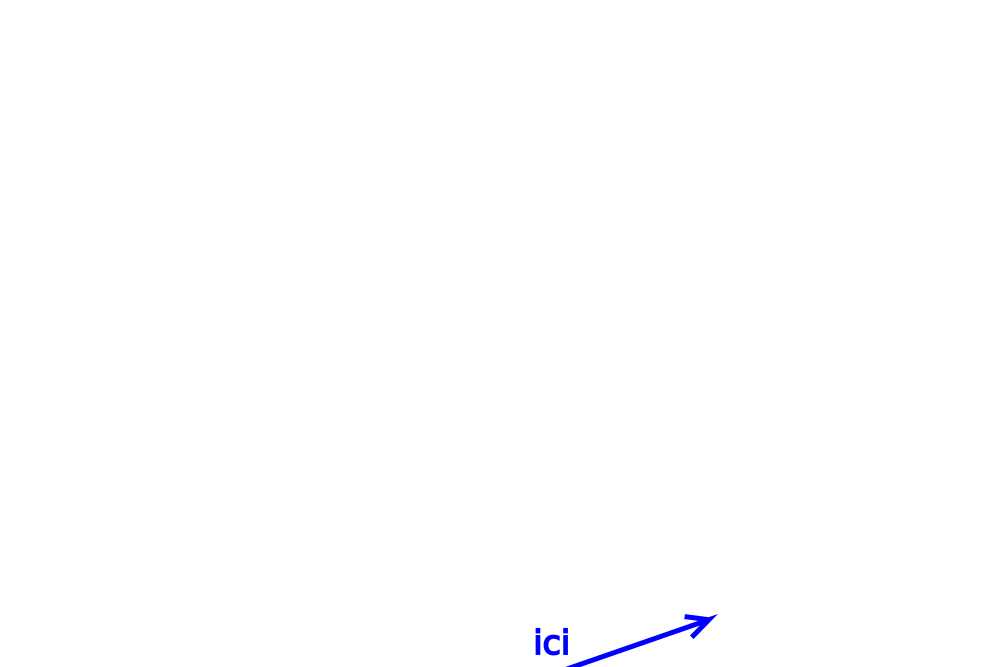
| + | |Step_Title=Once placed on the wall... | ||
| + | |Step_Content=The dispenser attaches to the wall using the mounting holes on either side of the plumber's mustache. | ||
| + | |||
| + | You'll also find one below the arrival module (see photo). | ||
|Step_Picture_00=8bits_&_Chocolate_-_distributeur_décoratif_de_friandises_fix3.jpg | |Step_Picture_00=8bits_&_Chocolate_-_distributeur_décoratif_de_friandises_fix3.jpg | ||
|Step_Picture_00_annotation={"objects":[],"height":"399","width":"600"} | |Step_Picture_00_annotation={"objects":[],"height":"399","width":"600"} | ||
| Ligne 308 : | Ligne 312 : | ||
|Step_Picture_04_annotation={"objects":[{"type":"wfarrow","originX":"center","originY":"center","left":369.51,"top":391.02,"width":10,"height":90,"fill":"rgba(255,0,0,0)","stroke":"blue","strokeWidth":2.28,"strokeDashArray":null,"strokeLineCap":"butt","strokeLineJoin":"miter","strokeMiterLimit":10,"scaleX":1.31,"scaleY":1.31,"angle":250.8,"flipX":false,"flipY":false,"opacity":1,"shadow":null,"visible":true,"clipTo":null,"backgroundColor":"","fillRule":"nonzero","globalCompositeOperation":"source-over","transformMatrix":null,"skewX":0,"skewY":0,"points":[{"x":10,"y":10},{"x":10,"y":100},{"x":5,"y":90},{"x":10,"y":100},{"x":15,"y":90}]},{"type":"textbox","originX":"center","originY":"center","left":345,"top":386,"width":50,"height":22.6,"fill":"blue","stroke":"blue","strokeWidth":1,"strokeDashArray":null,"strokeLineCap":"butt","strokeLineJoin":"miter","strokeMiterLimit":10,"scaleX":1,"scaleY":1,"angle":0,"flipX":false,"flipY":false,"opacity":1,"shadow":null,"visible":true,"clipTo":null,"backgroundColor":"","fillRule":"nonzero","globalCompositeOperation":"source-over","transformMatrix":null,"skewX":0,"skewY":0,"text":"ici","fontSize":20,"fontWeight":"normal","fontFamily":"sans-serif","fontStyle":"","lineHeight":1.16,"textDecoration":"","textAlign":"left","textBackgroundColor":"","charSpacing":0,"minWidth":20,"styles":{"0":{"1":{},"2":{},"3":{} } } }],"height":"400","width":"600"} | |Step_Picture_04_annotation={"objects":[{"type":"wfarrow","originX":"center","originY":"center","left":369.51,"top":391.02,"width":10,"height":90,"fill":"rgba(255,0,0,0)","stroke":"blue","strokeWidth":2.28,"strokeDashArray":null,"strokeLineCap":"butt","strokeLineJoin":"miter","strokeMiterLimit":10,"scaleX":1.31,"scaleY":1.31,"angle":250.8,"flipX":false,"flipY":false,"opacity":1,"shadow":null,"visible":true,"clipTo":null,"backgroundColor":"","fillRule":"nonzero","globalCompositeOperation":"source-over","transformMatrix":null,"skewX":0,"skewY":0,"points":[{"x":10,"y":10},{"x":10,"y":100},{"x":5,"y":90},{"x":10,"y":100},{"x":15,"y":90}]},{"type":"textbox","originX":"center","originY":"center","left":345,"top":386,"width":50,"height":22.6,"fill":"blue","stroke":"blue","strokeWidth":1,"strokeDashArray":null,"strokeLineCap":"butt","strokeLineJoin":"miter","strokeMiterLimit":10,"scaleX":1,"scaleY":1,"angle":0,"flipX":false,"flipY":false,"opacity":1,"shadow":null,"visible":true,"clipTo":null,"backgroundColor":"","fillRule":"nonzero","globalCompositeOperation":"source-over","transformMatrix":null,"skewX":0,"skewY":0,"text":"ici","fontSize":20,"fontWeight":"normal","fontFamily":"sans-serif","fontStyle":"","lineHeight":1.16,"textDecoration":"","textAlign":"left","textBackgroundColor":"","charSpacing":0,"minWidth":20,"styles":{"0":{"1":{},"2":{},"3":{} } } }],"height":"400","width":"600"} | ||
|Step_Picture_05_annotation={"objects":[{"type":"wfarrow","originX":"center","originY":"center","left":369.51,"top":391.02,"width":10,"height":90,"fill":"rgba(255,0,0,0)","stroke":"blue","strokeWidth":2.28,"strokeDashArray":null,"strokeLineCap":"butt","strokeLineJoin":"miter","strokeMiterLimit":10,"scaleX":1.31,"scaleY":1.31,"angle":250.8,"flipX":false,"flipY":false,"opacity":1,"shadow":null,"visible":true,"clipTo":null,"backgroundColor":"","fillRule":"nonzero","globalCompositeOperation":"source-over","transformMatrix":null,"skewX":0,"skewY":0,"points":[{"x":10,"y":10},{"x":10,"y":100},{"x":5,"y":90},{"x":10,"y":100},{"x":15,"y":90}]},{"type":"textbox","originX":"center","originY":"center","left":345,"top":386,"width":50,"height":22.6,"fill":"blue","stroke":"blue","strokeWidth":1,"strokeDashArray":null,"strokeLineCap":"butt","strokeLineJoin":"miter","strokeMiterLimit":10,"scaleX":1,"scaleY":1,"angle":0,"flipX":false,"flipY":false,"opacity":1,"shadow":null,"visible":true,"clipTo":null,"backgroundColor":"","fillRule":"nonzero","globalCompositeOperation":"source-over","transformMatrix":null,"skewX":0,"skewY":0,"text":"ici","fontSize":20,"fontWeight":"normal","fontFamily":"sans-serif","fontStyle":"","lineHeight":1.16,"textDecoration":"","textAlign":"left","textBackgroundColor":"","charSpacing":0,"minWidth":20,"styles":{"0":{"1":{},"2":{},"3":{} } } }],"height":"400","width":"600"} | |Step_Picture_05_annotation={"objects":[{"type":"wfarrow","originX":"center","originY":"center","left":369.51,"top":391.02,"width":10,"height":90,"fill":"rgba(255,0,0,0)","stroke":"blue","strokeWidth":2.28,"strokeDashArray":null,"strokeLineCap":"butt","strokeLineJoin":"miter","strokeMiterLimit":10,"scaleX":1.31,"scaleY":1.31,"angle":250.8,"flipX":false,"flipY":false,"opacity":1,"shadow":null,"visible":true,"clipTo":null,"backgroundColor":"","fillRule":"nonzero","globalCompositeOperation":"source-over","transformMatrix":null,"skewX":0,"skewY":0,"points":[{"x":10,"y":10},{"x":10,"y":100},{"x":5,"y":90},{"x":10,"y":100},{"x":15,"y":90}]},{"type":"textbox","originX":"center","originY":"center","left":345,"top":386,"width":50,"height":22.6,"fill":"blue","stroke":"blue","strokeWidth":1,"strokeDashArray":null,"strokeLineCap":"butt","strokeLineJoin":"miter","strokeMiterLimit":10,"scaleX":1,"scaleY":1,"angle":0,"flipX":false,"flipY":false,"opacity":1,"shadow":null,"visible":true,"clipTo":null,"backgroundColor":"","fillRule":"nonzero","globalCompositeOperation":"source-over","transformMatrix":null,"skewX":0,"skewY":0,"text":"ici","fontSize":20,"fontWeight":"normal","fontFamily":"sans-serif","fontStyle":"","lineHeight":1.16,"textDecoration":"","textAlign":"left","textBackgroundColor":"","charSpacing":0,"minWidth":20,"styles":{"0":{"1":{},"2":{},"3":{} } } }],"height":"400","width":"600"} | ||
| − | |Step_Title= | + | }} |
| − | |Step_Content= | + | {{Tuto Step |
| + | |Step_Title=... and filled with candies! | ||
| + | |Step_Content=Just have to fill of chocolate! | ||
| − | + | Mamma Mia! Here we go! | |
| − | |||
| − | |||
|Step_Picture_00=8bits_&_Chocolate_-_distributeur_mural_de_friandises_HLD_6608.jpg | |Step_Picture_00=8bits_&_Chocolate_-_distributeur_mural_de_friandises_HLD_6608.jpg | ||
|Step_Picture_01=8bits_&_Chocolate_-_distributeur_décoratif_de_friandises_HLD_6581.jpg | |Step_Picture_01=8bits_&_Chocolate_-_distributeur_décoratif_de_friandises_HLD_6581.jpg | ||
|Step_Picture_02=8bits_&_Chocolate_-_distributeur_décoratif_de_friandises_HLD_6618.jpg | |Step_Picture_02=8bits_&_Chocolate_-_distributeur_décoratif_de_friandises_HLD_6618.jpg | ||
| − | |||
| − | |||
}} | }} | ||
| − | {{ | + | {{Notes |
| − | |Notes= | + | |Notes=Created by the [[Group:I-Lab|I-Lab of Toulon]] during the Trotec challenge on Wikifab. |
}} | }} | ||
| − | {{ | + | {{Tuto Status |
| − | |Complete= | + | |Complete=Published |
}} | }} | ||
Version actuelle datée du 9 décembre 2019 à 12:23
Decorative candy dispenser in retro-gaming style.


Difficulté
Facile
Durée
6 heure(s)
Catégories
Art, Décoration, Alimentation & Agriculture, Mobilier, Maison, Jeux & Loisirs
Coût
50 EUR (€)
Sommaire
- 1 Introduction
- 2 Video d'introduction
- 3 Étape 1 - Starting with a cardboard prototype
- 4 Étape 2 - Making about 25 prototypes (or close to) to get it running
- 5 Étape 3 - If you only want to reproduce, start here!
- 6 Étape 4 - Setup of the laser cutting machine
- 7 Étape 5 - Tank module in the shape of a pixelated heart
- 8 Étape 6 - Rotating delivery system module
- 9 Étape 7 - "Turn" module
- 10 Étape 8 - Small straight section
- 11 Étape 9 - Long straight section
- 12 Étape 10 - ending module
- 13 Étape 11 - Modules assembly
- 14 Étape 12 - Adding some color (painting)
- 15 Étape 13 - Level assembly
- 16 Étape 14 - Once placed on the wall...
- 17 Étape 15 - ... and filled with candies!
- 18 Notes et références
- 19 Commentaires
Introduction
You like peanuts covered with chocolate and retro video games?
You've got a desperatly empty wall and would like to pay tribute to the most famous plumber ?
Then here is a tutorial which will help you building a candy dispenser (for candies starting with M and ending with M) inspired by Mario's first appearance in a video game when he faced a certain Donkey Kong.
It's a completely customizable project, you'll be able to build the level of your dreams for your candies. Indeed the course you will create is made of modules that you can assemble as you want in almost any order as in a building game.
This project is made using only laser cutting (well, there's a few bolts and some glue and paint involved in the process...)
I hope you'll get the feeling of my project and create new modules, or imagine other themes for the decorations. It's up to you !


Matériaux
- Poplar plywood in 3mm thickness
- Transparent PMMA in 3mm thickness
- Wood glue
- 4mm screws (50mm long) and nuts
- Red and black paint (green and white for the flag)
- M&M's
Outils
- Vector drawing software, here Illustrator (or Inkscape)
- Laser cutting machine (I used the Trotec Speedy 300 from my favorite fablab)
- Brush
- Sandpaper
- Candle (or wax)
Étape 1 - Starting with a cardboard prototype
This step is only required if you start from scratch as I did (for example if you want to create new modules or a new theme)
After a few sketchs a a first file made using my favorite verctor graphic software I started by creating a cardboard prototype
This way you'll be able to quickly see what can and can not work and not waste wood unnecessarily. A file is very rarely perfect on the first run (or even the second!)


Étape 2 - Making about 25 prototypes (or close to) to get it running
Well, I may be exaggerating a little bit. After the first cardboard prototype I thought it would be nice to make the course completely modular (sometimes we have ideas like that... which we almost regret!).
Easy idea ... harder to get it done. Iterate. Test after test I ended up with something satisfactory.
The course making me think of Mario vs Donkey Kong I decided to make a retro gaming theme inspired by the beautiful era of 8bits...
What's nice is that you can keep the modules plugging system and only change the theme, to adapt it as you wish.

Étape 3 - If you only want to reproduce, start here!
As previously explained (admit that you jumped directly to this one), the principle of this distributor is that it is flexible! Simply put, if you want to make a journey 2 meters high it's possible. Just cut out the modules you need and assemble them in whatever order you want. For the moment I realized 6 modules:
- A candy container in pixelated heart (to take back lives)
- A rotating distribution system
- A turn (can be mounted as right or left turn)
- A small straight section
- A longer straight section
- And a terminating cup (with a nice end of level flag!)
In the future I'm counting on you to help me to make other nice modules (motorized distribution system, continuous distribution for kibble for example cat, waterfall, jump... looping... good ok I'm going too far.)
For these 6 modules you will find a corresponding file that will allow you to do it independently. For each module you need plywood and pmma with the exception of the rotary system which is all plywood.
I advise you to think ahead of the course you want to achieve and group several modules on a single cutting board depending on the size of your boards and laser cutting. By default each module can be cut on a board of 610 x 305 mm.


Étape 4 - Setup of the laser cutting machine
The material parameters for Trotec Speedy 300 laser cutting are as follows:
- Power: '80' Speed: '1.5' for 3mm poplar plywood
- Power: '100' Speed: '1' for 3 mm transparent PMMA
These settings are to be applied to the colors red, blue and green to allow the cutting of the interior parts before the exteriors... Written like that it may seem a little complicated, but if you look at the files you will understand better what I want to talk about.


Étape 5 - Tank module in the shape of a pixelated heart
Laser cutting time for this module:
- for 3mm poplar plywood pieces: 3 minutes 45 seconds
- for 3mm transparent PMMA pieces: 38 seconds
SVG files : for plywood, for PMMA
PDF manual with help to build this module
AI file with all informations and content on different layers

Étape 6 - Rotating delivery system module
Laser cutting time for this module:
- for 3mm poplar plywood pieces: 9 minutes 36 seconds
- no PMMA parts
PDF manual with help to build this module
AI file with all informations and content on different layers
I advise you to sand the central rotating part (see photos) and rub a candle or some wa to improve the rotation.


Étape 7 - "Turn" module
Laser cutting time for 1 module:
- for 3mm poplar plywood pieces: 2 minutes 24 seconds
- for 3mm transparent PMMA pieces: 14 seconds
SVG files : for plywood, for PMMA
PDF manual with help to build this module
AI file with all informations and content on different layers
Étape 8 - Small straight section
Laser cutting time for this module:
- for 3mm poplar plywood pieces: 1 minutes 21 seconds
- for 3mm transparent PMMA pieces: 13 seconds
SVG files : for plywood, for PMMA
PDF manual with help to build this module
AI file with all informations and content on different layers

Étape 9 - Long straight section
Laser cutting time for one long straight section:
- for 3mm poplar plywood pieces: 3 minutes 27 seconds
- for 3mm transparent PMMA pieces: 27 seconds
SVG files : for plywood, for PMMA
PDF manual with help to build this module
AI file with all informations and content on different layers

Étape 10 - ending module
Laser cutting time for this module:
- for 3mm poplar plywood pieces: 2 minutes 24 seconds
- for 3mm transparent PMMA pieces: 21 seconds
SVG files : for plywood, for PMMA
PDF manual with help to build this module
AI file with all informations and content on different layers

Étape 11 - Modules assembly
For the modules assembly I suggest that you refer to the PDF files.
You'll find the pieces numbering and how to assemle them (with a few additional hints)

Étape 12 - Adding some color (painting)
If you want to paint your work as I did, you'll find all the color indications in the PDFs of the modules.


Étape 13 - Level assembly
Once your different modules have been made, you can assemble them together using the 4 x 50 screws. You can see this in pictures in the video presentation of the project.


Étape 14 - Once placed on the wall...
The dispenser attaches to the wall using the mounting holes on either side of the plumber's mustache.
You'll also find one below the arrival module (see photo).


Étape 15 - ... and filled with candies!
Just have to fill of chocolate!
Mamma Mia! Here we go!


Notes et références
Created by the I-Lab of Toulon during the Trotec challenge on Wikifab.
Published
 Français
 English
 Deutsch
 Español
 Italiano
 Português