You will be able to use this item to analyse water sample and determine their degree of purity. Follow this tutorial and you ll also learn how to take readings with your water probe and how the probe works.
In the last section, you ll learn how to plot the values recorded by your water probe on a shared online map, and launch a citizen science project on zooniverse.com to communicate about your findings as well as to engage other people in your research.Sommaire
- 1 Introduction
- 2 Video d'introduction
- 3 Étape 1 - Assembling the probe
- 4 Étape 2 - Program the arduino board
- 5 Étape 3 - Using the water probe
- 6 Étape 4 - Water pollution
- 7 Étape 5 - Plotting data on a shared online map
- 8 Étape 6 - Launching a citizen science project
- 9 Notes et références
- 10 List of parts
- 11 Commentaires
Introduction
The conductivity meter is a relatively simple device. Its workings rely upon the fact that pure water does not actually carry an electric charge very well. So what we’re really doing with this device is assessing the concentration of conductive particles that are floating in the
(mostly nonconductive) water.
Water is very seldom just the sum of its basic chemical formula: two atoms of hydrogen and one of oxygen. Typically, water is a mixture that also includes other substances that have dissolved into it, including minerals, metals, and salts. In chemistry, water is the solvent, the other substances the solutes, and combined they make a solution.
Solutes create ions: atoms that carry an electric charge. These ions are what actually move electricity through water.
That’s why measuring conductivity is a good way to learn how pure (really, how impure) a water sample may be: the more stuff that’s dissolved in the watery solution, the faster electricity will move through it.Youtube
Matériaux
Outils
Étape 1 - Assembling the probe
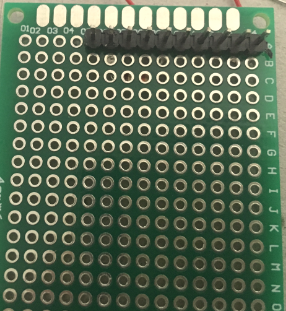
Begin by soldering the male pin header strip onto the PCB board. You need to cover at least 10 points of the PCB (see figure below).
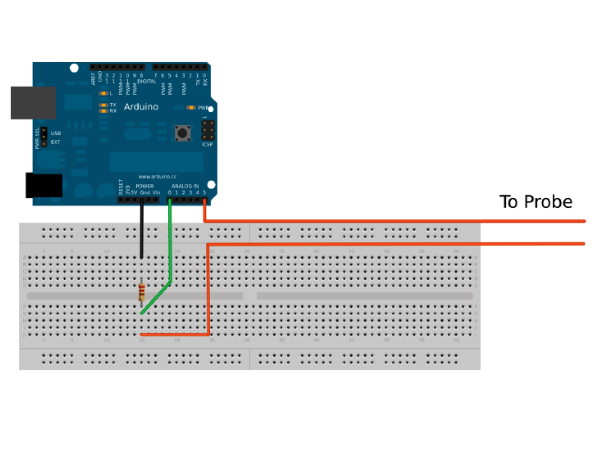
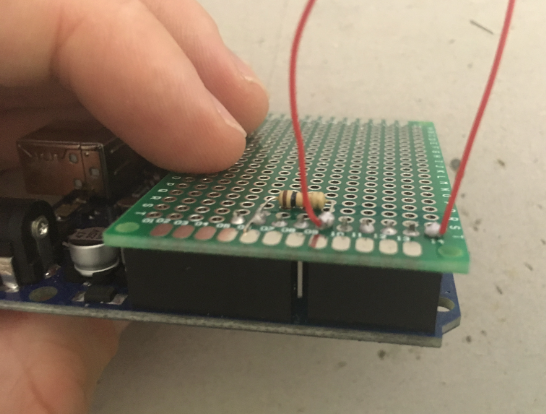
Next, solder the 1kohm resistor to the PCB. We soldered one end to n°6, the other end to n°9. This way, when the PCB will be mounted on the arduino uno board, one end of the resistor will connect to A0, the other one to GND.
Next, cut two pieces of electric wire, each about 20 cm long. The length doesn’t really matter, however, longer wires will enable you to distance the arduino board further away from liquids.
Solder one end of one wire to one end of the resistor. This will connect to A0 on the board. Solder the other end to n° on the PCB. The latter will then connect with A5 on the arduino uno board.
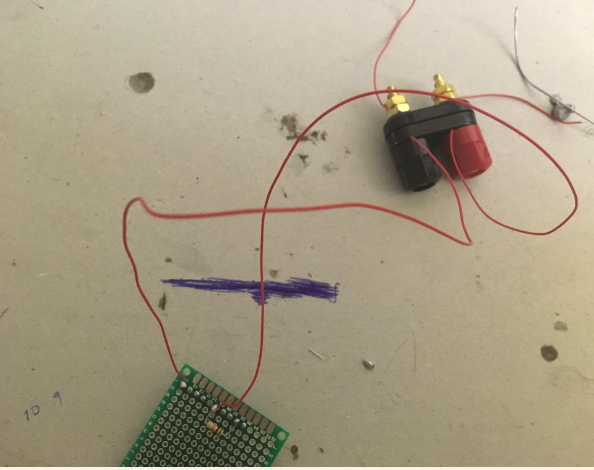
Strip off the other ends of the electric wire you just soldered onto the PCB, and connect them to the top of the binding post.
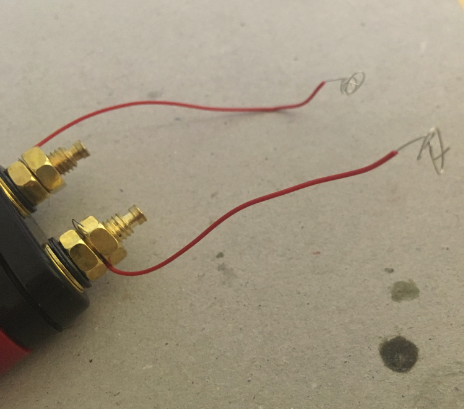
Now cut two short pieces of electric wire (about 10 cm long each), and strip off both ends of each wire. Connect one end of each to the bottom part of the binding post. Curl the other end of each wire. The curly ends are the one which will dive into the liquid.
Étape 2 - Program the arduino board
To have a functioning water probe, you ll need to upload a specific program onto the arduino uno board.
Here is the sketch you need to upload:
/*
Water Conductivity Monitor
Sketch for an Arduino gadget that measures the electrical
conductivity of water.
This example code is based on example code that is in the public domain.
*/
const float ArduinoVoltage = 5.00; // CHANGE THIS FOR 3.3v Arduinos
const float ArduinoResolution = ArduinoVoltage / 1024;
const float resistorValue = 10000.0;
int threshold = 3;
int inputPin = A0;
int ouputPin = A5;
void setup()
{
Serial.begin(9600);
pinMode(ouputPin, OUTPUT);
pinMode(inputPin, INPUT);
}
void loop()
{
int analogValue=0;
int oldAnalogValue=1000;
float returnVoltage=0.0;
float resistance=0.0;
double Siemens;
float TDS=0.0;
while(((oldAnalogValue-analogValue)>threshold)
Étape 3 - Using the water probe
After you've uploaded the code, dip the two curly ends of the water probe into a liquid and open the serial monitor.
You should be getting readings from the probe, which give you a rough idea of the resistance of the liquid, hence its conductivity.
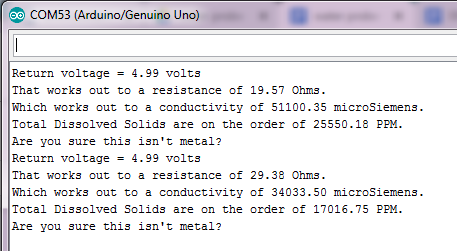
You can easily test whether your probe is working properly, by just connecting the two curly ends to a piece of metal.
If the serial monitor returns the following message: “Are you sure this isn’t metal?”, you can be sure that the probe is giving you accurate readings.
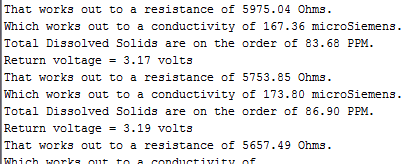
For tap water, you should be getting a conductivity of about 60 microSiemens.
Now try to add some washing up liquid to the water and see what readings you get.
This time, the conductivity of the liquid raises up to about 170 microSiemens.
Étape 4 - Water pollution
There is a straightforward connexion between water conductivity and water pollution. Since conductivity is an indication of the amount of foreign substances dissolved in water, it follows that the more conductive a liquid is, the more polluted it also is.
The consequences of water pollution are negative in many ways. One example is related to the concept surface tension.
Because of their polarity, water molecules are strongly attracted to one another, which gives water a high surface tension. The molecules at the surface of the water “stick together” to form a type of ‘skin’ on the water, strong enough to support very light objects. Insects that walk on water are taking advantage of this surface tension. Surface tension causes water to clump in drops rather than spreading out in a thin layer. It also allows water to move through plant roots and stems and the smallest blood vessels in your body – as one molecule moves up the tree root or through the capillary, it ‘pulls’ the others with it.
However, when foreign substances (ex. washing up liquid) are dissolved into water , this alters the surface tension of water altogether, causing a number of issues.
One experiment you can run at home will help illustrate surface tension and the consequences of polluting water.
Take a paper clip and delicately lower it onto a bowl full of water. The paper clip should then stay on the surface and float.
If, however, a single drop of washing up liquid or other chemical is introduced in the bowl of water, this will cause the paper clip to immediately sink.
The analogy here is between the paper clip and those insects that take advantage of the surface tension of water to walk on it. As foreign substances are introduced in a water reservoir (be this a lake, a stream, etc.) the surface tension is altered, and these insects will no longer be able to float on the surface. Ultimately this impacts on their lifecycle.
You can watch a video of this experiment here.
You will be sharing the data recorded by your water probe on UMap, which allows users to create their own maps embedding the data of their choice.
First, head to https://umap.openstreetmap.fr/fr/
You ll need to create an account to be able to edit your own maps.
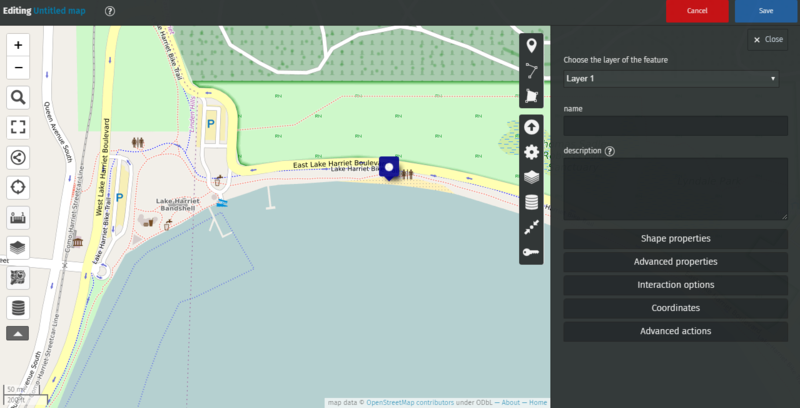
Once you ve successfully logged in, hit the “Create a map” button.
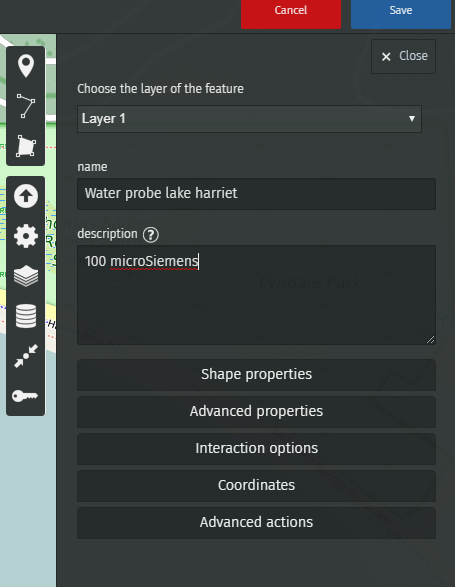
You can now draw markers and enter the description you wish to publish.
For example, let’s enter the value recorded by our water probe at Lake Harriet, in Minneapolis.
We’ve recorded 100 microsiemens, which by the way means that it is safe to bathe in Lake Harriet!
To share this map with anyone, you just need to provide them with the appropriate link.
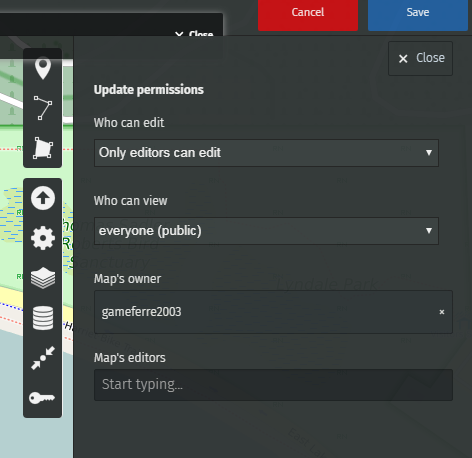
Go to Update permissions and editors
You can choose who can view and who can edit this map.
To enable editors to edit the map, copy the link of your map (the web address of your map) and share it with whoever you want.
Étape 6 - Launching a citizen science project
Citizen science is the involvement of the public in scientific research – whether community-driven research or global investigations.
Citizen scientists can help trained scientists gather data from all over the world — even from space. They can provide new ideas and new ways of thinking.
Kids often make great citizen scientists because they tend to be curious and good at following precise directions. Sometimes they’re even better at these things than adults.
You will be creating a project on zooniverse.com, anyone will be able to view and contribute to the project.
First, head to zooniverse.org and create an account.
Once you’ve successfully logged in, create a new project by clicking on build a project
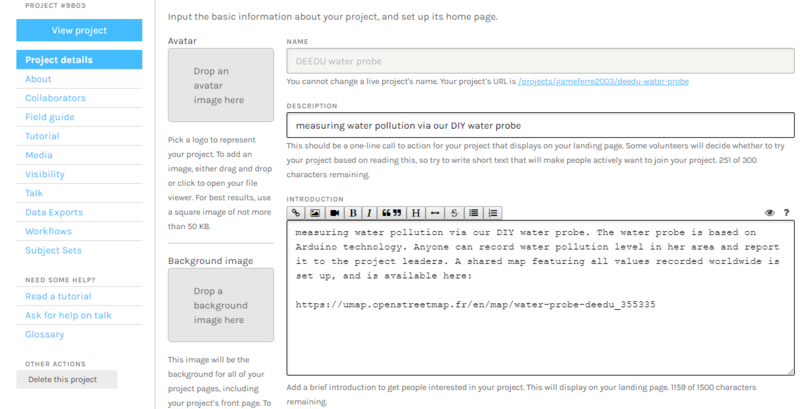
From the dashboard, you can edit your project and enter as much information as you wish.
Don’t forget to embed a link to the shared map in the description of the project.
Notes et références
List of parts
1x arduino Uno board
1x 40x60mm PCB
electric wire
1x chassis mount dual female binding post
1x 10Kohm resistor
1 male pin header strip for arduino
Begin by soldering the male pin header strip onto the PCB board. You need to cover at least 10 points of the PCB (see figure below).
Draft


 Français
 English
 Deutsch
 Español
 Italiano
 Português