Sommaire
- 1 Étape 1 - Table Build-Top deck 1
- 2 Étape 2 - Table Build- Top deck 2
- 3 Étape 3 - Table Build- Top deck 3
- 4 Étape 4 - Table Build - Side Legs 1
- 5 Étape 5 - Table Build - Side Legs 2
- 6 Étape 6 - Table Build - Tapping beams
- 7 Étape 7 - Barrel Support 1
- 8 Étape 8 - Barrel Support 2
- 9 Étape 9 - Barrel/Shaft/Bearings
- 10 Étape 10 - Coupling 1 and Heating elements
- 11 Étape 11 - Gearbox support
- 12 Étape 12 - Motor shaft coupling
- 13 Étape 13 - Motor mechanical install
- 14 Étape 14 - Heat Shield bend and install
- 15 Étape 15 - Hopper Bend and install
- 16 Commentaires
Matériaux
Outils
Étape 1 - Table Build-Top deck 1
Tools
1/2" Socket
Parts
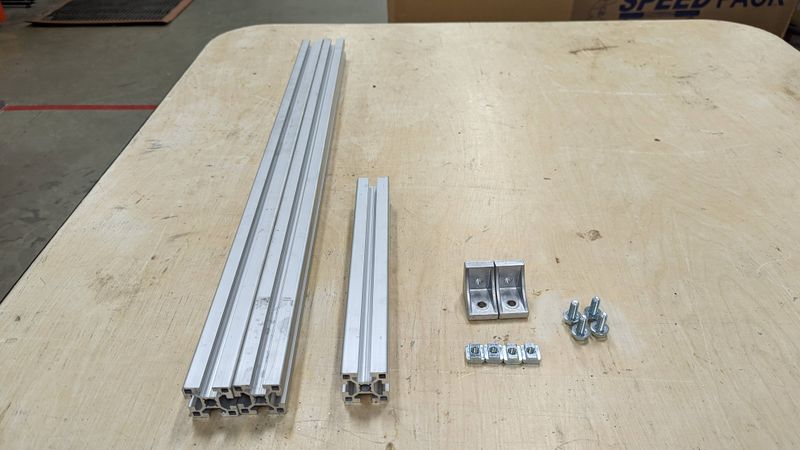
2x 1000mm 4080 extrusion
4x 300mm 4040 extrusion
40x t-nuts
22x M8x20 bolts
22x M8 Washers
12x Corner Brackets
Steps
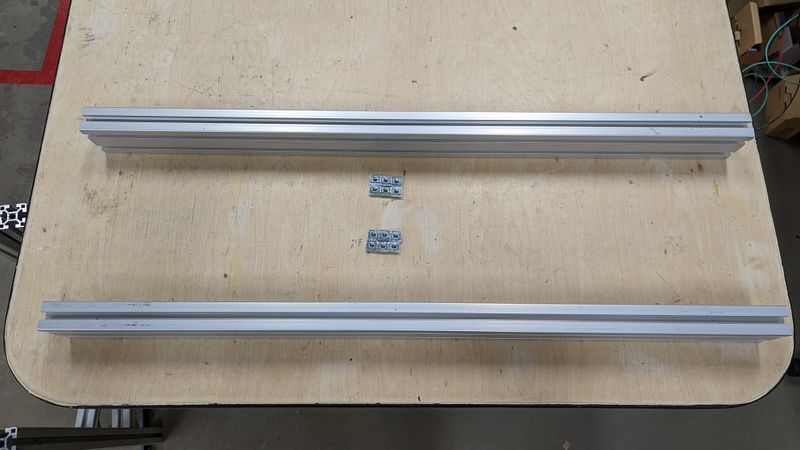
- Slide 6 t nuts into the top side of the 1000mm extrusion. (repeat for other beam)
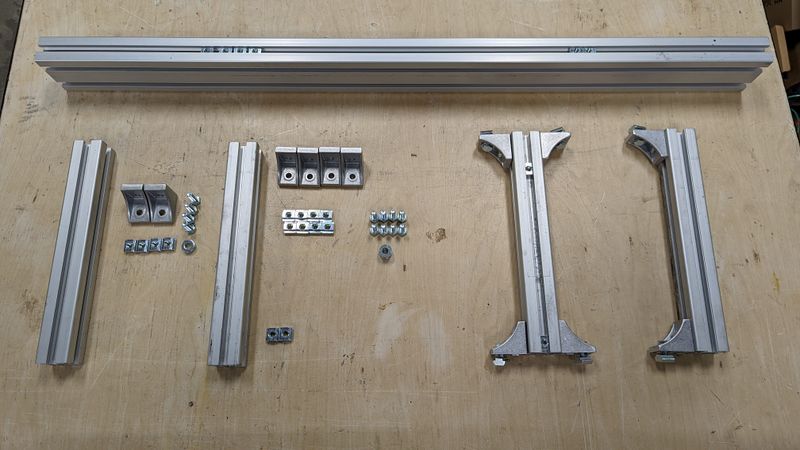
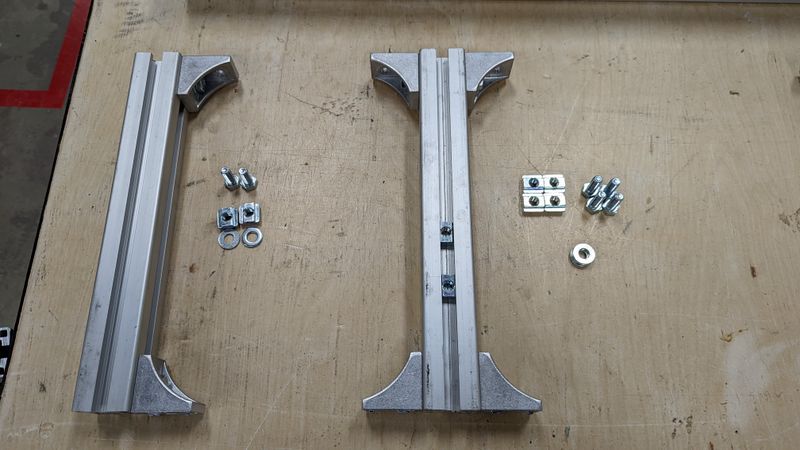
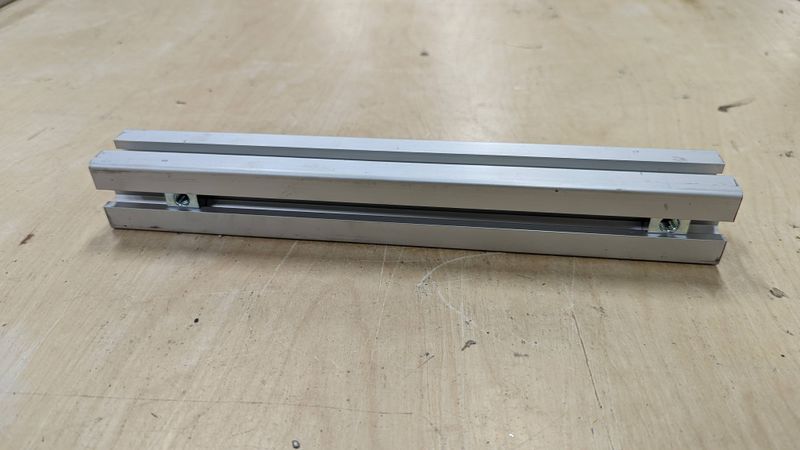
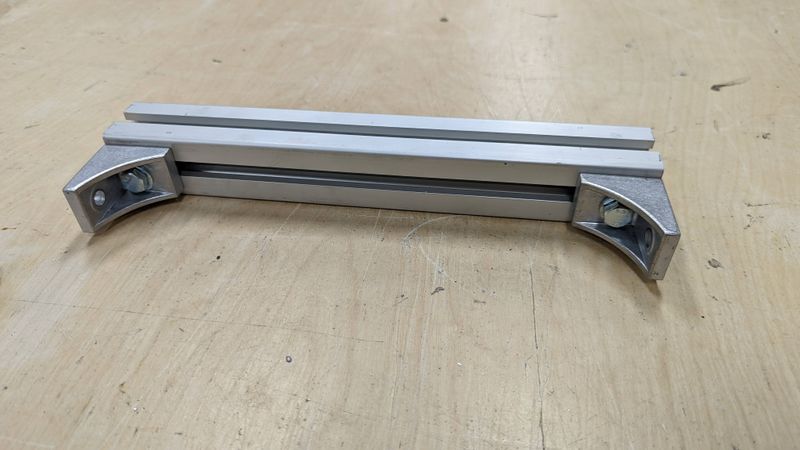
- For the 300mm beams, 2 pairs of 2 will be identical, one "I" shaped, and one "C" shaped.
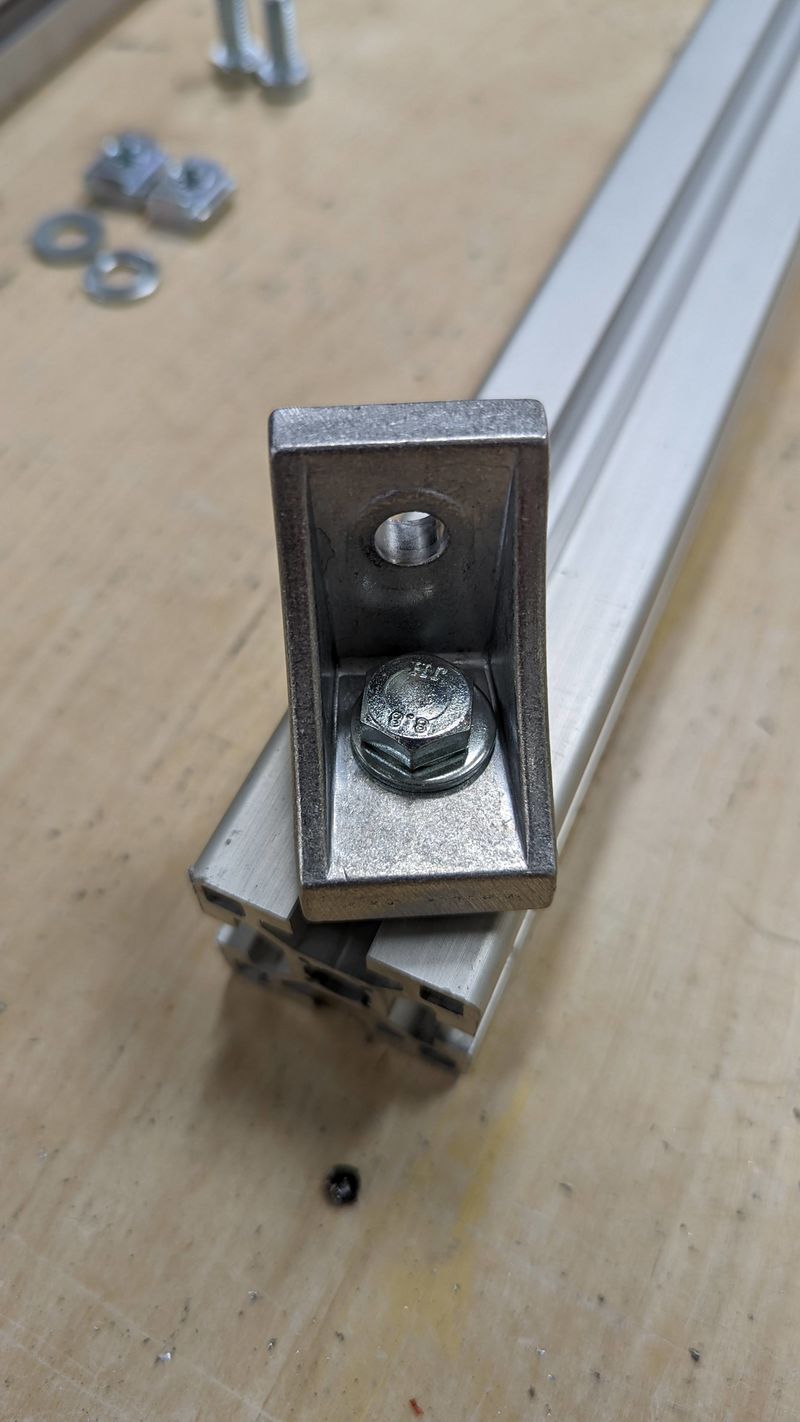
- For the C-shaped beam, Slide two t-nuts into one rail. Attach the corner brackets at the ends, ensuring the bracket is flush with the beams end. *Always use the side of the bracket with a flat face (non-lipped) first. This ensures you can get a tool onto the 2nd bolt without being blocked.
- For the I-Beams, repeat the same steps for the C-beam, but on both sides.
- Repeat so you have 2 I-beams and 2-C beams.
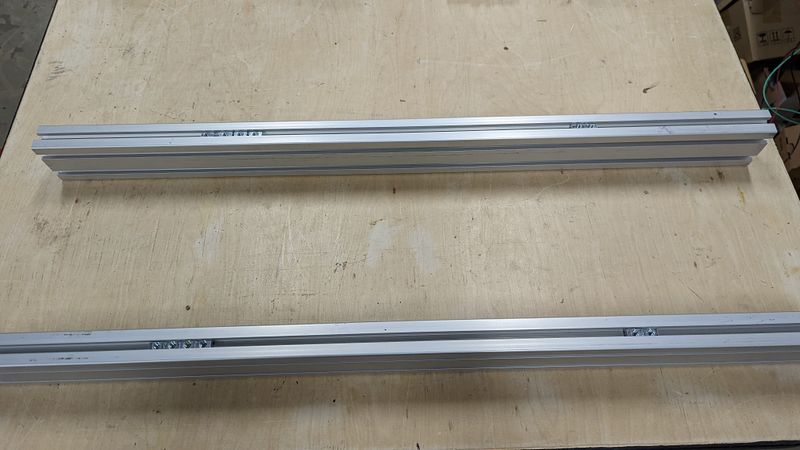
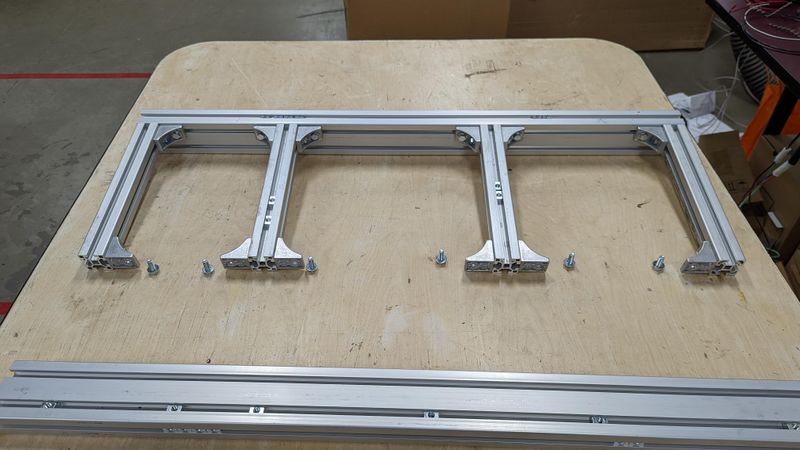
- *Optional* Add bolts to all remaining bracket holes and loosely attach t-nuts. (as seen in the right two beams in image 3)
Étape 2 - Table Build- Top deck 2
Tools
1/2" Socket Wrench
Parts
Assemblies from previous step
Steps
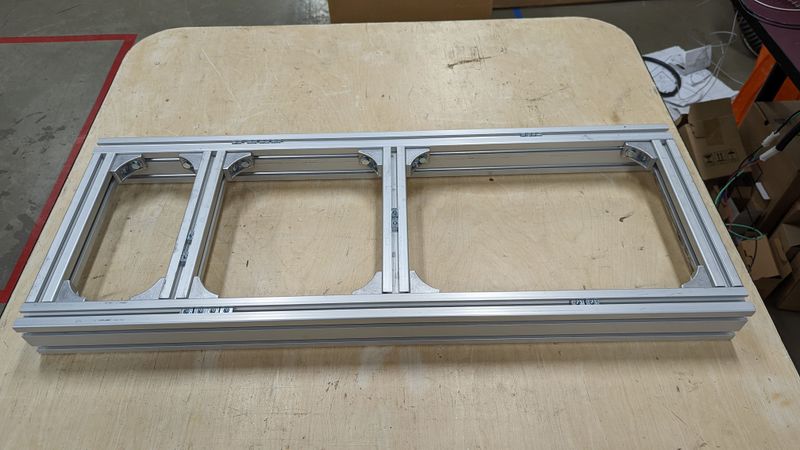
- If you have already attached the bolts/and t-nuts from the optional step - Slide beams into the upper channel (as seen in image 1) Otherwise, thread the nuts into the channel and attach LOOSELY with bolts.
- Repeat for the bottom rail.
- Secure the C beams in place with the socket wrench, but leave the I-beams LOOSE as they will need to be shifted later.
Étape 3 - Table Build- Top deck 3
Tools
1/2" Socket Wrench
Parts
Assembly from previous step
4x Steel Corner Brackets
32x M8x20 Bolts
32x M8 washers
32x t-nuts
Steps
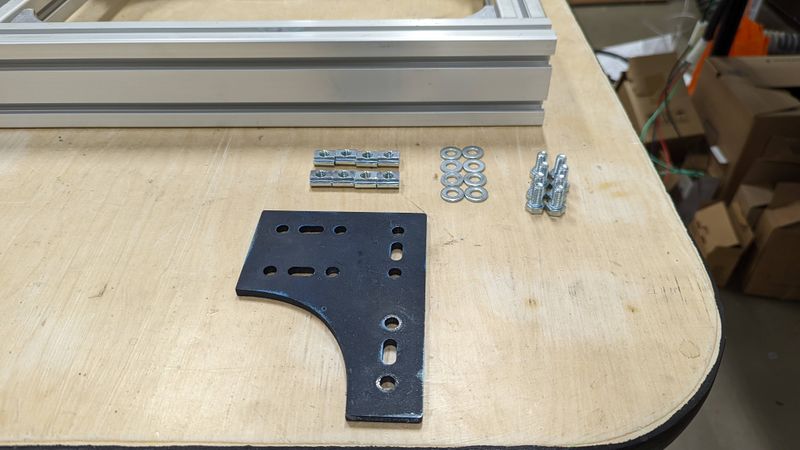
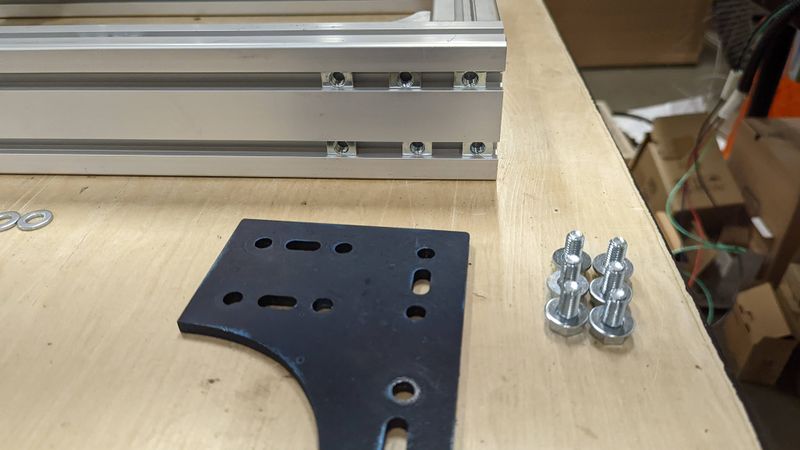
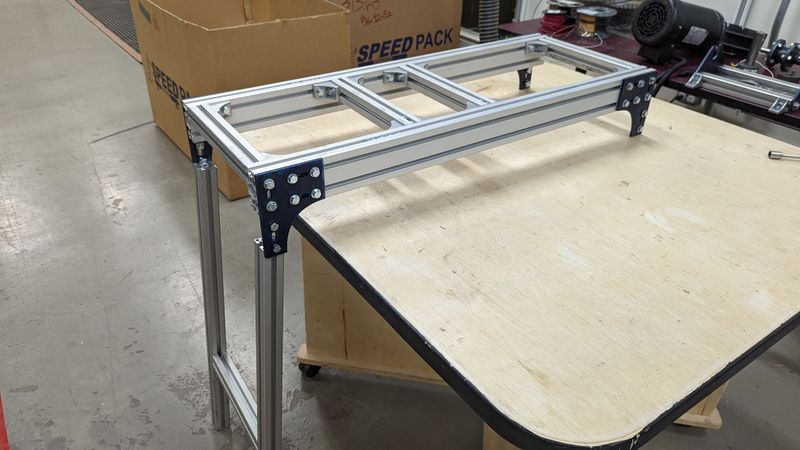
- On the exterior corner of the 4080 extrusion, slide 3 t-nuts into each top/bottom rail.
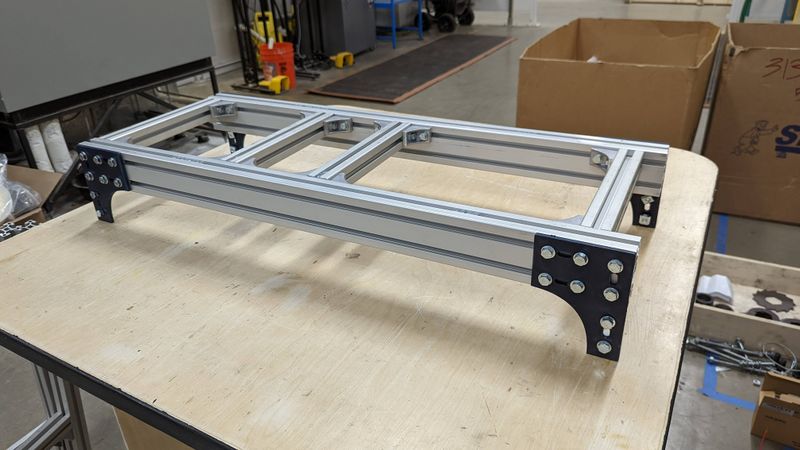
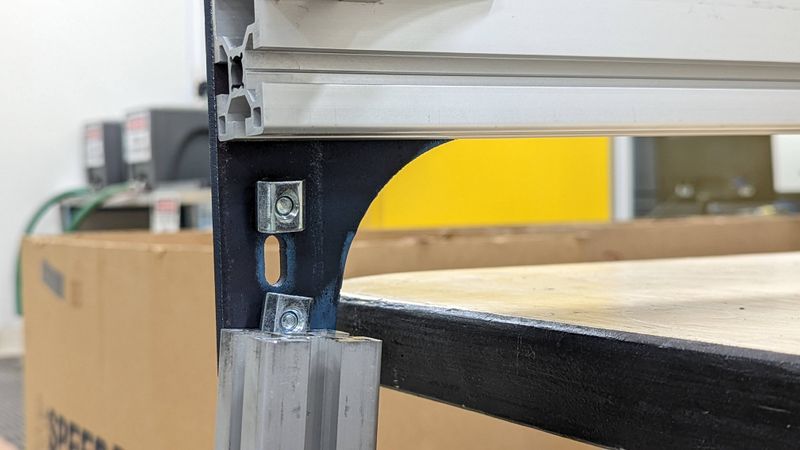
- Secure corner plate to rale with accompanying 6 bolt/washer combos.
- Add 2 additional bolt/washer/t-nut combos to the 2 remaining vertical holes. Keep these very loose as we'll slide them into another assembly later.
- Repeat on all corners.
Étape 4 - Table Build - Side Legs 1
Tools
1/2" Socket Wrench
Parts
4x 800mm 4040 Aluminum extrusion
2x 300mm 4040 Aluminum extrusion
4x corner Brackets
8x M8x20 Bolts
8x M8 washers
8x t-nuts
Steps
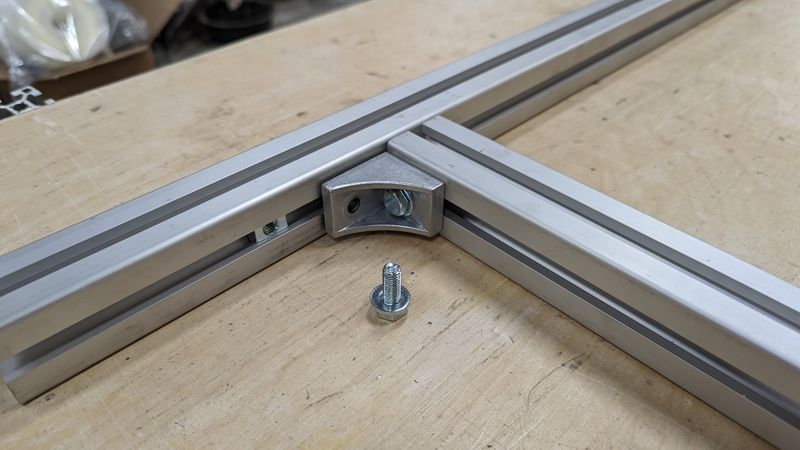
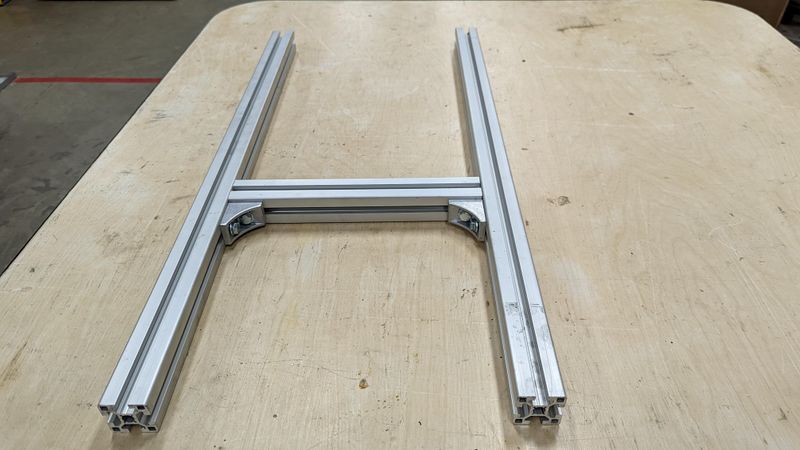
- Slot 2 t-nuts into one rail of the 300mm extrusion
- Secure corner brackets on the rail, ensuring that the ends are flush with the beam.
- Slide a t-nut into a rail on the 800mm extrusion about 12in from the end.
- Secure one side of the short beam to the long beam.
- Repeat on the other side.
- Repeat steps 1-5 so you have 2 "H" assemblies.
Étape 5 - Table Build - Side Legs 2
Tools
1/2" Socket Wrench
Parts
2 "H" Assemblies from previous step
Top deck Assembly
Steps
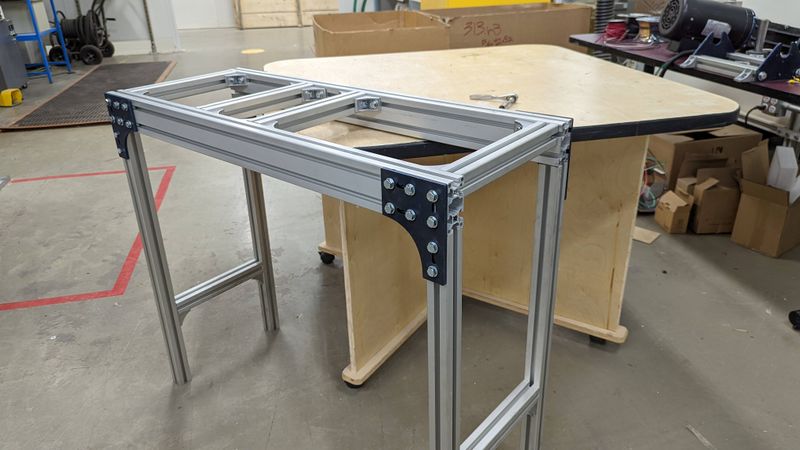
- Shift the top deck assembly off your worksurface so that 2 corners are free hanging in space.
- Position an H assembly underneath the corners, aligning the pre-attached t-nuts to the external rail slots. This requires you to adjust the t-nuts so they are perfectly vertical.
- Slide the H assembly up until it is flush with the top deck and holding its weight.
- Once in place, tighten down the bolts
- Repeat on the other side.
Étape 6 - Table Build - Tapping beams
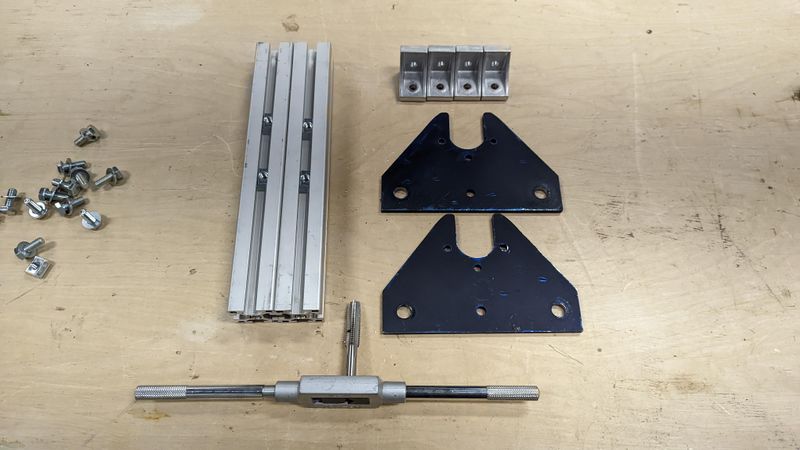
Tools
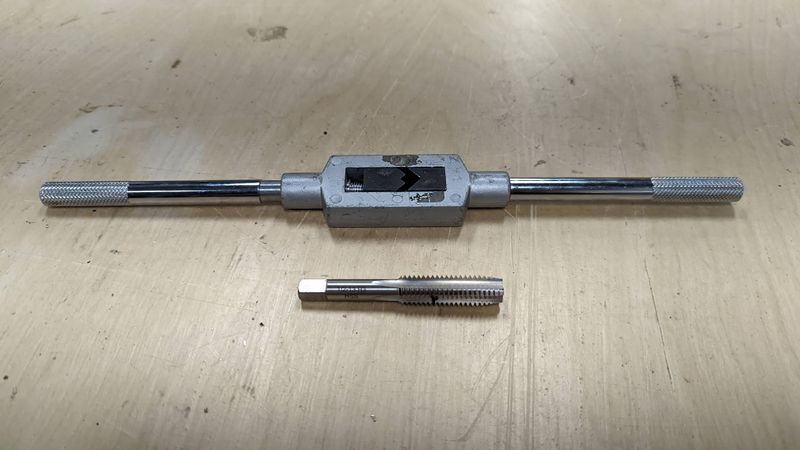
1/2" tap
Parts
Table assembly
Steps
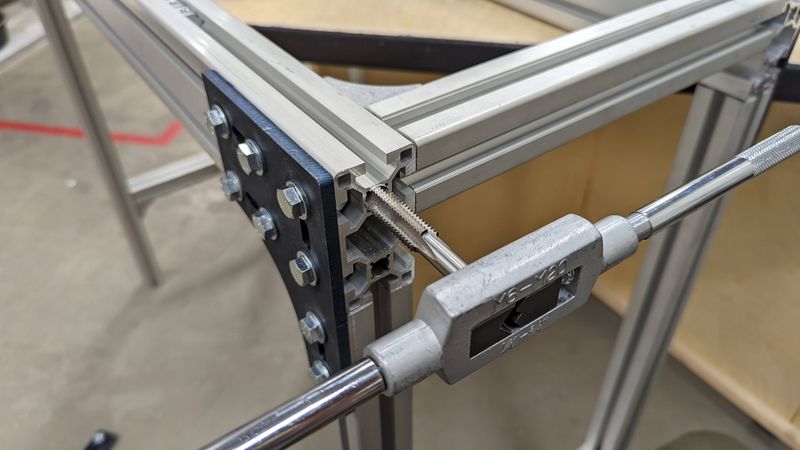
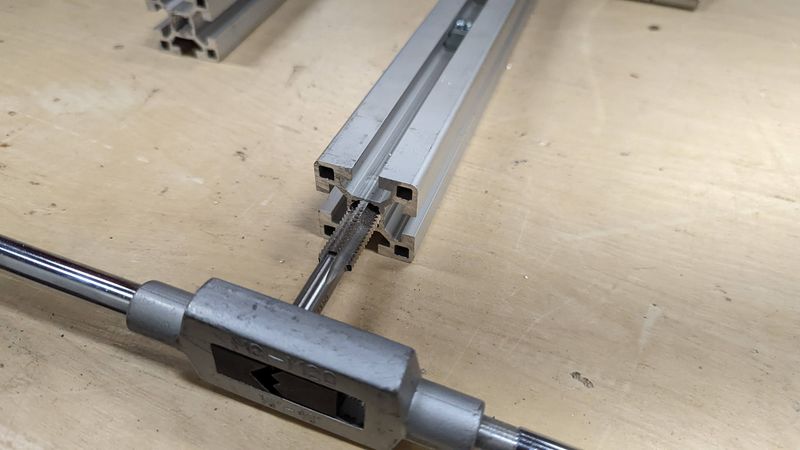
- Tap the two central holes on the exterior of the 1000mm 4080 extrusion.
- Repeat on all 4 corners.
Étape 7 - Barrel Support 1
Tools
1/2" tap
1/2" socket wrench
3/4" socket wrench
Parts
2x 300mm Extrusion
2x Steel barrel brackets
4x corner brackets
4x 1/2"x1" hex bolts
4x 1/2" washers
4x M8x20 Bolts
4x M8 washers
4x t-nuts
Steps
- Tap both end holes in each 300mm beam.
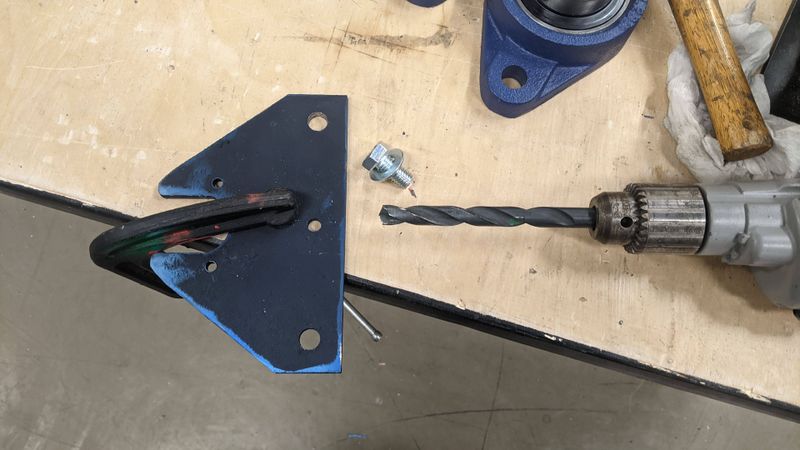
- (check to make sure the 1/2 bolts fit through the large holes on the barrel brackets. If not, use a 1/2" drill bit to open the holes up)
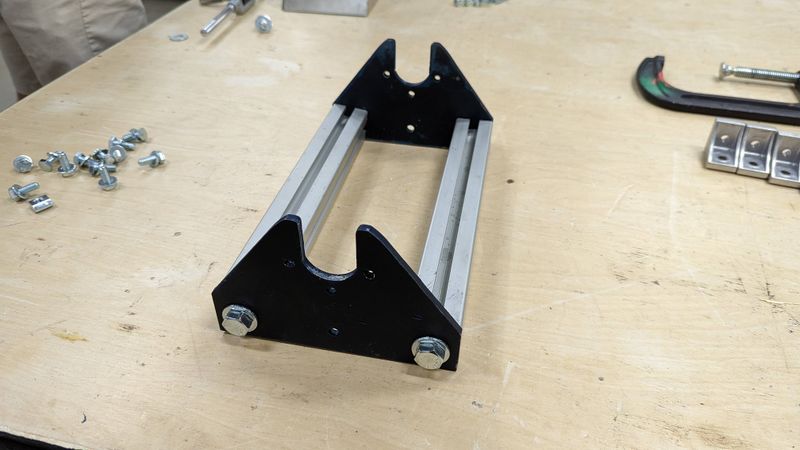
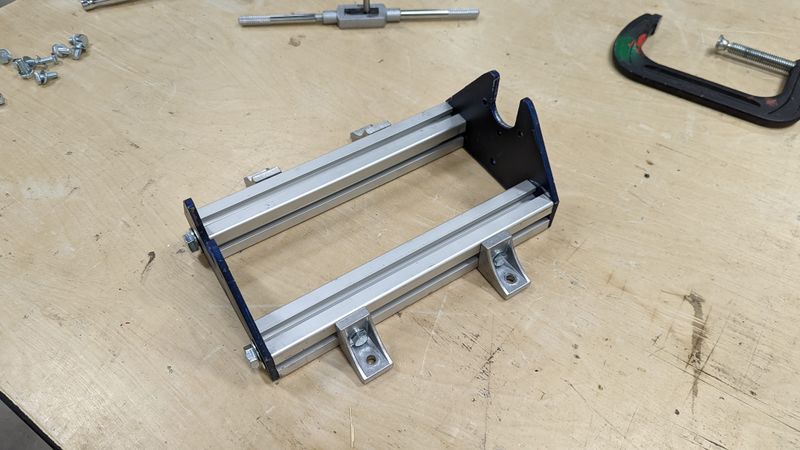
- Slide 2 nuts into each beam. position these rails on the outside/facing away from each other (see image 6 for orientation)
- Secure the barrel brackets to the beams as seen in image 5.
- Secure corner brackets to slotted t-nuts so the open hole is facing down. Keep these loose as there final position will be determined later.
Étape 8 - Barrel Support 2
Tools
1/2" socket wrench
Parts
Barrel Support Assembly
Table
Barrel
4x M8x20 Bolts
4x M8 washers
Steps
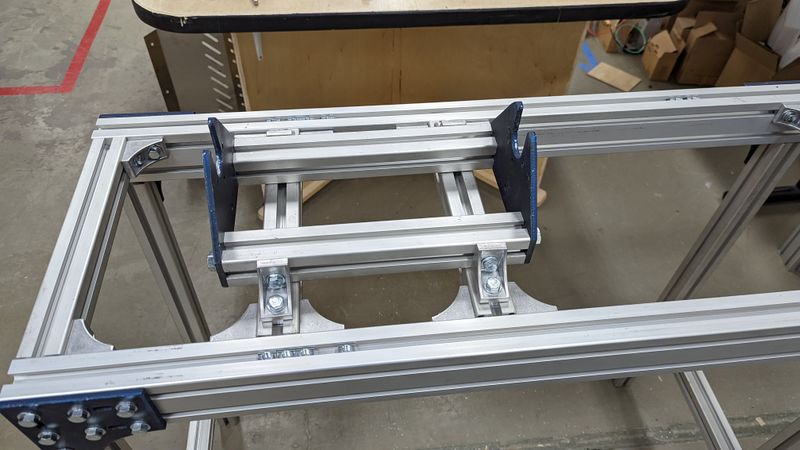
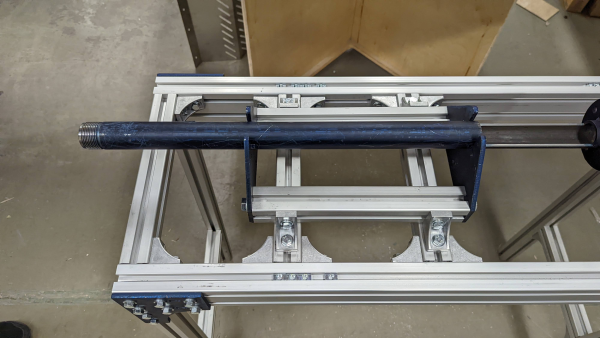
- Place the Barrel support assembly on the table so it that it crosses the two "I" assemblies.
- Loosely attach the assembly to the table with bolts/washers.
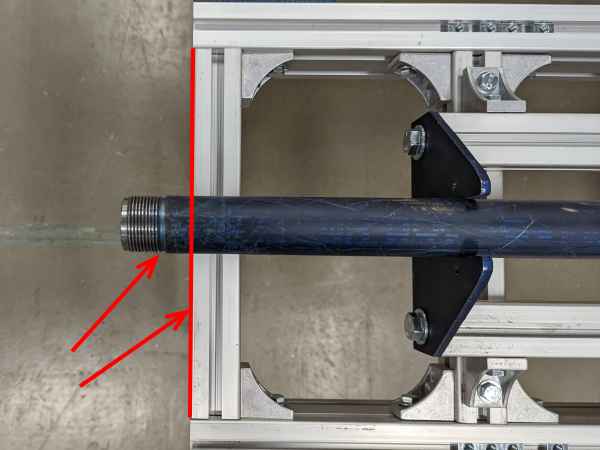
- Place the barrel into the support structure, aligning the flat notches on the barrel to the bracket.
- Slide the barrel towards the end of the table until the threads CLEAR the table face.
- Leave these connections loose as it will be moved into its final position later.
- Temporarily remove the barrel.
Étape 9 - Barrel/Shaft/Bearings
Tools
1/2" Socket Wrench
adjustable wrench
Parts
Barrel
Extrusion Screw
3x Bearings
1x Bearing spacer
Flange
Bearing Housing
8x M8x25 Bolts
8x M8 washers
8x M8 nuts
Steps
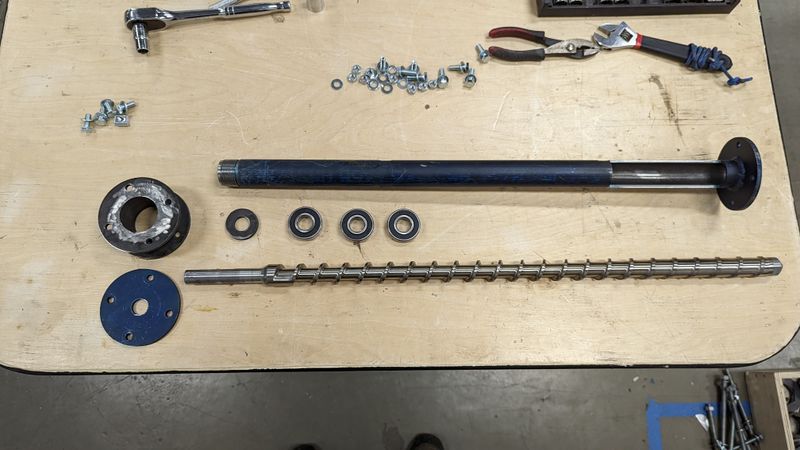
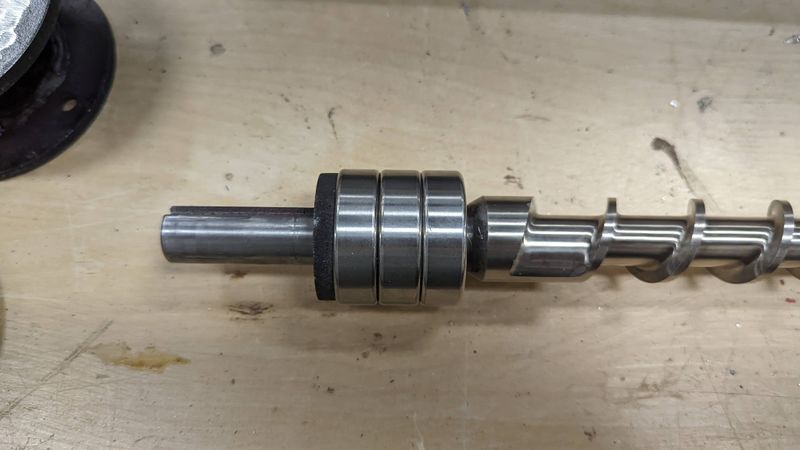
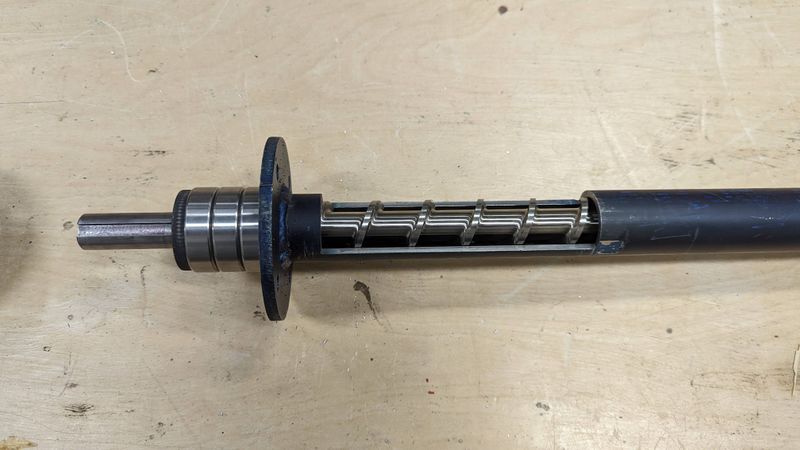
- Slide the bearings onto the screw shaft, followed by the bearing spacer.
- Slide the barrel over the screw.
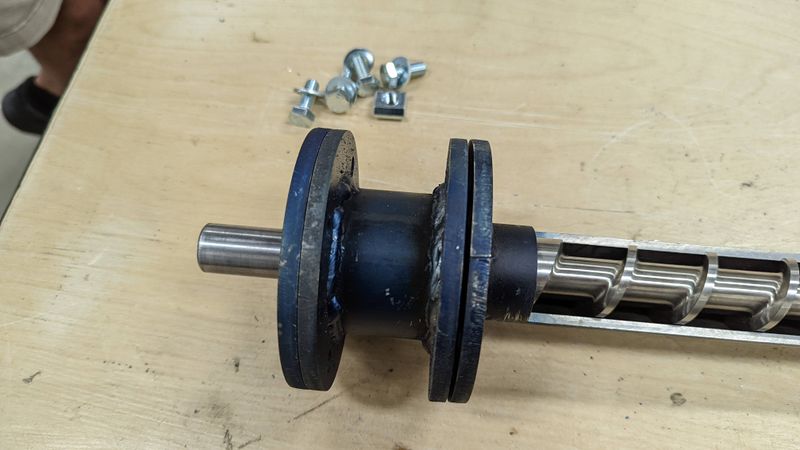
- Slide the bearing housing over the bearings and flush with the barrel.
- Slide the flange over the shaft and flush with the bearing housing.
- Secure the bearing and flange in place with m8 bolts/washers/nuts.
- (see image 5 for a finished state, but ignore the other parts)
Étape 10 - Coupling 1 and Heating elements
Tools
Mallet
Hex wrench (for heating element bolts, depends on manufacturer)
Parts
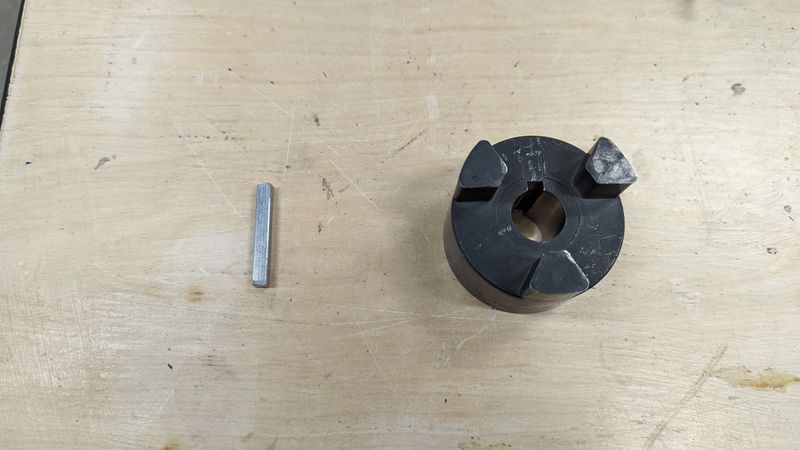
20mm coupling
1/4" Key(filed down)
6x heating band elements
Steps
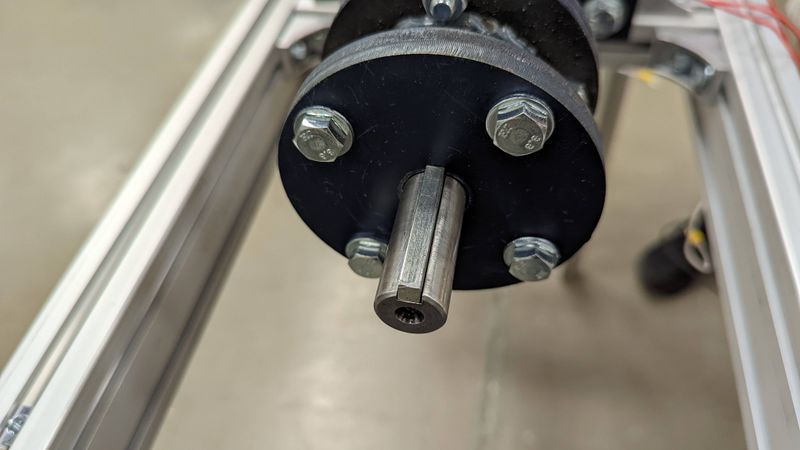
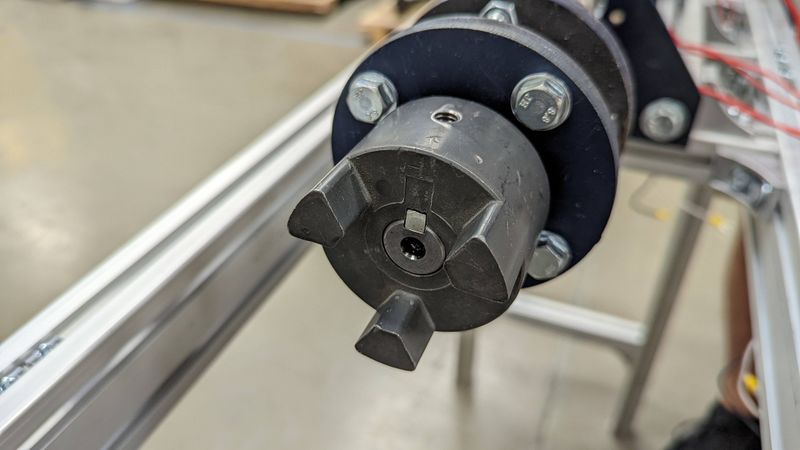
- Place the key into the keyway on the extruder shaft.
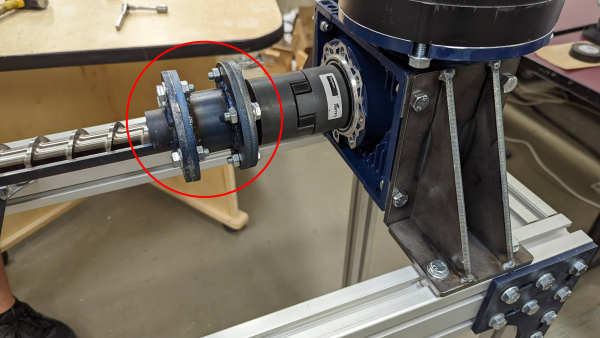
- Slide the coupling over the shaft/key until it is flush with the extruder shaft. It should not come into contact with the m8 Bolts on the flange.
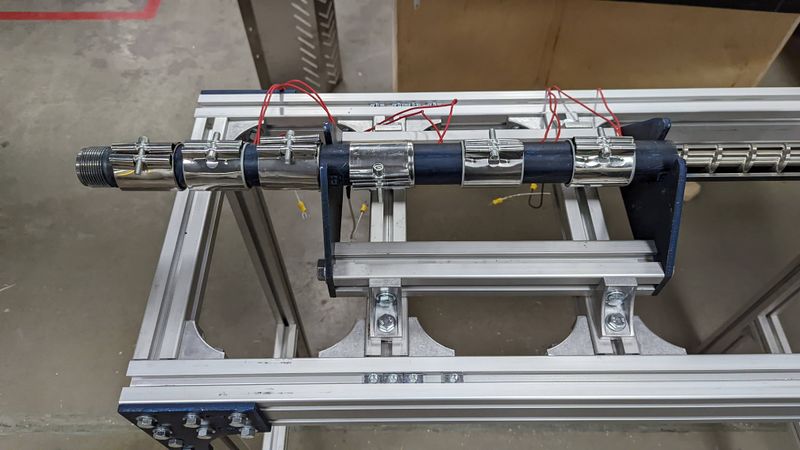
- On the other end of the barrel, slide the heating elements into position.
- Three should be within the barrel supports, and three should be past the support towards the extrusion end.
Étape 11 - Gearbox support
Tools
1/2" Socket Wrench
Adjustable wrench
Parts
Gearbox support A
Gearbox support B
Gearbox/motor assembly
8x m8x25 bolts
8x m8 washers
8x m8 nylon lock nuts
Steps
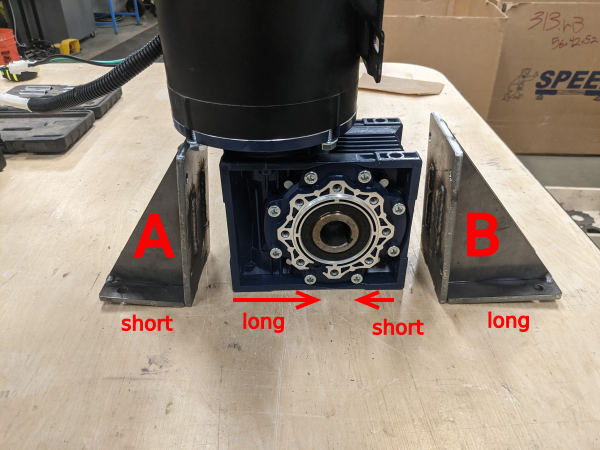
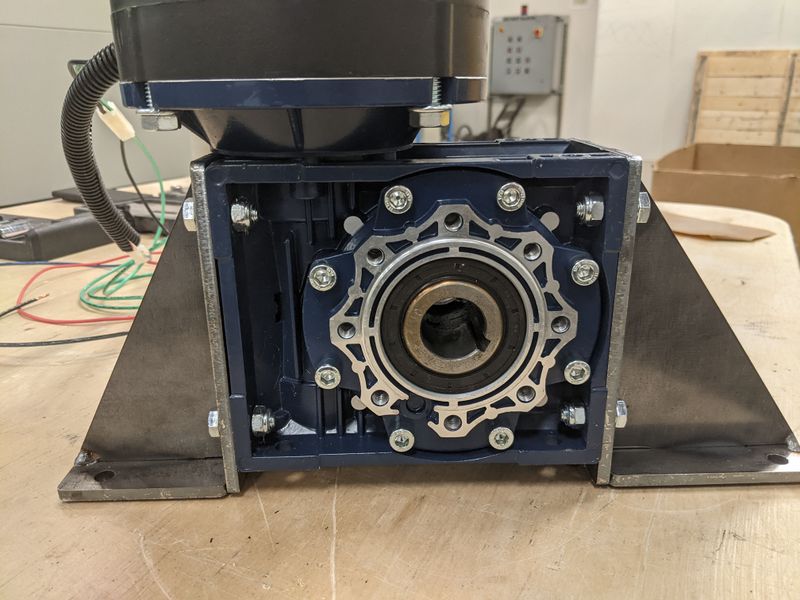
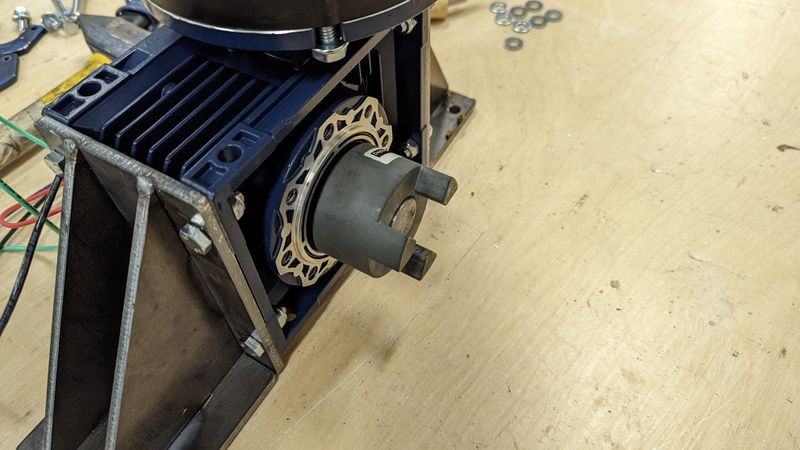
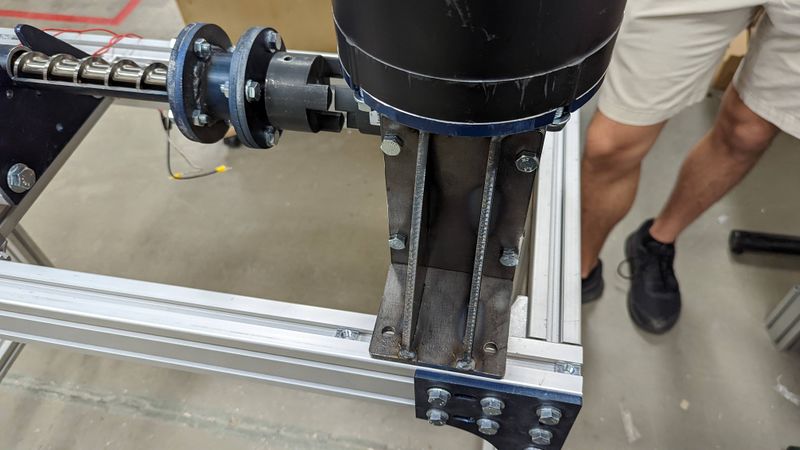
It is important to note that the two supports are not identical. Support A has a narrower base than B.
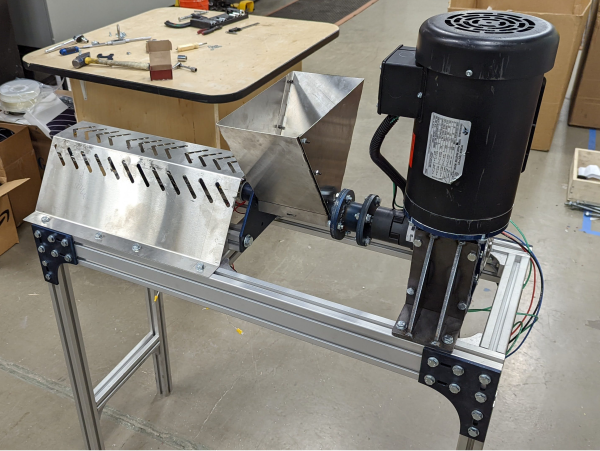
- Position the supports as seen in Image 1, ensuring that support A faces the gearbox side with longer distance between its wall and the shaft.
- Secure the supports with bolts/washer/lock nuts.
Étape 12 - Motor shaft coupling
Tools
Mallet
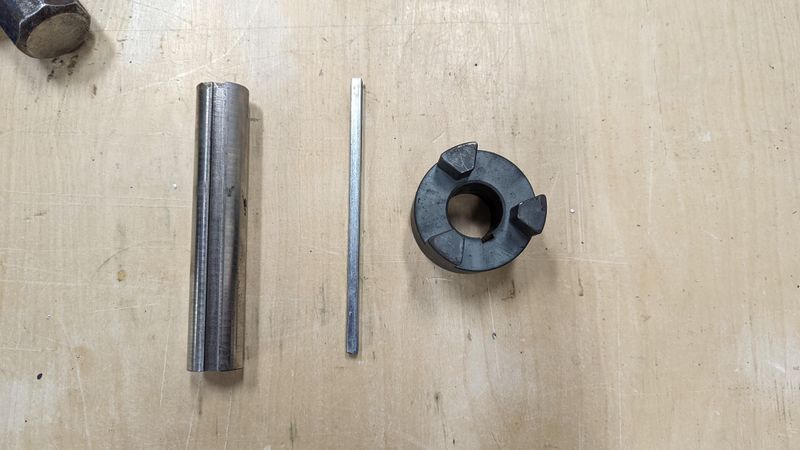
Parts
1 1/8" Shaft
1/4" key
1 1/8" coupling
Gearbox
Steps
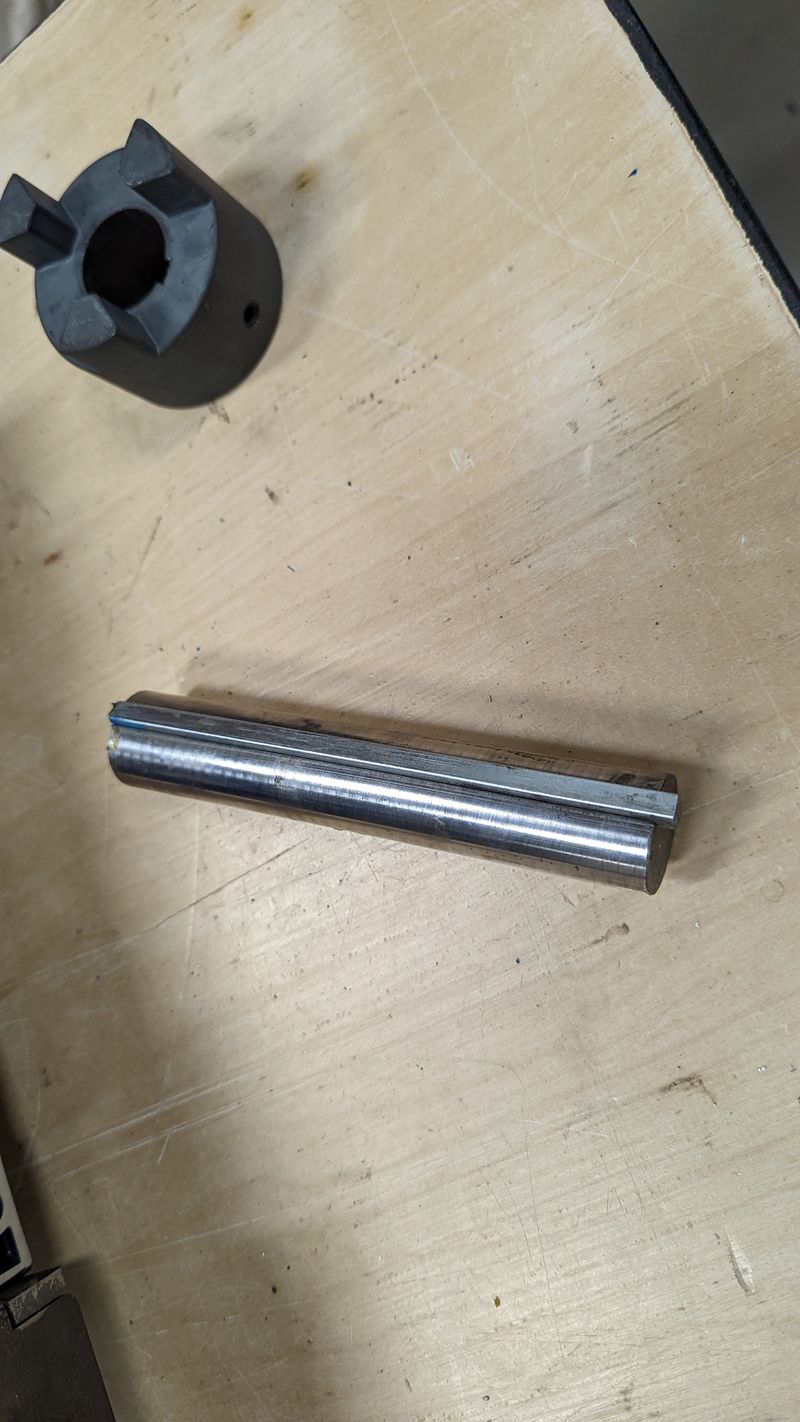
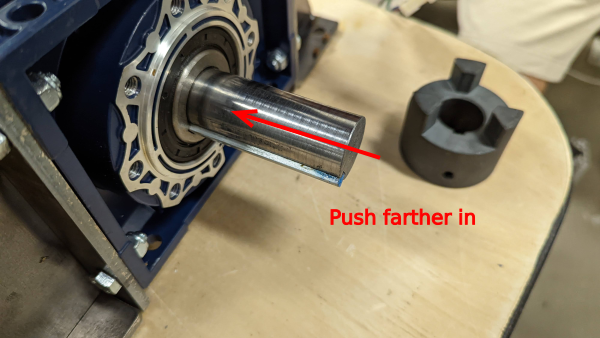
- Place the key into the shaft
- Slide these parts into the gearbox until flush with the back side of the gearbox.
- Slide the coupling onto the shaft
Étape 13 - Motor mechanical install
Tools
1/2" socket wrench
Parts
Motor Assembly
Table
4x m8x20 Bolts
4x washers
Spider coupling
Steps
- Position the motor on the table, sliding the t-nuts from the previous steps into position.
- Loosely secure the motor to the table.
- Insert the spider into one of the couplings.
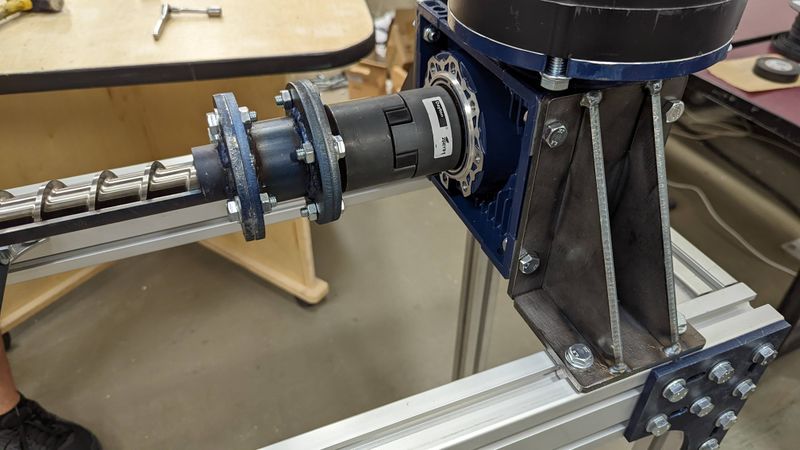
- Making use of the loose bolts, move the barrel and motor together until they are meshed at the couplings with the spider in between.
Étape 14 - Heat Shield bend and install
Tools
1/2" socket
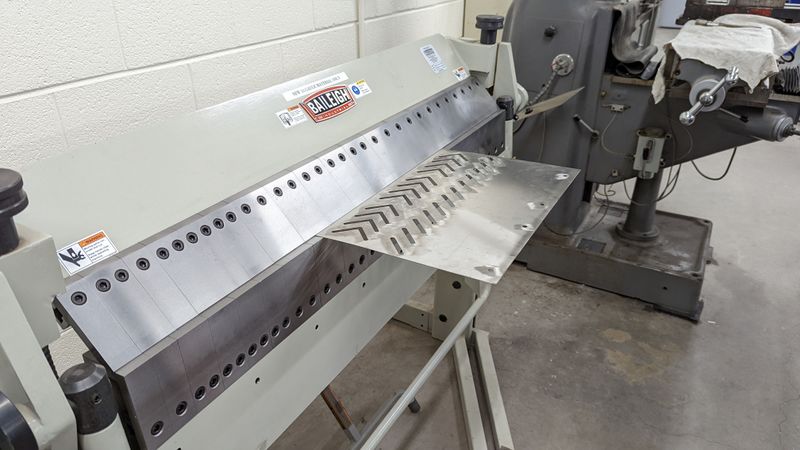
Metal break
Digital angle gauge
Parts
Perforated shield
6x M8x16 bolts/washers
Steps
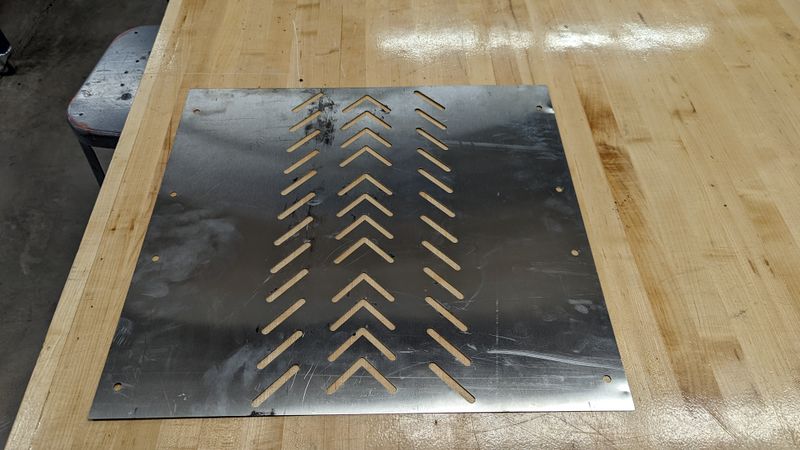
- Identify the small cut notches on the sheet metal that indicate where the bends should go.
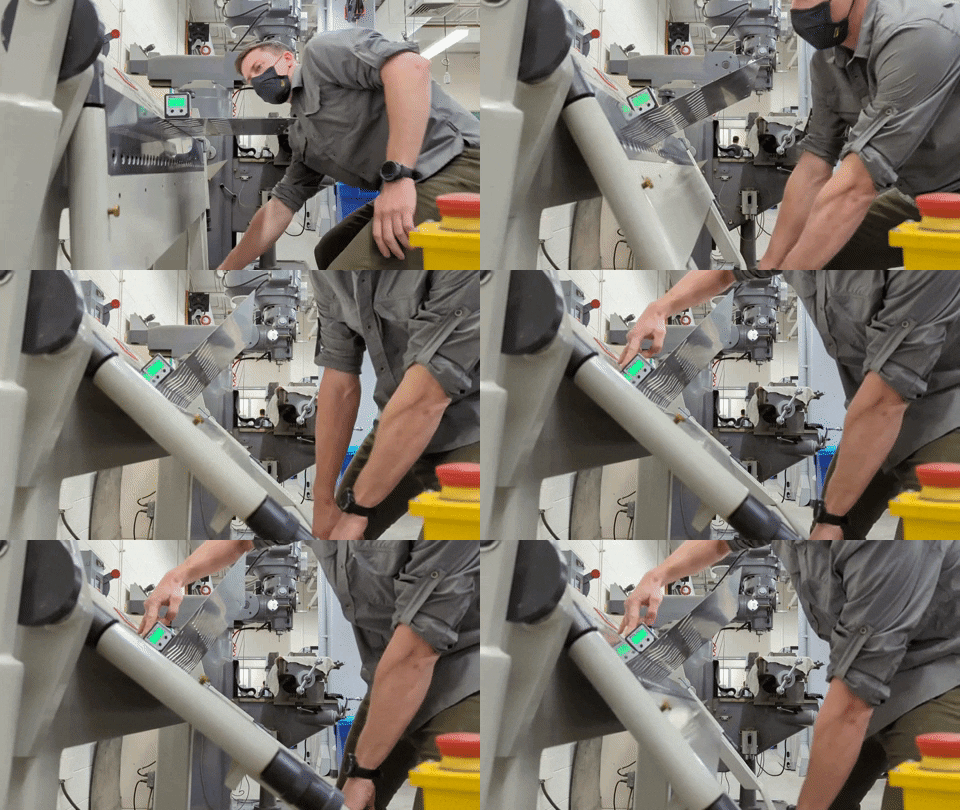
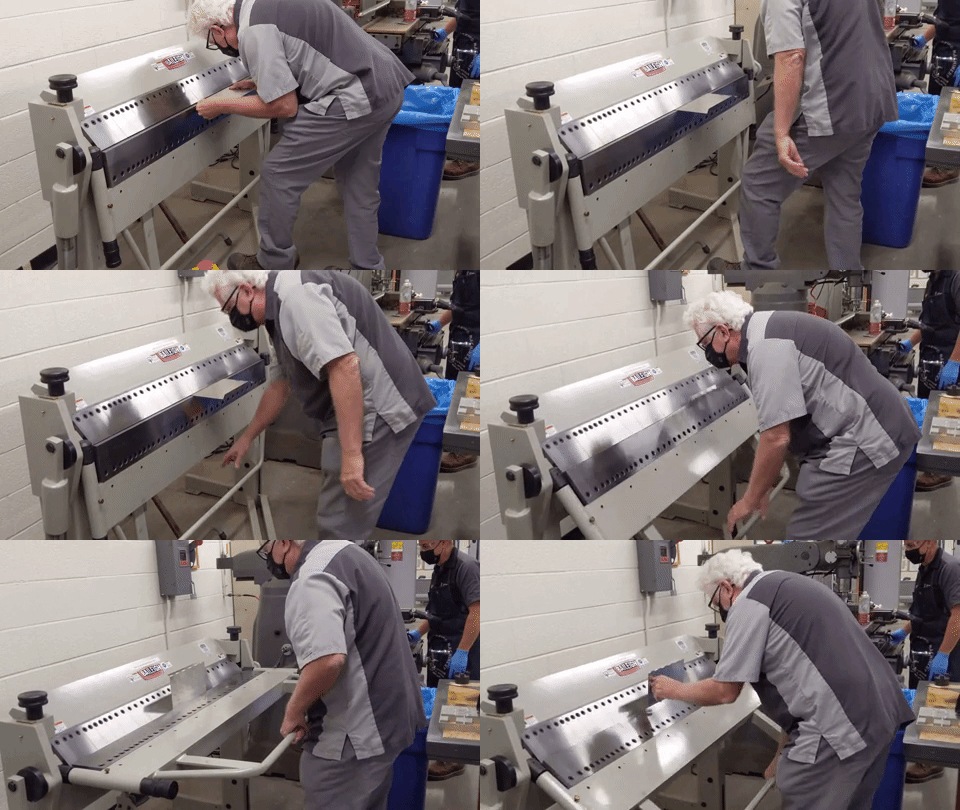
- Using the break, fix the sheet metal in position (figure 2) and bend the sheet at a 45 degree angle.
- Flip and repeat for all 4 bends.
- Position the shield in place and secure the back row with 4 bolts/washers and the pre-installed t-nuts.
- attach the front of the shield with only the left two bolts. (the other two will be utilized for securing the electronic box later)
Étape 15 - Hopper Bend and install
Tools
Metal break
Digital angle gauge or square edge
vice
Rivet gun or hex wrench set
Parts
2x pre-cut hopper sheets
6x rivets or M4 nut/bolt combo
Steps
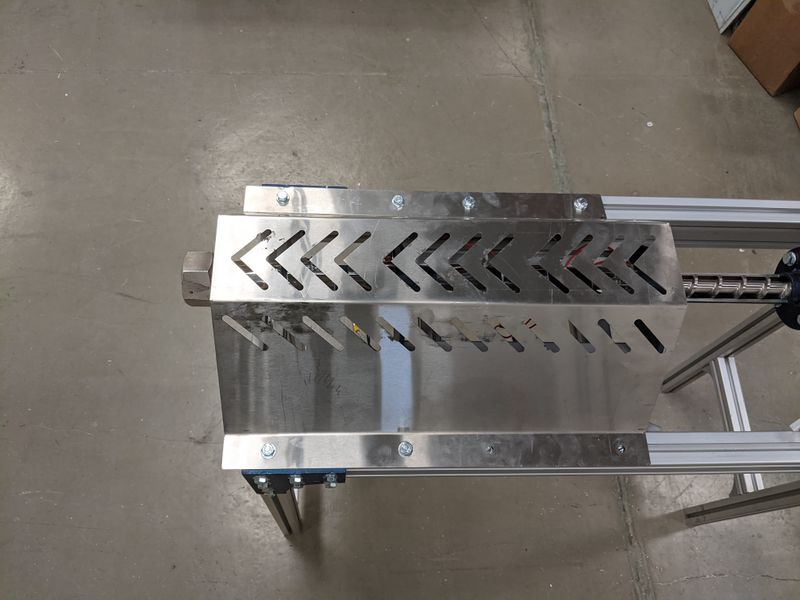
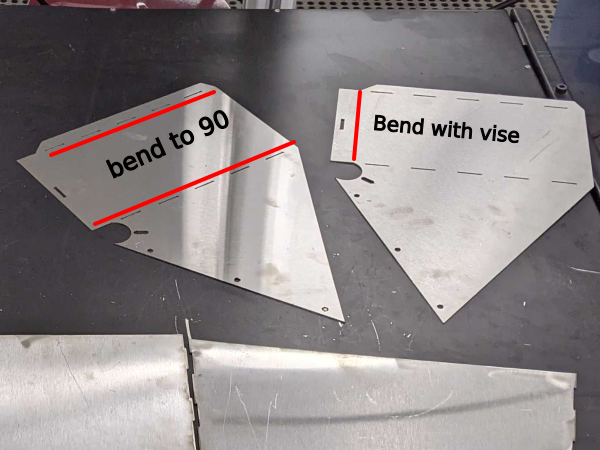
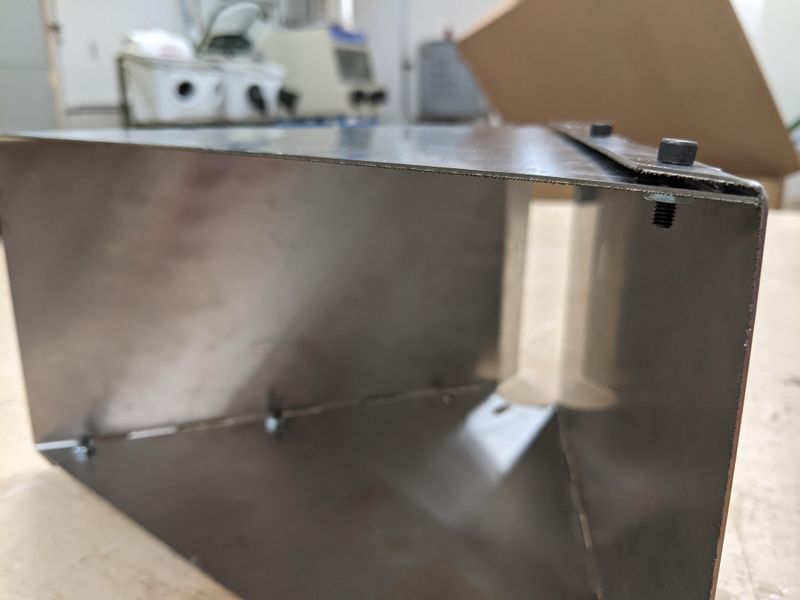
- Using the break, fold the perforated sheet on the designated lines to 90 degrees. Both bends should be inward, so that the triangle flap and short flap face each other.
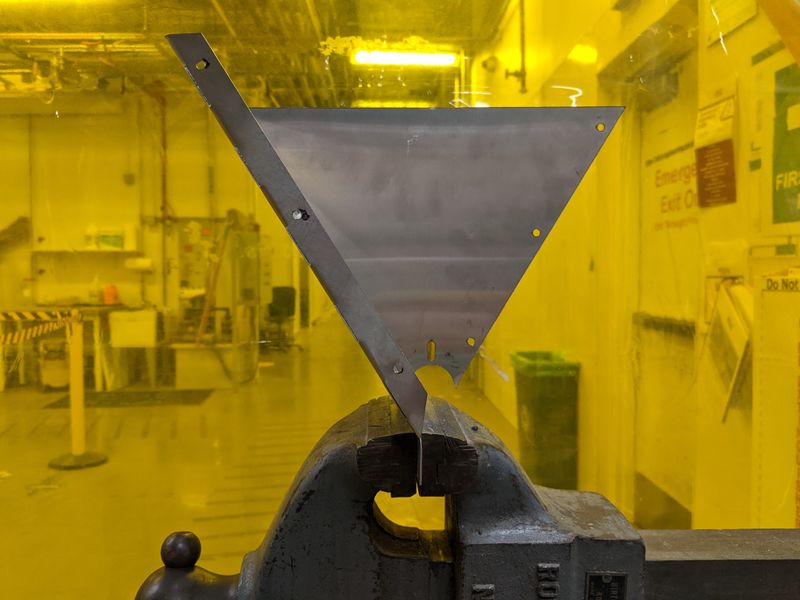
- The bottom of the hopper sheets need to be flared out so it can fit around the barrel. *We found this easier to do in the vice because you can visually inspect the angle
- Place the bent hopper half in a vice, and slowly press on the rectangular face until the top of sheet is parallel with the floor/table. (image 3)
- Repeat for the other sheet.
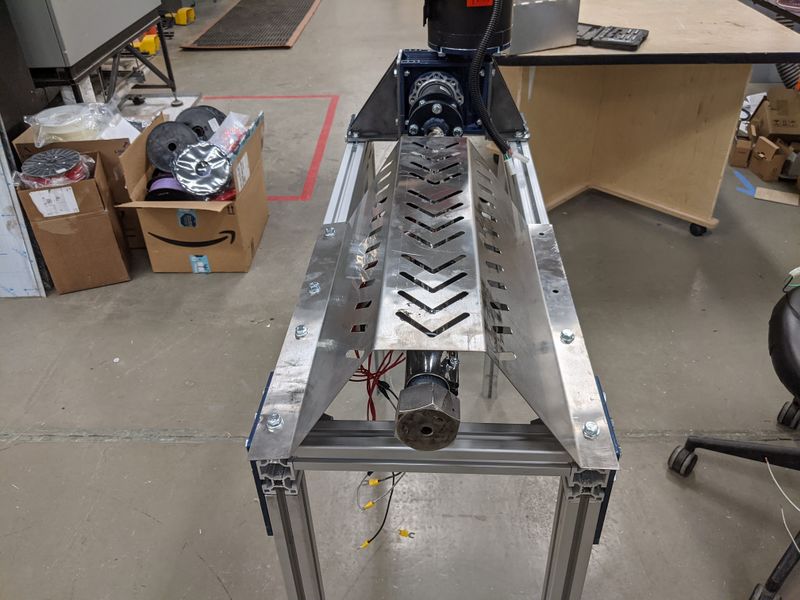
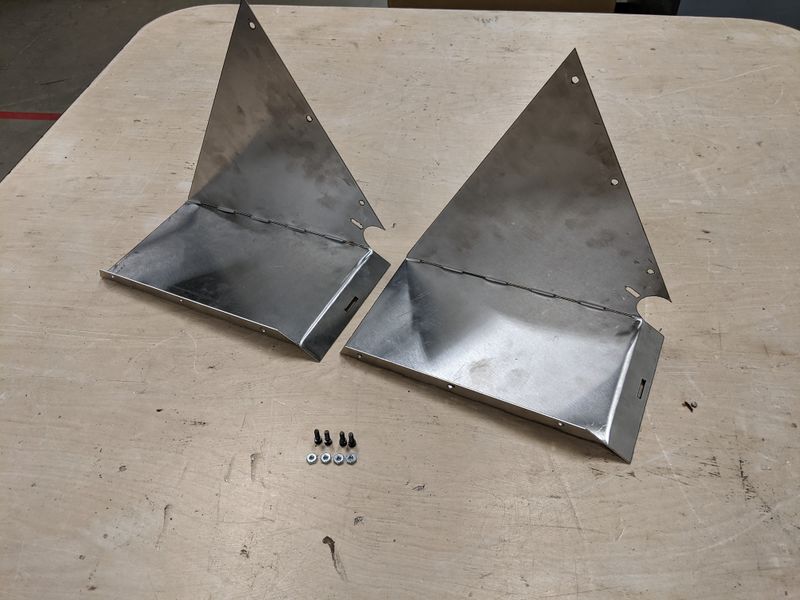
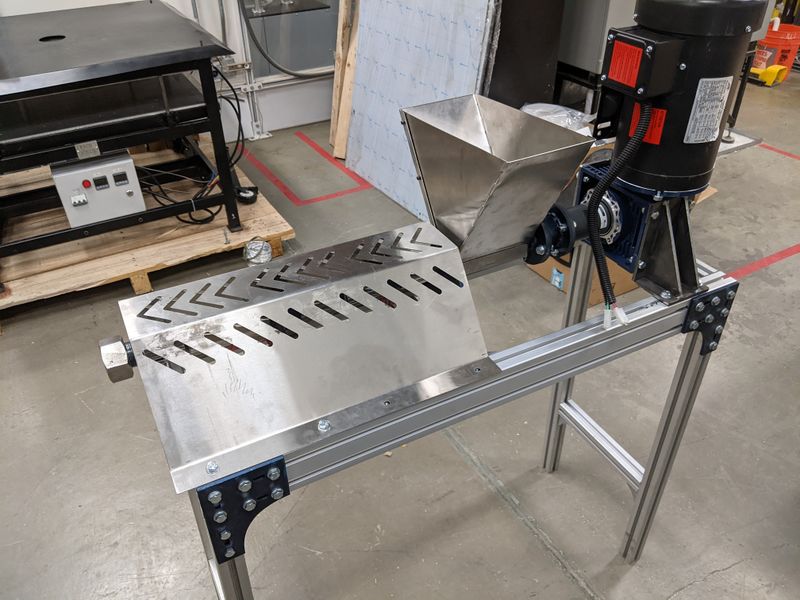
- Nest the two pieces so the triangular face is captured by the lip on the other sheet. Secure in place with either bolts/nuts or rivets
- Place the hopper over the barrel.
Published
 Français
 English
 Deutsch
 Español
 Italiano
 Português