| Ligne 154 : | Ligne 154 : | ||
- enjoy :)</translate> | - enjoy :)</translate> | ||
|Step_Picture_00=COREMO_TRAILER_-_Community_Repair_Mobile_photo_17_2024-04-18_13-41-51.jpg | |Step_Picture_00=COREMO_TRAILER_-_Community_Repair_Mobile_photo_17_2024-04-18_13-41-51.jpg | ||
| + | |Step_Picture_01=COREMO_TRAILER_-_Community_Repair_Mobile_photo_19_2024-04-18_13-41-51.jpg | ||
}} | }} | ||
{{Notes | {{Notes | ||
Version du 18 avril 2024 à 15:16
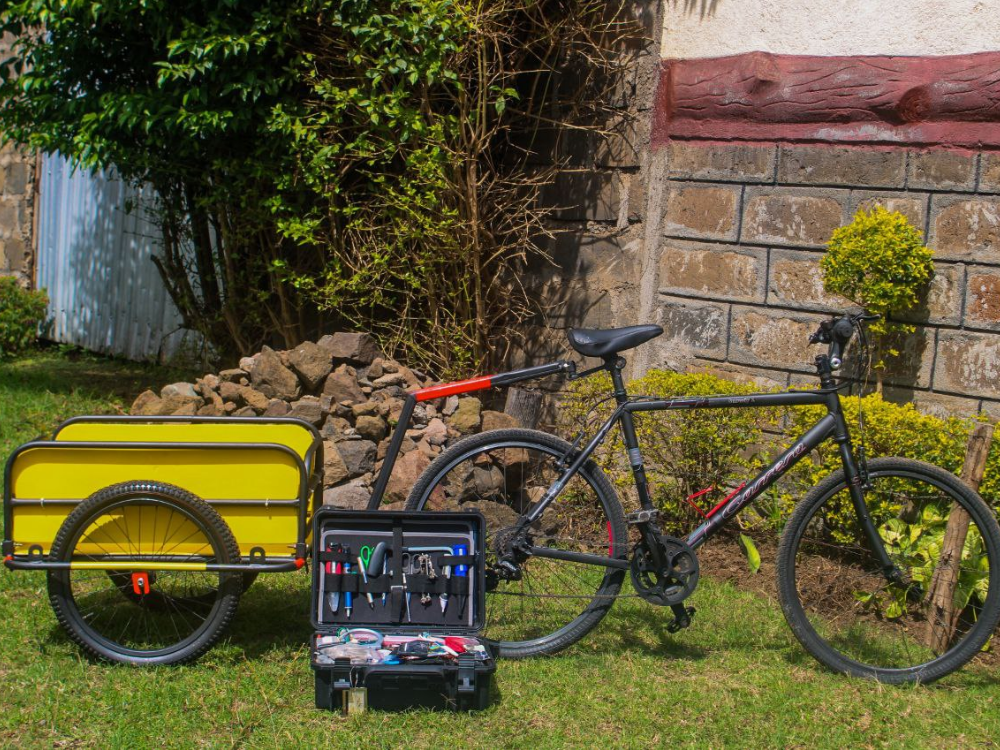
First Prototype of a Community Repair Mobile Trailer for remote areas and repair services supporting the application of the #ASKotec (Access to Skills and Knowledge - open tech emergency case) and other mobile makerspaces. (currently developed in Kenya)

Difficulté
Difficile
Durée
7 jour(s)
Catégories
Machines & Outils, Recyclage & Upcycling, Transport
Coût
500 USD ($)
Sommaire
- 1 Introduction
- 2 Étape 1 - Drafting the metal frame
- 3 Étape 2 - Preparing the parts
- 4 Étape 3 - Welding the metal frame
- 5 Étape 4 - Detail: Building the Coupling
- 6 Étape 5 - Building the Side Frames
- 7 Étape 6 - Cut the wooden Side Panels
- 8 Étape 7 - Detail: All connectors for wheels and frames
- 9 Étape 8 - Painting the Frame
- 10 Étape 9 - Assembling the Frame
- 11 Étape 10 - Finishing the Side Panels
- 12 Étape 11 - Assebling the final Trailer
- 13 Commentaires
Introduction
This Step-by-Step Tutorial serves as Open Source instruction for a Proof of Concept Prototype for a Community Repair Mobile (Trailer Edition) for remote areas (currently applied in Kenya) and will provide the option of repair services through the use of the #ASKotec (Access to Skills and Knowledge - open tech emergency case) and other mobile makerspaces/toolkits. (currently developed in Kenya by Adam Abdumalik with support from international community members).
This serves as a stage 1 solution for more variations, modules and adaptations to come as of:
- Solar Power (Soldering, Charging, etc.)
- Solar Electric Mobility
- Scaling production, decentralised and Open Source implementation
- Share your thoughts and comments as we update the documentation


Matériaux
- Steel (Tubes, Plates)
- Wood Plates
- Wheels
- Bicycle
- Toolkit (any)
- Screws
- Zip Ties
- Paint
Outils
- (1) Welding machine
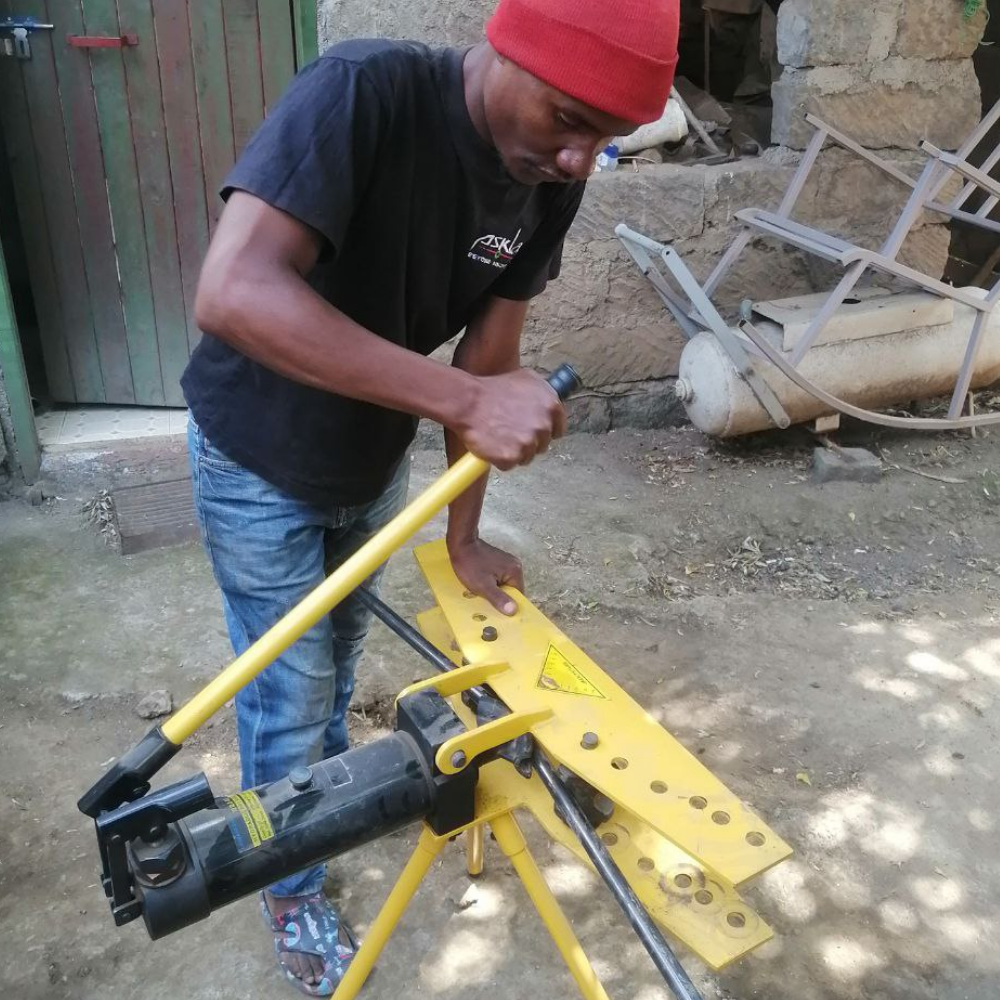
- (2) Tube Bender
- (3) Angle Grinder
- File
- Drill
- Hammer
- Wrench
Étape 1 - Drafting the metal frame
In order to fit the bicycle selected, the frame should match typical sizes of bikes.
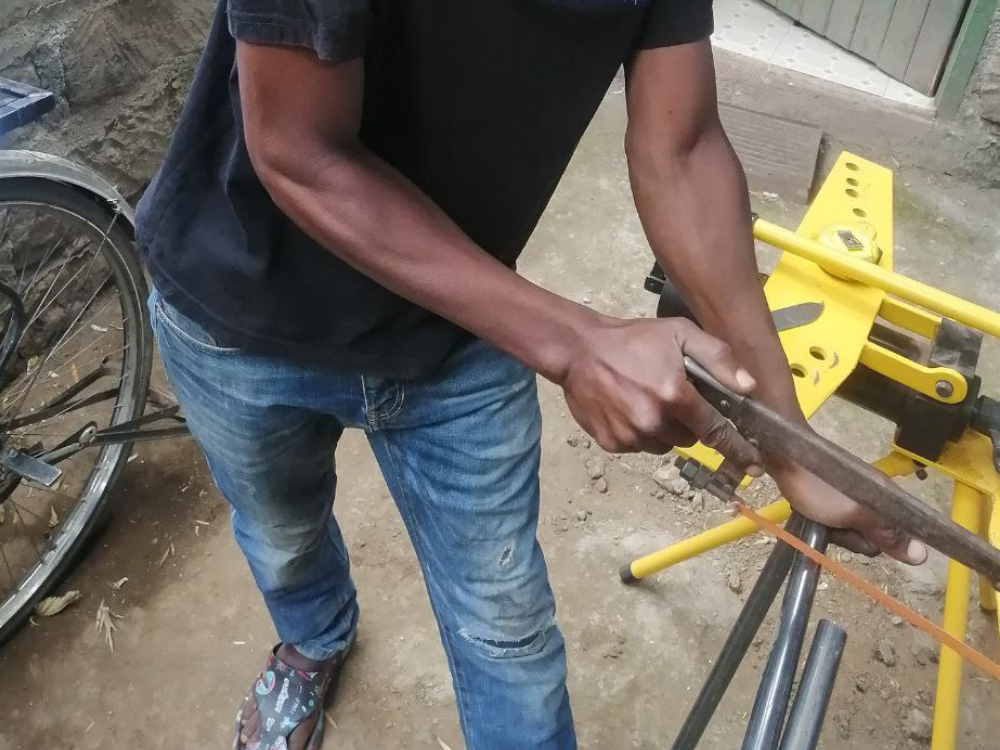
Step 1 therefore is collecting material, sketching in size and measurement of all parts, cutting it to size and bending the tubes.

Étape 2 - Preparing the parts

Étape 3 - Welding the metal frame

Étape 4 - Detail: Building the Coupling
- connection between the bicycle and the trailer

Étape 5 - Building the Side Frames

Étape 6 - Cut the wooden Side Panels

Étape 7 - Detail: All connectors for wheels and frames
- For Side Frames
- For Wheels
- For Strap-Connectors

Étape 8 - Painting the Frame

Étape 9 - Assembling the Frame
- All Walls and Panels and Wheels for test fitting and preparing for panel painting


Étape 10 - Finishing the Side Panels
- Paint the side panels to give it some character
- Fix the panels with Zip Ties
- add your first tools (e.g. an #ASKotec)
- final touches to the Frame/Trailer

Étape 11 - Assebling the final Trailer
- Attach the Coupling
- Make a test ride
- enjoy :)


Published
 Français
 English
 Deutsch
 Español
 Italiano
 Português