Sommaire
- 1 Étape 1 - Get to know your product
- 2 Étape 2 - Install and configure software
- 3 Étape 3 - How does it work
- 4 Étape 4 - General setup
- 5 Étape 5 - Using the AutoDrive or the MultiDrive
- 6 Étape 6 - Set up the software
- 7 Étape 7 - Scan
- 8 Étape 8 - Safety advice & Tips
- 9 Notes et références
- 10 Commentaires
Matériaux
- NextEngine 3D Scanner
- AutoDrive Platform
- Object to be scanned
Outils
Computer with ScanStudio Software
- Note: ScanStudio only works on Windows 7 / 8 /8.1 and 10 versions
Étape 1 - Get to know your product
- WEIGHT 7.68 KG
- INPUT POWER 100-240 VAC/60W
- Measurement system MultiStripe Laser Triangulation (MLT)
- Sensor Twin 5.0 Mega-pixel CMOS RGB image sensors
- SIZE 276 x 223 x 91mm
- Field AREA 5.1" x 3.8" (Macro) and 13.5" x 10.1" (Wide)
- Capteur density 268K points/in (Macro) and 29K points/in (Wide)
- Texture Density 500DPI ( Macro) and 200DPI (Wide)
- Dimensional Accuracy 100 micorn ( Marco) and 300 micron ( Wide)
- Acquisition Speed 50,000 points/sec
- CONNECTIVITY USB 2.0
- OPERATING SYSTEM Windows XP/Vista/7/8 (64-bits)
- MINIMUM REQUIREMENT: 2 GHz Dual-core, 3GB RAM, 256MB graphics
- FILE FORMAT STL, OBJ, VRML, XYZ, PLY
- FILE SIZE 200MB fot typical model
- SOFTWARE ScanStudio™ (FREEWARE)
Étape 2 - Install and configure software
- To use the NextEngine scanner you must first download the licensed software provided with the scanner.
- Connect your machine to your computer with the USB cable.
- Run the CD that comes with the device. The license number is written somewhere in the box .
- The Application Preferences Dialog is available from the Edit-Preferences menu and can be used to
- Customize ScanStudio to fit your usage
Étape 3 - How does it work
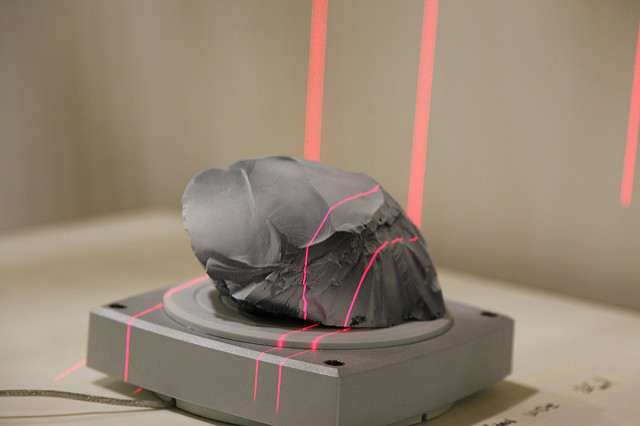
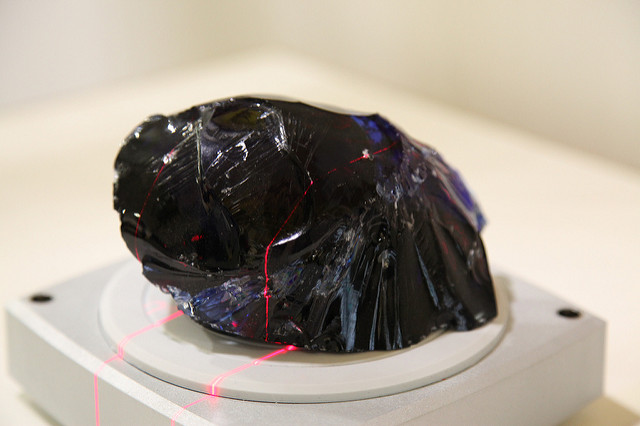
The scanner send a laser ray towards the object and by observing the distortion of the line calculates the distance of several hundred points on the objet's surface. Once it has all these points it uses a complicated set of mathematical equations to reconstruct a 3D image.
Étape 4 - General setup
- Surface Prep
Prepare dark, shiny or transparent objects using included tools to help the lasers capture the data.
- Paint Pens: Washes off most
- Powder: Talc
- Other spray alternatives such as foot powder spray or white hairspray can be used as well.
Alignment Prep It may be helpful prior to scanning to make alignment marks using the alignment pen. These marks will make it easier to place pins and identify locations on the object. Alternatively, the 3D geometry that the Scanner captures can be used to align scans.
Étape 5 - Using the AutoDrive or the MultiDrive
- Setting up the AutoDrive and PartGripper:
- Screw PartGripper into one of four corner sockets on AutoPositioner
- Tighten Platter on PartGripper
- Rotate Post clockwise (about 6 turns) to tighten PartGripper into AutoDrive
- Plug in the AutoDrive to the scanner
- Start ScanStudioHD and proceed to Calibration
- This function is available for re-calibration when alignment results in an error or when the AutoDrive was detached and is reattached
Étape 6 - Set up the software
- Scan Process
- After calibration is done
A new scan panel will be loaded when
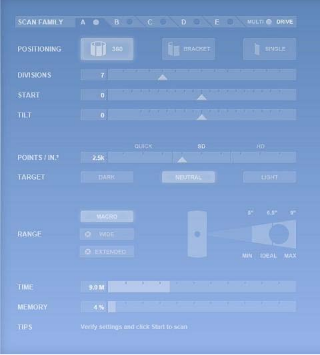
- Five families are now available for predefined settings for Positioning, Divisions, Start Angle, Tilt Angle, Points/IN^2 and Target
- Clicking on the family name will enable the tab to edit the settings.
- To enable or disable a family, simply check or uncheck the circle next to the family name.
- Starting positions can be set for both the initial and tilt axis by moving the slider bar arrow.
- The start axis has the full 360 rotation and tilt axis is bounded to -35 to 45 degrees.
- Use the top slider bars to visually set the starting and tilt positions. (This will update the settings for
the scan family)
- Select the scan settings for each tab and check the tabs you want to have scan.
If the setting for a tab have been adjusted, but the tab is not checked it will not scan.
the green and refine (no pins required)
-Force Calibration. If your scans are not coming in aligned, you may need to run a force calibration. You can do this from the drop down menu , Align, then go down to Calibrate MultiDrive -All MultiDrive scans are to be in MACRO mode. -Select a ROI for your model to prevent the MultiDrive from being scanned in for certain tilt angles. -If additional scans are needed, enter scan panel and position the model by using different starting and tilt angles to capture additional scans. -If you physically adjust the part, then a 3 pin alignment will be needed to align. -When finished, trim unnecessary data and "Fuse" or "Volume Merge" the model for export:
Étape 7 - Scan
- Intro
- Enter the Scan Panel by clicking the Scan button
- Customize your scan name in the yellow toolbar
- There are 3 main types of scans:
360: - Select the "360" scan option in the scan panel to scan the object from every angle. - The number of divisions will control the degree of rotation between scans and the total number of scans - The individual scans will be grouped as a family. Bracket: - Select "bracket" scan in the scan panel to scan three consecutive angles. - The number of divisions will control the degree of rotation between scans - The three scans will be grouped as a family. More on Scans and Families Single: -Single scan of the object from one angle. Speed Precision: Choose MACRO or WIDE distance based on object size and desired resolution 9 Macro = 0.005" accuracy, 3x5" field of view - Place object 6.5 inches from the front of the scanner Wide = 0.015" accuracy, 10x13" field of view - Place object 17 inches from the front of the scanner Extended = 0.015"+ accuracy, 16x22" field of view - Available with HD PRO - Objects can be placed up to 30" from the face of the scanner Speed: ScanStudio CORE Choose Standard, Quick or Fine scan speed based on desired scan time and quality ScanStudio HD/HD PRO Macro Reference Table 10 Wide/Extended Reference Table Tips - For ScanStudioHD, go to Scan -> Settings -> Texture Capture Mode - and choose Monochrome for faster scan speed. - Choose Fine or HD Speed for the greatest resolution. - Choose Quick Speed to capture data the quickest with lowest resolution (not recommended for most parts). Position - Orient object in viewfinder using Rotate buttons Turn/Step Arrows: - One click on a Turn Arrow rotates the AutoDrive a single increment for more precice positioning. - One click on a Step Arrow rotates the AutoDrive one division. - For example, if the divisions is set at 4, clicking on the step button will rotate the object 90 degrees. - The left arrow rotates the object clockwise. - The right arrow rotates the object counterclockwise Note: The AutoPositioner should only be rotated using the Rotate Arrows and should not be done manually. Region of Interest - Drag the cursor around the object to select a smaller scan area 11 Regenerate - Since the raw scan data is saved at scan-time, you can regenerate the points at any time with different point-generation settings. - These settings have the same effect as the sliders on the scan setup screen. - Re-Gen is particularly useful for changing the decimation value after a scan has been completed. Steps: - Click on Fuse, Re-Generate Scan(s) - Select new scan settings for reprocessing - Restore Trimmed Data: Choose this option to restore the trimmed data from either a single scan, family or the entire model.
Étape 8 - Safety advice & Tips
- You shall wear eye protection when working with tools and processes.
- You shall always point the scanning device away form you as the scannner's laser work and could potentially harm your eyes when directly looking at the laser.
- You shall make sure the rotating stand and screws are securely fastened before the scanning process begins
- If you need to prepare any black, reflective or transparent objects, you shall only use the following:
- Powder: Talc composition
- Spray Powder*
- Other spray alternatives: foot powder spray pr white hairspray can be used as well.
- You shall not leave a machine unattended while in operation.
- Force Calibration. If your scans are not coming in aligned, you may need to run a force calibration. You can do this from the drop down menu -> Align -> then go down to Calibrate MultiDrive
Notes et références
- Je me suis inspiré du User Training Manual - NextEngine 3D Scanner réalisé par ARC SpaceShop que je trouve très bien fait.
- Je me suis inspiré aussi du NextEngine 3D Scanning Tutorial réalisé par University of Florida que je trouve très bien fait.
- Crédits Photo Institute of Making

 Français
 English
 Deutsch
 Español
 Italiano
 Português