Is your loyal canine companion in need of some extra support for walks?
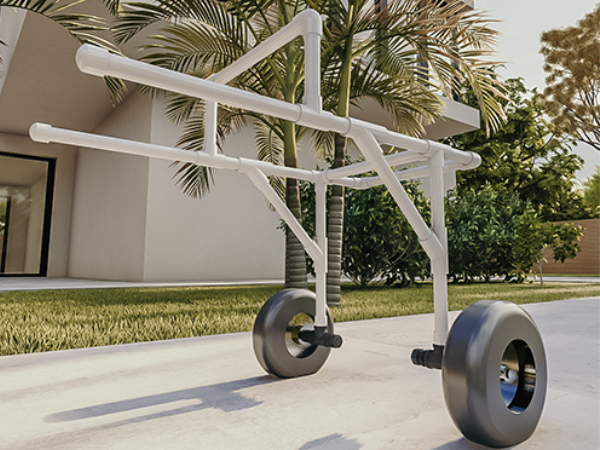
This cost-effective and space-saving wheelchair can help them embark on new adventures! It's easy to assemble, made with sturdy ¾-inch PVC pipe, and equipped with all-terrain wheels.Sommaire
- 1 Introduction
- 2 Video d'introduction
- 3 Étape 1 - Building the Wheels of your Dog’s Wheelchair
- 4 Étape 2 - Constructing the Front Frame of the Wheelchair
- 5 Étape 3 - Creating the Side Frame of the Dog Wheelchair
- 6 Étape 4 - Let’s Make the Back Frame of the PVC Wheelchair Frame
- 7 Étape 5 - Let’s Affix All the Parts of the Dog’s Wheelchair
- 8 Notes et références
- 9 Commentaires
Introduction
Constructing this wheelchair is a simple and budget-friendly do-it-yourself project.
Ideal for dogs, pets, gift ideas, animal shelters, family projects, and more. Ready to build your own? Let's get started!
Instructions:
Before you begin, please note that the diagrams provided are intended to guide you through the building process. However, we do not offer specific recommendations for tools, hardware, or products to use. These designs are meant for a truly do-it-yourself approach.
That said, here are some general suggestions for working with PVC:
- Use tools designed for PVC, including compatible bits and saws for cutting and drilling.
- For joining PVC pipe and tubing, many find it efficient to use glue. Ensure that any adhesive you use is suitable for both the materials and your intended application.
- Safety is paramount, so always prioritize safety measures.
Youtube
Matériaux
1 3/4" Tube - 14" Length PVC - Standard PVC
2 3/4" Tube - 13" Length PVC - Standard PVC
2 3/4" Tube - 6" Length PVC - Standard PVC
2 3/4" Tube - 13.98" Length PVC - Standard PVC
1 3/4" Tube - 3.2" Length PVC - Standard PVC
3 3/4" Tube - 7" Length PVC - Standard PVC
2 3/4" Tube - 9.88" Length PVC - Standard PVC
1 3/4" Tube - 6.31" Length PVC - Standard PVC
1 3/4" Tube - 6.98" Length PVC - Standard PVC
1 3/4" Tube - 6.28" Length PVC - Standard PVC
1 3/4" Tube - 3.3" Length PVC - Standard PVC
2 3/4" Tube - 5" Length PVC - Standard PVC
2 3/4" Adapter Male Threaded PVC - Standard PVC
2 10" Wheel with 3/4" Tee Black Steel Connection Accessory - Mixed
2 3/4" Tee Female Slip PVC - Standard PVC
2 3/4" Cap Slip PVC - Standard PVC
4 3/4" 90° Elbow Slip PVC - Standard PVC
4 3/4" Wye Slip PVC - Standard PVC
2 3/4" 4-Way Outlet Slip PVC - Standard PVC
Outils
Étape 1 - Building the Wheels of your Dog’s Wheelchair
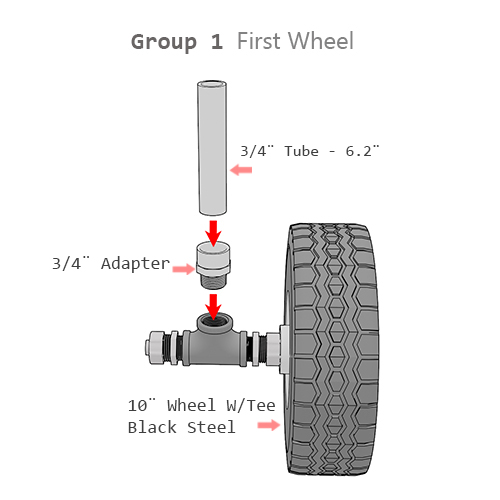
You will require a 6.2-inch long ¾” tube, a ¾” adapter, and a 10-inch wheel with a tee made of black steel. We will begin by constructing the wheelbase, creating two identical units. Follow the same procedure for both wheels, referring to the diagram above for the required parts (x2).
Insert the 6.2-inch long ¾” tube into the ¾” adapter. Then, place the assembled adapter into the 10-inch wheel with tee, as shown in the diagram. Once completed, set them aside until you are ready to attach them to the frame later on.
Étape 2 - Constructing the Front Frame of the Wheelchair
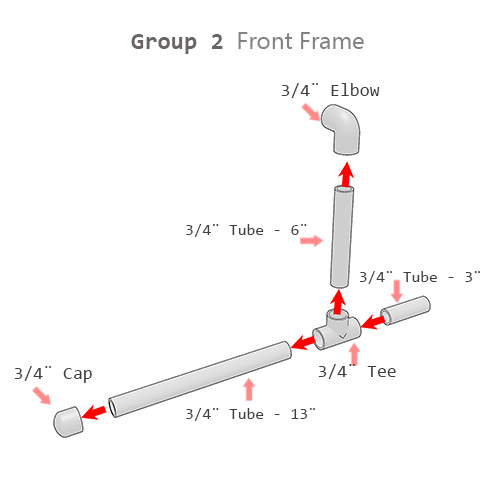
For this step, you will need a ¾” elbow, a 6-inch long ¾” tube, a 3-inch long ¾” tube, a ¾” tee, a 13-inch long ¾” tube, and a ¾” cap. The diagram provided illustrates half of your front frame. Therefore, you need to replicate this structure twice (x2).
The second frame should mirror the one shown above, essentially appearing identical but in reverse. Attach the 6-inch long ¾” tube to the ¾” elbow. Then, connect this piece to the central hole of the ¾” tee. Attach the 3-inch long ¾” tube to the right hole of the tee, and the 13-inch long ¾” tube to the remaining hole. Finally, cap the end of the 13-inch tube with the ¾” cap.
Once completed, you should have two identical halves of your front frame. We will revisit these later in the assembly process.
Étape 3 - Creating the Side Frame of the Dog Wheelchair
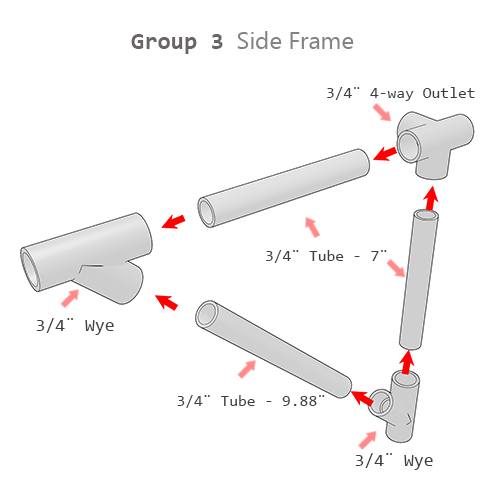
For this step, you will need a ¾” 4-Way Outlet, two 7-inch long ¾” tubes, and two ¾” Wyes. It's time to build both side frames of your dog wheelchair. The diagram provided shows only the left side frame, so begin by assembling it. Then, create a second frame that mirrors the design shown above.
Étape 4 - Let’s Make the Back Frame of the PVC Wheelchair Frame
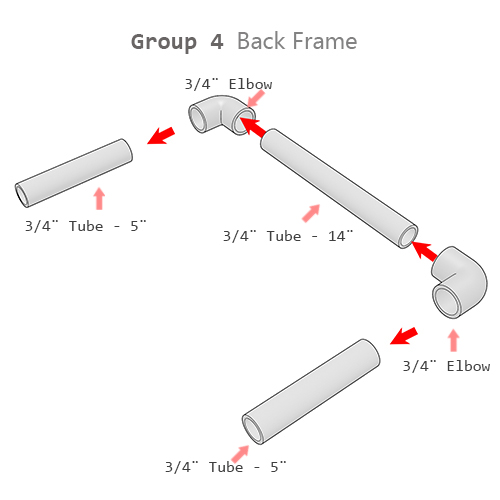
To complete this section, gather two ¾” elbows, two 5-inch long ¾” tubes, and a 14-inch long ¾” tube. Constructing the back frame of your dog wheelchair should be straightforward, requiring only one of these assemblies.
Connect all five parts as indicated in the graphic above, then set this assembly aside.
Étape 5 - Let’s Affix All the Parts of the Dog’s Wheelchair
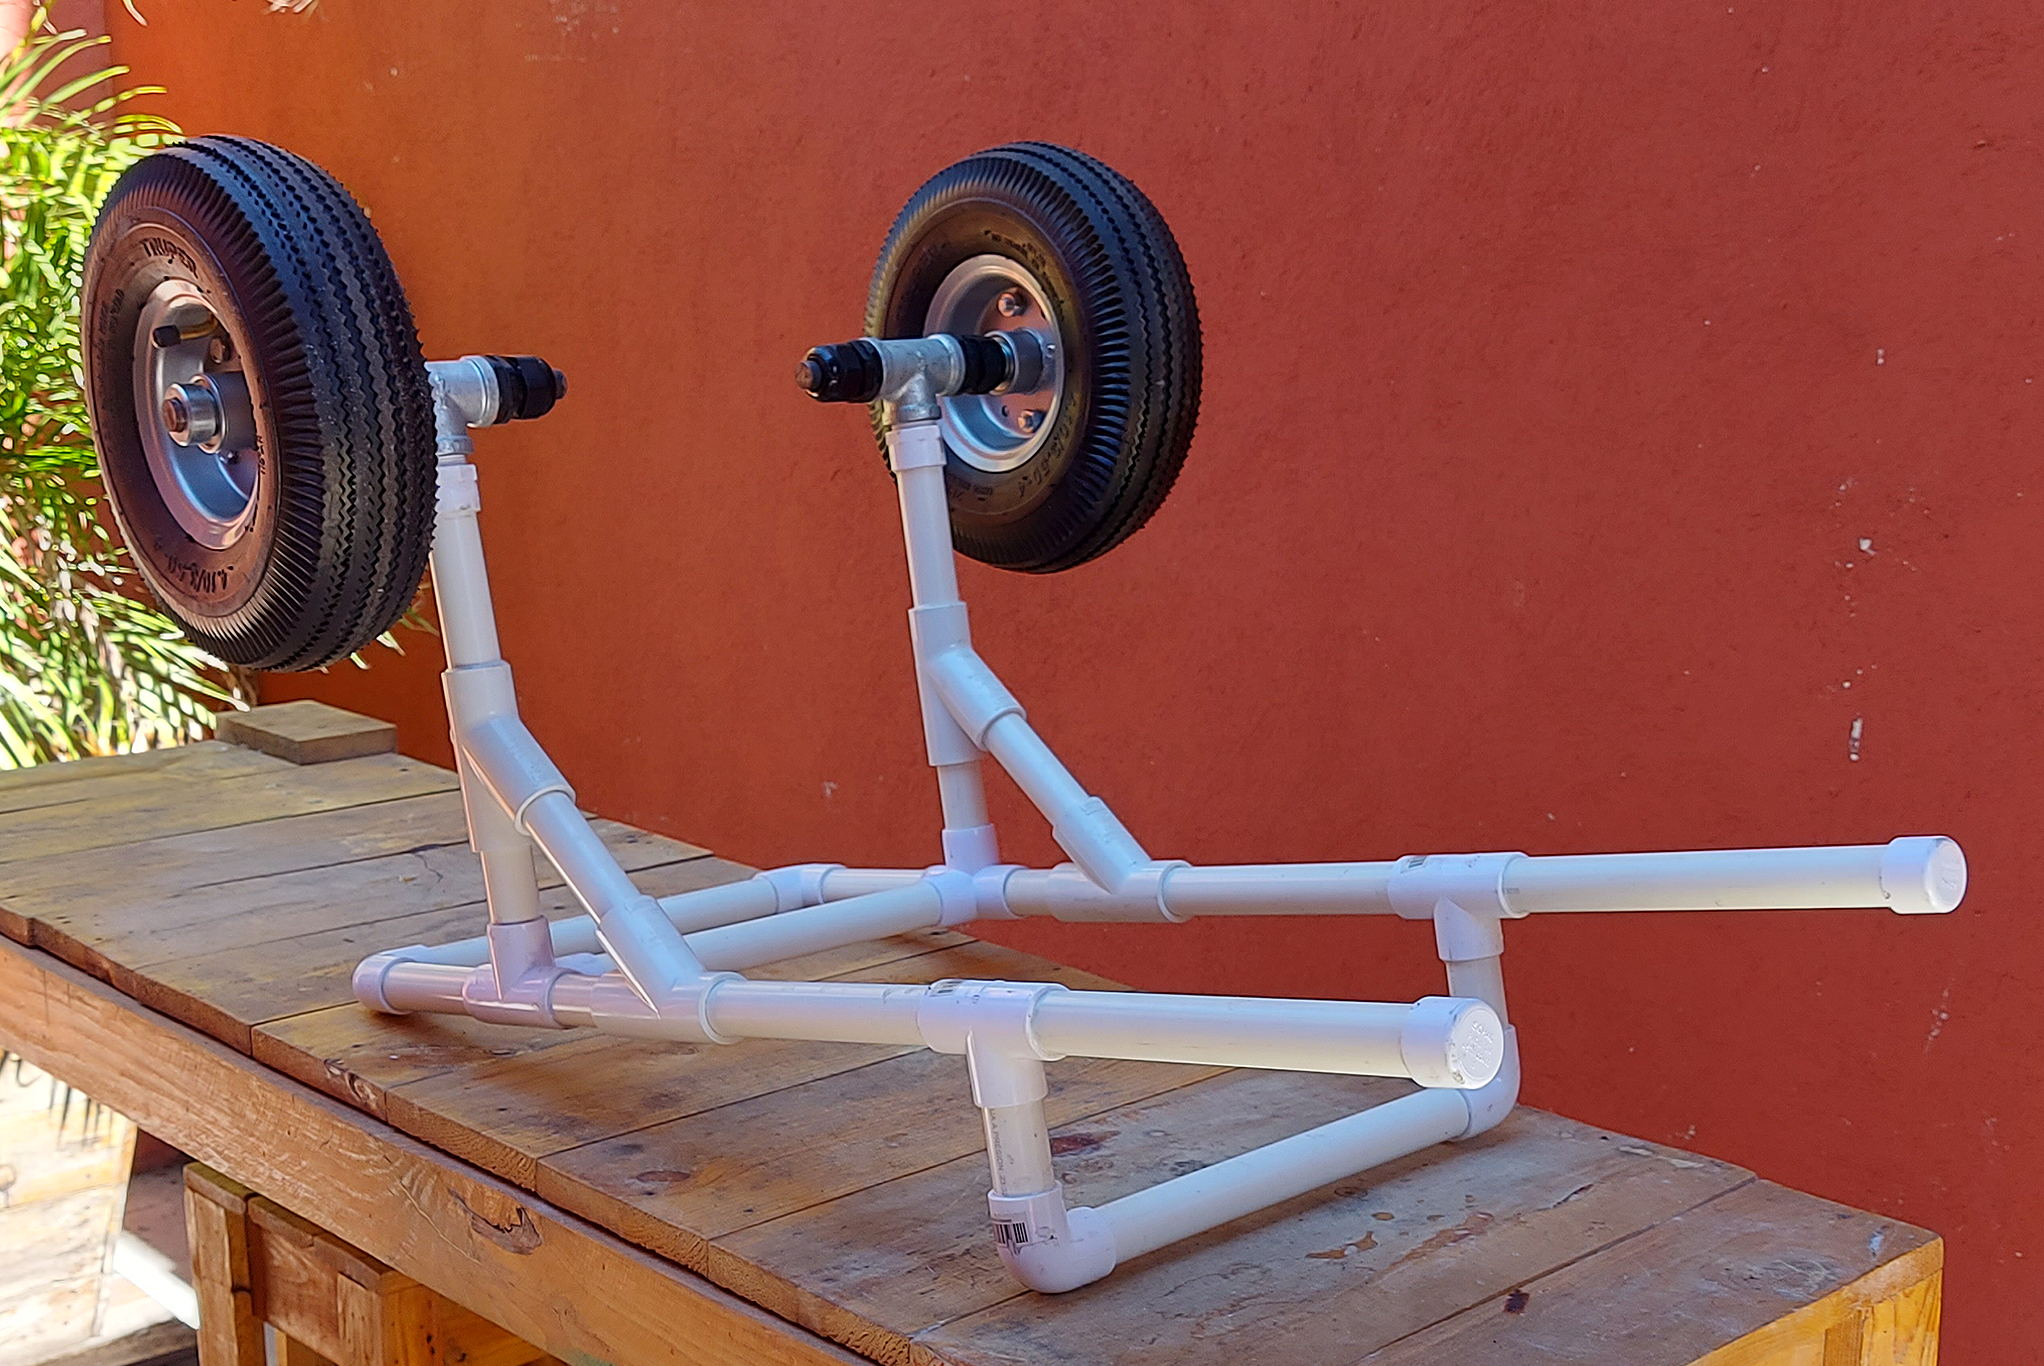
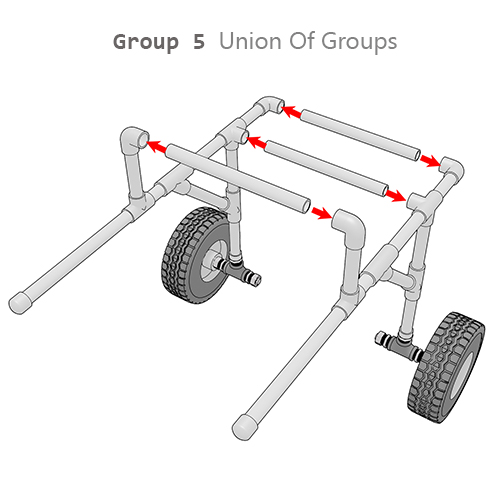
We're nearly finished! Let's now join all the pieces together. For this final step, you'll need just two more 14-inch PVC tubes. Use these tubes to connect both sides of all your frames. Then, proceed to connect your back frame and wheels. And that's it!
Did you have fun assembling this dog wheelchair? If you know anyone who might find it useful, please share this wikifab with them.
Notes et références
For the free 3D design visit Crafty Amigo, you'll be able to modify according to the height of your dog.
Draft
 Français
 English
 Deutsch
 Español
 Italiano
 Português