Sommaire
- 1 Introduction
- 2 Étape 1 - Getting Started
- 3 Étape 2 - Get PCBs for Your Projects Manufactured
- 4 Étape 3 - Create a New Project
- 5 Étape 4 - Add Devices
- 6 Étape 5 - Hardware - From Device to Cloud
- 7 Étape 6 - Create Dashboard
- 8 Étape 7 - Rules to Trigger and Integration Services
- 9 Étape 8 - Code (ESP32_MQTT_Qubitro)
- 10 Commentaires
Introduction
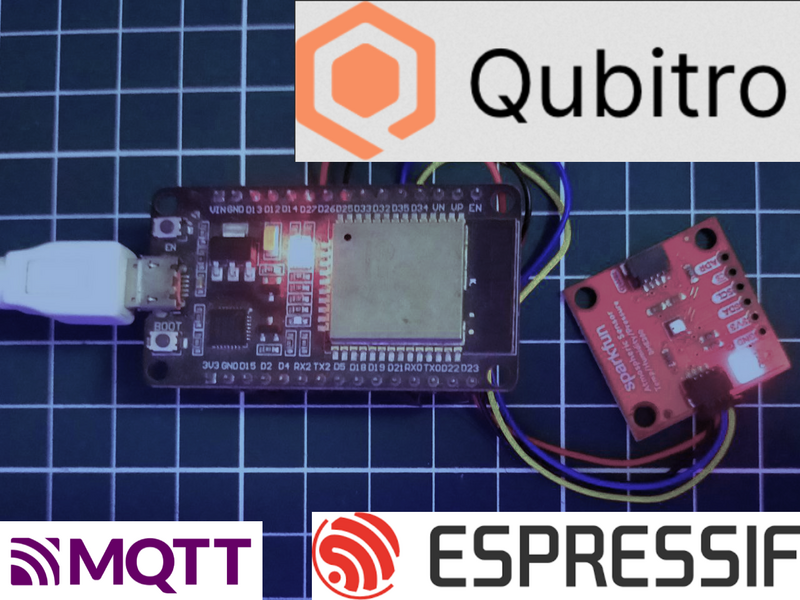
Qubitro is an IoT (Internet of Things) platform that provides tools and services for connecting, managing, and analyzing IoT devices and data. It provides a cloud-based platform where users can securely connect their IoT devices and collect data from sensors and actuators.
Matériaux
Outils
Étape 1 - Getting Started
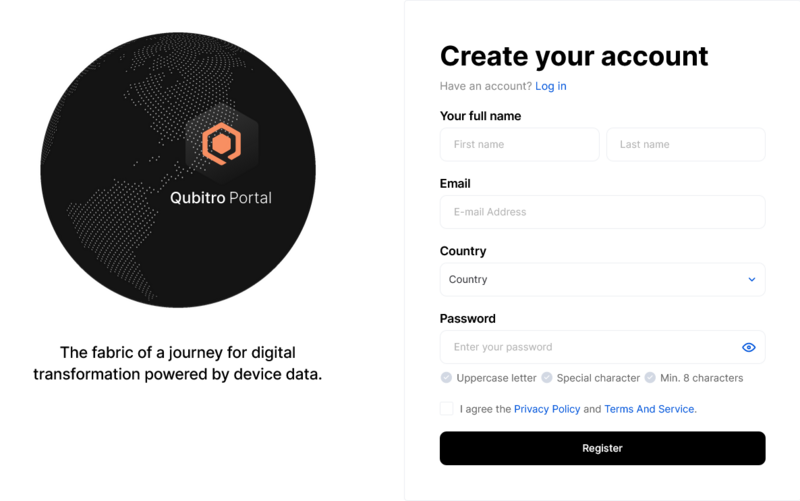
To get started with Qubitro, we will first need to create an account. Go to the Qubitro website (https://www.qubitro.com/) and click on the "Sign Up" button. You will be prompted to enter Full Name, Email Address,Country, and password to create your account.
Once, we have created the account, we can log in from https://portal.qubitro.com/login. However, we shall automatically be logged in to our account.
Étape 2 - Get PCBs for Your Projects Manufactured
You must check out PCBWAY for ordering PCBs online for cheap!
You get 10 good-quality PCBs manufactured and shipped to your doorstep for cheap. You will also get a discount on shipping on your first order. Upload your Gerber files onto PCBWAY to get them manufactured with good quality and quick turnaround time. PCBWay now could provide a complete product solution, from design to enclosure production. Check out their online Gerber viewer function. With reward points, you can get free stuff from their gift shop.
Étape 3 - Create a New Project
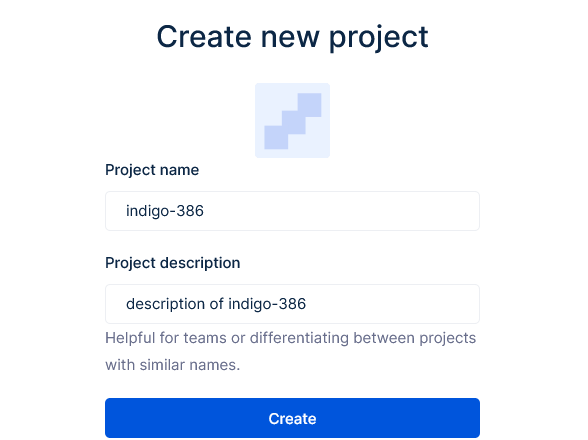
Once you have logged in, you will be prompted to create a project. Enter a name for your project and mention a description for your project.
Étape 4 - Add Devices
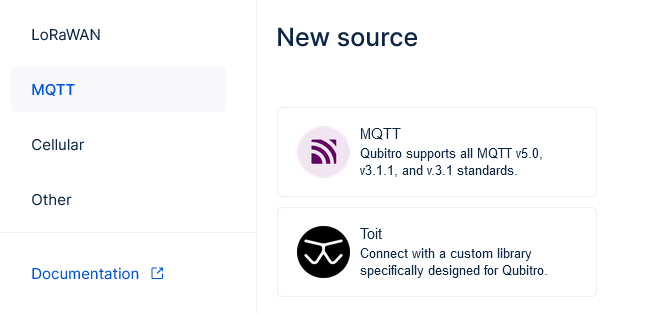
Next, you will need to add devices to your application. Go to the Project (if not already open), there we can see a button [+ New Source]. From this section, we will have 3 major sections -
1. Communication Protocol
With a prompt to choose between LoRaWAN, MQTT, & Cellular. We can choose the protocol that best suits our use-case.
I choose MQTT to get started with the platform basics. And since I shall be using Arduino IDE for programming the board, I went ahead with the MQTT Broker (Qubitro has its own broker - we shall see it in the upcoming section). In case you wish to know how the Toit platform works, you can check my Tutorial on Toit.io
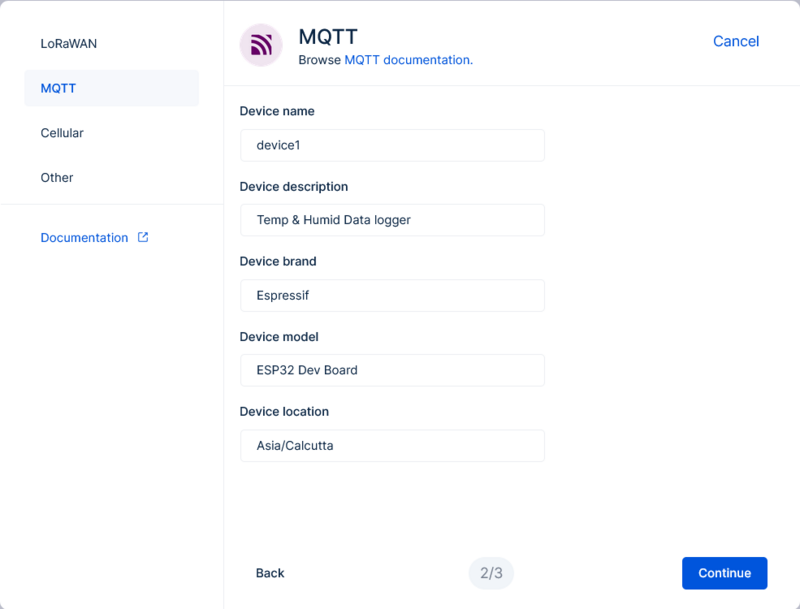
2. Device Details
I shall be using an ESP32 Dev Board, and therefore entered the details as per the image below -
3. Credentials
In the next step, we receive credentials, to connect to the MQTT Broker. We can use this detail to connect to the broker as a client - to Publish or Subscribe.
Now that we have the server, port, username and password we are all ready to send data to the Qubitro Cloud. Copy these details in a safe place (We can view them later in the device settings as well though)
Étape 5 - Hardware - From Device to Cloud
Once you have configured your devices, you can start collecting data. Qubitro provides a range of tools for data collection and analysis, including real-time data visualization, data logging, and data filtering.
We shall upload a code on ESP32 using Arduino IDE to send data to Qubitro -
#include <WiFiClientSecure.h>
#include <PubSubClient.h>
#include <HTTPClient.h>
#include <ArduinoJson.h>
These are the necessary libraries for establishing an MQTT connection, handling HTTP requests, and working with JSON data.
const char* ssid = "xxxxxxxxx";
const char* password = "xxxxxxxxx";
String topic = "xxxxx";
String mqtt_server = "broker.qubitro.com";
String mqttuser = "xxxxxxxxxxxxxxxxxxxxxx";
String mqttpass = "xxxxxxxxxxxxxxxxxxxxxx";
String clientId = "xxxxxxxxxxxxxxxxxxxxxx";
These variables store the Wi-Fi credentials (ssid and password), MQTT broker server address (mqtt_server), MQTT authentication credentials (mqttuser and mqttpass), MQTT client ID (clientId), and the MQTT topic (topic) to which the data will be published.
WiFiClientSecure espClient;
PubSubClient client(espClient);
float humidity = 0;
float temp = 0;
Create an instance of WiFiClientSecure and PubSubClient classes to establish a secure connection with the MQTT broker. Also, initializing default value of temperature and humidity.
#define MSG_BUFFER_SIZE (500)
char msg[MSG_BUFFER_SIZE];
char output[MSG_BUFFER_SIZE];
Define the size of the message buffer for storing MQTT messages.
void device_setup() {
// ... Wi-Fi connection setup ...
}
This function sets up the Wi-Fi connection by connecting to the specified Wi-Fi network (ssid and password).
void reconnect() {
// ... MQTT reconnection logic ...
}
This function handles the reconnection to the MQTT broker in case of disconnection.
void setup() {
// ... Initialization code ...
}
The setup() function is the entry point of the code. It initializes the serial communication, sets up the device, establishes a connection with the MQTT broker, and prepares the secure connection using WiFiClientSecure and PubSubClient objects.
void loop() {
// ... Main code loop ...
}
The loop() function is the main execution loop of the code. It checks the MQTT connection, publishes the simulated temperature and humidity data to the MQTT topic, and then waits for a delay of 1 second before repeating the process.
Inside the loop() function, you'll notice the following steps:
if (!client.connected())checks if the MQTT client is connected. If not, it calls thereconnect()function to establish the connection.client.loop()allows the MQTT client to maintain the connection and handle any incoming messages.- The
tempandhumidityvariables are randomly generated simulated values. - A JSON document is created using the ArduinoJson library to store the temperature and humidity data.
- The JSON document is serialized into a string format using the
serializeJson()function and stored in theoutputvariable. - The
client.publish()function is used to publish the serialized JSON data to the specified MQTT topic. - The serialized JSON data is printed to the serial monitor using
Serial.println(). - A delay of 1 second is added before repeating the loop.
Full version of the code available in the Code Section.
Now that we have written the code, upload it to the ESP32 board and wait for it to send data to cloud.
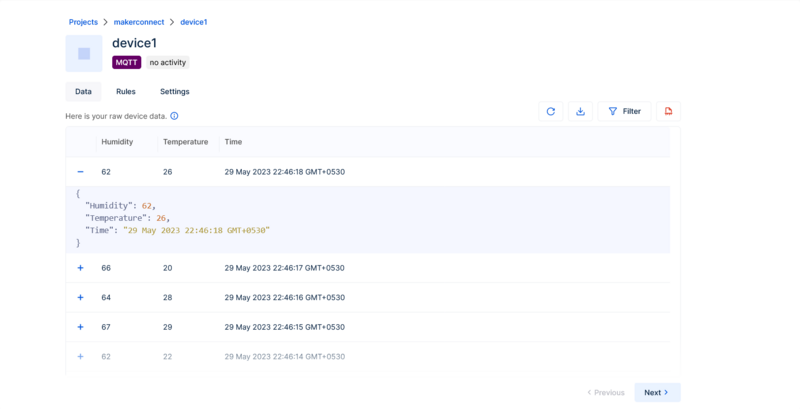
To check data, go to Device Name that you created, and check for any incoming data in the table. (refresh the table in case data not retrieved)
Étape 6 - Create Dashboard
Now that we were able to fetch for real-time data from the ESP32 board and view it on the table of Qubitro. Let us use the visualization feature to plot a graph of the data. Trust me, it takes seconds to setup the whole thing.
- Go to Dashboards, and create a New Dashboard. Give it a name.
- Once created, open it and go to Edit > Add Widget > Charts.
- Click on the new widget > three dots (settings) > Customization.
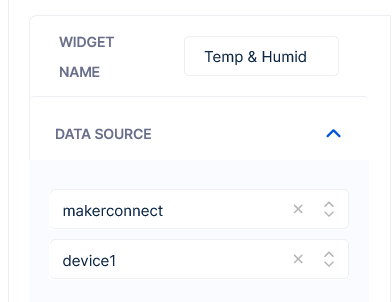
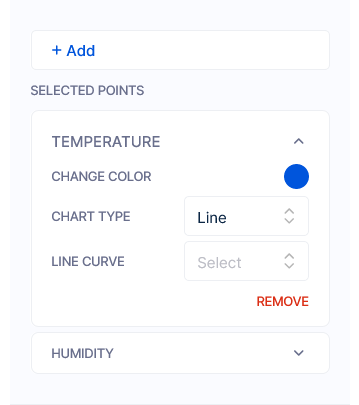
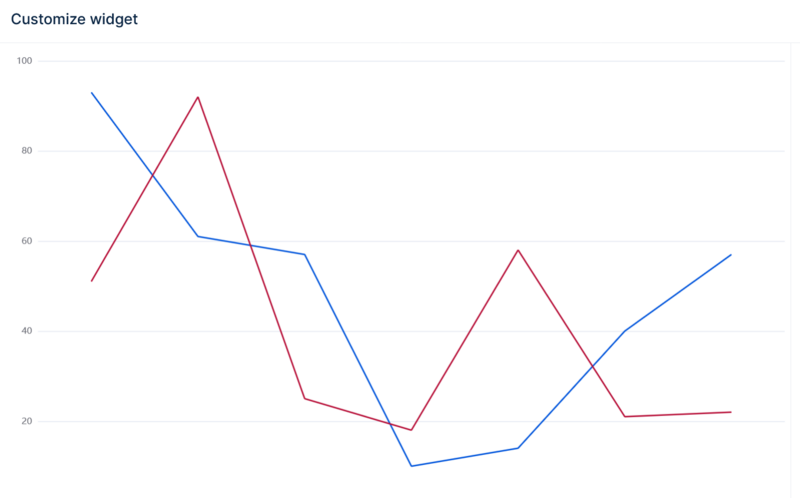
- Accordingly, select the data source, chart type and colour for data variables. Follow the below images for reference, and final Graph.
Data source example above
Data Point example above
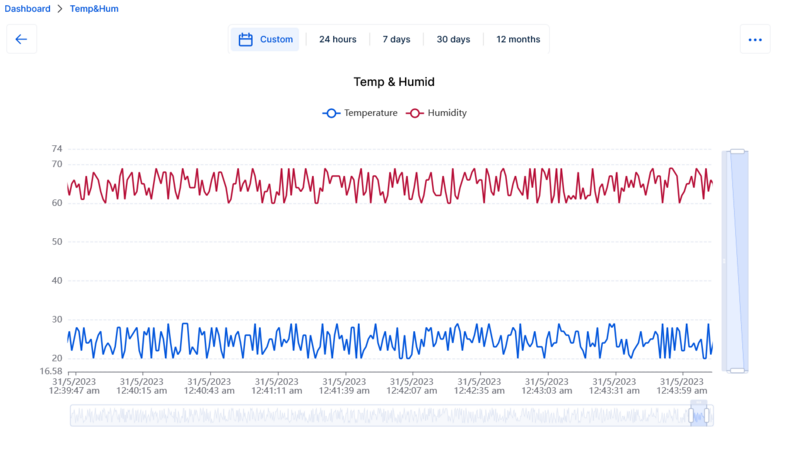
Finally, I received the above graph based on a 30-minute data logging. If we head back to the main dashboard page, we can have a proper view, and with a view configuration, receive live data in realtime on Qubitro.
- In the dashboard, click on the chart widget we created, click on edit and drag it to the middle.
- Stretch and play with the widget according to the need. Resizing it for proper viewing. Remember to save it.
If you are facing trouble with viewing the data with 4 points in the graph period, you can change it in the View Mode's configuration of the graph widget.
Now, using this we can view the data of our device based on our needs!
Étape 7 - Rules to Trigger and Integration Services
Finally, Qubitro allows you to integrate with other services such as Twilio, Slack, MailGun, and SendGrid. We can also use the trigger for Webhooks (RAW HTTP request) triggering, You can do this by clicking on the "Rules" tab in the Device section and selecting the service you want to integrate with.
Congratulations! You have now completed the Qubitro IoT Platform documentation tutorial. We hope that this tutorial has provided you with the information you need to get started with Qubitro and create your own IoT application.
If you have any questions or need further assistance, please visit the Qubitro website or contact their support team.
Hurray! 🎉
We have learned another IoT Platform - Qubitro Device Data Platform
Étape 8 - Code (ESP32_MQTT_Qubitro)
#include <WiFiClientSecure.h>
#include <PubSubClient.h>
#include <HTTPClient.h>
#include <ArduinoJson.h>

// WiFi SSID and Password
const char* ssid = "xxxxxxxxx";
const char* password = "xxxxxxxxx";
String topic = "xxxxx";
String mqtt_server = "broker.qubitro.com";
String mqttuser = "xxxxxxxxxxxxxxxxxxxxxx";
String mqttpass = "xxxxxxxxxxxxxxxxxxxxxx";
String clientId = "xxxxxxxxxxxxxxxxxxxxxx";

WiFiClientSecure espClient;
PubSubClient client(espClient);

float humidity = 0;
float temp = 0;


#define MSG_BUFFER_SIZE (500)
char msg[MSG_BUFFER_SIZE];
char output[MSG_BUFFER_SIZE];

void device_setup() {
  delay(10);
  // We start by connecting to a WiFi network
  Serial.println();
  Serial.print("Connecting to ");
  Serial.println(ssid);

  WiFi.mode(WIFI_STA);
  WiFi.begin(ssid, password);

  while (WiFi.status() != WL_CONNECTED) {
    delay(500);
    Serial.print(".");
  }
  Serial.println("");
  Serial.println("WiFi connected");
  Serial.println("IP address: ");
  Serial.println(WiFi.localIP());

}

void reconnect() {
  // Loop until we’re reconnected
  while (!client.connected()) {
    Serial.println("Attempting MQTT connection…");

    if (client.connect(clientId.c_str(), mqttuser.c_str(), mqttpass.c_str())) {
      Serial.print("MQTT connected");
    } else {
      Serial.print("failed, rc = ");
      Serial.print(client.state());
      Serial.println(", try again in 5 seconds");
      // Wait 5 seconds before retrying
      delay(5000);
    }
  }
}

void setup() {
  delay(500);
  // When opening the Serial Monitor, select 9600 Baud
  Serial.begin(115200);
  delay(500);
  device_setup();
  espClient.setInsecure();//skip verification
  //Serial.println(mqtt_server);
  client.setServer(mqtt_server.c_str(), 8883);
}

void loop() {

  if (!client.connected()) {
    reconnect();
  }
  client.loop();

  temp = random(20,30);
  humidity = random(60,70);

  StaticJsonDocument<200> doc;
  doc["Temperature"] = temp;
  doc["Humidity"] = humidity;
  serializeJson(doc, output);
  doc.garbageCollect();

  client.publish(topic.c_str(), output);
  Serial.println(output);

  delay(1000);
}
Draft

 Français
 English
 Deutsch
 Español
 Italiano
 Português