(Imported page from en.wikifab.org) |
(convert properties for internationnalized Wikifab) |
||
| Ligne 1 : | Ligne 1 : | ||
| − | {{Tuto Details | + | {{ {{tntn|Tuto Details}} |
|SourceLanguage=en | |SourceLanguage=en | ||
|Language=en | |Language=en | ||
| Ligne 5 : | Ligne 5 : | ||
|Type=Creation | |Type=Creation | ||
|Area=Decoration, Furniture | |Area=Decoration, Furniture | ||
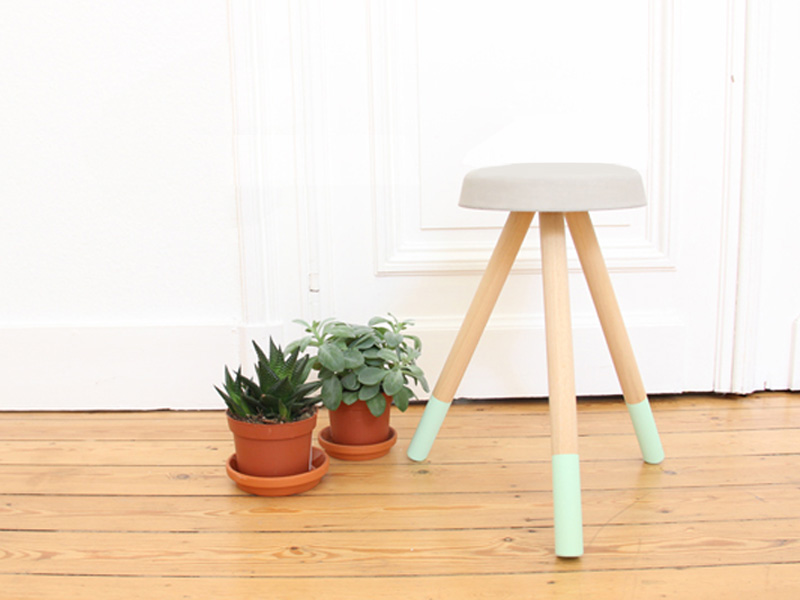
| − | |Description=The $5 bucket stool is a project created by Ben Uyeda, the designer behind the very inspiring blog [http://homemade-modern.com/ Homemade Modern]. The stool is durable, simple to make and aesthetically pleasing. What’s great about this project is that there is very little waste. The bucket serves a vessel for mixing the concrete and as the form for the stool. When the stool has cured it can be removed without damaging the bucket. A 48" dowel cut into three 16-inch pieces provides legs without waste. | + | |Description=<translate>The $5 bucket stool is a project created by Ben Uyeda, the designer behind the very inspiring blog [http://homemade-modern.com/ Homemade Modern]. The stool is durable, simple to make and aesthetically pleasing. What’s great about this project is that there is very little waste. The bucket serves a vessel for mixing the concrete and as the form for the stool. When the stool has cured it can be removed without damaging the bucket. A 48" dowel cut into three 16-inch pieces provides legs without waste.</translate> |
|Difficulty=Very easy | |Difficulty=Very easy | ||
|Cost=5 | |Cost=5 | ||
| Ligne 14 : | Ligne 14 : | ||
|Main_Picture=TAB_Step00.jpg | |Main_Picture=TAB_Step00.jpg | ||
}} | }} | ||
| − | {{Introduction}} | + | {{ {{tntn|Introduction}}|}} |
| − | {{Materials | + | {{ {{tntn|Materials}} |
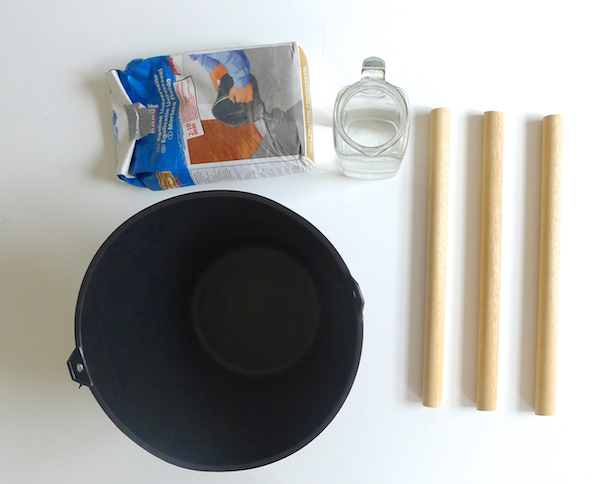
| − | |Material=* Concrete Mix | + | |Material=<translate>* Concrete Mix |
* 1 ¼" Diameter Wooden Dowel 48" long | * 1 ¼" Diameter Wooden Dowel 48" long | ||
* Clean Tap Water | * Clean Tap Water | ||
| − | * Copper Pipe Caps and Washers | + | * Copper Pipe Caps and Washers</translate> |
|Tools=* 5 Gallon Bucket | |Tools=* 5 Gallon Bucket | ||
* Wood saw | * Wood saw | ||
| Ligne 32 : | Ligne 32 : | ||
}} | }} | ||
{{Separator}} | {{Separator}} | ||
| − | {{Tuto Step | + | {{ {{tntn|Tuto Step}} |
| − | |Step_Title=Put 3 inches of concrete mix in the bucket | + | |Step_Title=<translate>Put 3 inches of concrete mix in the bucket</translate> |
|Step_Content=Make sure the bucket is clean and dry before opening up the concrete and scooping 3 inches of concrete mix into the bucket. Add some water and start mixing. Be careful not to over water the concrete or it will be weak and crumble. Thoroughly mix the concrete so that every grain of the mix is wet. The mix should be the consistency of cookie dough. | |Step_Content=Make sure the bucket is clean and dry before opening up the concrete and scooping 3 inches of concrete mix into the bucket. Add some water and start mixing. Be careful not to over water the concrete or it will be weak and crumble. Thoroughly mix the concrete so that every grain of the mix is wet. The mix should be the consistency of cookie dough. | ||
| Ligne 44 : | Ligne 44 : | ||
|Step_Picture_05=No-image-yet.jpg | |Step_Picture_05=No-image-yet.jpg | ||
}} | }} | ||
| − | {{Tuto Step | + | {{ {{tntn|Tuto Step}} |
| − | |Step_Title=Place the legs | + | |Step_Title=<translate>Place the legs</translate> |
| − | |Step_Content=Cut the 48” dowel into three pieces 16” long each. | + | |Step_Content=<translate>Cut the 48” dowel into three pieces 16” long each. |
| − | Once the concrete has settled, place the legs in the bucket. Stick the legs about 1 ½” past the surface of the concrete and let them rest against the sides of the bucket. | + | Once the concrete has settled, place the legs in the bucket. Stick the legs about 1 ½” past the surface of the concrete and let them rest against the sides of the bucket.</translate> |
|Step_Picture_00=TAB_Step03_01.jpg | |Step_Picture_00=TAB_Step03_01.jpg | ||
|Step_Picture_01=No-image-yet.jpg | |Step_Picture_01=No-image-yet.jpg | ||
| Ligne 56 : | Ligne 56 : | ||
|Step_Picture_05=No-image-yet.jpg | |Step_Picture_05=No-image-yet.jpg | ||
}} | }} | ||
| − | {{Tuto Step | + | {{ {{tntn|Tuto Step}} |
| − | |Step_Title=Wait 20 hours then remove | + | |Step_Title=<translate>Wait 20 hours then remove</translate> |
| − | |Step_Content=Bend the sides of the bucket outwards a few times in each direction to loosen the concrete; then pull the stool out by the legs. | + | |Step_Content=<translate>Bend the sides of the bucket outwards a few times in each direction to loosen the concrete; then pull the stool out by the legs.</translate> |
|Step_Picture_00=TAB_Step04_01.jpg | |Step_Picture_00=TAB_Step04_01.jpg | ||
|Step_Picture_01=No-image-yet.jpg | |Step_Picture_01=No-image-yet.jpg | ||
| Ligne 66 : | Ligne 66 : | ||
|Step_Picture_05=No-image-yet.jpg | |Step_Picture_05=No-image-yet.jpg | ||
}} | }} | ||
| − | {{Tuto Step | + | {{ {{tntn|Tuto Step}} |
| − | |Step_Title=Sand the edges | + | |Step_Title=<translate>Sand the edges</translate> |
| − | |Step_Content=The concrete has not yet fully hardened and is pretty easy to work with. 120 grit sand paper can be used to smooth the edges. | + | |Step_Content=<translate>The concrete has not yet fully hardened and is pretty easy to work with. 120 grit sand paper can be used to smooth the edges.</translate> |
|Step_Picture_00=TAB_Step05_01.jpg | |Step_Picture_00=TAB_Step05_01.jpg | ||
|Step_Picture_01=No-image-yet.jpg | |Step_Picture_01=No-image-yet.jpg | ||
| Ligne 76 : | Ligne 76 : | ||
|Step_Picture_05=No-image-yet.jpg | |Step_Picture_05=No-image-yet.jpg | ||
}} | }} | ||
| − | {{Tuto Step | + | {{ {{tntn|Tuto Step}} |
| − | |Step_Title=Paint the legs in your favorite color | + | |Step_Title=<translate>Paint the legs in your favorite color</translate> |
| − | |Step_Content=Pain the legs. Use a masking tape to make a clean separation between the rough and painted wood. | + | |Step_Content=<translate>Pain the legs. Use a masking tape to make a clean separation between the rough and painted wood. |
Before painting, clean the surface to which you'll paint. | Before painting, clean the surface to which you'll paint. | ||
| − | Wait for the surface to dry completely before removing the tape. | + | Wait for the surface to dry completely before removing the tape.</translate> |
|Step_Picture_00=TAB_Step06_01.jpg | |Step_Picture_00=TAB_Step06_01.jpg | ||
|Step_Picture_01=No-image-yet.jpg | |Step_Picture_01=No-image-yet.jpg | ||
| Ligne 90 : | Ligne 90 : | ||
|Step_Picture_05=No-image-yet.jpg | |Step_Picture_05=No-image-yet.jpg | ||
}} | }} | ||
| − | {{Tuto Step | + | {{ {{tntn|Tuto Step}} |
| − | |Step_Title=Ta da! | + | |Step_Title=<translate>Ta da!</translate> |
| − | |Step_Content=It looks like something that could retail for $50 but you can make it for $5. | + | |Step_Content=<translate>It looks like something that could retail for $50 but you can make it for $5.</translate> |
|Step_Picture_00=TAB_Step07_01.jpg | |Step_Picture_00=TAB_Step07_01.jpg | ||
|Step_Picture_01=No-image-yet.jpg | |Step_Picture_01=No-image-yet.jpg | ||
| Ligne 100 : | Ligne 100 : | ||
|Step_Picture_05=No-image-yet.jpg | |Step_Picture_05=No-image-yet.jpg | ||
}} | }} | ||
| − | {{Notes | + | {{ {{tntn|Notes}} |
| − | |Notes=* This project was created by Ben Uyeda, the designer behind the blog [http://homemade-modern.com/ Homemade Modern] | + | |Notes=<translate>* This project was created by Ben Uyeda, the designer behind the blog [http://homemade-modern.com/ Homemade Modern] |
* Check [http://homemade-modern.com/ep08-5-bucket-stool/ the original project on Homemade Modern] | * Check [http://homemade-modern.com/ep08-5-bucket-stool/ the original project on Homemade Modern] | ||
* For more detailed instructions, dimensioned drawings and different variations of the project, check out [http://www.amazon.com/gp/product/0762455071?keywords=homemade%20modern&qid=1448403011&ref_=sr_1_1&sr=8-1 the Homemade Modern book.] | * For more detailed instructions, dimensioned drawings and different variations of the project, check out [http://www.amazon.com/gp/product/0762455071?keywords=homemade%20modern&qid=1448403011&ref_=sr_1_1&sr=8-1 the Homemade Modern book.] | ||
}} | }} | ||
| − | {{Tuto_Status | + | {{Tuto_Status</translate> |
|Complete=Check this box when the tutorial is complete | |Complete=Check this box when the tutorial is complete | ||
}} | }} | ||
{{Separator}} | {{Separator}} | ||
Version du 11 août 2017 à 10:00
Étape 1 - Put 3 inches of concrete mix in the bucket
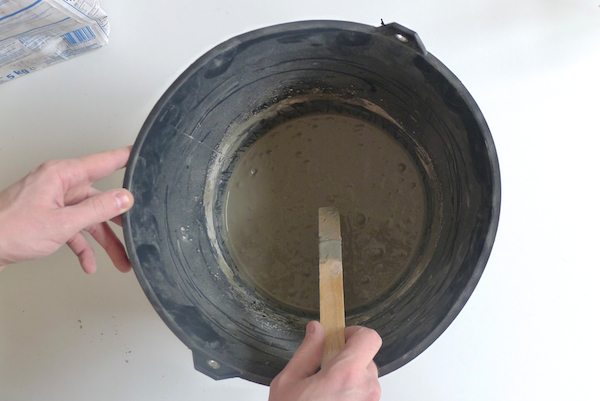
Make sure the bucket is clean and dry before opening up the concrete and scooping 3 inches of concrete mix into the bucket. Add some water and start mixing. Be careful not to over water the concrete or it will be weak and crumble. Thoroughly mix the concrete so that every grain of the mix is wet. The mix should be the consistency of cookie dough.
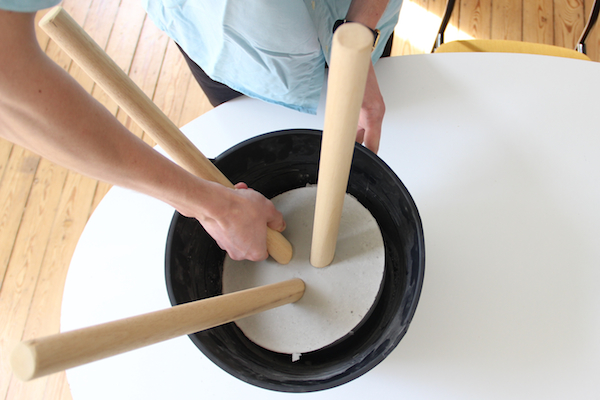
Étape 2 - Place the legs
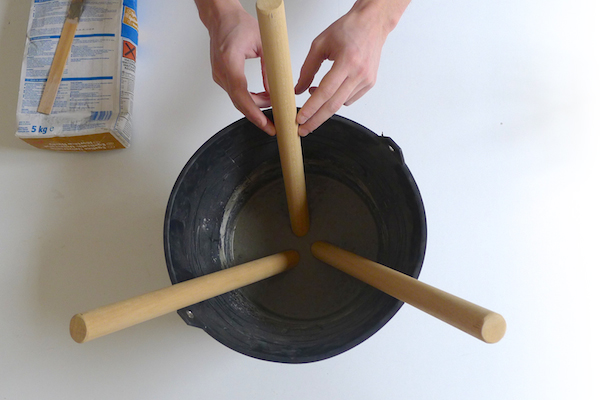
Cut the 48” dowel into three pieces 16” long each.
Once the concrete has settled, place the legs in the bucket. Stick the legs about 1 ½” past the surface of the concrete and let them rest against the sides of the bucket.
Étape 3 - Wait 20 hours then remove
Bend the sides of the bucket outwards a few times in each direction to loosen the concrete; then pull the stool out by the legs.
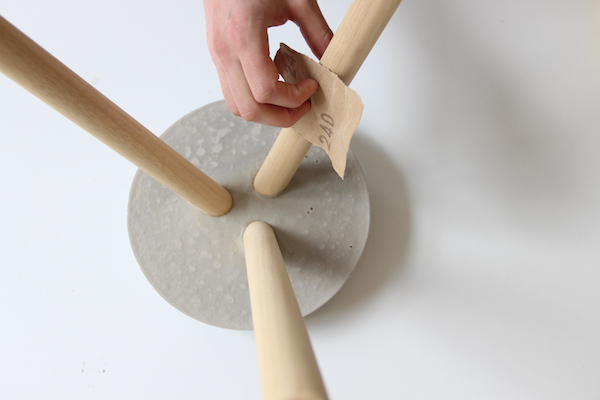
Étape 4 - Sand the edges
The concrete has not yet fully hardened and is pretty easy to work with. 120 grit sand paper can be used to smooth the edges.
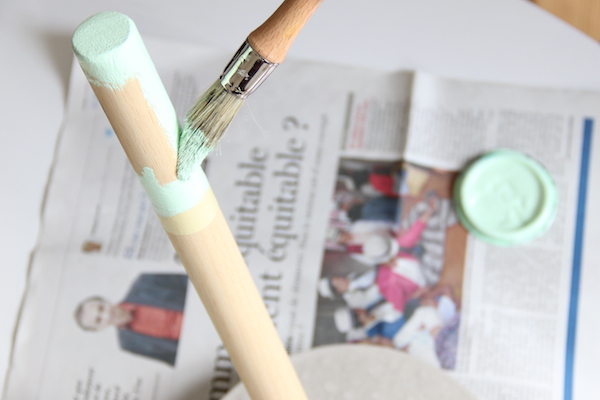
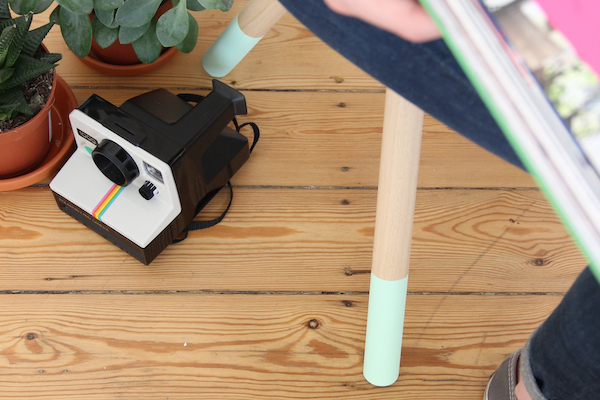
Étape 5 - Paint the legs in your favorite color
Pain the legs. Use a masking tape to make a clean separation between the rough and painted wood.
Before painting, clean the surface to which you'll paint.
Wait for the surface to dry completely before removing the tape.
Notes et références
- This project was created by Ben Uyeda, the designer behind the blog Homemade Modern
- Check the original project on Homemade Modern
- For more detailed instructions, dimensioned drawings and different variations of the project, check out the Homemade Modern book.
Check this box when the tutorial is complete

 Français
 English
 Deutsch
 Español
 Italiano
 Português