(Imported page from en.wikifab.org) |
(update property name) |
||
| (5 révisions intermédiaires par 3 utilisateurs non affichées) | |||
| Ligne 1 : | Ligne 1 : | ||
{{Tuto Details | {{Tuto Details | ||
| − | |SourceLanguage= | + | |SourceLanguage=none |
|Language=en | |Language=en | ||
|IsTranslation=0 | |IsTranslation=0 | ||
|Type=Creation | |Type=Creation | ||
|Area=Decoration | |Area=Decoration | ||
| − | |Description=Simple candlestick made of copper and wood | + | |Description=<translate><!--T:1--> Simple candlestick made of copper and wood</translate> |
|Difficulty=Easy | |Difficulty=Easy | ||
|Cost=20 | |Cost=20 | ||
| Ligne 14 : | Ligne 14 : | ||
|Main_Picture=BOU_Step01_01.jpg | |Main_Picture=BOU_Step01_01.jpg | ||
}} | }} | ||
| − | {{Introduction}} | + | {{Introduction|}} |
{{Materials | {{Materials | ||
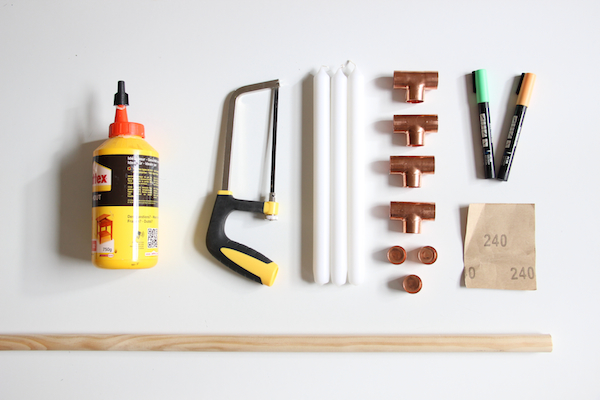
| − | |Material=* 3 candles | + | |Material=<translate><!--T:2--> |
| + | * 3 candles | ||
* 4 tee fittings copper | * 4 tee fittings copper | ||
* 3 spigots copper | * 3 spigots copper | ||
| − | * A brush handle 65 cm long and 22 mm in diameter | + | * A brush handle 65 cm long and 22 mm in diameter</translate> |
|Tools=*A small saw | |Tools=*A small saw | ||
* Sandpaper | * Sandpaper | ||
| Ligne 35 : | Ligne 36 : | ||
{{Separator}} | {{Separator}} | ||
{{Tuto Step | {{Tuto Step | ||
| − | |Step_Title=Cut the pieces of wood | + | |Step_Title=<translate><!--T:3--> Cut the pieces of wood</translate> |
| − | |Step_Content=Sawing the wood pieces in: | + | |Step_Content=<translate><!--T:4--> |
| + | Sawing the wood pieces in: | ||
* 1 x 10 cm long | * 1 x 10 cm long | ||
* 1 x 15 cm long | * 1 x 15 cm long | ||
* 1 x 20 cm long | * 1 x 20 cm long | ||
| − | * 5 x 5 cm long | + | * 5 x 5 cm long</translate> |
|Step_Picture_00=BOU_Step03_01.jpg | |Step_Picture_00=BOU_Step03_01.jpg | ||
|Step_Picture_01=No-image-yet.jpg | |Step_Picture_01=No-image-yet.jpg | ||
| Ligne 49 : | Ligne 51 : | ||
}} | }} | ||
{{Tuto Step | {{Tuto Step | ||
| − | |Step_Title=Sand the wood pieces | + | |Step_Title=<translate><!--T:5--> Sand the wood pieces</translate> |
| − | |Step_Content=Sand with sandpaper the ends of each piece of wood to get them fit easily in the copper joins. | + | |Step_Content=<translate><!--T:6--> Sand with sandpaper the ends of each piece of wood to get them fit easily in the copper joins.</translate> |
|Step_Picture_00=BOU_Step04_01.jpg | |Step_Picture_00=BOU_Step04_01.jpg | ||
|Step_Picture_01=No-image-yet.jpg | |Step_Picture_01=No-image-yet.jpg | ||
| Ligne 59 : | Ligne 61 : | ||
}} | }} | ||
{{Tuto Step | {{Tuto Step | ||
| − | |Step_Title=Glue and assemble the candlestick | + | |Step_Title=<translate><!--T:7--> Glue and assemble the candlestick</translate> |
| − | |Step_Content=Glue each end of the wood and assemble them with copper as the photo. | + | |Step_Content=<translate><!--T:8--> Glue each end of the wood and assemble them with copper as the photo.</translate> |
|Step_Picture_00=BOU_Step05_01.jpg | |Step_Picture_00=BOU_Step05_01.jpg | ||
|Step_Picture_01=No-image-yet.jpg | |Step_Picture_01=No-image-yet.jpg | ||
| Ligne 69 : | Ligne 71 : | ||
}} | }} | ||
{{Tuto Step | {{Tuto Step | ||
| − | |Step_Title=Cut the candles | + | |Step_Title=<translate><!--T:9--> Cut the candles</translate> |
| − | |Step_Content=Cut the candles to give them different sizes. | + | |Step_Content=<translate><!--T:10--> Cut the candles to give them different sizes.</translate> |
|Step_Picture_00=BOU_Step06_01.jpg | |Step_Picture_00=BOU_Step06_01.jpg | ||
|Step_Picture_01=No-image-yet.jpg | |Step_Picture_01=No-image-yet.jpg | ||
| Ligne 79 : | Ligne 81 : | ||
}} | }} | ||
{{Tuto Step | {{Tuto Step | ||
| − | |Step_Title=Decorating candles | + | |Step_Title=<translate><!--T:11--> Decorating candles</translate> |
| − | |Step_Content=Bring your final touch: decorate the candles using the paint markers. | + | |Step_Content=<translate><!--T:12--> Bring your final touch: decorate the candles using the paint markers.</translate> |
|Step_Picture_00=BOU_Step08_01.jpg | |Step_Picture_00=BOU_Step08_01.jpg | ||
|Step_Picture_01=No-image-yet.jpg | |Step_Picture_01=No-image-yet.jpg | ||
| Ligne 89 : | Ligne 91 : | ||
}} | }} | ||
{{Tuto Step | {{Tuto Step | ||
| − | |Step_Title=Ta Da! | + | |Step_Title=<translate><!--T:13--> Ta Da!</translate> |
| − | |Step_Content=Check out our candlestick in the "Blog of the Month" of Nest magazine! You will also discover many inspirations and seasonal stories around deco themes, house, flavors, nature and ideas! | + | |Step_Content=<translate><!--T:14--> Check out our candlestick in the "Blog of the Month" of Nest magazine! You will also discover many inspirations and seasonal stories around deco themes, house, flavors, nature and ideas!</translate> |
|Step_Picture_00=BOU_Step09_01.jpg | |Step_Picture_00=BOU_Step09_01.jpg | ||
|Step_Picture_01=No-image-yet.jpg | |Step_Picture_01=No-image-yet.jpg | ||
| Ligne 98 : | Ligne 100 : | ||
|Step_Picture_05=No-image-yet.jpg | |Step_Picture_05=No-image-yet.jpg | ||
}} | }} | ||
| − | {{Notes}} | + | {{Notes|}} |
{{Tuto_Status | {{Tuto_Status | ||
| − | |Complete= | + | |Complete=Published |
}} | }} | ||
{{Separator}} | {{Separator}} | ||
Version actuelle datée du 9 décembre 2019 à 11:28
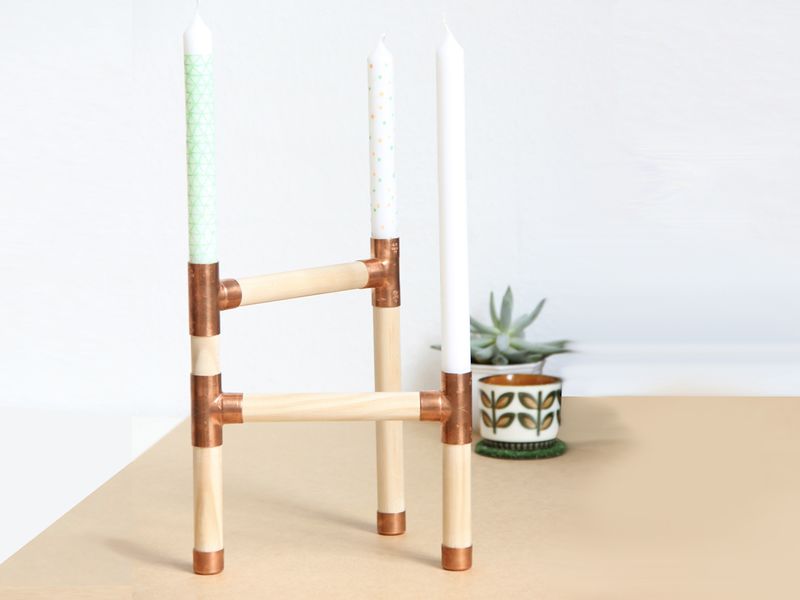
Simple candlestick made of copper and wood
Difficulté
Facile
Durée
20 minute(s)
Catégories
Décoration
Coût
20 EUR (€)
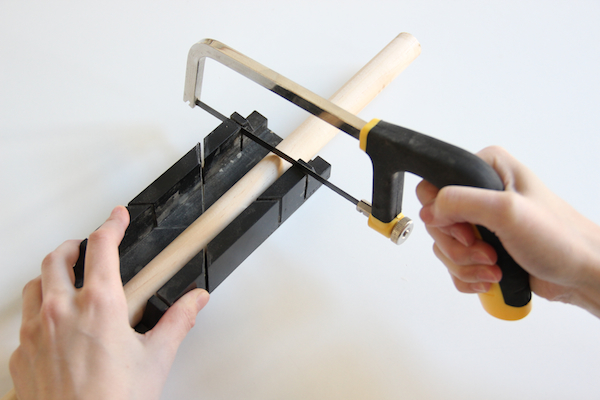
Étape 1 - Cut the pieces of wood
Sawing the wood pieces in:
- 1 x 10 cm long
- 1 x 15 cm long
- 1 x 20 cm long
- 5 x 5 cm long
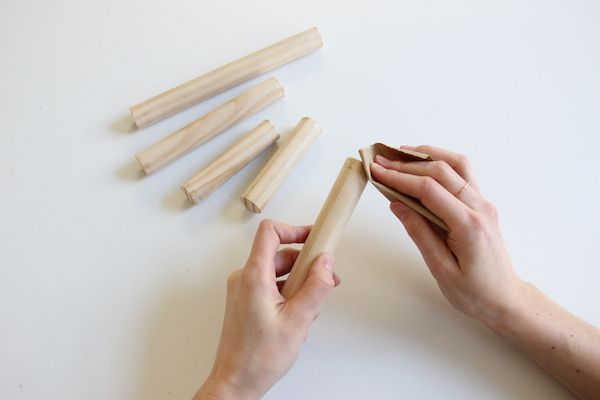
Étape 2 - Sand the wood pieces
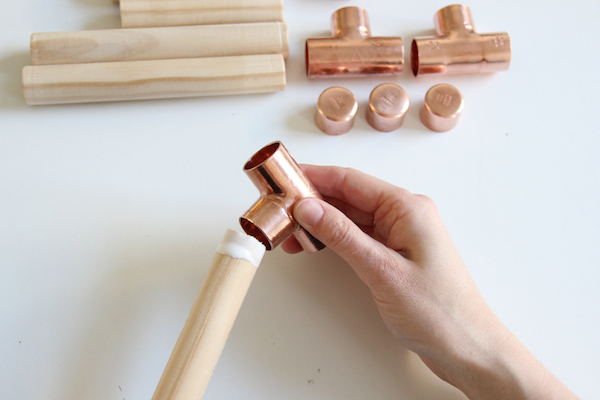
Sand with sandpaper the ends of each piece of wood to get them fit easily in the copper joins.
Étape 3 - Glue and assemble the candlestick
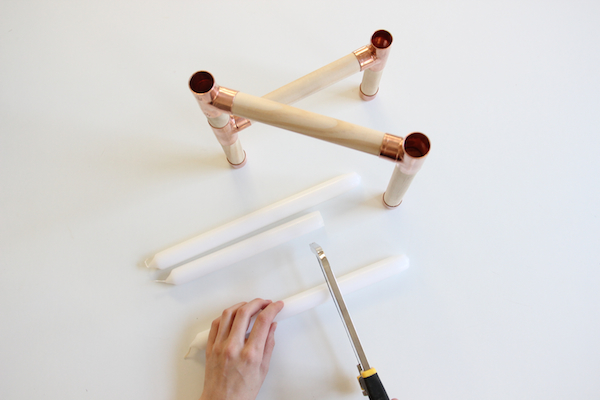
Glue each end of the wood and assemble them with copper as the photo.
Étape 6 - Ta Da!
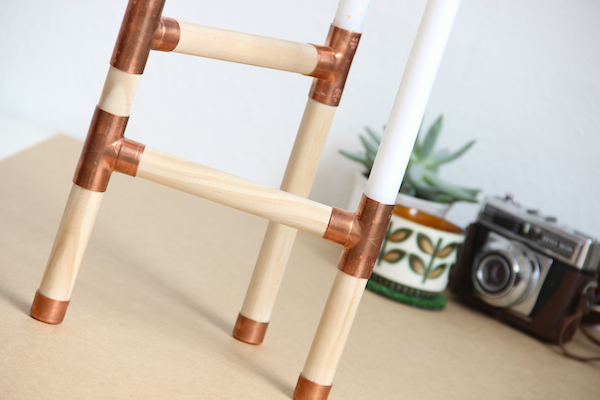
Check out our candlestick in the "Blog of the Month" of Nest magazine! You will also discover many inspirations and seasonal stories around deco themes, house, flavors, nature and ideas!
Published

 Français
 English
 Deutsch
 Español
 Italiano
 Português