(Page créée avec « {{Tuto Details |Licences=Attribution (CC BY) |Description=<translate>La machine à pichenette: matériel nécessaire: -capteur de mouvement -carte microbit -</translat... ») |
|||
| (3 révisions intermédiaires par le même utilisateur non affichées) | |||
| Ligne 1 : | Ligne 1 : | ||
{{Tuto Details | {{Tuto Details | ||
| + | |Main_Picture=picehnette_de_fou_Image.jpeg | ||
|Licences=Attribution (CC BY) | |Licences=Attribution (CC BY) | ||
| − | |Description=<translate>La | + | |Description=<translate>La question à pichenette: |
| − | + | Une machine qui donnera un score en fonction de la puissance de la pichenette, le score permettra de savoir combien de points rapportera la question.</translate> | |
| − | |||
| − | |||
| − | |||
|Area=Electronics, Play and Hobbies, Recycling and Upcycling, Science and Biology | |Area=Electronics, Play and Hobbies, Recycling and Upcycling, Science and Biology | ||
|Type=Creation | |Type=Creation | ||
| − | |Difficulty= | + | |Difficulty=Easy |
|Duration=2 | |Duration=2 | ||
|Duration-type=hour(s) | |Duration-type=hour(s) | ||
|Cost=22 | |Cost=22 | ||
|Currency=EUR (€) | |Currency=EUR (€) | ||
| + | |Tags=questions | ||
}} | }} | ||
{{Introduction | {{Introduction | ||
| Ligne 18 : | Ligne 17 : | ||
}} | }} | ||
{{Materials | {{Materials | ||
| − | |Material=<translate></translate> | + | |Step_Picture_00=Picehnette_de_fou_Capture_d_cran_2024-04-12_090351.png |
| − | |Tools=<translate></translate> | + | |Step_Picture_01=Picehnette_de_fou_MicrosoftTeams-image_2_1_.jpg |
| + | |Step_Picture_01_annotation={"version":"3.5.0","objects":[{"type":"image","version":"3.5.0","originX":"left","originY":"top","left":0,"top":0,"width":4032,"height":3024,"fill":"rgb(0,0,0)","stroke":null,"strokeWidth":0,"strokeDashArray":null,"strokeLineCap":"butt","strokeDashOffset":0,"strokeLineJoin":"miter","strokeMiterLimit":4,"scaleX":0.15,"scaleY":0.15,"angle":0,"flipX":false,"flipY":false,"opacity":1,"shadow":null,"visible":true,"clipTo":null,"backgroundColor":"","fillRule":"nonzero","paintFirst":"fill","globalCompositeOperation":"source-over","transformMatrix":null,"skewX":0,"skewY":0,"crossOrigin":"","cropX":0,"cropY":0,"src":"https://wikifab.org/images/f/f0/Picehnette_de_fou_MicrosoftTeams-image_2_1_.jpg","filters":[]},{"type":"wfellipse","version":"3.5.0","originX":"center","originY":"center","left":244.92,"top":195.92,"width":122.8,"height":122.8,"fill":"rgba(255,0,0,0)","stroke":"#FF0000","strokeWidth":2,"strokeDashArray":null,"strokeLineCap":"butt","strokeDashOffset":0,"strokeLineJoin":"miter","strokeMiterLimit":4,"scaleX":1,"scaleY":1,"angle":0,"flipX":false,"flipY":false,"opacity":1,"shadow":null,"visible":true,"clipTo":null,"backgroundColor":"","fillRule":"nonzero","paintFirst":"fill","globalCompositeOperation":"source-over","transformMatrix":null,"skewX":0,"skewY":0,"rx":61.40117619988906,"ry":61.40117619988906}],"height":450,"width":600} | ||
| + | |Step_Picture_02=Picehnette_de_fou_Image-_1_.jpeg | ||
| + | |Step_Picture_03=Picehnette_de_fou_Capture_d_cran_2024-04-12_090545.png | ||
| + | |Step_Picture_04=Picehnette_de_fou_Capture_d_cran_2024-04-12_090622.png | ||
| + | |Step_Picture_05=Picehnette_de_fou_Capture_d_cran_2024-04-12_090714.png | ||
| + | |Material=<translate>-carte microbit | ||
| + | |||
| + | -plastique de récupération | ||
| + | |||
| + | -mousse de récupération | ||
| + | |||
| + | -vis | ||
| + | |||
| + | -bois de récupération | ||
| + | |||
| + | -ressort | ||
| + | |||
| + | -potentiomètre | ||
| + | |||
| + | -fer à souder | ||
| + | |||
| + | -DFROBOT | ||
| + | |||
| + | -câble micro usb</translate> | ||
| + | |Tools=<translate>-découpe laser | ||
| + | |||
| + | -makecode | ||
| + | |||
| + | -solidworks | ||
| + | |||
| + | <br /></translate> | ||
}} | }} | ||
{{Tuto Step | {{Tuto Step | ||
| − | |Step_Title=<translate></translate> | + | |Step_Title=<translate>télécharger le fichier 3d et le programme microbit</translate> |
| − | |Step_Content=<translate></translate> | + | |Step_Content=<translate>ici: https://drive.google.com/drive/folders/14h8J1pmvLDmq1SS1b1dNgrIBqhYMl4aU?usp=sharing |
| + | |||
| + | <br /></translate> | ||
| + | |Step_Picture_00=Picehnette_de_fou_Capture_d_cran_2024-04-12_083427.png | ||
| + | |Step_Picture_00_annotation={"version":"3.5.0","objects":[{"type":"image","version":"3.5.0","originX":"left","originY":"top","left":0,"top":0.14,"width":503,"height":543,"fill":"rgb(0,0,0)","stroke":null,"strokeWidth":0,"strokeDashArray":null,"strokeLineCap":"butt","strokeDashOffset":0,"strokeLineJoin":"miter","strokeMiterLimit":4,"scaleX":1.19,"scaleY":1.19,"angle":0,"flipX":false,"flipY":false,"opacity":1,"shadow":null,"visible":true,"clipTo":null,"backgroundColor":"","fillRule":"nonzero","paintFirst":"fill","globalCompositeOperation":"source-over","transformMatrix":null,"skewX":0,"skewY":0,"crossOrigin":"","cropX":0,"cropY":0,"src":"https://wikifab.org/images/4/4d/Picehnette_de_fou_Capture_d_cran_2024-04-12_083427.png","filters":[]}],"height":648,"width":600} | ||
| + | |Step_Picture_01=Axe_Picehenette.png | ||
| + | }} | ||
| + | {{Tuto Step | ||
| + | |Step_Title=<translate>Découpe</translate> | ||
| + | |Step_Content=<translate>Après avoir réuni les matériaux et charger les fichiers dans la découpe laser, placez le bois dans la découpe et lancez la découpe. | ||
| + | |||
| + | <br /></translate> | ||
| + | |Step_Picture_00=Picehnette_de_fou_MicrosoftTeams-image.jpg | ||
| + | }} | ||
| + | {{Tuto Step | ||
| + | |Step_Title=<translate>préparation de la zone de frappe</translate> | ||
| + | |Step_Content=<translate>Découpez la mousse en forme de boule</translate> | ||
| + | |Step_Picture_00=Picehnette_de_fou_MicrosoftTeams-image_2_1_.jpg | ||
| + | }} | ||
| + | {{Tuto Step | ||
| + | |Step_Title=<translate>fixation des différentes parties et préparation de l'orifice pour l'écran</translate> | ||
| + | |Step_Content=<translate>Maintenant que vous avez toutes les parties c'est l'heure de passer à l'assemblage. Munissez vous de vis, de colle ou de clous , ainsi que de vos différentes partie et assemblez le tout.</translate> | ||
| + | |Step_Picture_00=Picehnette_de_fou_Capture_d_cran_2024-04-12_084130.png | ||
| + | }} | ||
| + | {{Tuto Step | ||
| + | |Step_Title=<translate>Préparation du micro bit</translate> | ||
| + | |Step_Content=<translate>À l'aide d'un fer souder on va venir souder les 3 broches du potentiomètre à un circuit imprimer afin de le lier aux pin du microbit via le DFROBOT</translate> | ||
| + | }} | ||
| + | {{Tuto Step | ||
| + | |Step_Title=<translate>Installer le programme sur le microbit</translate> | ||
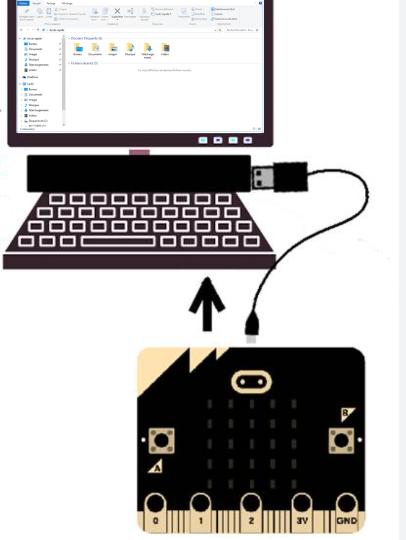
| + | |Step_Content=<translate>Brancher le Microbit à l'ordinateur et injecter le programme installé plus tôt</translate> | ||
| + | |Step_Picture_00=Picehnette_de_fou_Capture_d_cran_2024-04-12_084400.png | ||
}} | }} | ||
{{Notes | {{Notes | ||
| Ligne 29 : | Ligne 90 : | ||
}} | }} | ||
{{PageLang | {{PageLang | ||
| + | |Language=fr | ||
|SourceLanguage=none | |SourceLanguage=none | ||
|IsTranslation=0 | |IsTranslation=0 | ||
| − | |||
}} | }} | ||
{{Tuto Status | {{Tuto Status | ||
|Complete=Draft | |Complete=Draft | ||
}} | }} | ||
Version actuelle datée du 12 avril 2024 à 08:44
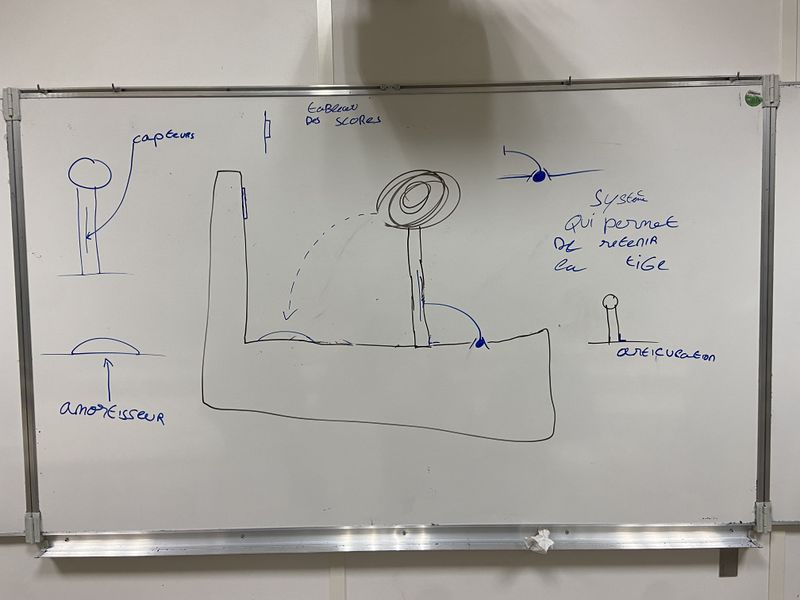
La question à pichenette:
Une machine qui donnera un score en fonction de la puissance de la pichenette, le score permettra de savoir combien de points rapportera la question.
Difficulté
Facile
Durée
2 heure(s)
Catégories
Électronique, Jeux & Loisirs, Recyclage & Upcycling, Science & Biologie
Coût
22 EUR (€)
Sommaire
- 1 Étape 1 - télécharger le fichier 3d et le programme microbit
- 2 Étape 2 - Découpe
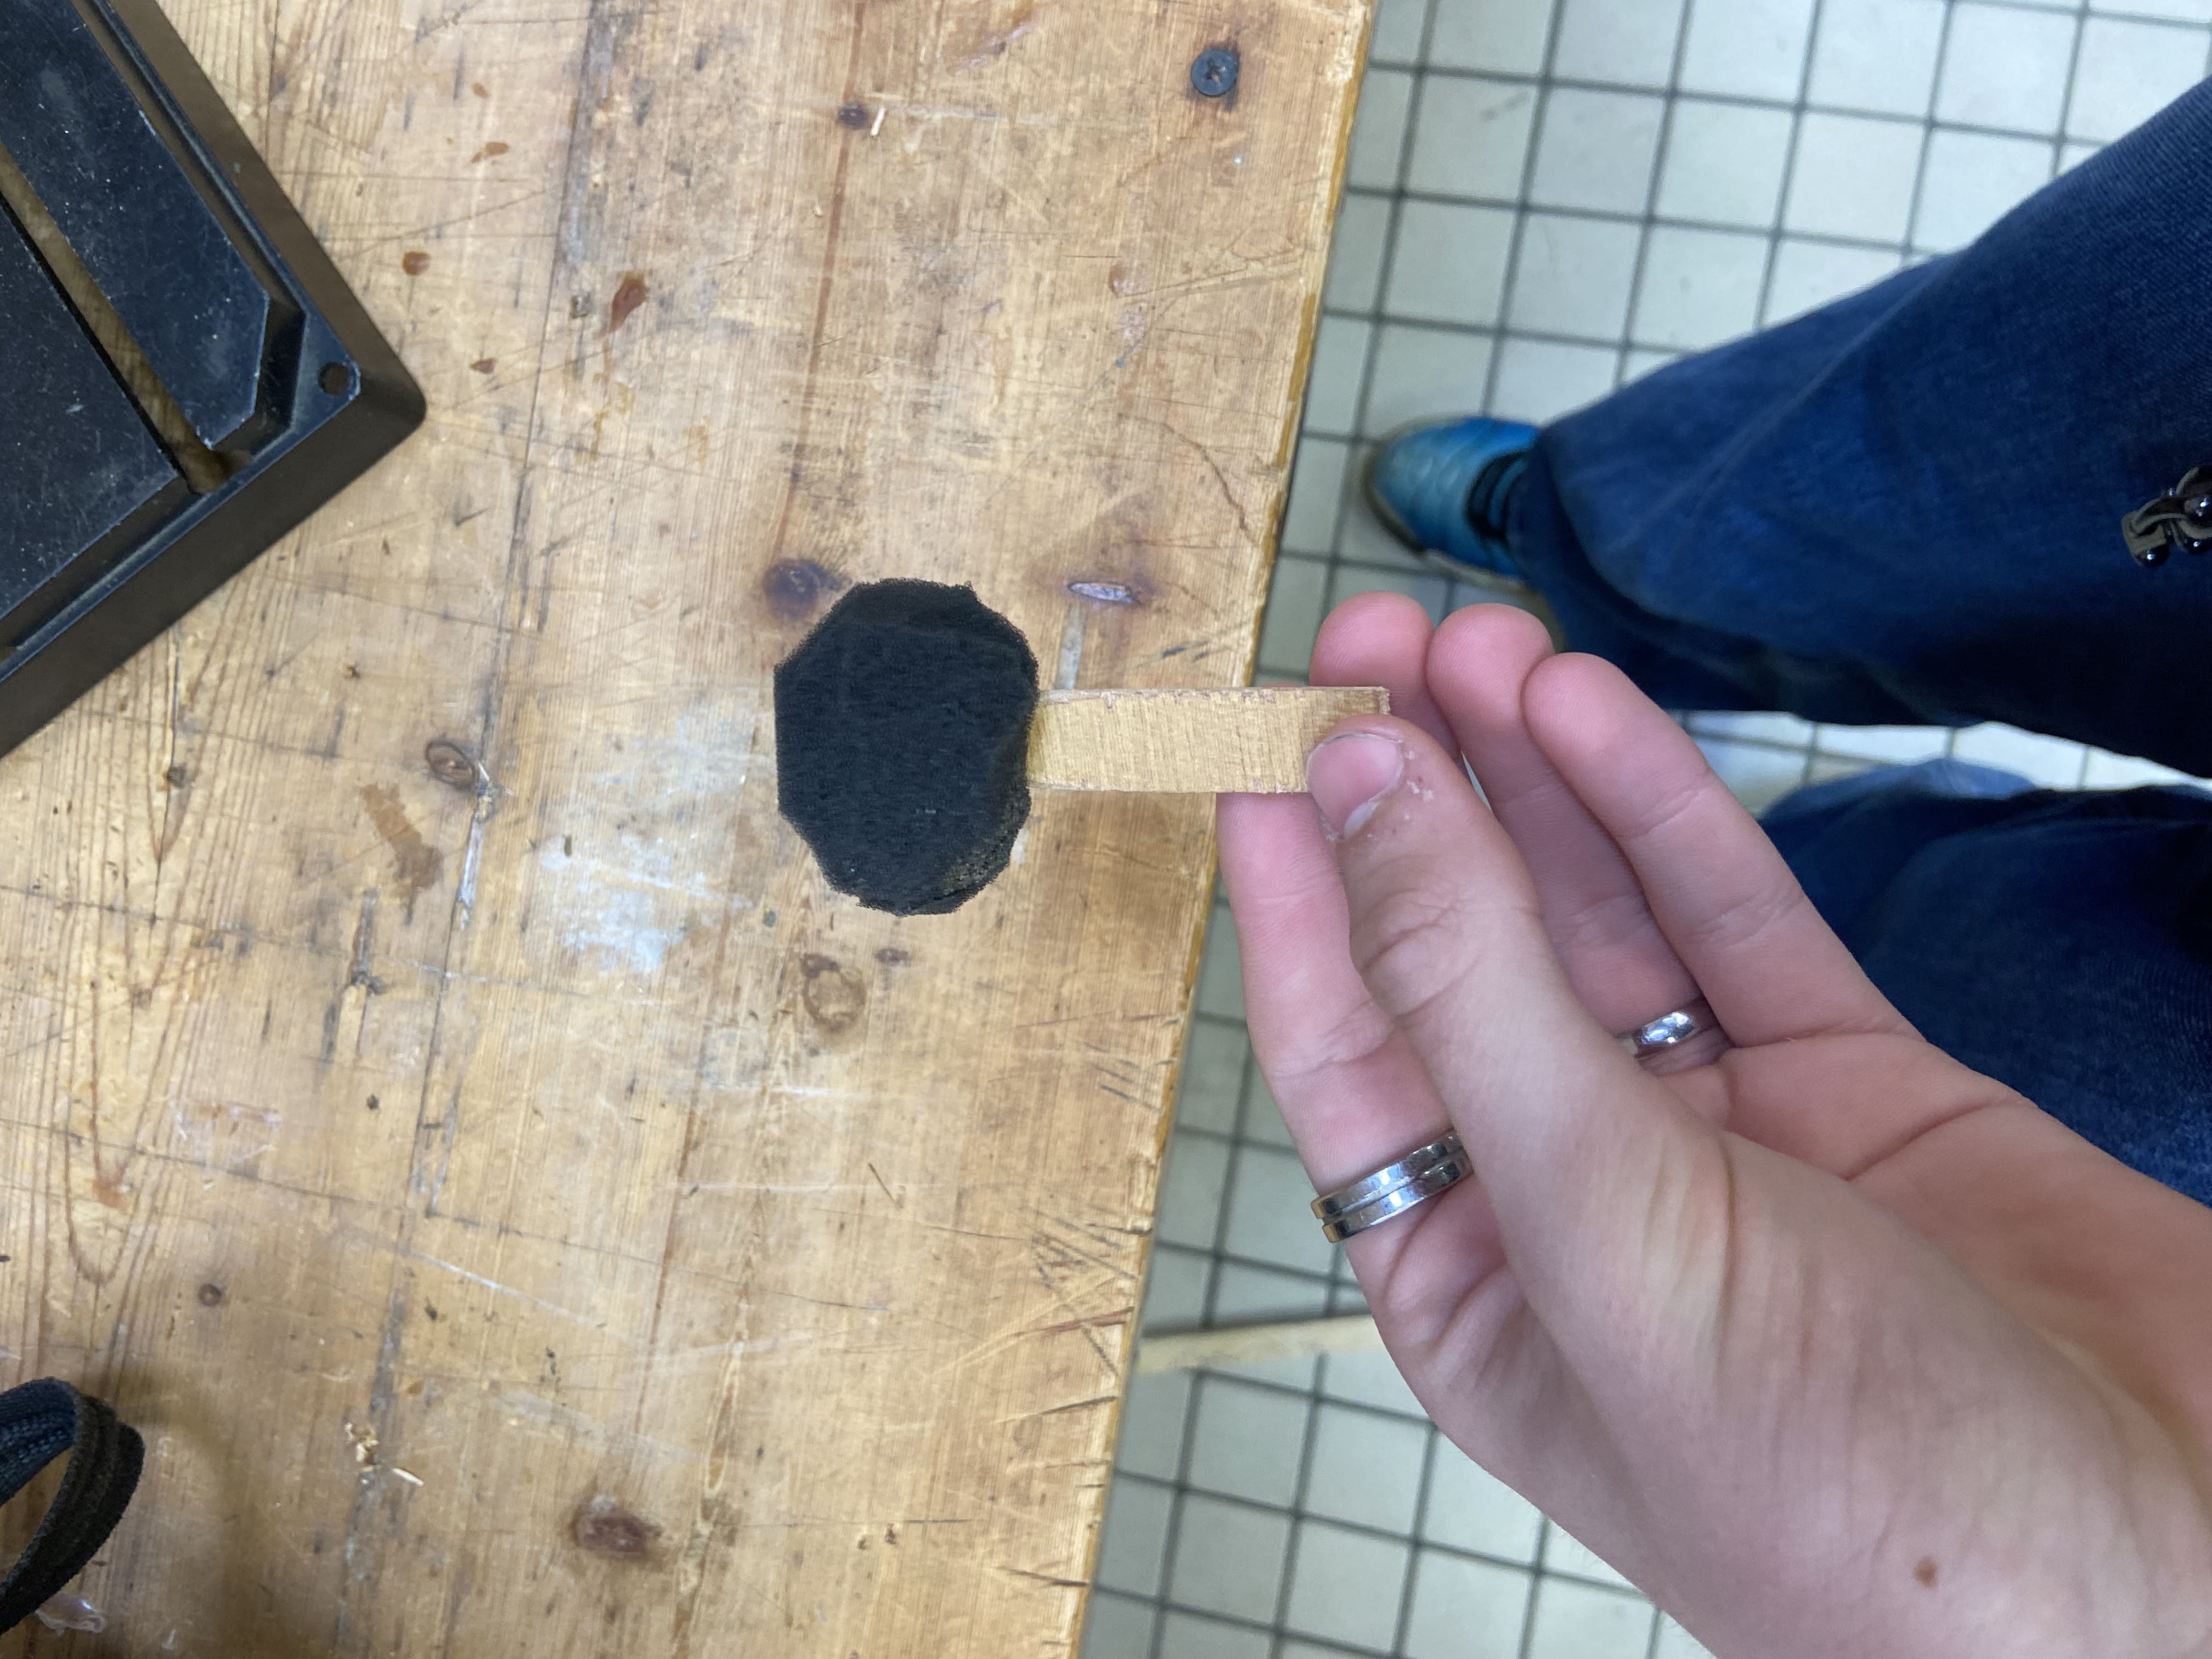
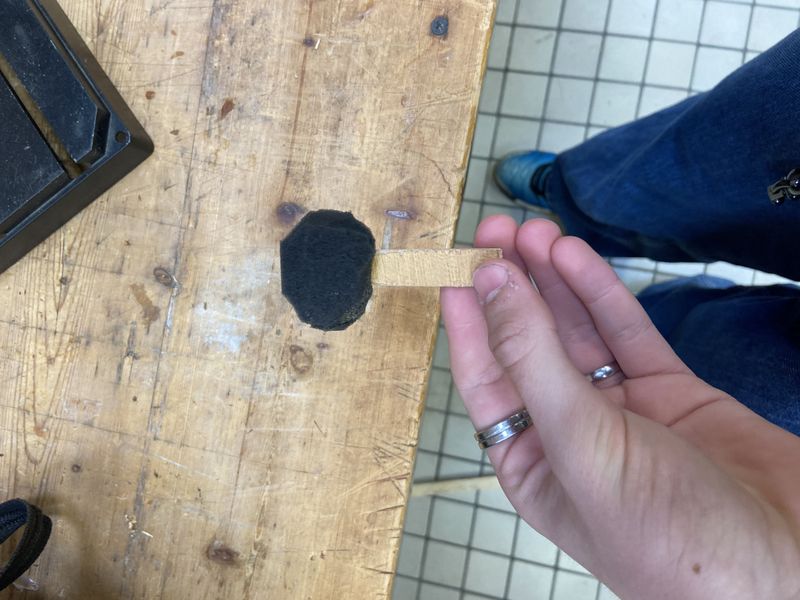
- 3 Étape 3 - préparation de la zone de frappe
- 4 Étape 4 - fixation des différentes parties et préparation de l'orifice pour l'écran
- 5 Étape 5 - Préparation du micro bit
- 6 Étape 6 - Installer le programme sur le microbit
- 7 Commentaires
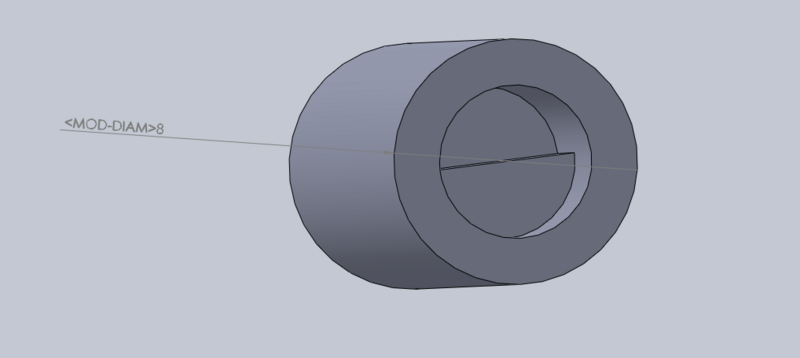
Étape 1 - télécharger le fichier 3d et le programme microbit
ici: https://drive.google.com/drive/folders/14h8J1pmvLDmq1SS1b1dNgrIBqhYMl4aU?usp=sharing
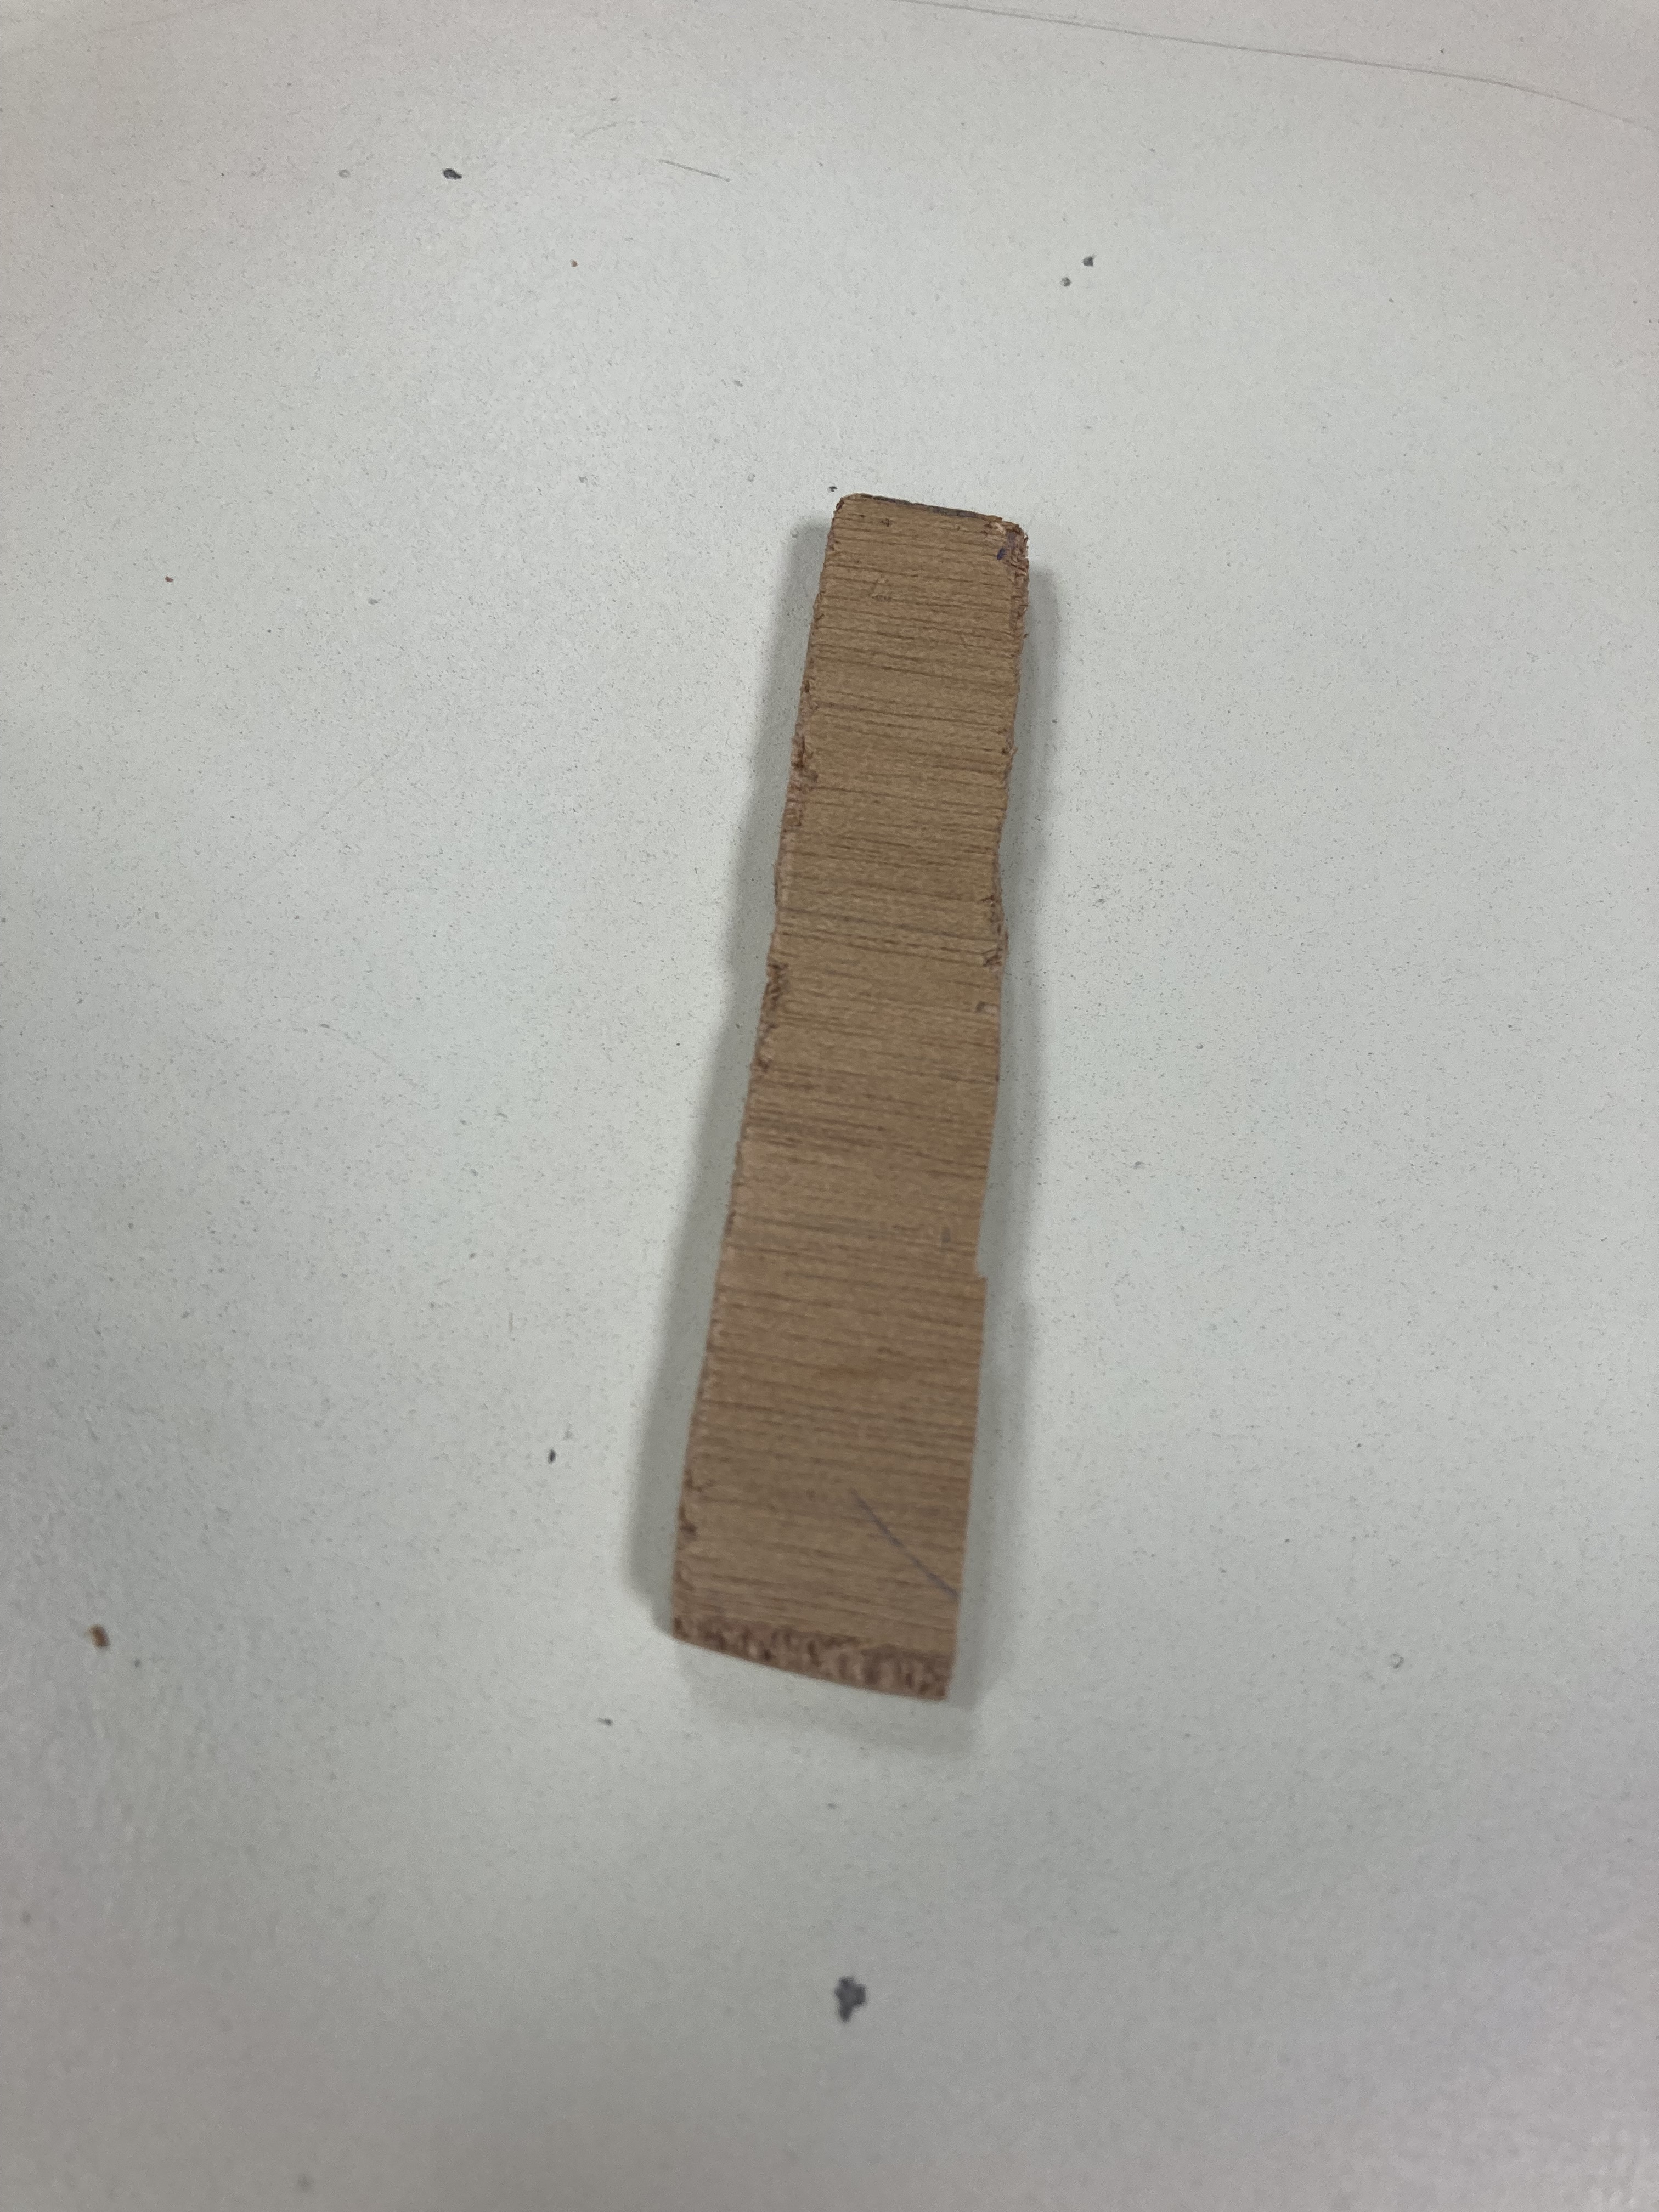
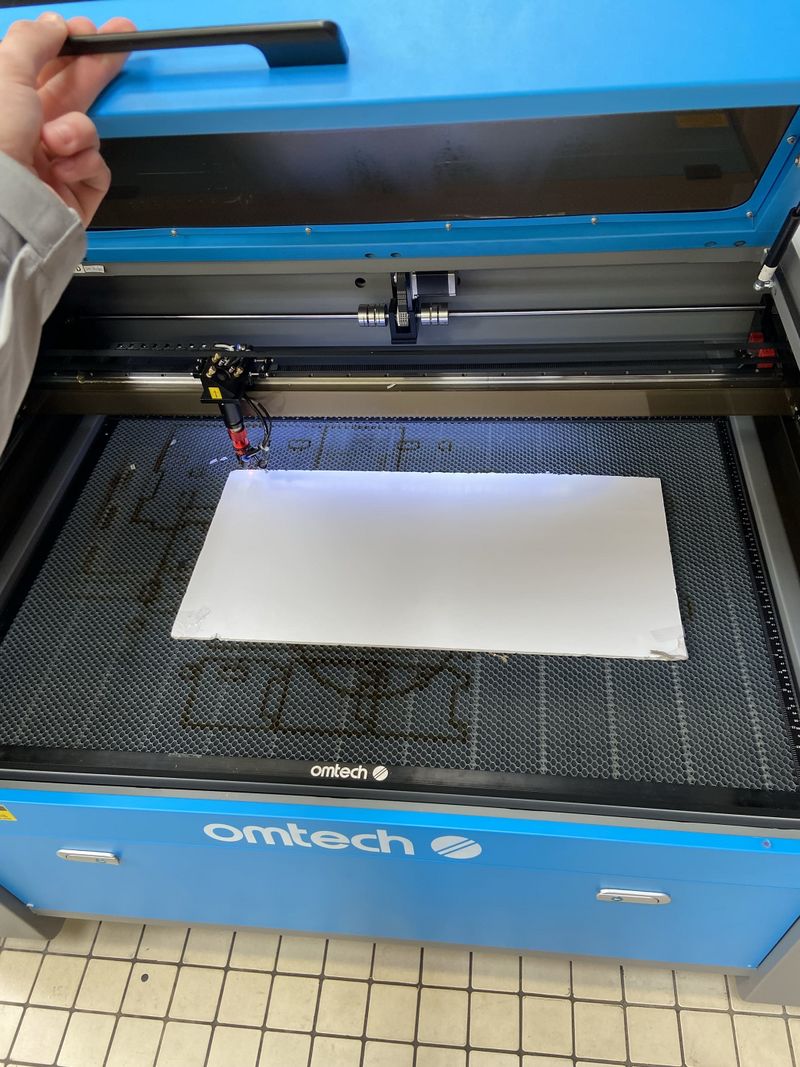
Étape 2 - Découpe
Après avoir réuni les matériaux et charger les fichiers dans la découpe laser, placez le bois dans la découpe et lancez la découpe.
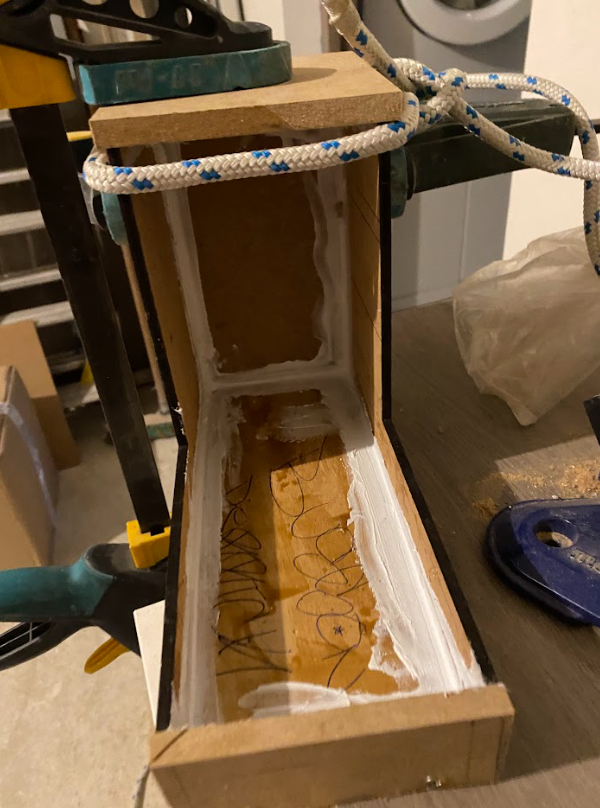
Étape 4 - fixation des différentes parties et préparation de l'orifice pour l'écran
Maintenant que vous avez toutes les parties c'est l'heure de passer à l'assemblage. Munissez vous de vis, de colle ou de clous , ainsi que de vos différentes partie et assemblez le tout.
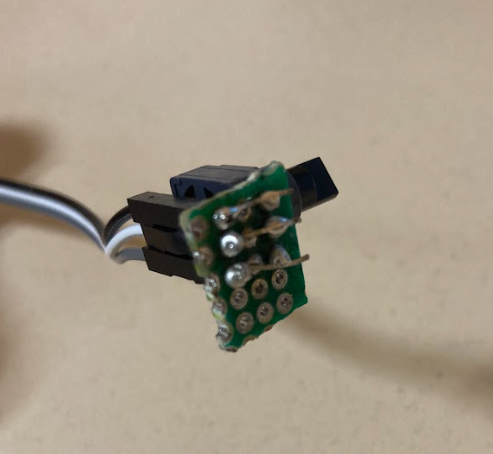
Étape 5 - Préparation du micro bit
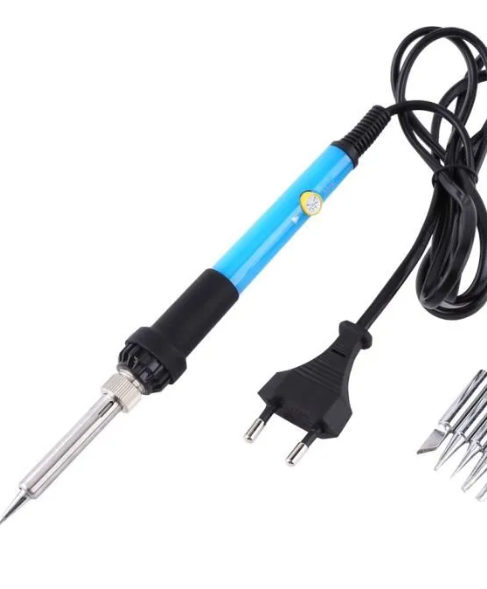
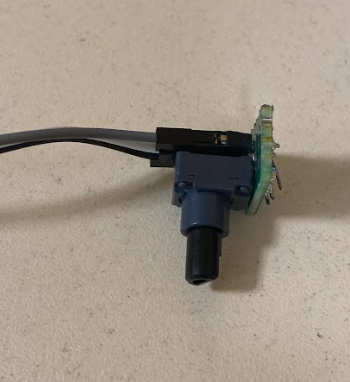
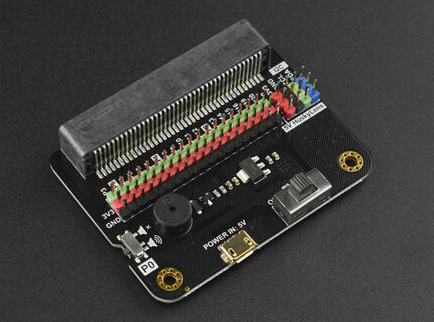
À l'aide d'un fer souder on va venir souder les 3 broches du potentiomètre à un circuit imprimer afin de le lier aux pin du microbit via le DFROBOT
Étape 6 - Installer le programme sur le microbit
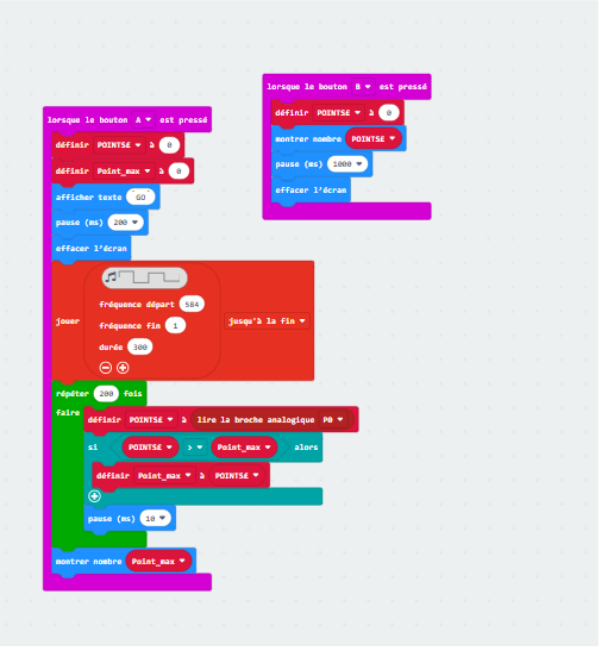
Brancher le Microbit à l'ordinateur et injecter le programme installé plus tôt
Draft
 Français
 English
 Deutsch
 Español
 Italiano
 Português