(Page créée avec « {{Tuto Details |Licences=Attribution (CC BY) |Description=<translate>Use the ESP32's wifi module to communicate with a computer</translate> |Area=Electronics, Robotics |Ty... ») |
|||
| (9 révisions intermédiaires par le même utilisateur non affichées) | |||
| Ligne 1 : | Ligne 1 : | ||
{{Tuto Details | {{Tuto Details | ||
| + | |Main_Picture=ESP32_DHT22_IFTTT_306268167_427924746149632_7414040424516888266_n.jpg | ||
| + | |Main_Picture_annotation={"version":"3.5.0","objects":[{"type":"image","version":"3.5.0","originX":"left","originY":"top","left":77,"top":-1,"width":2048,"height":2047,"fill":"rgb(0,0,0)","stroke":null,"strokeWidth":0,"strokeDashArray":null,"strokeLineCap":"butt","strokeDashOffset":0,"strokeLineJoin":"miter","strokeMiterLimit":4,"scaleX":0.22,"scaleY":0.22,"angle":0,"flipX":false,"flipY":false,"opacity":1,"shadow":null,"visible":true,"clipTo":null,"backgroundColor":"","fillRule":"nonzero","paintFirst":"fill","globalCompositeOperation":"source-over","transformMatrix":null,"skewX":0,"skewY":0,"crossOrigin":"","cropX":0,"cropY":0,"src":"https://wikifab.org/images/8/81/ESP32_DHT22_IFTTT_306268167_427924746149632_7414040424516888266_n.jpg","filters":[]}],"height":449.6881496881497,"width":600} | ||
|Licences=Attribution (CC BY) | |Licences=Attribution (CC BY) | ||
|Description=<translate>Use the ESP32's wifi module to communicate with a computer</translate> | |Description=<translate>Use the ESP32's wifi module to communicate with a computer</translate> | ||
| Ligne 5 : | Ligne 7 : | ||
|Type=Creation | |Type=Creation | ||
|Difficulty=Easy | |Difficulty=Easy | ||
| − | |Duration= | + | |Duration=15 |
| − | |Duration-type= | + | |Duration-type=minute(s) |
|Cost=0 | |Cost=0 | ||
|Currency=USD ($) | |Currency=USD ($) | ||
}} | }} | ||
{{Introduction | {{Introduction | ||
| − | |Introduction=<translate></translate> | + | |Introduction=<translate>'''Introduction & Goals:''' |
| + | |||
| + | |||
| + | This project utilizes the Wifi module on an ESP32 along with the Publish/Subscribe (PubSub) library on the Arduino IDE to communicate with other Internet of Things (IoT) devices. In this specific tutorial, we learn how to use the ESP32 to communicate with your personal device in a bidirectional way. | ||
| + | |||
| + | |||
| + | GOALS: | ||
| + | |||
| + | #Learn what Message Queuing Telemetry Transport (MQTT) is | ||
| + | #Set up esp32 dev library and pubSub along with MQTT to exchange messages</translate> | ||
}} | }} | ||
{{Materials | {{Materials | ||
| Ligne 19 : | Ligne 30 : | ||
{{Tuto Step | {{Tuto Step | ||
|Step_Title=<translate>Prepare an MQTT Broker</translate> | |Step_Title=<translate>Prepare an MQTT Broker</translate> | ||
| − | |Step_Content=<translate>Before we begin, we need to ensure you have an MQTT broker to communicate and test with. We can download [https://mqttx.app/ MQTTX] to ensure communication. | + | |Step_Content=<translate>Before we begin, we need to ensure you have an MQTT broker to communicate and test with. We can download [https://mqttx.app/ MQTTX] (the front-end broker) to ensure communication. MQTT is a lightweight messaging protocol designed for efficient communication between devices in low-bandwidth, high-latency networks. It uses a publish-subscribe model, which we will go over later. |
<br /></translate> | <br /></translate> | ||
| Ligne 26 : | Ligne 37 : | ||
{{Tuto Step | {{Tuto Step | ||
|Step_Title=<translate>Install ESP32 Development Board & other dependancies</translate> | |Step_Title=<translate>Install ESP32 Development Board & other dependancies</translate> | ||
| − | |Step_Content=<translate>Ensure that the ESP32 dev library is installed, then go to libraries in the Arduino IDE and download PubSubClient.</translate> | + | |Step_Content=<translate>Ensure that the ESP32 dev library is installed, then go to libraries in the Arduino IDE and download PubSubClient. PubSub, short for Publish/Subscribe, is a messaging pattern where senders (publishers) distribute messages to receivers (subscribers) without directly communicating with them. Publishers send messages to a central hub (broker), which then distributes them to all interested subscribers based on their topic subscriptions. This is useful to conserve data when trying to share information, because rather than multiple different connections between the publisher and each subscriber, the publisher only needs to send the information once.</translate> |
|Step_Picture_00=ESP32_MQTT_Screenshot_2024-02-10_at_2.38.56_PM.png | |Step_Picture_00=ESP32_MQTT_Screenshot_2024-02-10_at_2.38.56_PM.png | ||
}} | }} | ||
| Ligne 98 : | Ligne 109 : | ||
</syntaxhighlight></translate> | </syntaxhighlight></translate> | ||
| + | }} | ||
| + | {{Tuto Step | ||
| + | |Step_Title=<translate>Running and Testing</translate> | ||
| + | |Step_Content=<translate># Please follow these steps to upload the complete code using Arduino and power on the ESP32: | ||
| + | ## Connect the ESP32 to your computer using a USB cable. | ||
| + | ## Open the Arduino IDE and select the appropriate board and port from the "Tools" menu. | ||
| + | ## Copy and paste the complete code into the Arduino IDE. | ||
| + | ## Click the "Upload" button (or use the shortcut Ctrl+U) to compile and upload the code to the ESP32. | ||
| + | ## Wait for the upload process to finish, ensuring there are no errors. | ||
| + | ## Once the code is uploaded, disconnect the ESP32 from the computer. | ||
| + | ## Power on the ESP32 by connecting it to a suitable power source. | ||
| + | # Open the serial monitor and set the baud rate to 115200. Then, check the connection status of the ESP32 by monitoring the output in the serial monitor. | ||
| + | # Use the MQTTX client to establish a connection with the MQTT broker and publish messages such as <code>Hi, I'm MQTTX</code> to the ESP32.</translate> | ||
| + | |Step_Picture_00=ESP32_MQTT_Screenshot_2024-02-10_at_2.53.11_PM.png | ||
}} | }} | ||
{{Notes | {{Notes | ||
| − | |Notes=<translate></translate> | + | |Notes=<translate>'''Real World Use Cases:''' |
| + | |||
| + | # https://www.pubnub.com/blog/what-is-mqtt-use-cases/ | ||
| + | # https://www.influxdata.com/blog/mqtt-use-cases/</translate> | ||
}} | }} | ||
{{PageLang | {{PageLang | ||
| + | |Language=en | ||
|SourceLanguage=none | |SourceLanguage=none | ||
|IsTranslation=0 | |IsTranslation=0 | ||
| − | |||
}} | }} | ||
{{Tuto Status | {{Tuto Status | ||
|Complete=Draft | |Complete=Draft | ||
}} | }} | ||
Version actuelle datée du 10 février 2024 à 22:00
Introduction
Introduction & Goals:
This project utilizes the Wifi module on an ESP32 along with the Publish/Subscribe (PubSub) library on the Arduino IDE to communicate with other Internet of Things (IoT) devices. In this specific tutorial, we learn how to use the ESP32 to communicate with your personal device in a bidirectional way.
GOALS:
- Learn what Message Queuing Telemetry Transport (MQTT) is
- Set up esp32 dev library and pubSub along with MQTT to exchange messages
Matériaux
Outils
Étape 1 - Prepare an MQTT Broker
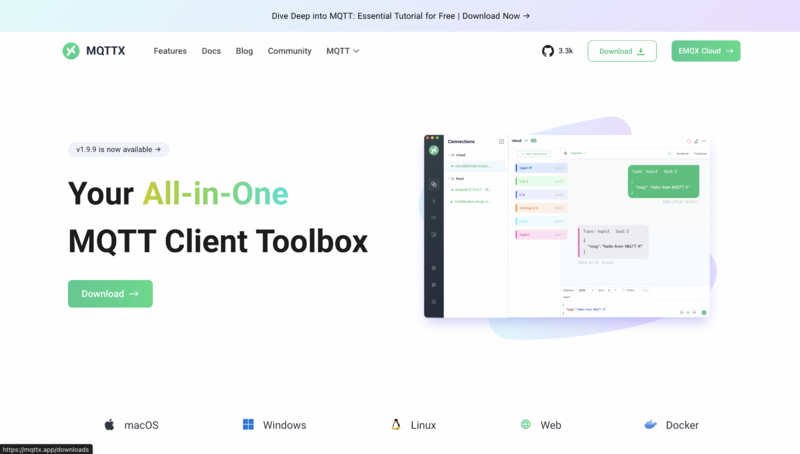
Before we begin, we need to ensure you have an MQTT broker to communicate and test with. We can download MQTTX (the front-end broker) to ensure communication. MQTT is a lightweight messaging protocol designed for efficient communication between devices in low-bandwidth, high-latency networks. It uses a publish-subscribe model, which we will go over later.
Étape 2 - Install ESP32 Development Board & other dependancies
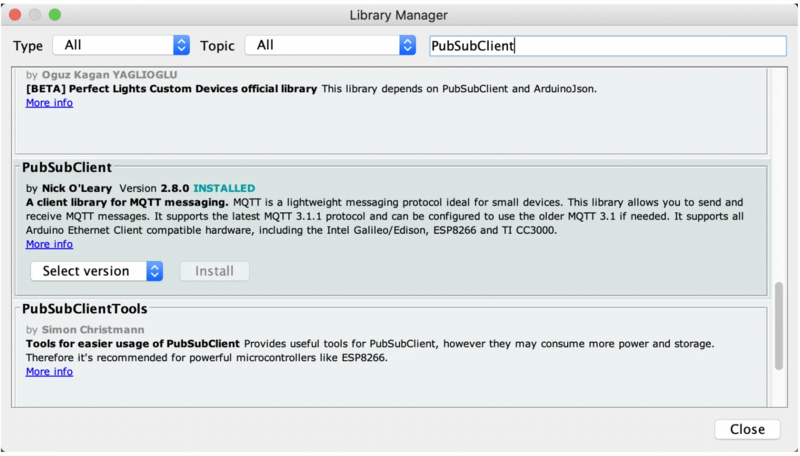
Ensure that the ESP32 dev library is installed, then go to libraries in the Arduino IDE and download PubSubClient. PubSub, short for Publish/Subscribe, is a messaging pattern where senders (publishers) distribute messages to receivers (subscribers) without directly communicating with them. Publishers send messages to a central hub (broker), which then distributes them to all interested subscribers based on their topic subscriptions. This is useful to conserve data when trying to share information, because rather than multiple different connections between the publisher and each subscriber, the publisher only needs to send the information once.
Étape 3 - Full Code
Copy the full code into your IDE. Feel free to change things like the text it prints, etc
 1 #include <WiFi.h>
 2 #include <PubSubClient.h>
 3
 4 // WiFi
 5 const char *ssid = "xxxxx"; // Enter your Wi-Fi name
 6 const char *password = "xxxxx";  // Enter Wi-Fi password
 7
 8 // MQTT Broker
 9 const char *mqtt_broker = "broker.emqx.io";
10 const char *topic = "emqx/esp32";
11 const char *mqtt_username = "emqx";
12 const char *mqtt_password = "public";
13 const int mqtt_port = 1883;
14
15 WiFiClient espClient;
16 PubSubClient client(espClient);
17
18 void setup() {
19     // Set software serial baud to 115200;
20     Serial.begin(115200);
21     // Connecting to a WiFi network
22     WiFi.begin(ssid, password);
23     while (WiFi.status() != WL_CONNECTED) {
24         delay(500);
25         Serial.println("Connecting to WiFi..");
26     }
27     Serial.println("Connected to the Wi-Fi network");
28     //connecting to a mqtt broker
29     client.setServer(mqtt_broker, mqtt_port);
30     client.setCallback(callback);
31     while (!client.connected()) {
32         String client_id = "esp32-client-";
33         client_id += String(WiFi.macAddress());
34         Serial.printf("The client %s connects to the public MQTT broker\n", client_id.c_str());
35         if (client.connect(client_id.c_str(), mqtt_username, mqtt_password)) {
36             Serial.println("Public EMQX MQTT broker connected");
37         } else {
38             Serial.print("failed with state ");
39             Serial.print(client.state());
40             delay(2000);
41         }
42     }
43     // Publish and subscribe
44     client.publish(topic, "Hi, I'm ESP32 ^^");
45     client.subscribe(topic);
46 }
47
48 void callback(char *topic, byte *payload, unsigned int length) {
49     Serial.print("Message arrived in topic: ");
50     Serial.println(topic);
51     Serial.print("Message:");
52     for (int i = 0; i < length; i++) {
53         Serial.print((char) payload[i]);
54     }
55     Serial.println();
56     Serial.println("-----------------------");
57 }
58
59 void loop() {
60     client.loop();
61 }
Étape 4 - Running and Testing
- Please follow these steps to upload the complete code using Arduino and power on the ESP32:
- Connect the ESP32 to your computer using a USB cable.
- Open the Arduino IDE and select the appropriate board and port from the "Tools" menu.
- Copy and paste the complete code into the Arduino IDE.
- Click the "Upload" button (or use the shortcut Ctrl+U) to compile and upload the code to the ESP32.
- Wait for the upload process to finish, ensuring there are no errors.
- Once the code is uploaded, disconnect the ESP32 from the computer.
- Power on the ESP32 by connecting it to a suitable power source.
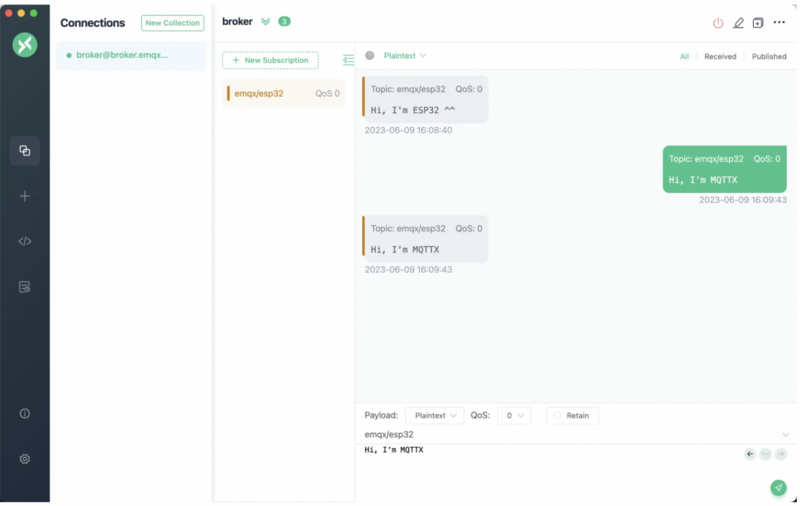
- Open the serial monitor and set the baud rate to 115200. Then, check the connection status of the ESP32 by monitoring the output in the serial monitor.
- Use the MQTTX client to establish a connection with the MQTT broker and publish messages such as
Hi, I'm MQTTXto the ESP32.
Notes et références
Real World Use Cases:
Draft


 Français
 English
 Deutsch
 Español
 Italiano
 Português