(Page créée avec « {{Tuto Details |Description=<translate>The following guide documents the build of the Precious Plastic Sheet Press as supplied and designed by Citizen Scientific Workshop.... ») |
|||
| Ligne 15 : | Ligne 15 : | ||
{{Materials}} | {{Materials}} | ||
{{Tuto Step | {{Tuto Step | ||
| − | |Step_Title=<translate>Top and Bottom Plates (grid structure)</translate> | + | |Step_Title=<translate>Top and Bottom Plates (grid structure 1)</translate> |
|Step_Content=<translate><nowiki>*</nowiki>The following X steps will be used to make 2 identical plate assemblies. The parts listed are for 1 assembly (so double everything if you're making two plates at a time) | |Step_Content=<translate><nowiki>*</nowiki>The following X steps will be used to make 2 identical plate assemblies. The parts listed are for 1 assembly (so double everything if you're making two plates at a time) | ||
| − | ==== Tools ==== | + | ====Tools==== |
1/4"-20 tap + tap handle | 1/4"-20 tap + tap handle | ||
| Ligne 26 : | Ligne 26 : | ||
<br /> | <br /> | ||
| − | ==== Parts ==== | + | ====Parts==== |
1 meter aluminum sheet | 1 meter aluminum sheet | ||
| − | 2x 1000mm | + | 2x 1000mm 4080 extrusion |
| − | 4x | + | 4x 920mm 4080 extrusion |
| − | 4x 286mm | + | 4x 286mm 4080 extrusion |
| − | 2x266mm | + | 2x266mm 4080 extrusion |
156 T-nuts (16*9) + 12) | 156 T-nuts (16*9) + 12) | ||
| Ligne 41 : | Ligne 41 : | ||
156 M8x16mm Bolts | 156 M8x16mm Bolts | ||
| − | + | 156 M8 washers | |
| − | # Tap the 36 pre-drilled 13/64" holes with the 1/4"-20 tap. | + | ====Steps==== |
| − | ## use the countersink bit to clean up any debris. | + | |
| − | # Layout the large extrusion (image 2) so that the 1m sides are parallel, and the 960mm beams are evenly distributed at 90 degrees to the 1m beams. | + | #Tap the 36 pre-drilled 13/64" holes with the 1/4"-20 tap. |
| − | # Insert 12 t-nuts (6 in each row) into each extrusion face that faces the inside of the plate. (image 2). 8 faces total(4 from exterior beams, and 4 from each side of the two interior beams. 96 nuts total | + | ##use the countersink bit to clean up any debris. |
| − | # Position the two 266mm beams in the center row, splitting it into 3 equal sections. | + | #Layout the large extrusion (image 2) so that the 1m sides are parallel, and the 960mm beams are evenly distributed at 90 degrees to the 1m beams. |
| − | # Position the four 286mm beams in the top and bottom rows, matching the position of the 266 beams. | + | #Insert 12 t-nuts (6 in each row) into each extrusion face that faces the inside of the plate. (image 2). 8 faces total(4 from exterior beams, and 4 from each side of the two interior beams. 96 nuts total |
| − | # For each | + | #Position the two 266mm beams in the center row, splitting it into 3 equal sections. |
| + | #Position the four 286mm beams in the top and bottom rows, matching the position of the 266 beams. | ||
| + | #For each 80mm face of these interior beams, place 4 t nuts (2 in each slot). Be sure to place these on both faces. 48 nuts total. <br /> | ||
'''Attaching the exterior beams to the plate''' | '''Attaching the exterior beams to the plate''' | ||
| − | # On the bottom | + | #On the bottom 40mm face, slide 4 t nuts into each 1000mm beam. (image 4) |
| − | # Match these T nuts with the holes in the plate as this will be a "blind" install. (image 5) | + | #Match these T nuts with the holes in the plate as this will be a "blind" install. (image 5) |
| − | # slide the plate off your work area so you can access the holes from below. | + | #slide the plate off your work area so you can access the holes from below. |
| − | # Place the extrusion directly on top of the plate ensuring not to shift it off its alignment. | + | #Place the extrusion directly on top of the plate ensuring not to shift it off its alignment. |
| − | # Using the M8 bolts, secure the beam to the plate. | + | #Using the M8 bolts, secure the beam to the plate. |
| − | # Repeat this process until you have attached both 1000mm beams and 960mm beams. (12 bolts total)</translate> | + | #Repeat this process until you have attached both 1000mm beams and 960mm beams. (12 bolts total)</translate> |
|Step_Picture_00=PP_Sheetpress_PXL_20220111_174002949.jpg | |Step_Picture_00=PP_Sheetpress_PXL_20220111_174002949.jpg | ||
|Step_Picture_01=PP_Sheetpress_PXL_20220111_180820186.jpg | |Step_Picture_01=PP_Sheetpress_PXL_20220111_180820186.jpg | ||
| Ligne 65 : | Ligne 67 : | ||
|Step_Picture_04=PP_Sheetpress_PXL_20220111_192321011.jpg | |Step_Picture_04=PP_Sheetpress_PXL_20220111_192321011.jpg | ||
|Step_Picture_05=PP_Sheetpress_PXL_20220111_192655317.jpg | |Step_Picture_05=PP_Sheetpress_PXL_20220111_192655317.jpg | ||
| + | }} | ||
| + | {{Tuto Step | ||
| + | |Step_Title=<translate>Top and Bottom Plates (grid structure 2)</translate> | ||
| + | |Step_Content=<translate>====Tools==== | ||
| + | same as above | ||
| + | |||
| + | ====Parts==== | ||
| + | 36 corner brackets | ||
| + | |||
| + | ====Steps==== | ||
| + | |||
| + | # Prepare your parts. Each "cell" will require 4 brackets, 16 M8Bolts, and 16 washers | ||
| + | # Starting with the 4 corners of the ''entire assembly'', attach the corner brackets and tighten the bolts only to finger-tight. | ||
| + | # Next attach the 920 beam ends to the outer perimeter. | ||
| + | # Next, attach the inner beams in place. Ensure that all beams are equally spaced. (remember that the 2 interior beams are shorter though) <br /></translate> | ||
| + | |Step_Picture_00=PP_Sheetpress_PXL_20220111_195719974.jpg | ||
| + | |Step_Picture_01=PP_Sheetpress_PXL_20220111_204734409.jpg | ||
| + | |Step_Picture_02=PP_Sheetpress_PXL_20220111_204729651.jpg | ||
}} | }} | ||
{{Notes | {{Notes | ||
Version du 11 janvier 2022 à 23:03
The following guide documents the build of the Precious Plastic Sheet Press as supplied and designed by Citizen Scientific Workshop.
Difficulté
Difficile
Durée
5 jour(s)
Catégories
Recyclage & Upcycling
Coût
7000 EUR (€)
Matériaux
Outils
Étape 1 - Top and Bottom Plates (grid structure 1)
*The following X steps will be used to make 2 identical plate assemblies. The parts listed are for 1 assembly (so double everything if you're making two plates at a time)
Tools
1/4"-20 tap + tap handle
countersink (or anything over 1/4" bit) for hole cleanup
1/2" Socket
Parts
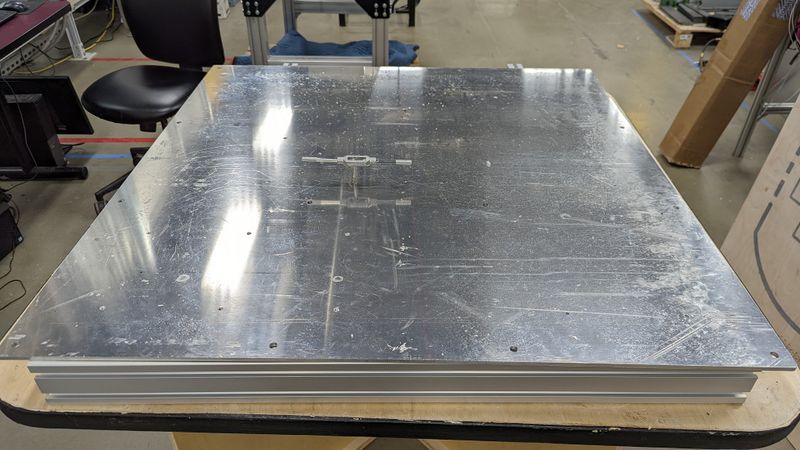
1 meter aluminum sheet
2x 1000mm 4080 extrusion
4x 920mm 4080 extrusion
4x 286mm 4080 extrusion
2x266mm 4080 extrusion
156 T-nuts (16*9) + 12)
156 M8x16mm Bolts
156 M8 washers
Steps
- Tap the 36 pre-drilled 13/64" holes with the 1/4"-20 tap.
- use the countersink bit to clean up any debris.
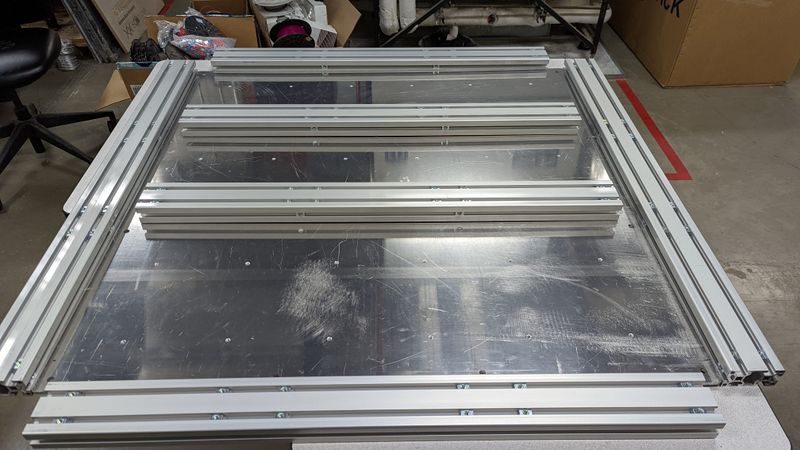
- Layout the large extrusion (image 2) so that the 1m sides are parallel, and the 960mm beams are evenly distributed at 90 degrees to the 1m beams.
- Insert 12 t-nuts (6 in each row) into each extrusion face that faces the inside of the plate. (image 2). 8 faces total(4 from exterior beams, and 4 from each side of the two interior beams. 96 nuts total
- Position the two 266mm beams in the center row, splitting it into 3 equal sections.
- Position the four 286mm beams in the top and bottom rows, matching the position of the 266 beams.
- For each 80mm face of these interior beams, place 4 t nuts (2 in each slot). Be sure to place these on both faces. 48 nuts total.
Attaching the exterior beams to the plate
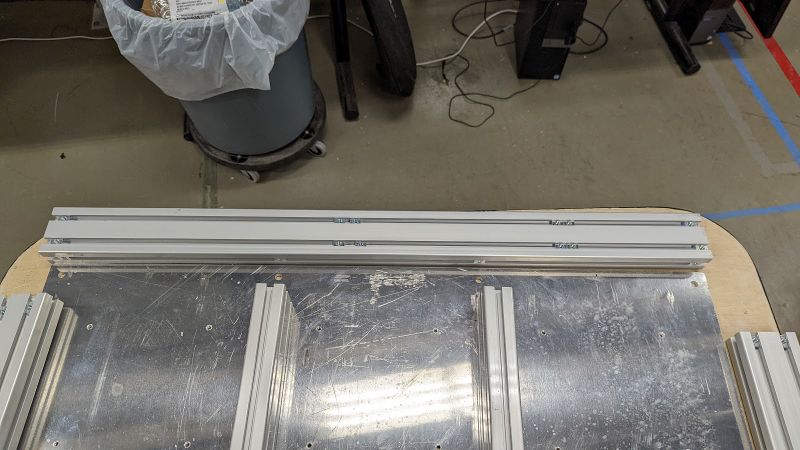
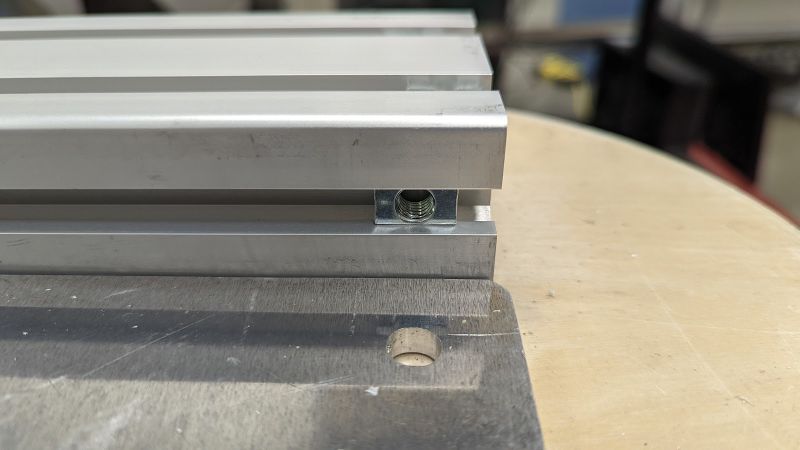
- On the bottom 40mm face, slide 4 t nuts into each 1000mm beam. (image 4)
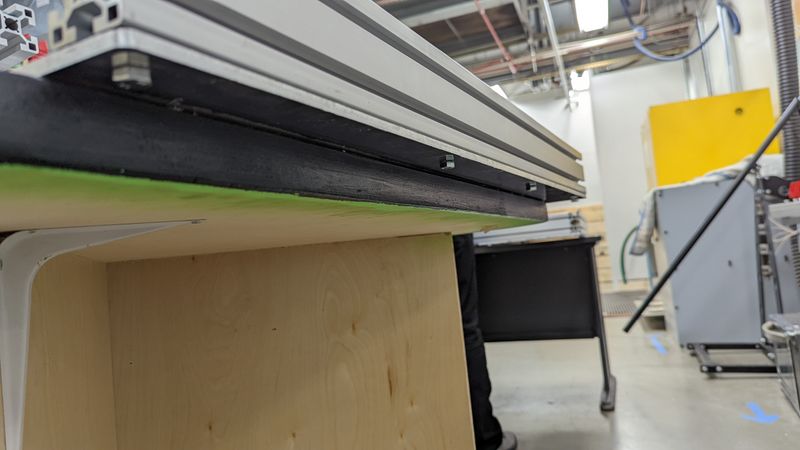
- Match these T nuts with the holes in the plate as this will be a "blind" install. (image 5)
- slide the plate off your work area so you can access the holes from below.
- Place the extrusion directly on top of the plate ensuring not to shift it off its alignment.
- Using the M8 bolts, secure the beam to the plate.
- Repeat this process until you have attached both 1000mm beams and 960mm beams. (12 bolts total)
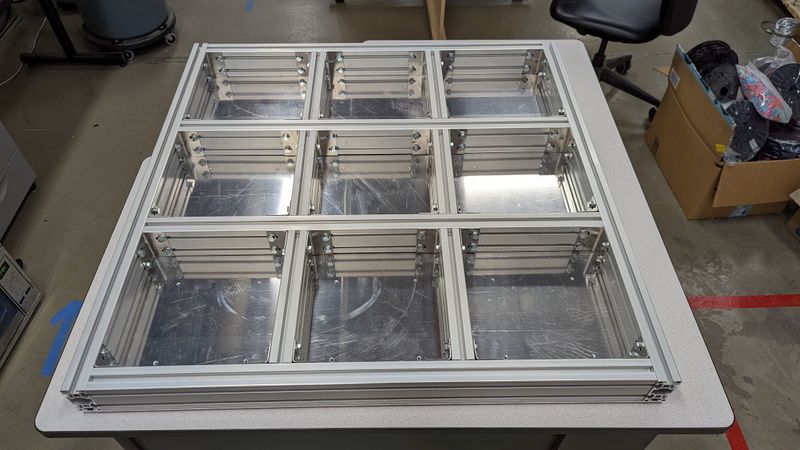
Étape 2 - Top and Bottom Plates (grid structure 2)
Tools
same as above
Parts
36 corner brackets
Steps
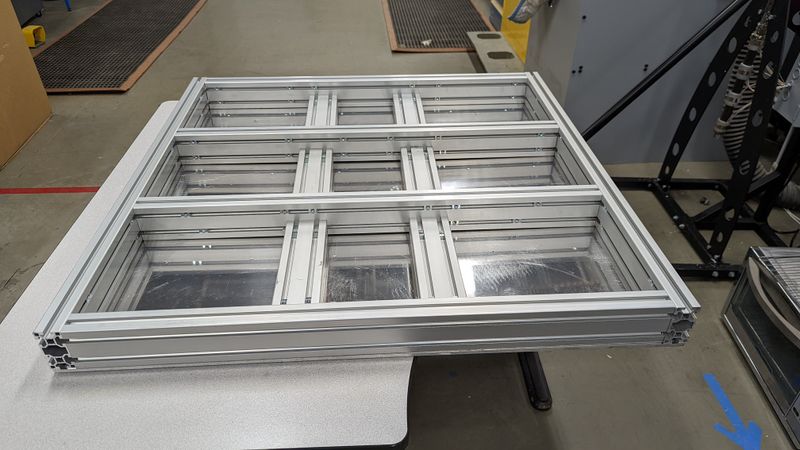
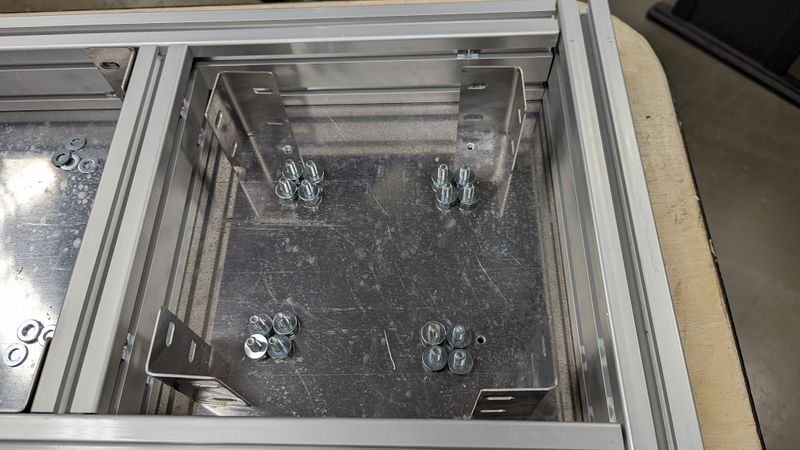
- Prepare your parts. Each "cell" will require 4 brackets, 16 M8Bolts, and 16 washers
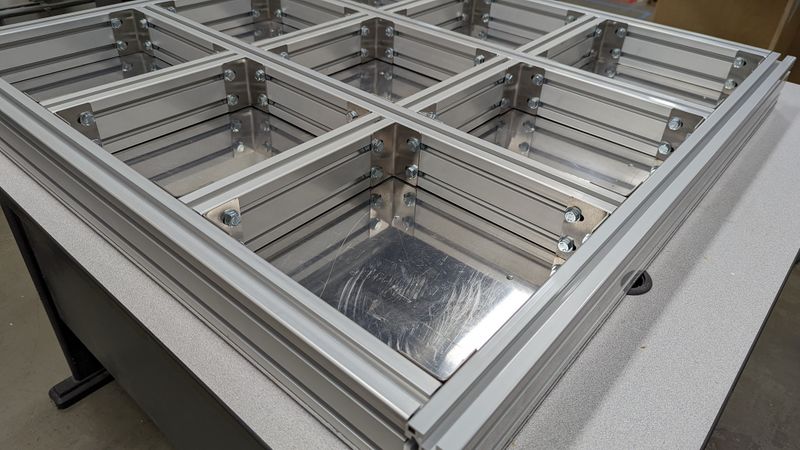
- Starting with the 4 corners of the entire assembly, attach the corner brackets and tighten the bolts only to finger-tight.
- Next attach the 920 beam ends to the outer perimeter.
- Next, attach the inner beams in place. Ensure that all beams are equally spaced. (remember that the 2 interior beams are shorter though)
Draft
 Français
 English
 Deutsch
 Español
 Italiano
 Português