(Cette version a été marquée pour être traduite) |
(update property name) |
||
| Ligne 1 : | Ligne 1 : | ||
| − | {{ | + | {{Tuto Details |
|Main_Picture=Sunzilla_Assembly_03.png | |Main_Picture=Sunzilla_Assembly_03.png | ||
|Licences=CERN Open Hardware Licence v1.2 | |Licences=CERN Open Hardware Licence v1.2 | ||
| Ligne 14 : | Ligne 14 : | ||
|IsTranslation=0 | |IsTranslation=0 | ||
}} | }} | ||
| − | {{ | + | {{Introduction |
|Introduction=<translate><!--T:2--> | |Introduction=<translate><!--T:2--> | ||
'''Technical details:''' | '''Technical details:''' | ||
| Ligne 21 : | Ligne 21 : | ||
* Effectiv battery storage: 600 Wh</translate> | * Effectiv battery storage: 600 Wh</translate> | ||
}} | }} | ||
| − | {{ | + | {{Materials |
|Step_Picture_00=Sunzilla_Assembly_01.png | |Step_Picture_00=Sunzilla_Assembly_01.png | ||
|Step_Picture_01=Sunzilla_Assembly_02.png | |Step_Picture_01=Sunzilla_Assembly_02.png | ||
| Ligne 34 : | Ligne 34 : | ||
|Tools=<translate></translate> | |Tools=<translate></translate> | ||
}} | }} | ||
| − | {{ | + | {{Separator}} |
| − | {{ | + | {{Tuto Step |
|Step_Title=<translate><!--T:5--> Connect the three boxes</translate> | |Step_Title=<translate><!--T:5--> Connect the three boxes</translate> | ||
|Step_Content=<translate><!--T:6--> Press the cable inside when both white points match and turn the blue top unit of the cable to lock.</translate> | |Step_Content=<translate><!--T:6--> Press the cable inside when both white points match and turn the blue top unit of the cable to lock.</translate> | ||
| Ligne 43 : | Ligne 43 : | ||
|Step_Picture_03=Sunzilla_Assembly_06.png | |Step_Picture_03=Sunzilla_Assembly_06.png | ||
}} | }} | ||
| − | {{ | + | {{Tuto Step |
|Step_Title=<translate><!--T:7--> Close the solar module box</translate> | |Step_Title=<translate><!--T:7--> Close the solar module box</translate> | ||
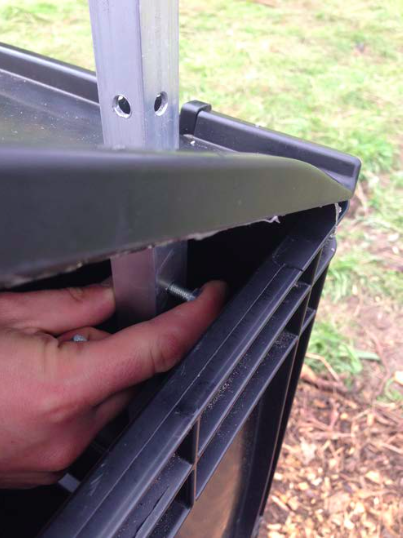
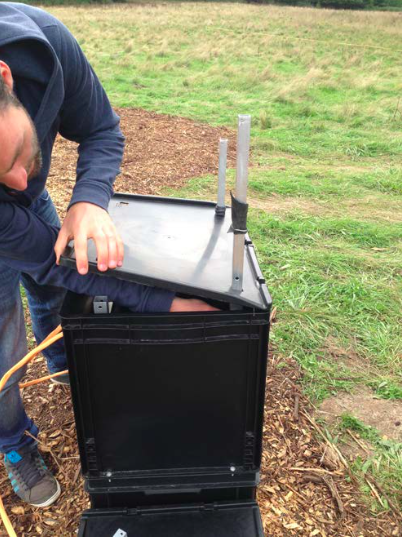
|Step_Content=<translate><!--T:8--> Close the solar module box, put the two long aluminium profiles in their holes. Open slightly the box and insert two screws to lock the profiles. Choose the same holes in the middle and be sure to do the same on both sides.</translate> | |Step_Content=<translate><!--T:8--> Close the solar module box, put the two long aluminium profiles in their holes. Open slightly the box and insert two screws to lock the profiles. Choose the same holes in the middle and be sure to do the same on both sides.</translate> | ||
| Ligne 50 : | Ligne 50 : | ||
|Step_Picture_02=Sunzilla_Assembly_10.png | |Step_Picture_02=Sunzilla_Assembly_10.png | ||
}} | }} | ||
| − | {{ | + | {{Tuto Step |
|Step_Title=<translate><!--T:9--> Insert the aluminium profiles</translate> | |Step_Title=<translate><!--T:9--> Insert the aluminium profiles</translate> | ||
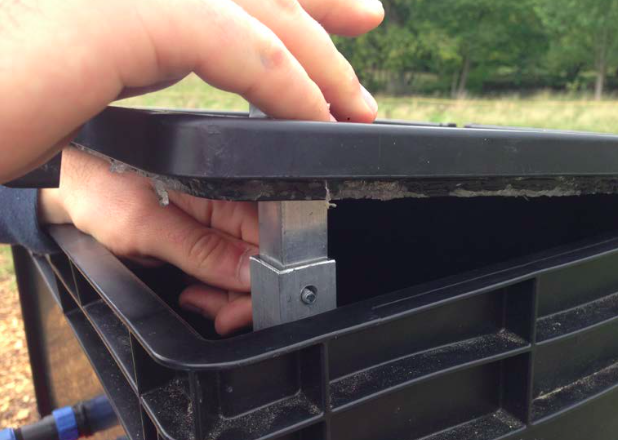
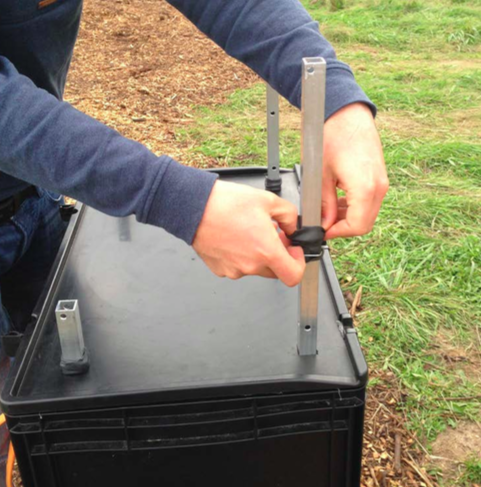
|Step_Content=<translate><!--T:10--> Take the shorter aluminium profiles, insert them as shown on the pic and lock them.</translate> | |Step_Content=<translate><!--T:10--> Take the shorter aluminium profiles, insert them as shown on the pic and lock them.</translate> | ||
| Ligne 56 : | Ligne 56 : | ||
|Step_Picture_01=Sunzilla_Assembly_12.png | |Step_Picture_01=Sunzilla_Assembly_12.png | ||
}} | }} | ||
| − | {{ | + | {{Tuto Step |
|Step_Title=<translate><!--T:11--> Pull down the elastic bands</translate> | |Step_Title=<translate><!--T:11--> Pull down the elastic bands</translate> | ||
|Step_Content=<translate></translate> | |Step_Content=<translate></translate> | ||
|Step_Picture_00=Sunzilla_Assembly_13.png | |Step_Picture_00=Sunzilla_Assembly_13.png | ||
}} | }} | ||
| − | {{ | + | {{Tuto Step |
|Step_Title=<translate></translate> | |Step_Title=<translate></translate> | ||
|Step_Content=<translate><!--T:12--> Take the solar cells. Unfold them and shift the aluminium edges at all four sides</translate> | |Step_Content=<translate><!--T:12--> Take the solar cells. Unfold them and shift the aluminium edges at all four sides</translate> | ||
| Ligne 70 : | Ligne 70 : | ||
|Step_Picture_04=Sunzilla_Assembly_18.png | |Step_Picture_04=Sunzilla_Assembly_18.png | ||
}} | }} | ||
| − | {{ | + | {{Tuto Step |
|Step_Title=<translate></translate> | |Step_Title=<translate></translate> | ||
|Step_Content=<translate><!--T:13--> Take the upper part of the solar module and connect the whole solar module with the upper aluminium profile. Be sure that the solar module is on the left side of the aluminium profile. Connect also the lower part.</translate> | |Step_Content=<translate><!--T:13--> Take the upper part of the solar module and connect the whole solar module with the upper aluminium profile. Be sure that the solar module is on the left side of the aluminium profile. Connect also the lower part.</translate> | ||
| Ligne 78 : | Ligne 78 : | ||
|Step_Picture_03=Sunzilla_Assembly_22.png | |Step_Picture_03=Sunzilla_Assembly_22.png | ||
}} | }} | ||
| − | {{ | + | {{Tuto Step |
|Step_Title=<translate></translate> | |Step_Title=<translate></translate> | ||
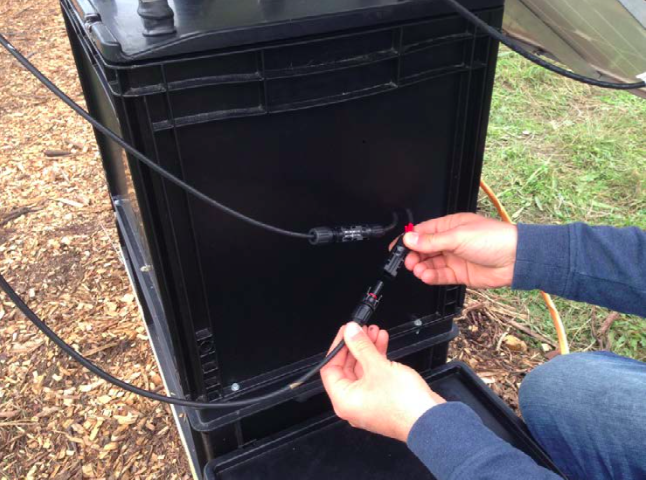
|Step_Content=<translate><!--T:14--> Connect the cables from the solar cells to the solar module box.</translate> | |Step_Content=<translate><!--T:14--> Connect the cables from the solar cells to the solar module box.</translate> | ||
| Ligne 84 : | Ligne 84 : | ||
|Step_Picture_01=Sunzilla_Assembly_24.png | |Step_Picture_01=Sunzilla_Assembly_24.png | ||
}} | }} | ||
| − | {{ | + | {{Tuto Step |
|Step_Title=<translate><!--T:15--> Switch on battery box</translate> | |Step_Title=<translate><!--T:15--> Switch on battery box</translate> | ||
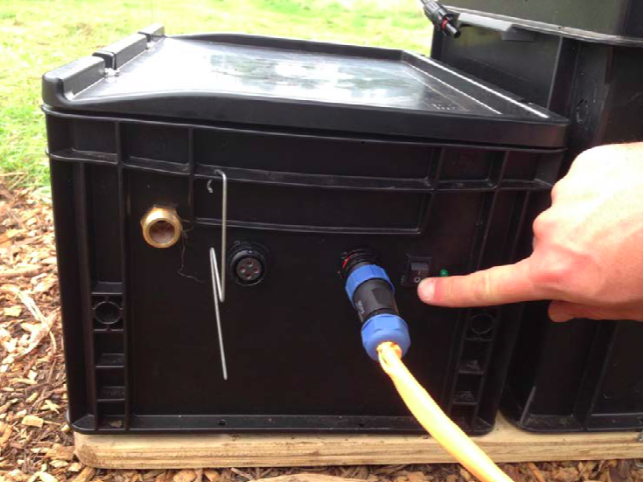
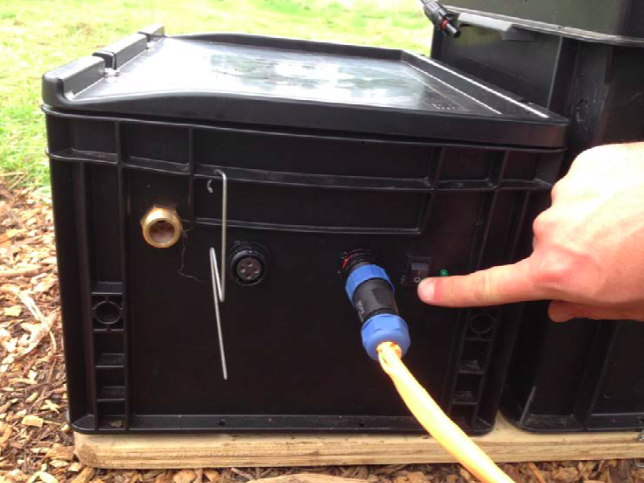
|Step_Content=<translate><!--T:16--> Switch on battery box. Green light should turn on</translate> | |Step_Content=<translate><!--T:16--> Switch on battery box. Green light should turn on</translate> | ||
| Ligne 94 : | Ligne 94 : | ||
|Step_Picture_05=No-image-yet.jpg | |Step_Picture_05=No-image-yet.jpg | ||
}} | }} | ||
| − | {{ | + | {{Tuto Step |
|Step_Title=<translate><!--T:17--> Switch on socket box</translate> | |Step_Title=<translate><!--T:17--> Switch on socket box</translate> | ||
|Step_Content=<translate><!--T:18--> Switch on socket box. Green light should turn on</translate> | |Step_Content=<translate><!--T:18--> Switch on socket box. Green light should turn on</translate> | ||
| Ligne 104 : | Ligne 104 : | ||
|Step_Picture_05=No-image-yet.jpg | |Step_Picture_05=No-image-yet.jpg | ||
}} | }} | ||
| − | {{ | + | {{Tuto Step |
|Step_Title=<translate><!--T:19--> Plug in consumer</translate> | |Step_Title=<translate><!--T:19--> Plug in consumer</translate> | ||
|Step_Content=<translate></translate> | |Step_Content=<translate></translate> | ||
| Ligne 114 : | Ligne 114 : | ||
|Step_Picture_05=No-image-yet.jpg | |Step_Picture_05=No-image-yet.jpg | ||
}} | }} | ||
| − | {{ | + | {{Tuto Step |
|Step_Title=<translate><!--T:20--> Dismanteling</translate> | |Step_Title=<translate><!--T:20--> Dismanteling</translate> | ||
|Step_Content=<translate><!--T:21--> | |Step_Content=<translate><!--T:21--> | ||
| Ligne 128 : | Ligne 128 : | ||
|Step_Picture_05=No-image-yet.jpg | |Step_Picture_05=No-image-yet.jpg | ||
}} | }} | ||
| − | {{ | + | {{Tuto Step |
|Step_Title=<translate><!--T:23--> Switch off Socket Box if switched on</translate> | |Step_Title=<translate><!--T:23--> Switch off Socket Box if switched on</translate> | ||
|Step_Content=<translate><!--T:24--> Switch off Socket Box if switched on</translate> | |Step_Content=<translate><!--T:24--> Switch off Socket Box if switched on</translate> | ||
| Ligne 138 : | Ligne 138 : | ||
|Step_Picture_05=No-image-yet.jpg | |Step_Picture_05=No-image-yet.jpg | ||
}} | }} | ||
| − | {{ | + | {{Tuto Step |
|Step_Title=<translate><!--T:25--> Turn Solar Panels out of sun</translate> | |Step_Title=<translate><!--T:25--> Turn Solar Panels out of sun</translate> | ||
|Step_Content=<translate><!--T:26--> Turn Solar Panels out of sun and cover at least one Solar-Panel (for exam- ple with Pullover)</translate> | |Step_Content=<translate><!--T:26--> Turn Solar Panels out of sun and cover at least one Solar-Panel (for exam- ple with Pullover)</translate> | ||
| Ligne 148 : | Ligne 148 : | ||
|Step_Picture_05=No-image-yet.jpg | |Step_Picture_05=No-image-yet.jpg | ||
}} | }} | ||
| − | {{ | + | {{Tuto Step |
|Step_Title=<translate><!--T:27--> Disconnect Solar-Connectors</translate> | |Step_Title=<translate><!--T:27--> Disconnect Solar-Connectors</translate> | ||
|Step_Content=<translate></translate> | |Step_Content=<translate></translate> | ||
| Ligne 158 : | Ligne 158 : | ||
|Step_Picture_05=No-image-yet.jpg | |Step_Picture_05=No-image-yet.jpg | ||
}} | }} | ||
| − | {{ | + | {{Tuto Step |
|Step_Title=<translate><!--T:28--> Switch off Battery box</translate> | |Step_Title=<translate><!--T:28--> Switch off Battery box</translate> | ||
|Step_Content=<translate></translate> | |Step_Content=<translate></translate> | ||
| Ligne 168 : | Ligne 168 : | ||
|Step_Picture_05=No-image-yet.jpg | |Step_Picture_05=No-image-yet.jpg | ||
}} | }} | ||
| − | {{ | + | {{Tuto Step |
|Step_Title=<translate><!--T:29--> Unplug / detach orange cables</translate> | |Step_Title=<translate><!--T:29--> Unplug / detach orange cables</translate> | ||
|Step_Content=<translate></translate> | |Step_Content=<translate></translate> | ||
| Ligne 178 : | Ligne 178 : | ||
|Step_Picture_05=No-image-yet.jpg | |Step_Picture_05=No-image-yet.jpg | ||
}} | }} | ||
| − | {{ | + | {{Tuto Step |
|Step_Title=<translate><!--T:30--> Switch on Socket box again</translate> | |Step_Title=<translate><!--T:30--> Switch on Socket box again</translate> | ||
|Step_Content=<translate><!--T:31--> | |Step_Content=<translate><!--T:31--> | ||
| Ligne 193 : | Ligne 193 : | ||
|Step_Picture_05=No-image-yet.jpg | |Step_Picture_05=No-image-yet.jpg | ||
}} | }} | ||
| − | {{ | + | {{Notes |
|Notes=<translate></translate> | |Notes=<translate></translate> | ||
}} | }} | ||
| − | {{ | + | {{Tuto Status |
|Complete=Published | |Complete=Published | ||
}} | }} | ||
{{Separator}} | {{Separator}} | ||
Version actuelle datée du 9 décembre 2019 à 12:59
Sommaire
- 1 Introduction
- 2 Étape 1 - Connect the three boxes
- 3 Étape 2 - Close the solar module box
- 4 Étape 3 - Insert the aluminium profiles
- 5 Étape 4 - Pull down the elastic bands
- 6 Étape 5 -
- 7 Étape 6 -
- 8 Étape 7 -
- 9 Étape 8 - Switch on battery box
- 10 Étape 9 - Switch on socket box
- 11 Étape 10 - Plug in consumer
- 12 Étape 11 - Dismanteling
- 13 Étape 12 - Switch off Socket Box if switched on
- 14 Étape 13 - Turn Solar Panels out of sun
- 15 Étape 14 - Disconnect Solar-Connectors
- 16 Étape 15 - Switch off Battery box
- 17 Étape 16 - Unplug / detach orange cables
- 18 Étape 17 - Switch on Socket box again
- 19 Commentaires
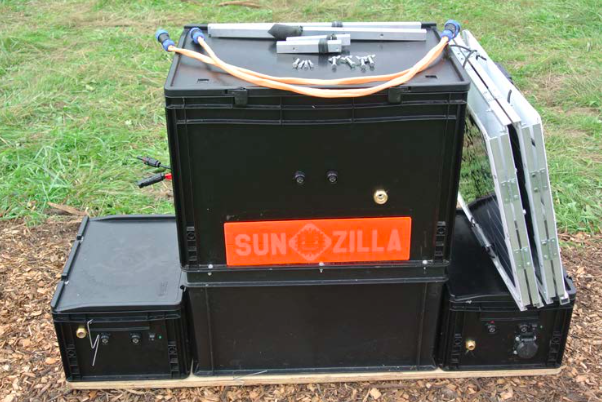
Introduction
Technical details:
- Solar peak Power: 140W
- Maximum AC-output of pure sinus inverter: 350W (700W peakload)
- Effectiv battery storage: 600 Wh
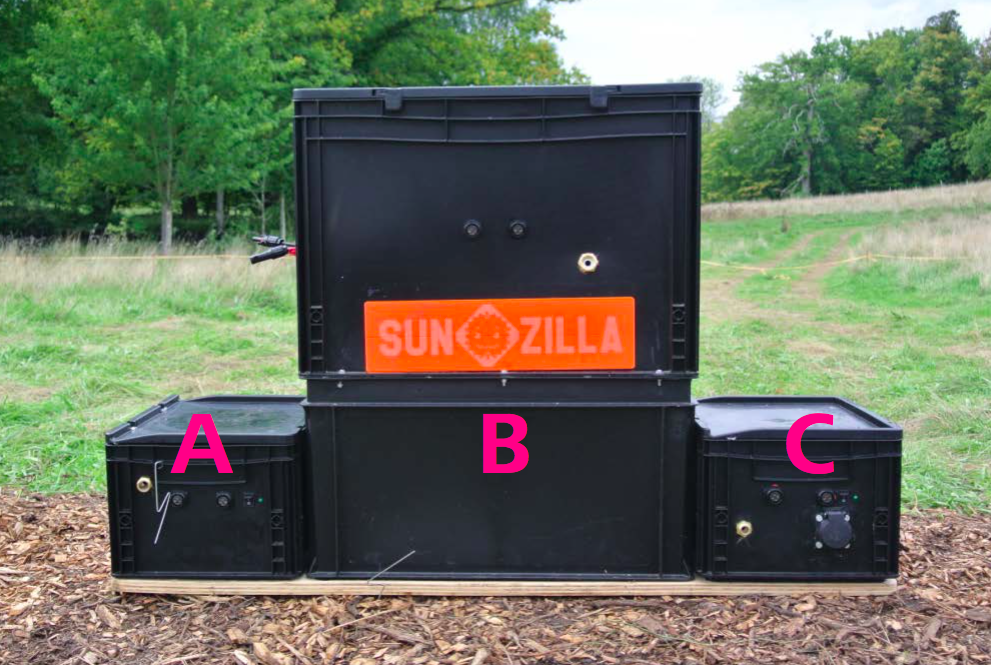
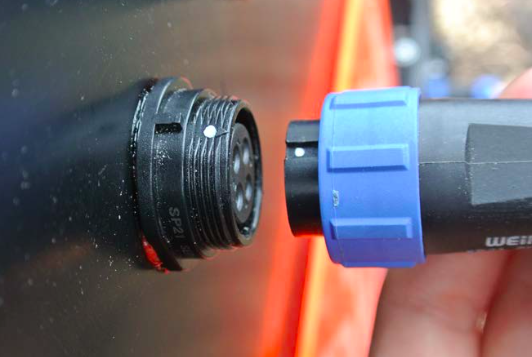
Étape 1 - Connect the three boxes
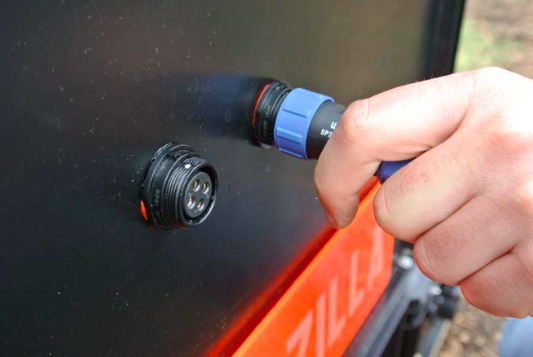
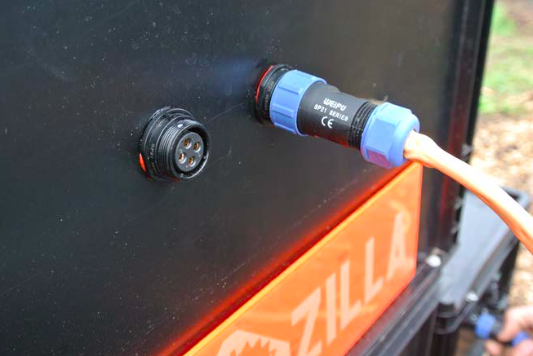
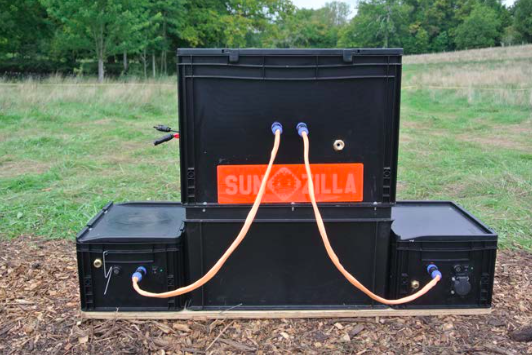
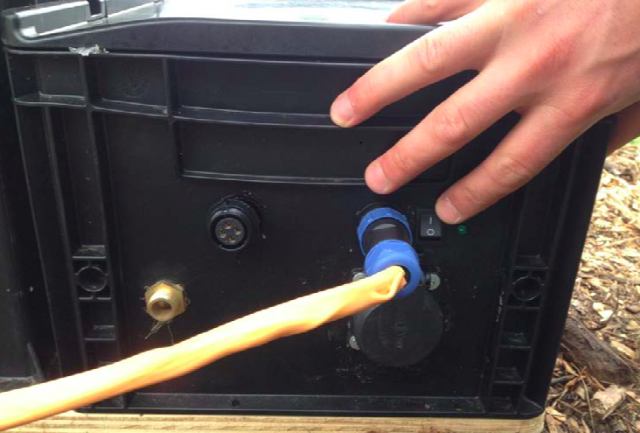
Press the cable inside when both white points match and turn the blue top unit of the cable to lock.
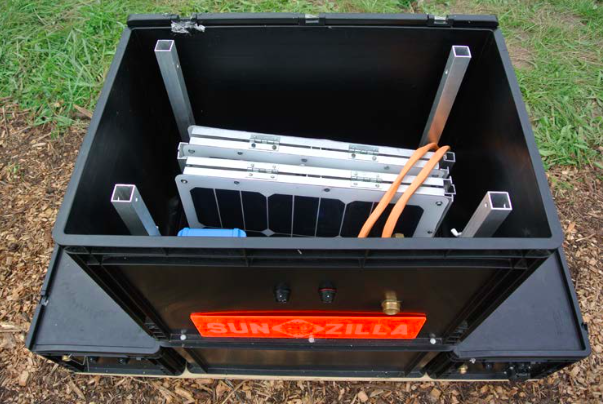
Étape 2 - Close the solar module box
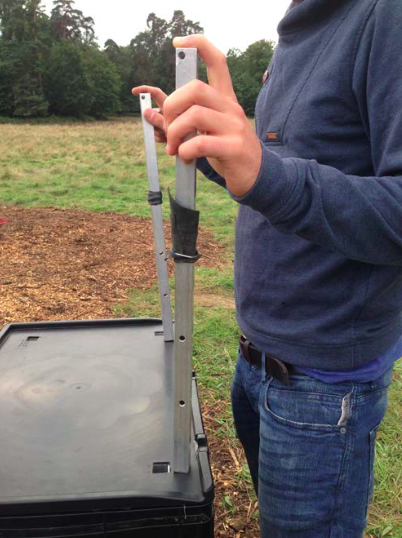
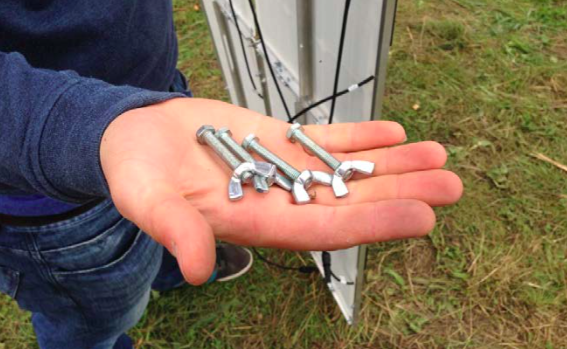
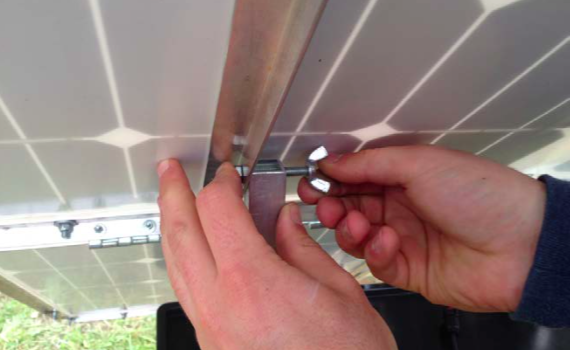
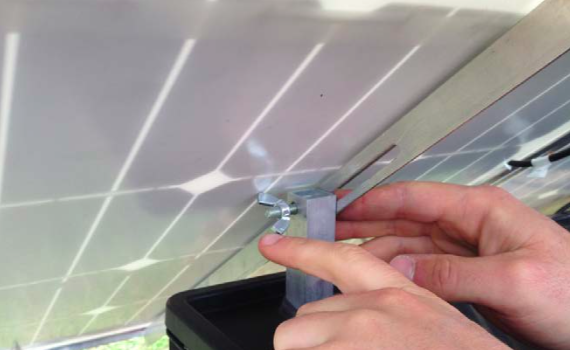
Close the solar module box, put the two long aluminium profiles in their holes. Open slightly the box and insert two screws to lock the profiles. Choose the same holes in the middle and be sure to do the same on both sides.
Étape 3 - Insert the aluminium profiles
Take the shorter aluminium profiles, insert them as shown on the pic and lock them.
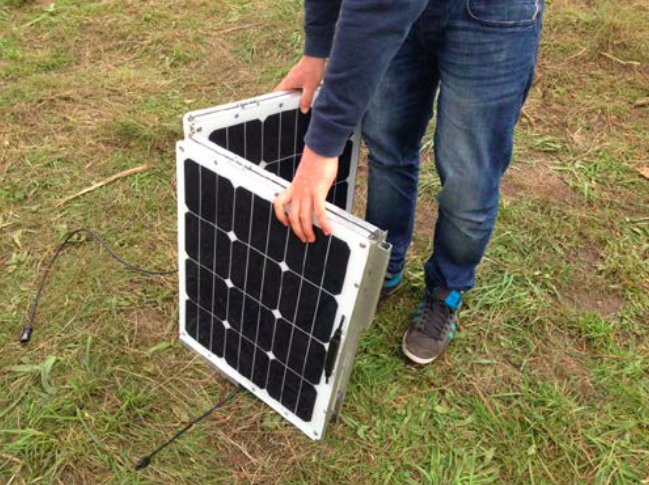
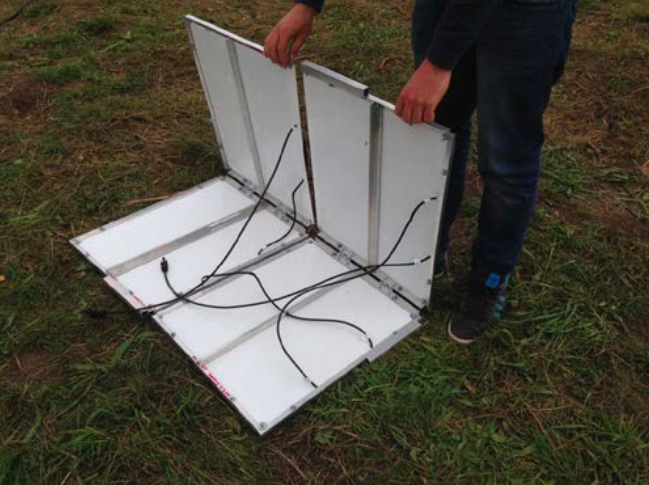
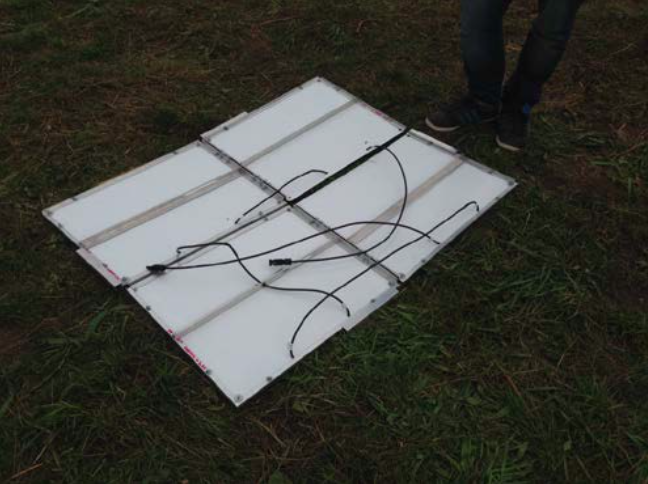
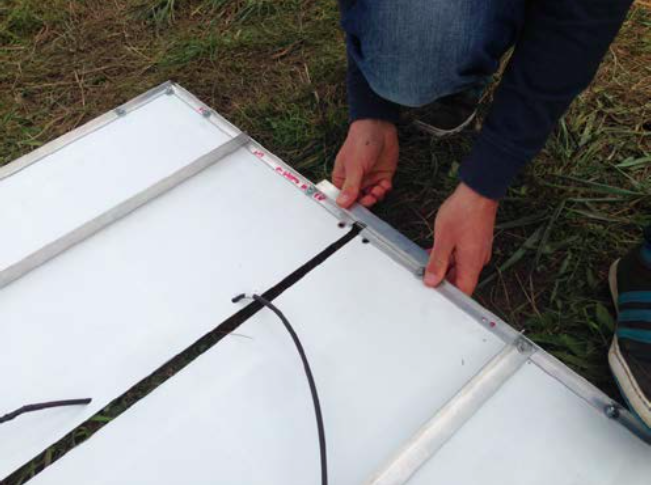
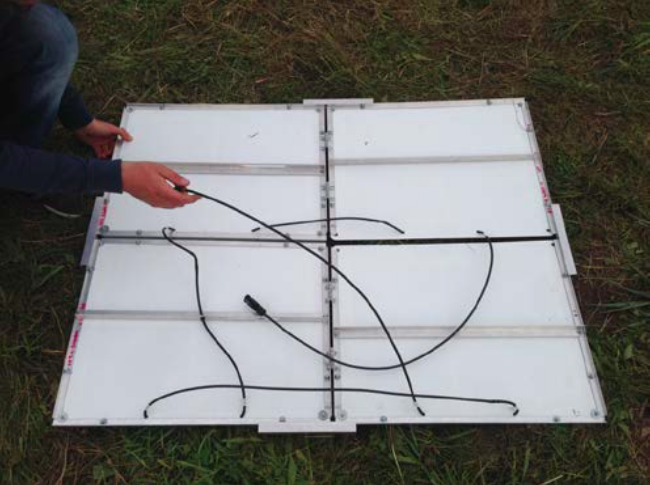
Étape 6 -
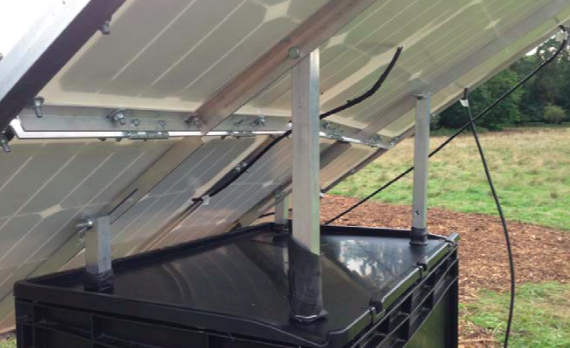
Take the upper part of the solar module and connect the whole solar module with the upper aluminium profile. Be sure that the solar module is on the left side of the aluminium profile. Connect also the lower part.
Étape 11 - Dismanteling
At Dismanteling, you MUST follow the right order of these steps, otherwise you could be hurt.
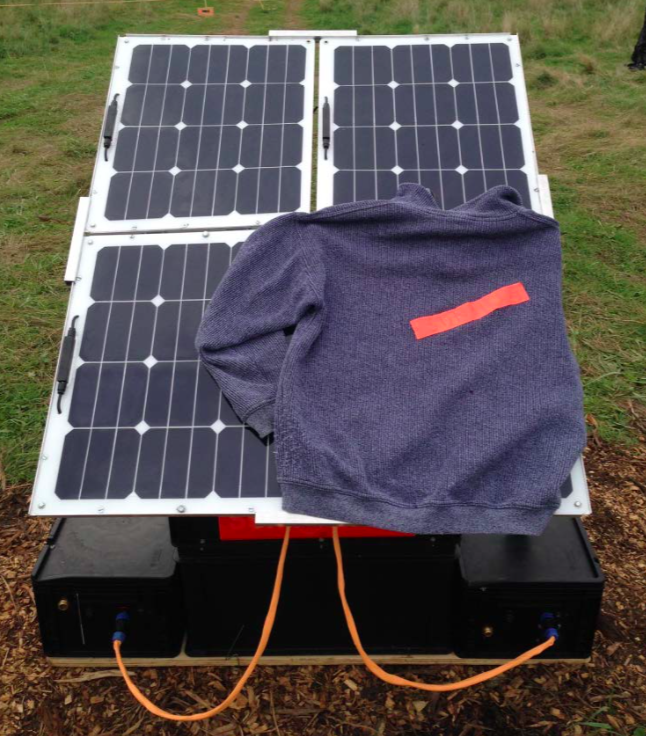
Étape 13 - Turn Solar Panels out of sun
Turn Solar Panels out of sun and cover at least one Solar-Panel (for exam- ple with Pullover)
Étape 17 - Switch on Socket box again
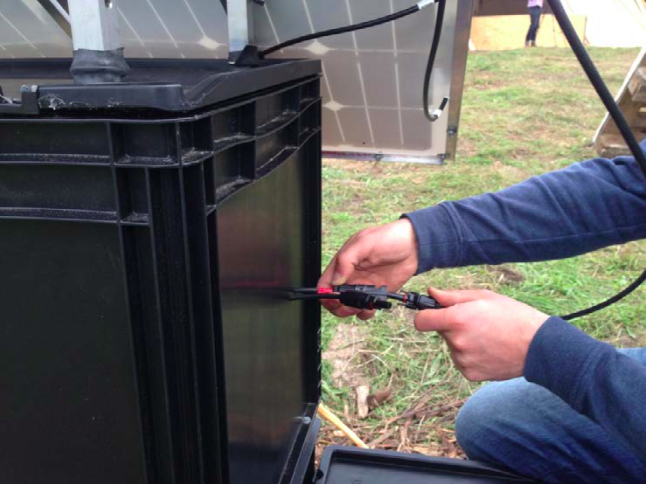
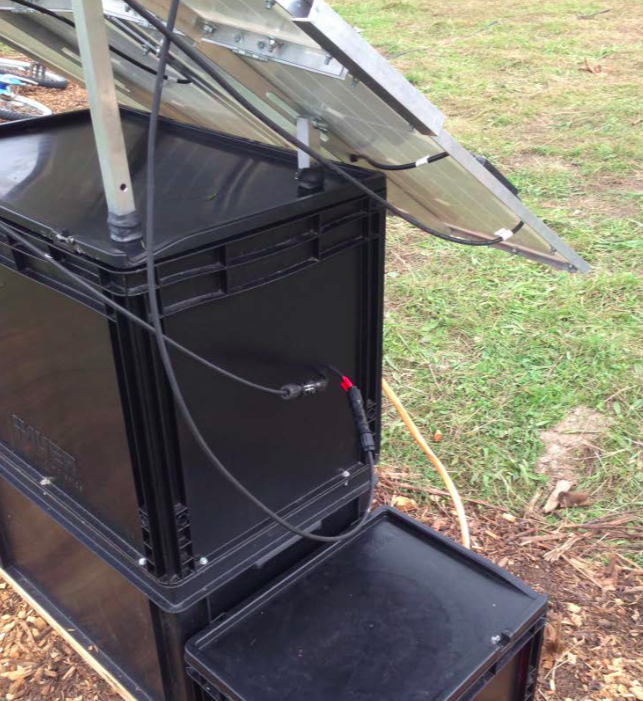
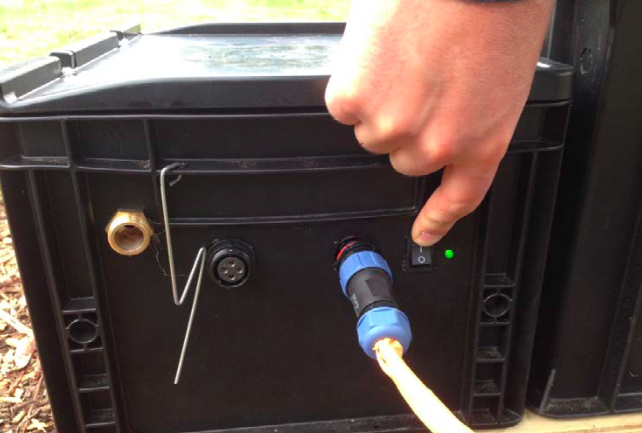
Switch on Socket box again until green light is off (to discharge local en- ergy storage), then switch OFF again!
YOU’RE DONE!
Published


 Français
 English
 Deutsch
 Español
 Italiano
 Português