

Une paire de couverts à salade en bois.
Difficulté
Difficile
Durée
4 heure(s)
Catégories
Alimentation & Agriculture, Mobilier
Coût
20 USD ($)
Sommaire
- 1 Introduction
- 2 Video d'introduction
- 3 Étape 1 - Découper le bois brut
- 4 Étape 2 - Réaliser l'encoche pour la barre d'aluminium
- 5 Étape 3 - Shape the wooden handles
- 6 Étape 4 - Drilled out the holes
- 7 Étape 5 - Add the aluminum
- 8 Étape 6 - Drive in the dowels
- 9 Étape 7 - Finish with oil
- 10 Étape 8 - Now, To Find Some Salad!
- 11 Notes et références
- 12 Commentaires
Introduction
J'ai fait cette paire de couverts à salade classique pour ma femme, mais nous voulions aussi une paire unique et un peu folle qui ressemble au Gant de l'Infini du dernier Avengers.
Matériaux
Un bloc de bois de tilleul
Une bar d'aluminum
Outils
Scie à ruban
Scie circulaire
Ponceuse à courroie
Perceuse
Chalumeau et gants
Étape 1 - Découper le bois brut
Pour les couverts classiques, j'ai utilisé un grand cube de bois de tilleul. Sur la face principale, dessiner schématiquement la forme de spatule, et la découper sur la scie à ruban. Tourner la pièce de façon à la découper ensuite dans la hauteur, et faire ainsi les deux parties identiques de la paire de couverts. Les deux parties sont encore épaisses et la forme pas finie : tout cela sera fait à ponceuses.

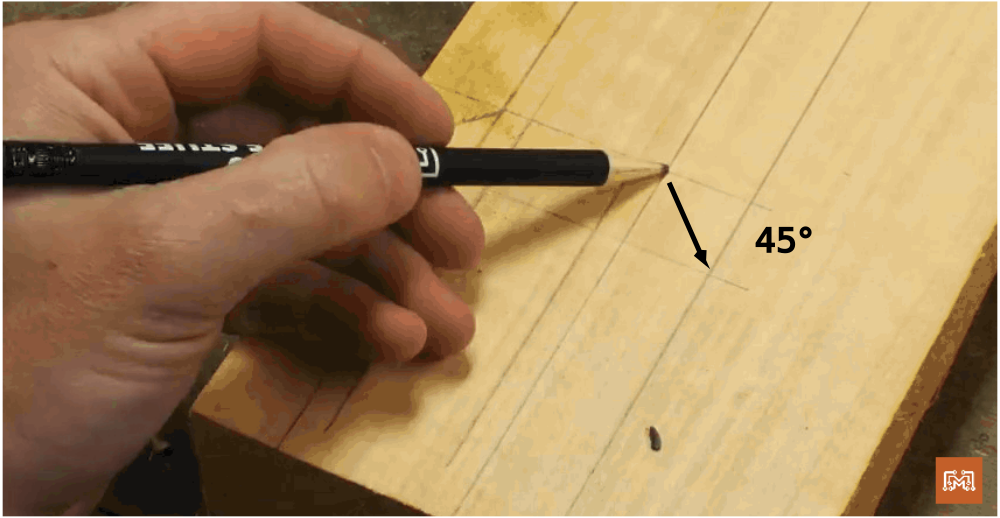


Étape 2 - Réaliser l'encoche pour la barre d'aluminium
Prenez garde lors de la découpe de l'encoche. Avec le recul, il peut être plus sûr de préparer rapidement un gabarit de sécurité. Passer le bout du manche des couverts sur la scie circulaire pour faire l'encoche qui accueillera la barre d'aluminium.


Étape 3 - Shape the wooden handles
This process involved a lot of patience and a lot of sanding. I flushed up the stem edges with the edges of the aluminum and then used the belt sander to finalize the handles’ overall shape. The two handles were pressed together and sanded simultaneously so that their profiles matched. The scoop was carved into the paddles by running them over the rounded end of the belt sander. To round over the crisp edges, I clamped the handles to my work bench and used some files to make some comfortable contours.


Étape 4 - Drilled out the holes
For the handles, I used some flat aluminum bar stock that I could bend over to act as a spring. Before I bent the metal, I set the flat bar into the slots on the wooden handles and drilled out the holes for the dowels that would connect the pieces with the drill press. I had some 3/8″ aluminum round bar and cut little dowel pieces on the miter saw. Two holes were drilled through both materials so later, I could permanently peg them together.

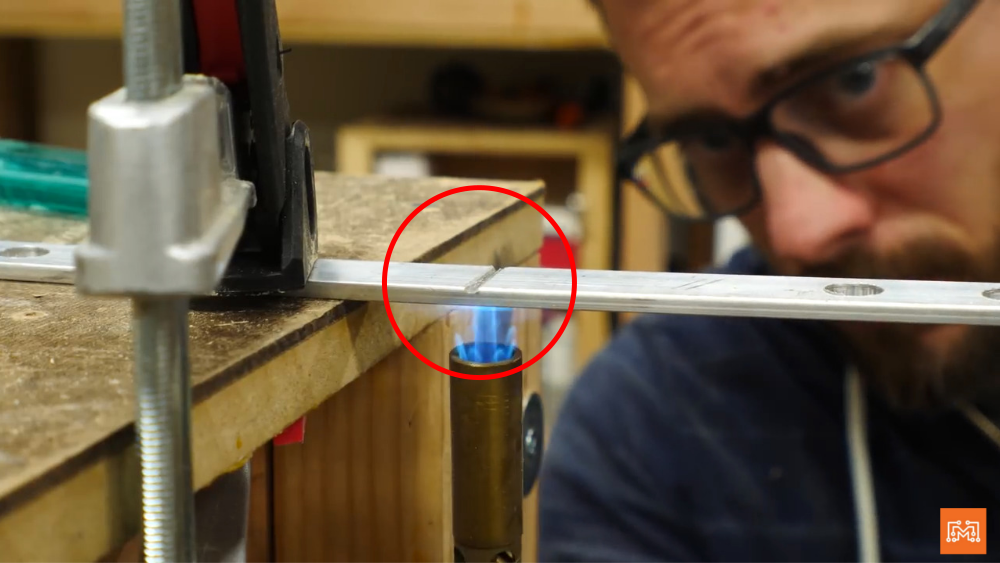
Étape 5 - Add the aluminum
To bend the flat bar into a spring, I first scored a groove down the center of the piece to act as a fold line. I carefully heated up the aluminum along this line and hammered the piece over into an acute angle. There was an obvious cut line left in the crease that I wanted to cover up. So, I used a torch and some aluminum rod to braise the crease for some extra strength and to give the handles a cleaner look.


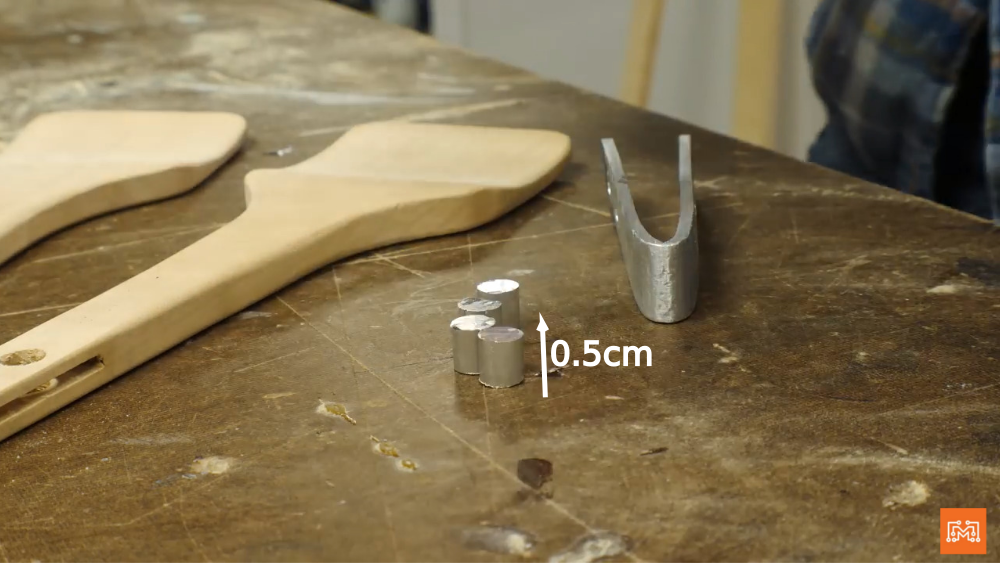
Étape 6 - Drive in the dowels
All that was left was to drive in the dowels (0,5cm high) through the attachment holes and secure them in place with some CA glue.

Étape 7 - Finish with oil
Because this piece will be touching food, I used a butcher block conditioner meant for cutting boards. This product is food safe and won’t leak any harmful chemicals into our healthy salads. I really like this oil because it’s quick and easy, leaves the wood a vibrant color, and I don’t have to worry about it coming in contact with the things we eat.

Étape 8 - Now, To Find Some Salad!
This project is done. I set out to make a functional set of salad tongs that we could use for dinner and I did that. But…a project this simple begs for a dash of nerd, so we went a little overboard and made something kind silly (awesome) using more outlandish tools.

Notes et références
Check out this tutoral and a many more on iliketomakestuff.com.
Yes
 Français
 English
 Deutsch
 Español
 Italiano
 Português