| Ligne 90 : | Ligne 90 : | ||
{{ {{tntn|Tuto Step}} | {{ {{tntn|Tuto Step}} | ||
|Step_Title=Préparation du code source. | |Step_Title=Préparation du code source. | ||
| − | |Step_Content= | + | |Step_Content=Il faut modifier le code en fonction de votre configuration et des informations MQTT : |
| + | |||
| + | -Le nom de votre réseau WIFI (SSID) | ||
| + | |||
| + | -Le mot de passe wifi | ||
| + | |||
| + | -MQTT USERNAME | ||
| + | |||
| + | -MQTT PASSWORD | ||
| + | |||
| + | -CLIENT ID | ||
| + | |||
| + | Voici le code source (remplacer les XXXX par vos informations) | ||
| + | |||
| + | // Make sure you install the ESP8266 Board Package via the Arduino IDE Board Manager and select the correct board and BAUD rate before compiling. | ||
| + | |||
| + | //#define CAYENNE_DEBUG | ||
| + | |||
| + | <nowiki>#</nowiki>define CAYENNE_PRINT Serial | ||
| + | |||
| + | <nowiki>#</nowiki>include <OneWire.h> | ||
| + | |||
| + | <nowiki>#</nowiki>include <DallasTemperature.h> | ||
| + | |||
| + | <nowiki>#</nowiki>include <CayenneMQTTESP8266.h> | ||
| + | |||
| + | <nowiki>#</nowiki>include <ESP8266WiFi.h> | ||
| + | |||
| + | <nowiki>#</nowiki>include <WiFiClient.h> | ||
| + | |||
| + | // Data wire is conntec to the Arduino digital pin 2 | ||
| + | |||
| + | <nowiki>#</nowiki>define ONE_WIRE_BUS 2 | ||
| + | |||
| + | // Setup a oneWire instance to communicate with any OneWire devices | ||
| + | |||
| + | OneWire oneWire(ONE_WIRE_BUS); | ||
| + | |||
| + | // Pass our oneWire reference to Dallas Temperature sensor | ||
| + | |||
| + | DallasTemperature DS18B20(&oneWire); | ||
| + | |||
| + | // WiFi network info. | ||
| + | |||
| + | char ssid[] = "XXXXXXXXXXXX"; | ||
| + | |||
| + | char wifiPassword[] = "XXXXXXXXXXXXXXXXX"; | ||
| + | |||
| + | // Cayenne authentication info. This should be obtained from the Cayenne Dashboard. | ||
| + | |||
| + | char username[] = "XXXXXXXXXXXXXXXXXXXXXXXXXXX"; | ||
| + | |||
| + | char password[] = "XXXXXXXXXXXXXXXXXXXXXXXXXXXX"; | ||
| + | |||
| + | char clientID[] = "XXXXXXXXXXXXXXXXXXXXXXXX"; | ||
| + | |||
| + | unsigned long lastMillis = 0; | ||
| + | |||
| + | void SetupDS18B20(){ | ||
| + | |||
| + | DS18B20.begin(); | ||
| + | |||
| + | } | ||
| + | |||
| + | void setup() { | ||
| + | |||
| + | Serial.begin(9600); | ||
| + | |||
| + | Cayenne.begin(username, password, clientID, ssid, wifiPassword); | ||
| + | |||
| + | } | ||
| + | |||
| + | void loop() { | ||
| + | |||
| + | Cayenne.loop(); | ||
| + | |||
| + | } | ||
| + | |||
| + | // Default function for sending sensor data at intervals to Cayenne. | ||
| + | |||
| + | CAYENNE_OUT_DEFAULT() | ||
| + | |||
| + | { | ||
| + | |||
| + | // Write data to Cayenne here. | ||
| + | |||
| + | DS18B20.requestTemperatures(); | ||
| + | |||
| + | //Read temperature from DS18b20 | ||
| + | |||
| + | float tempC = DS18B20.getTempCByIndex(0); | ||
| + | |||
| + | Cayenne.celsiusWrite(1, tempC); | ||
| + | |||
| + | //Switch wifi and wait | ||
| + | |||
| + | WiFi.disconnect(); | ||
| + | |||
| + | WiFi.forceSleepBegin(); | ||
| + | |||
| + | delay(60000); | ||
| + | |||
| + | //Switch wifi on again | ||
| + | |||
| + | WiFi.mode(WIFI_STA); | ||
| + | |||
| + | WiFi.begin(ssid, wifiPassword); | ||
| + | |||
| + | // Wait for connection | ||
| + | |||
| + | while (WiFi.status() != WL_CONNECTED) { | ||
| + | |||
| + | delay(200); | ||
| + | |||
| + | } | ||
| + | |||
| + | } | ||
| + | |||
| + | // Default function for processing actuator commands from the Cayenne Dashboard. | ||
| + | |||
| + | // You can also use functions for specific channels, e.g CAYENNE_IN(1) for channel 1 commands. | ||
| + | |||
| + | CAYENNE_IN_DEFAULT() | ||
| + | |||
| + | { | ||
| + | |||
| + | //CAYENNE_LOG("Channel %u, value %s", request.channel, getValue.asString()); | ||
| + | |||
| + | //Process message here. If there is an error set an error message using getValue.setError(), e.g getValue.setError("Error message"); | ||
| + | |||
| + | } | ||
|Step_Picture_00=Mise_en_service_d'un_thermomètre_connecté_source.PNG | |Step_Picture_00=Mise_en_service_d'un_thermomètre_connecté_source.PNG | ||
| + | }} | ||
| + | {{ {{tntn|Tuto Step}} | ||
| + | |Step_Title=Téléversement du code sur ESP01 | ||
| + | |Step_Content=Téléversement du code sur ESP01 | ||
| + | |||
| + | Connecter l'ESP01 sur l'adaptateur USB | ||
| + | |||
| + | Brancher l'adaptateur USB au pc, Vérifier que le port COM soit bien présent dans le panneau de configuration. | ||
| + | |||
| + | Téléverser le code sur l'esp01 | ||
}} | }} | ||
{{ {{tntn|Notes}} | {{ {{tntn|Notes}} | ||
Version du 26 novembre 2018 à 23:41
Sommaire
- 1 Étape 1 - Préparation de l'alimentation
- 2 Étape 2 - assemblage du module
- 3 Étape 3 - créer un compte sur https://cayenne.mydevices.com
- 4 Étape 4 - Préparation de l'arduino
- 5 Étape 5 - création d'un "device" sur le site de https://cayenne.mydevices.com
- 6 Étape 6 - Préparation du code source.
- 7 Étape 7 - Téléversement du code sur ESP01
- 8 Commentaires
Étape 1 - Préparation de l'alimentation
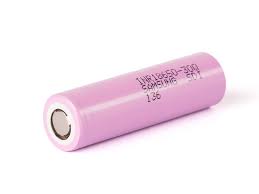
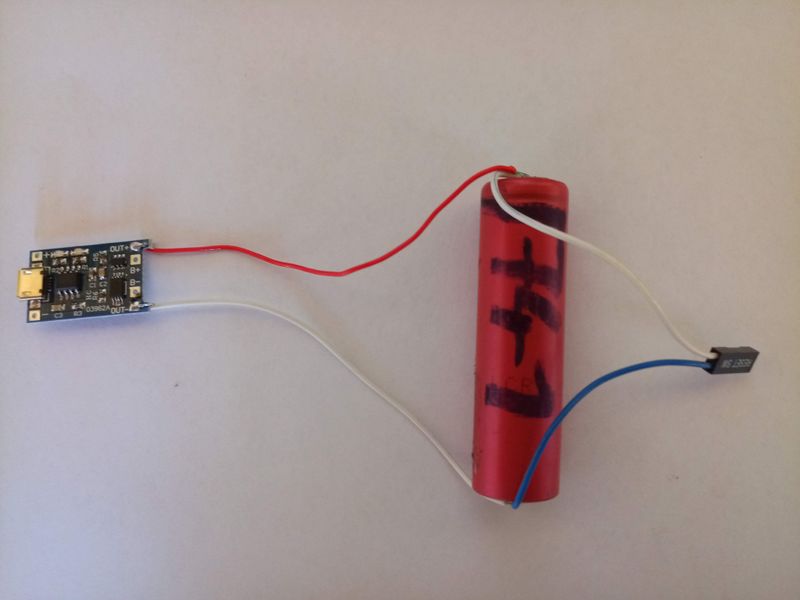
Souder les câbles aux bornes de la cellules et du régulateur de charge TP4056 (bien vérifier la polarité)
Souder 2 câbles entre la cellule et le SHIELD.(bien vérifier la polarité)
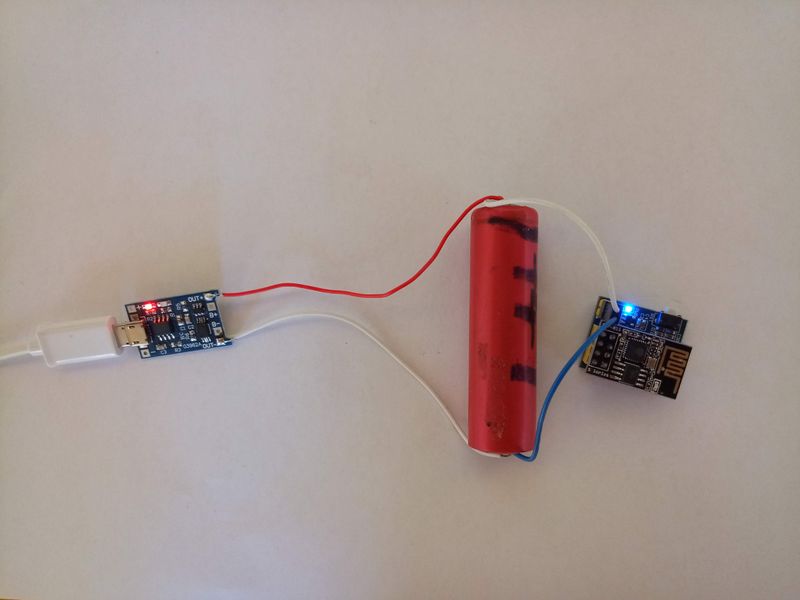
Étape 2 - assemblage du module
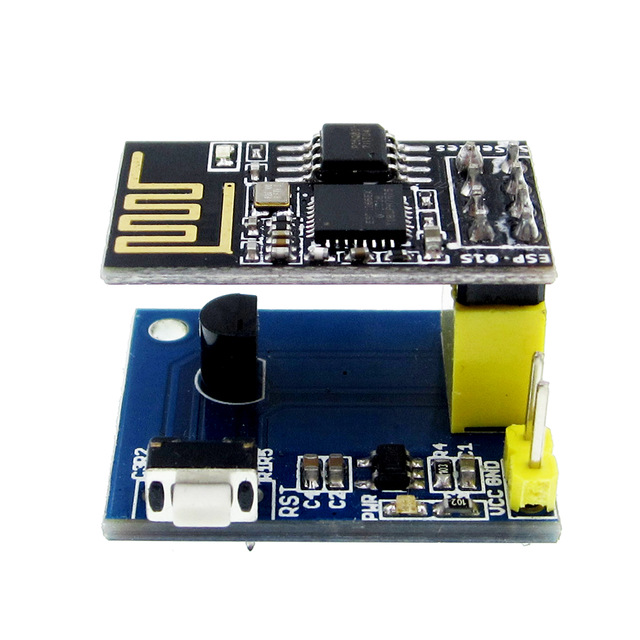
-connecter l'ESP01 sur le shield
-relier l'alimentation de la cellule au SHIELD
Étape 3 - créer un compte sur https://cayenne.mydevices.com
créer un compte sur https://cayenne.mydevices.com, la consultation des information de température se fera sur l'interface web du site
Étape 4 - Préparation de l'arduino
Télécharger la dernière version de l'arduino
https://mydevices.com/link/arduino-ide
Installer la librairie Cayenne MQTT
https://mydevices.com/link/esp8266-github
Installation du mode de compatibilité ESP8266 pour l'arduino
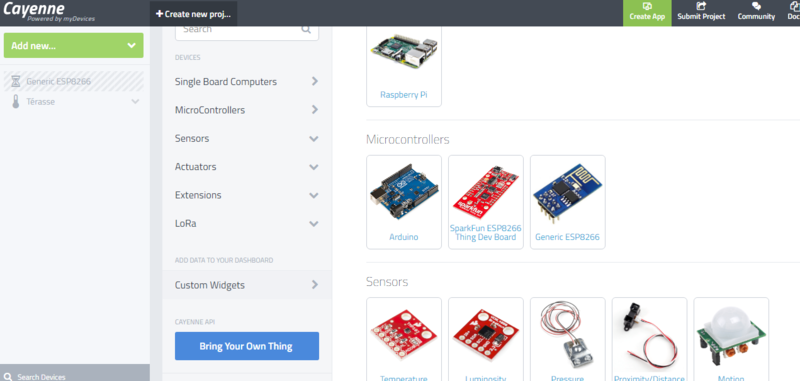
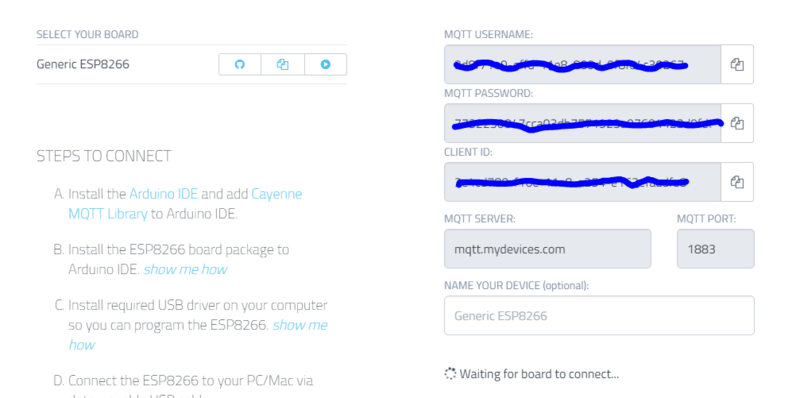
Étape 5 - création d'un "device" sur le site de https://cayenne.mydevices.com
Se connecter au site
Créer un nouveau "device" en haut à gauche de la page, choisir l'ESP8266
Il faut maintenant récupérer les différentes informations d'identification:
MQTT USERNAME
MQTT PASSWORD
CLIENT ID
Les informations sont à utiliser pour l'adaptation du code source.
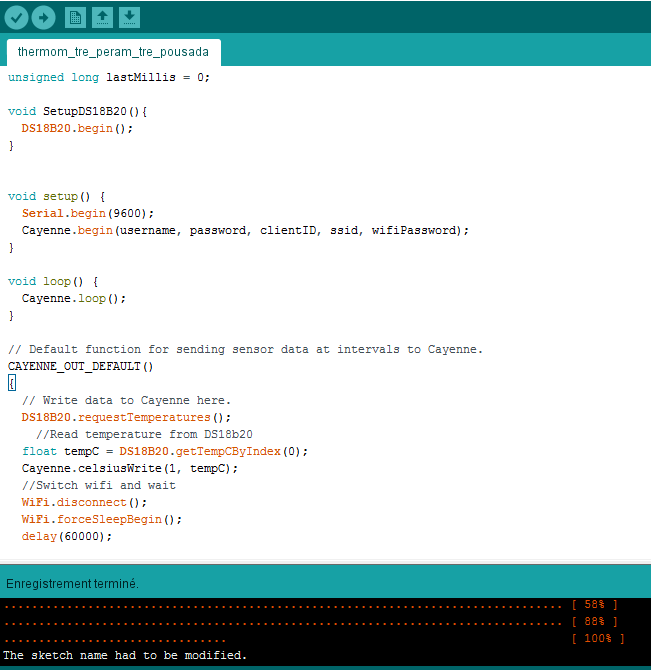
Étape 6 - Préparation du code source.
Il faut modifier le code en fonction de votre configuration et des informations MQTT :
-Le nom de votre réseau WIFI (SSID)
-Le mot de passe wifi
-MQTT USERNAME
-MQTT PASSWORD
-CLIENT ID
Voici le code source (remplacer les XXXX par vos informations)
// Make sure you install the ESP8266 Board Package via the Arduino IDE Board Manager and select the correct board and BAUD rate before compiling.
//#define CAYENNE_DEBUG
#define CAYENNE_PRINT Serial
#include <OneWire.h>
#include <DallasTemperature.h>
#include <CayenneMQTTESP8266.h>
#include <ESP8266WiFi.h>
#include <WiFiClient.h>
// Data wire is conntec to the Arduino digital pin 2
#define ONE_WIRE_BUS 2
// Setup a oneWire instance to communicate with any OneWire devices
OneWire oneWire(ONE_WIRE_BUS);
// Pass our oneWire reference to Dallas Temperature sensor
DallasTemperature DS18B20(&oneWire);
// WiFi network info.
char ssid[] = "XXXXXXXXXXXX";
char wifiPassword[] = "XXXXXXXXXXXXXXXXX";
// Cayenne authentication info. This should be obtained from the Cayenne Dashboard.
char username[] = "XXXXXXXXXXXXXXXXXXXXXXXXXXX";
char password[] = "XXXXXXXXXXXXXXXXXXXXXXXXXXXX";
char clientID[] = "XXXXXXXXXXXXXXXXXXXXXXXX";
unsigned long lastMillis = 0;
void SetupDS18B20(){
DS18B20.begin();
}
void setup() {
Serial.begin(9600);
Cayenne.begin(username, password, clientID, ssid, wifiPassword);
}
void loop() {
Cayenne.loop();
}
// Default function for sending sensor data at intervals to Cayenne.
CAYENNE_OUT_DEFAULT()
{
// Write data to Cayenne here.
DS18B20.requestTemperatures();
//Read temperature from DS18b20
float tempC = DS18B20.getTempCByIndex(0);
Cayenne.celsiusWrite(1, tempC);
//Switch wifi and wait
WiFi.disconnect();
WiFi.forceSleepBegin();
delay(60000);
//Switch wifi on again
WiFi.mode(WIFI_STA);
WiFi.begin(ssid, wifiPassword);
// Wait for connection
while (WiFi.status() != WL_CONNECTED) {
delay(200);
}
}
// Default function for processing actuator commands from the Cayenne Dashboard.
// You can also use functions for specific channels, e.g CAYENNE_IN(1) for channel 1 commands.
CAYENNE_IN_DEFAULT()
{
//CAYENNE_LOG("Channel %u, value %s", request.channel, getValue.asString());
//Process message here. If there is an error set an error message using getValue.setError(), e.g getValue.setError("Error message");
}
Étape 7 - Téléversement du code sur ESP01
Téléversement du code sur ESP01
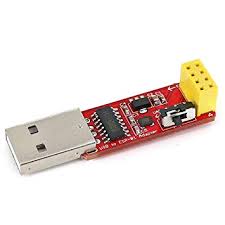
Connecter l'ESP01 sur l'adaptateur USB
Brancher l'adaptateur USB au pc, Vérifier que le port COM soit bien présent dans le panneau de configuration.
Téléverser le code sur l'esp01
Draft


 Français
 English
 Deutsch
 Español
 Italiano
 Português