| Ligne 1 : | Ligne 1 : | ||
{{ {{tntn|Tuto Details}} | {{ {{tntn|Tuto Details}} | ||
| − | |||
| − | |||
| − | |||
|Main_Picture=Living_Hinge_-_Charnières_vivantes_IMG_20190615_095150_resultat.jpg | |Main_Picture=Living_Hinge_-_Charnières_vivantes_IMG_20190615_095150_resultat.jpg | ||
|Licences=Attribution (CC BY) | |Licences=Attribution (CC BY) | ||
| − | |Description=Comment créer des charnières vivantes ? | + | |Description=<translate>Comment créer des charnières vivantes ?</translate> |
|Area=Machines and Tools | |Area=Machines and Tools | ||
|Type=Creation | |Type=Creation | ||
| Ligne 14 : | Ligne 11 : | ||
|Currency=EUR (€) | |Currency=EUR (€) | ||
|Tags=living, hinge, charnière, vivante, lasercut | |Tags=living, hinge, charnière, vivante, lasercut | ||
| + | |SourceLanguage=none | ||
| + | |Language=fr | ||
| + | |IsTranslation=0 | ||
}} | }} | ||
{{ {{tntn|Introduction}} | {{ {{tntn|Introduction}} | ||
| − | |Introduction=Plier le bois, le plexi, c'est possible avec cette technique. | + | |Introduction=<translate>Plier le bois, le plexi, c'est possible avec cette technique.</translate> |
}} | }} | ||
{{ {{tntn|Materials}} | {{ {{tntn|Materials}} | ||
| − | |Material= | + | |Material=<translate></translate> |
| − | |Tools= | + | |Tools=<translate></translate> |
|Tuto_Attachments={{ {{tntn|Tuto Attachments}} | |Tuto_Attachments={{ {{tntn|Tuto Attachments}} | ||
|Attachment=Parametric Kerf | |Attachment=Parametric Kerf | ||
| Ligne 34 : | Ligne 34 : | ||
{{ {{tntn|Separator}}}} | {{ {{tntn|Separator}}}} | ||
{{ {{tntn|Tuto Step}} | {{ {{tntn|Tuto Step}} | ||
| − | |Step_Title=Patterns | + | |Step_Title=<translate>Patterns</translate> |
| − | |Step_Content=En prenant le fichier pattern, vous pourrez reproduire ces charnières. Vous prenez la forme que vous dupliquez/clonez et c'est parti !!! | + | |Step_Content=<translate>En prenant le fichier pattern, vous pourrez reproduire ces charnières. Vous prenez la forme que vous dupliquez/clonez et c'est parti !!!</translate> |
|Step_Picture_00=Living_Hinge_-_Charnières_vivantes_IMG_20190615_095238_resultat.jpg | |Step_Picture_00=Living_Hinge_-_Charnières_vivantes_IMG_20190615_095238_resultat.jpg | ||
|Step_Picture_01=Living_Hinge_-_Charnières_vivantes_IMG_20190615_095253_resultat.jpg | |Step_Picture_01=Living_Hinge_-_Charnières_vivantes_IMG_20190615_095253_resultat.jpg | ||
}} | }} | ||
{{ {{tntn|Tuto Step}} | {{ {{tntn|Tuto Step}} | ||
| − | |Step_Title=Parametric Kerf | + | |Step_Title=<translate>Parametric Kerf</translate> |
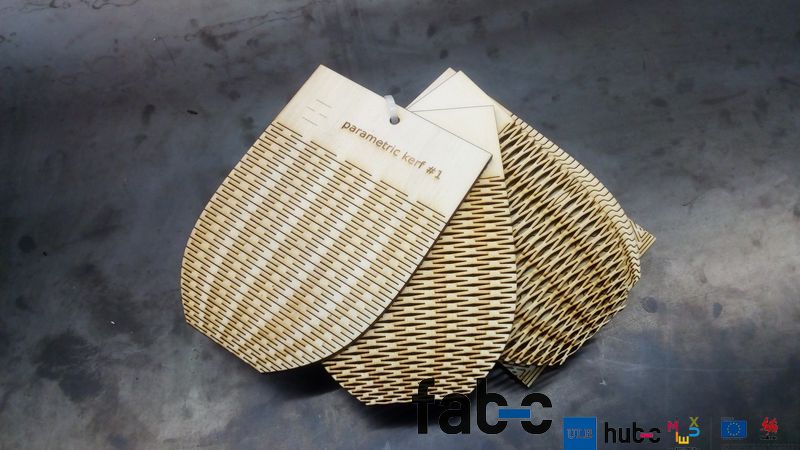
| − | |Step_Content=Ici, c'est la même chose qu'à l'étape 1 mais avec d'autres formes | + | |Step_Content=<translate>Ici, c'est la même chose qu'à l'étape 1 mais avec d'autres formes</translate> |
|Step_Picture_00=Living_Hinge_-_Charnières_vivantes_IMG_20190615_095223_resultat.jpg | |Step_Picture_00=Living_Hinge_-_Charnières_vivantes_IMG_20190615_095223_resultat.jpg | ||
|Step_Picture_01=Living_Hinge_-_Charnières_vivantes_IMG_20190615_095231_resultat.jpg | |Step_Picture_01=Living_Hinge_-_Charnières_vivantes_IMG_20190615_095231_resultat.jpg | ||
}} | }} | ||
{{ {{tntn|Tuto Step}} | {{ {{tntn|Tuto Step}} | ||
| − | |Step_Title=Straight | + | |Step_Title=<translate>Straight</translate> |
| − | |Step_Content=Attention, ici vous aurez besoin d'installer dans votre inkscape l'extenion : Inkscape_LivingHinge . Ensuite, dans extensions >> rendu >> living hinge, vous allez configurer les valeurs. | + | |Step_Content=<translate>Attention, ici vous aurez besoin d'installer dans votre inkscape l'extenion : Inkscape_LivingHinge . Ensuite, dans extensions >> rendu >> living hinge, vous allez configurer les valeurs. |
| − | <br /> | + | <br /></translate> |
|Step_Picture_00=Living_Hinge_-_Charnières_vivantes_IMG_20190615_095150_resultat.jpg | |Step_Picture_00=Living_Hinge_-_Charnières_vivantes_IMG_20190615_095150_resultat.jpg | ||
|Step_Picture_01=Living_Hinge_-_Charnières_vivantes_IMG_20190615_095217_resultat.jpg | |Step_Picture_01=Living_Hinge_-_Charnières_vivantes_IMG_20190615_095217_resultat.jpg | ||
| Ligne 56 : | Ligne 56 : | ||
}} | }} | ||
{{ {{tntn|Notes}} | {{ {{tntn|Notes}} | ||
| − | |Notes= | + | |Notes=<translate></translate> |
}} | }} | ||
{{ {{tntn|Tuto Status}} | {{ {{tntn|Tuto Status}} | ||
| − | |Complete= | + | |Complete=Published |
}} | }} | ||
Version du 17 juin 2019 à 14:07
Comment créer des charnières vivantes ?
Difficulté
Moyen
Durée
30 minute(s)
Catégories
Machines & Outils
Coût
0 EUR (€)
Introduction
Plier le bois, le plexi, c'est possible avec cette technique.
Matériaux
Outils
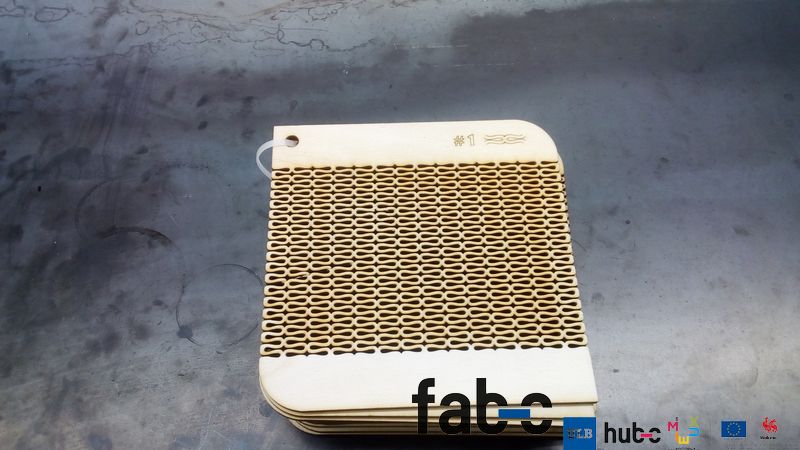
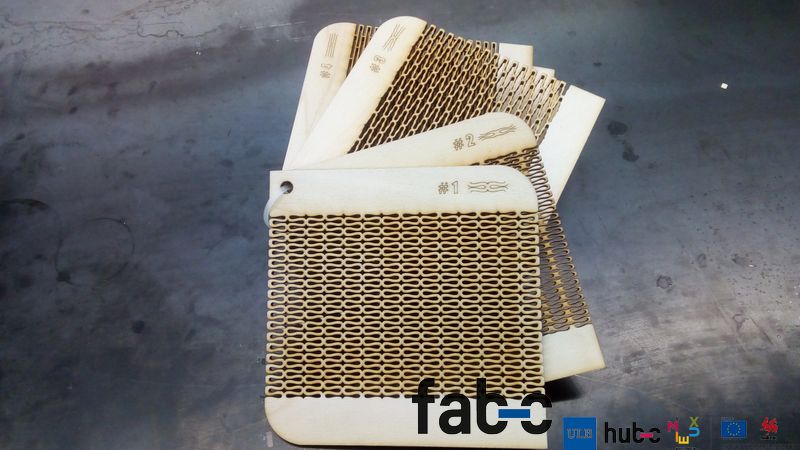
Étape 1 - Patterns
En prenant le fichier pattern, vous pourrez reproduire ces charnières. Vous prenez la forme que vous dupliquez/clonez et c'est parti !!!
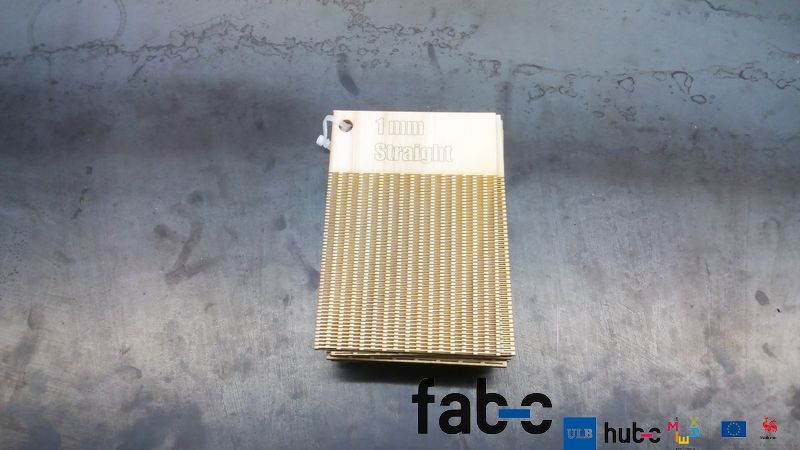
Étape 3 - Straight
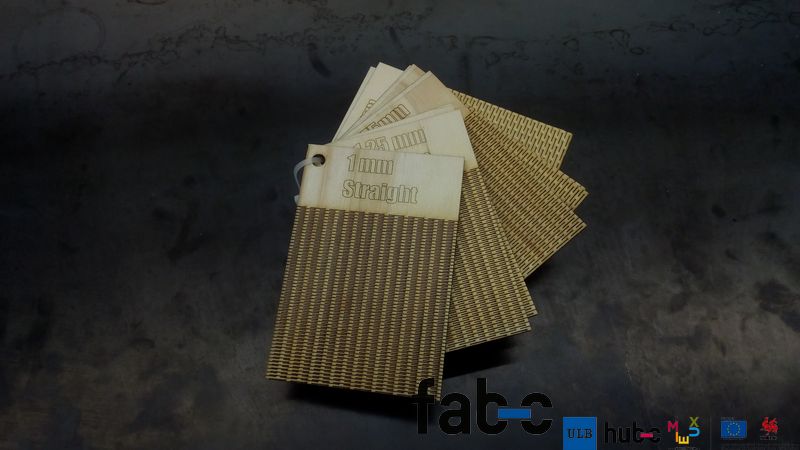
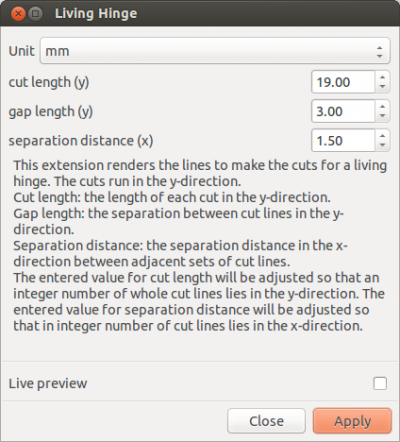
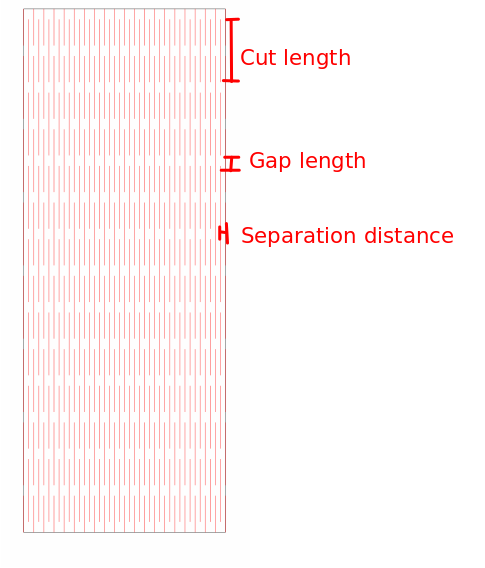
Attention, ici vous aurez besoin d'installer dans votre inkscape l'extenion : Inkscape_LivingHinge . Ensuite, dans extensions >> rendu >> living hinge, vous allez configurer les valeurs.
Published
 Français
 English
 Deutsch
 Español
 Italiano
 Português