(Imported page from en.wikifab.org) |
(convert properties for internationnalized Wikifab) |
||
| Ligne 1 : | Ligne 1 : | ||
| − | {{Tuto Details | + | {{ {{tntn|Tuto Details}} |
|SourceLanguage=en | |SourceLanguage=en | ||
|Language=en | |Language=en | ||
| Ligne 14 : | Ligne 14 : | ||
|Main_Picture=Entry way catch all table cabinet Final.jpg | |Main_Picture=Entry way catch all table cabinet Final.jpg | ||
}} | }} | ||
| − | {{Introduction}} | + | {{ {{tntn|Introduction}}|}} |
| − | {{Materials}} | + | {{ {{tntn|Materials}}|}} |
{{Separator}} | {{Separator}} | ||
| − | {{Tuto Step | + | {{ {{tntn|Tuto Step}} |
|Step_Content=I started with a full sheet of Maple plywood. I broke it down into manageable chunks using my track saw. | |Step_Content=I started with a full sheet of Maple plywood. I broke it down into manageable chunks using my track saw. | ||
|Step_Picture_00=Entry way catch all table cabinet 01.jpg | |Step_Picture_00=Entry way catch all table cabinet 01.jpg | ||
}} | }} | ||
| − | {{Tuto Step | + | {{ {{tntn|Tuto Step}} |
|Step_Title=Cut to the rough dimensions | |Step_Title=Cut to the rough dimensions | ||
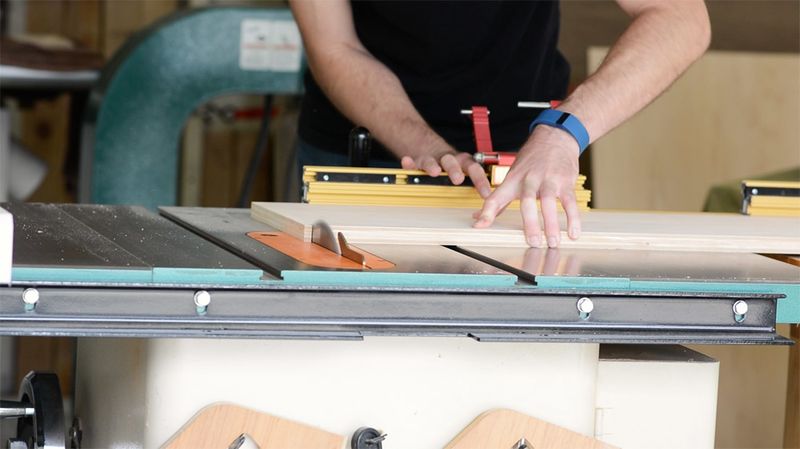
|Step_Content=Then I cut to the rough dimensions on my table saw. | |Step_Content=Then I cut to the rough dimensions on my table saw. | ||
|Step_Picture_00=Entry way catch all table cabinet 02.jpg | |Step_Picture_00=Entry way catch all table cabinet 02.jpg | ||
}} | }} | ||
| − | {{Tuto Step | + | {{ {{tntn|Tuto Step}} |
|Step_Title=Cover up the plywood lines | |Step_Title=Cover up the plywood lines | ||
|Step_Content=To cover up the plywood lines, I ripped some thin strips of maple hardwood. Here I'm applying the glue to adhere the strips. | |Step_Content=To cover up the plywood lines, I ripped some thin strips of maple hardwood. Here I'm applying the glue to adhere the strips. | ||
|Step_Picture_00=Entry way catch all table cabinet 03.jpg | |Step_Picture_00=Entry way catch all table cabinet 03.jpg | ||
}} | }} | ||
| − | {{Tuto Step | + | {{ {{tntn|Tuto Step}} |
|Step_Title=Attaching the strips | |Step_Title=Attaching the strips | ||
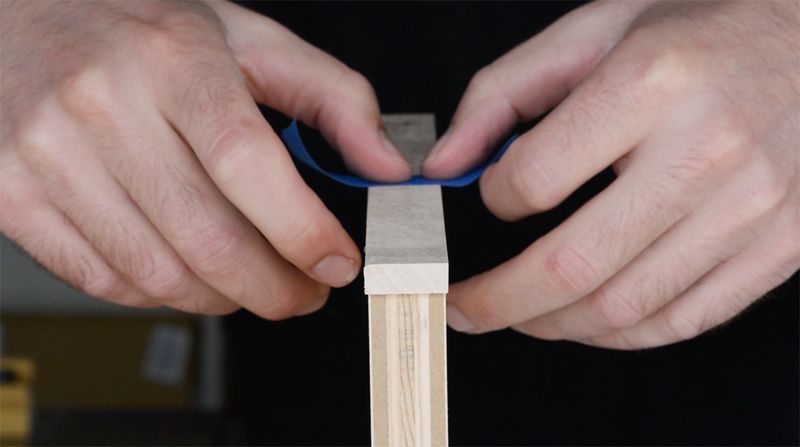
|Step_Content=...and now actually attaching the strips. I "clamp" them on using some painters tape. | |Step_Content=...and now actually attaching the strips. I "clamp" them on using some painters tape. | ||
|Step_Picture_00=Entry way catch all table cabinet 04.jpg | |Step_Picture_00=Entry way catch all table cabinet 04.jpg | ||
}} | }} | ||
| − | {{Tuto Step | + | {{ {{tntn|Tuto Step}} |
|Step_Title=Trim the strips using a router. | |Step_Title=Trim the strips using a router. | ||
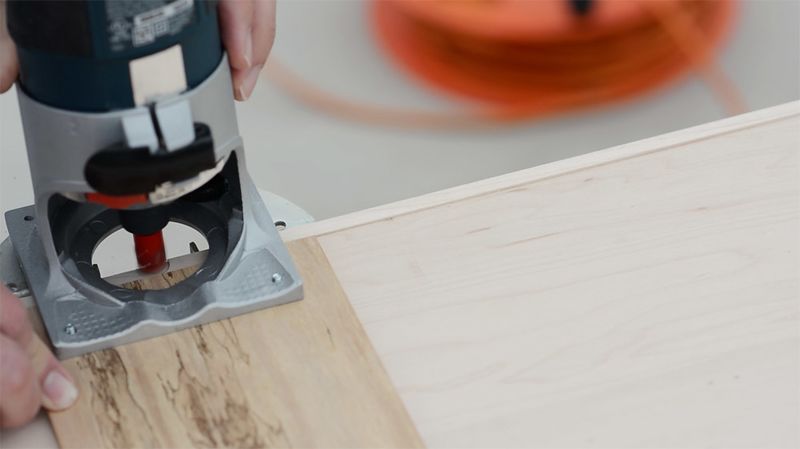
|Step_Content=I live the strips a little wider than 3/4 of an inch so that they are slightly proud of the plywood. Then I trim them flush using a router. | |Step_Content=I live the strips a little wider than 3/4 of an inch so that they are slightly proud of the plywood. Then I trim them flush using a router. | ||
|Step_Picture_00=Entry way catch all table cabinet 05.jpg | |Step_Picture_00=Entry way catch all table cabinet 05.jpg | ||
}} | }} | ||
| − | {{Tuto Step | + | {{ {{tntn|Tuto Step}} |
|Step_Title=Find tune everything | |Step_Title=Find tune everything | ||
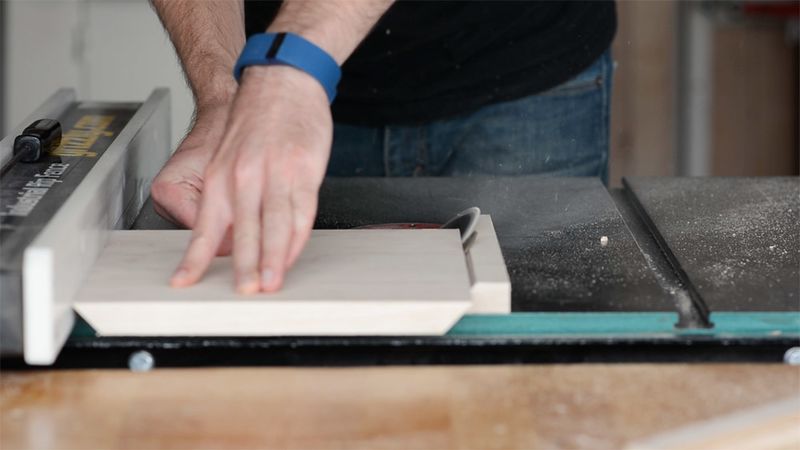
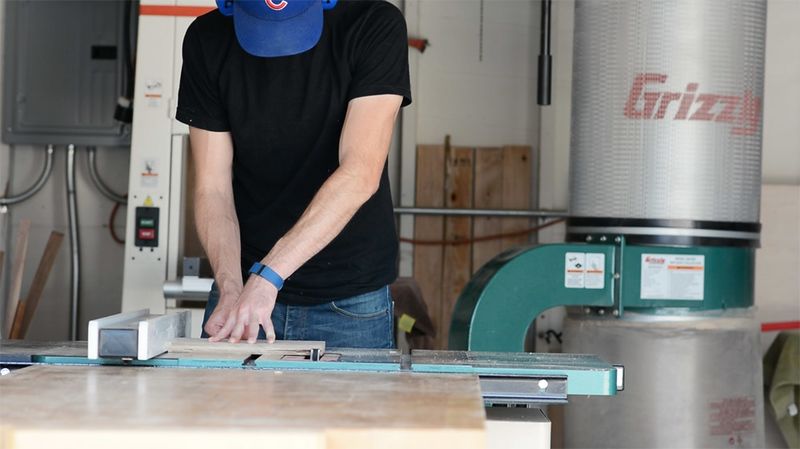
|Step_Content=Now that the rough pieces are created, I find tune everything to finished dimensions and cut in some joinery. Here I'm making miters on the edges of all of the case pieces. | |Step_Content=Now that the rough pieces are created, I find tune everything to finished dimensions and cut in some joinery. Here I'm making miters on the edges of all of the case pieces. | ||
| Ligne 49 : | Ligne 49 : | ||
|Step_Picture_01=Entry way catch all table cabinet 07.jpg | |Step_Picture_01=Entry way catch all table cabinet 07.jpg | ||
}} | }} | ||
| − | {{Tuto Step | + | {{ {{tntn|Tuto Step}} |
|Step_Title=Cut a few grooves | |Step_Title=Cut a few grooves | ||
|Step_Content=Then I cut a few grooves into the front of all of the pieces to hold some sliding doors. | |Step_Content=Then I cut a few grooves into the front of all of the pieces to hold some sliding doors. | ||
|Step_Picture_00=Entry way catch all table cabinet 08.jpg | |Step_Picture_00=Entry way catch all table cabinet 08.jpg | ||
}} | }} | ||
| − | {{Tuto Step | + | {{ {{tntn|Tuto Step}} |
|Step_Title=Cut in a dado to the top and bottom piece | |Step_Title=Cut in a dado to the top and bottom piece | ||
|Step_Content=Finally I cut in a dado to the top and bottom piece to eventually insert a vertical partition. I use a router and then square up the cut using a chisel. | |Step_Content=Finally I cut in a dado to the top and bottom piece to eventually insert a vertical partition. I use a router and then square up the cut using a chisel. | ||
|Step_Picture_00=Entry way catch all table cabinet 09.jpg | |Step_Picture_00=Entry way catch all table cabinet 09.jpg | ||
}} | }} | ||
| − | {{Tuto Step | + | {{ {{tntn|Tuto Step}} |
|Step_Title=Case assembly | |Step_Title=Case assembly | ||
|Step_Content=With every thing made, i assembled the case. I used a couple dominoes to make assembly easier and provide a bit of reinforcement. | |Step_Content=With every thing made, i assembled the case. I used a couple dominoes to make assembly easier and provide a bit of reinforcement. | ||
|Step_Picture_00=Entry way catch all table cabinet 10.jpg | |Step_Picture_00=Entry way catch all table cabinet 10.jpg | ||
}} | }} | ||
| − | {{Tuto Step | + | {{ {{tntn|Tuto Step}} |
|Step_Title=Make the doors | |Step_Title=Make the doors | ||
|Step_Content=Here I'm making the doors fro the case out of 1/4" maple plywood. They don't have any handles, just a little negative space for a finger to grab. | |Step_Content=Here I'm making the doors fro the case out of 1/4" maple plywood. They don't have any handles, just a little negative space for a finger to grab. | ||
|Step_Picture_00=Entry way catch all table cabinet 11.jpg | |Step_Picture_00=Entry way catch all table cabinet 11.jpg | ||
}} | }} | ||
| − | {{Tuto Step | + | {{ {{tntn|Tuto Step}} |
|Step_Title=Frame | |Step_Title=Frame | ||
|Step_Content=With the cabinet out of the way I turned my attention to the frame. First I milled and cut out blanks for all of the pieces. These are made from Walnut hardwood. | |Step_Content=With the cabinet out of the way I turned my attention to the frame. First I milled and cut out blanks for all of the pieces. These are made from Walnut hardwood. | ||
|Step_Picture_00=Entry way catch all table cabinet 12.jpg | |Step_Picture_00=Entry way catch all table cabinet 12.jpg | ||
}} | }} | ||
| − | {{Tuto Step | + | {{ {{tntn|Tuto Step}} |
|Step_Title=Cutting a long taper on the bandsaw. | |Step_Title=Cutting a long taper on the bandsaw. | ||
|Step_Content=You can see I'm a big proponent of marking the hell out of things. Trying to avoid mistakes...thought I still make them. | |Step_Content=You can see I'm a big proponent of marking the hell out of things. Trying to avoid mistakes...thought I still make them. | ||
| Ligne 80 : | Ligne 80 : | ||
|Step_Picture_01=Entry way catch all table cabinet 14.jpg | |Step_Picture_01=Entry way catch all table cabinet 14.jpg | ||
}} | }} | ||
| − | {{Tuto Step | + | {{ {{tntn|Tuto Step}} |
|Step_Title=Joinery | |Step_Title=Joinery | ||
|Step_Content=Then with all of the pieces to their proper dimensions I cut in some joinery, and some dados to hold the shelves. | |Step_Content=Then with all of the pieces to their proper dimensions I cut in some joinery, and some dados to hold the shelves. | ||
|Step_Picture_00=Entry way catch all table cabinet 15.jpg | |Step_Picture_00=Entry way catch all table cabinet 15.jpg | ||
}} | }} | ||
| − | {{Tuto Step | + | {{ {{tntn|Tuto Step}} |
|Step_Title=Glue and assemble everything | |Step_Title=Glue and assemble everything | ||
|Step_Content=Then I glued and assembled everything. | |Step_Content=Then I glued and assembled everything. | ||
| Ligne 95 : | Ligne 95 : | ||
|Step_Picture_03=Entry way catch all table cabinet 19.jpg | |Step_Picture_03=Entry way catch all table cabinet 19.jpg | ||
}} | }} | ||
| − | {{Tuto Step | + | {{ {{tntn|Tuto Step}} |
|Step_Title=Sand everything | |Step_Title=Sand everything | ||
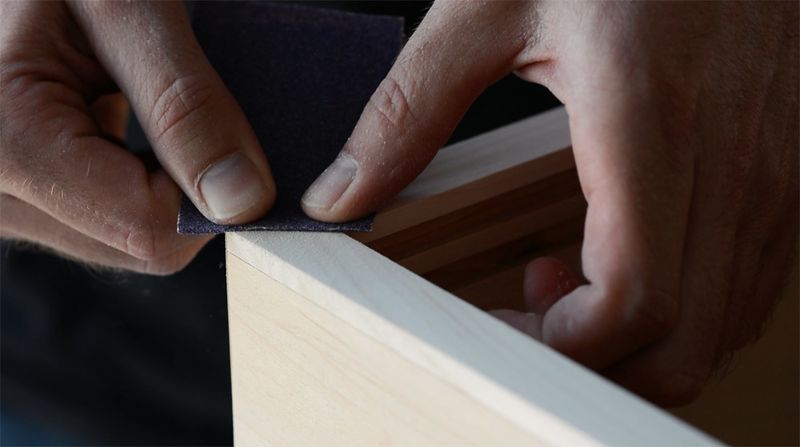
|Step_Content=Then I sanded everything. | |Step_Content=Then I sanded everything. | ||
|Step_Picture_00=Entry way catch all table cabinet 20.jpg | |Step_Picture_00=Entry way catch all table cabinet 20.jpg | ||
}} | }} | ||
| − | {{Tuto Step | + | {{ {{tntn|Tuto Step}} |
|Step_Title=Finished | |Step_Title=Finished | ||
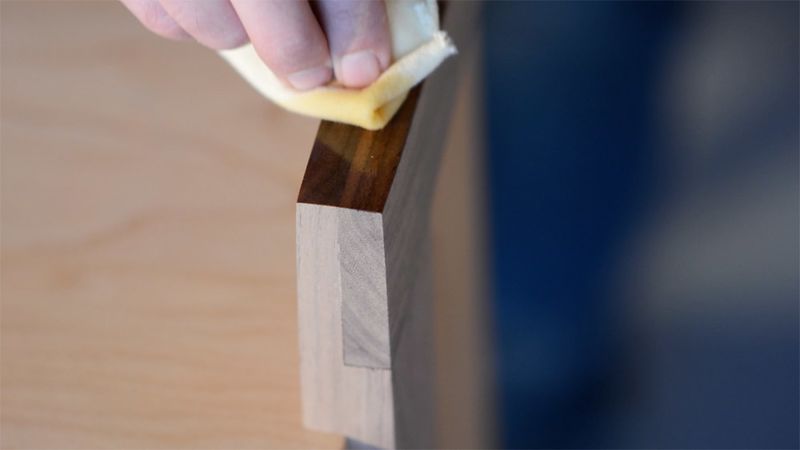
|Step_Content=Then I varnished everything | |Step_Content=Then I varnished everything | ||
|Step_Picture_00=Entry way catch all table cabinet 21.jpg | |Step_Picture_00=Entry way catch all table cabinet 21.jpg | ||
}} | }} | ||
| − | {{Tuto Step | + | {{ {{tntn|Tuto Step}} |
|Step_Title=Tada! | |Step_Title=Tada! | ||
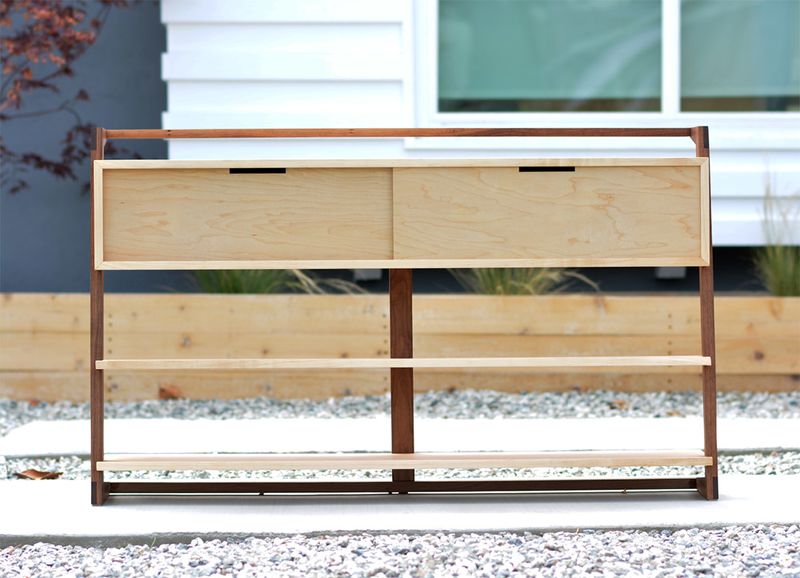
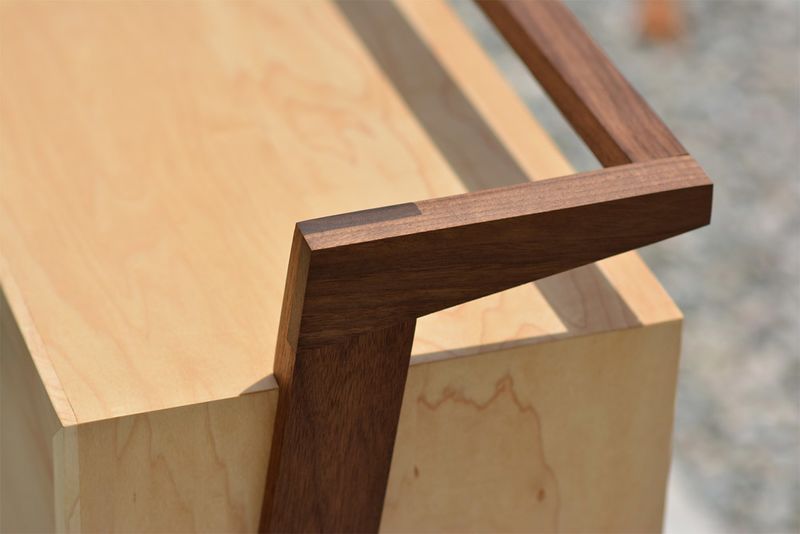
|Step_Content=This [https://www.youtube.com/watch?v=TjflF2hCdrQ youtube video] takes you through the design and build process. | |Step_Content=This [https://www.youtube.com/watch?v=TjflF2hCdrQ youtube video] takes you through the design and build process. | ||
| Ligne 113 : | Ligne 113 : | ||
|Step_Picture_01=Entry way catch all table cabinet final1.jpg | |Step_Picture_01=Entry way catch all table cabinet final1.jpg | ||
}} | }} | ||
| − | {{Notes | + | {{ {{tntn|Notes}} |
|Notes=* Check out my projects on my website : http://www.foureyesfurniture.com/ | |Notes=* Check out my projects on my website : http://www.foureyesfurniture.com/ | ||
}} | }} | ||
| − | {{Tuto Status | + | {{ {{tntn|Tuto Status}} |
|Complete=Check this box when the tutorial is complete | |Complete=Check this box when the tutorial is complete | ||
}} | }} | ||
Version du 11 août 2017 à 10:02
Sommaire
- 1 Étape 1 -
- 2 Étape 2 - Cut to the rough dimensions
- 3 Étape 3 - Cover up the plywood lines
- 4 Étape 4 - Attaching the strips
- 5 Étape 5 - Trim the strips using a router.
- 6 Étape 6 - Find tune everything
- 7 Étape 7 - Cut a few grooves
- 8 Étape 8 - Cut in a dado to the top and bottom piece
- 9 Étape 9 - Case assembly
- 10 Étape 10 - Make the doors
- 11 Étape 11 - Frame
- 12 Étape 12 - Cutting a long taper on the bandsaw.
- 13 Étape 13 - Joinery
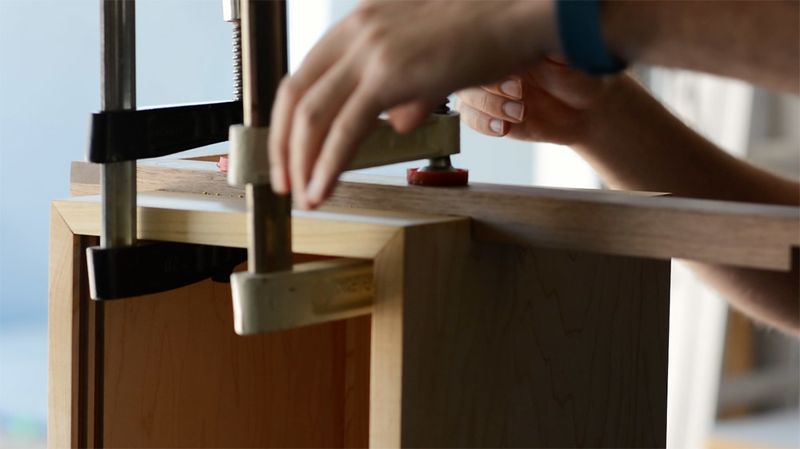
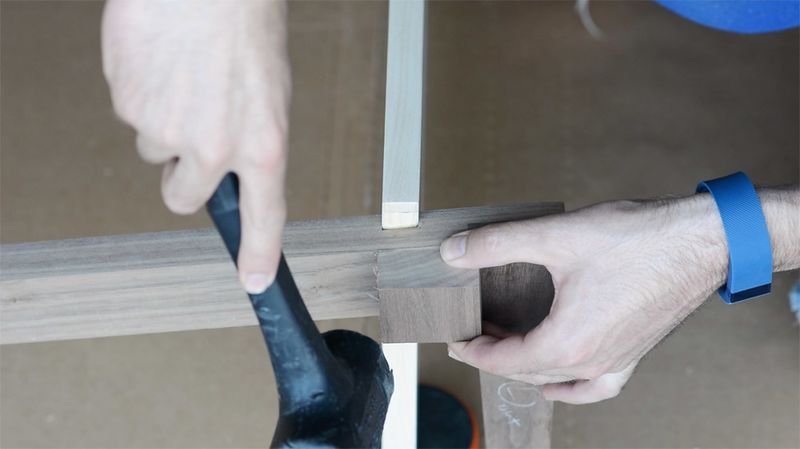
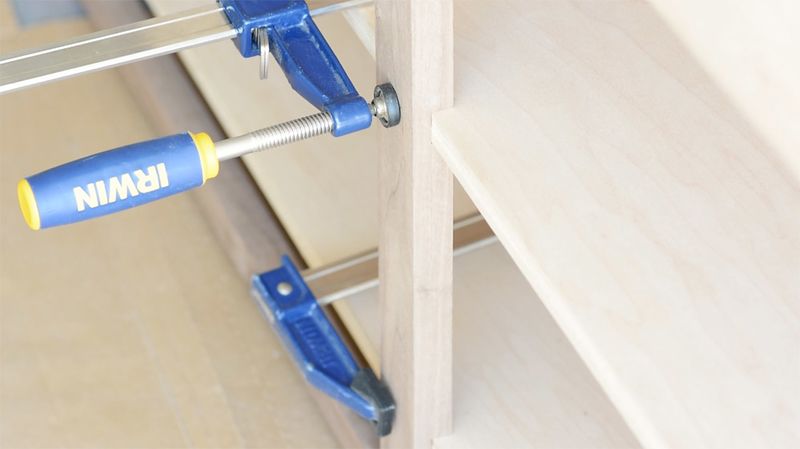
- 14 Étape 14 - Glue and assemble everything
- 15 Étape 15 - Sand everything
- 16 Étape 16 - Finished
- 17 Étape 17 - Tada!
- 18 Notes et références
- 19 Commentaires
Matériaux
Outils
Étape 1 -
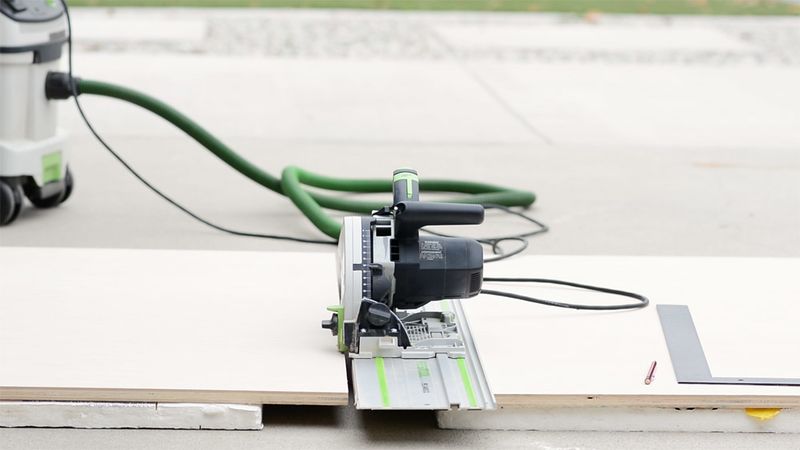
I started with a full sheet of Maple plywood. I broke it down into manageable chunks using my track saw.
Étape 3 - Cover up the plywood lines
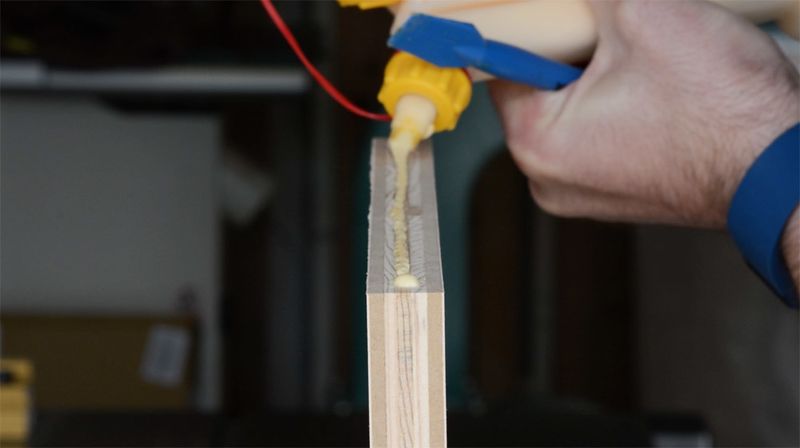
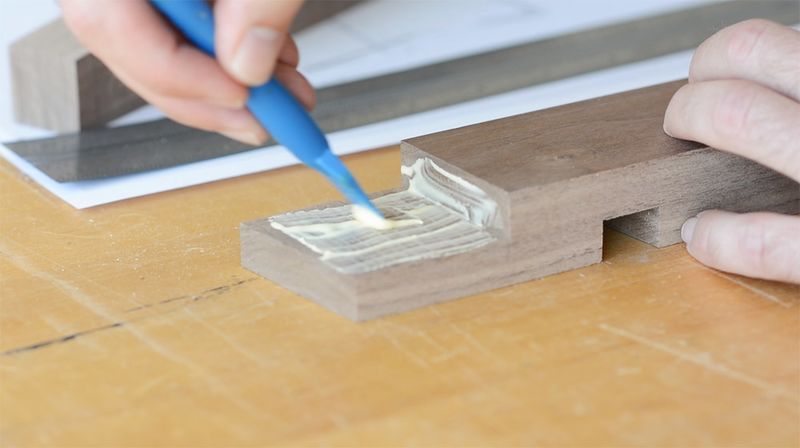
To cover up the plywood lines, I ripped some thin strips of maple hardwood. Here I'm applying the glue to adhere the strips.
Étape 4 - Attaching the strips
...and now actually attaching the strips. I "clamp" them on using some painters tape.
Étape 5 - Trim the strips using a router.
I live the strips a little wider than 3/4 of an inch so that they are slightly proud of the plywood. Then I trim them flush using a router.
Étape 6 - Find tune everything
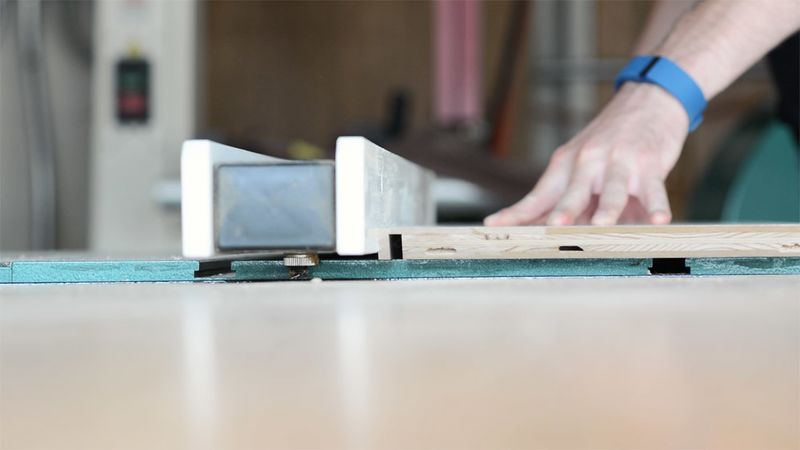
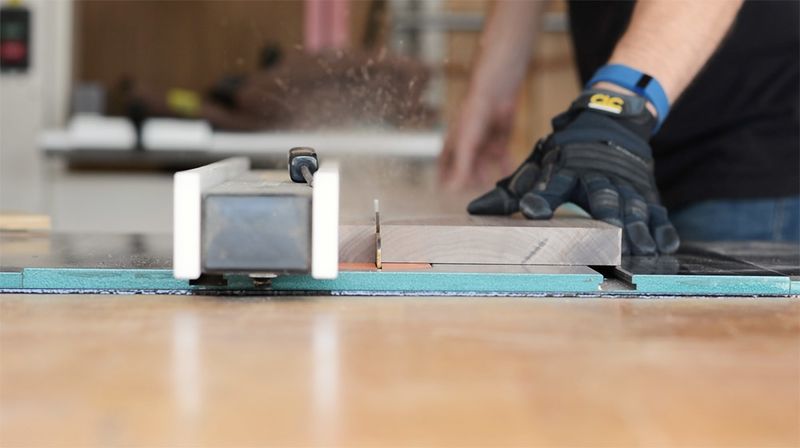
Now that the rough pieces are created, I find tune everything to finished dimensions and cut in some joinery. Here I'm making miters on the edges of all of the case pieces.
On the second picture I'm cutting in rabbets to the backs of the pieces so that I can eventually inset the back panel.
Étape 7 - Cut a few grooves
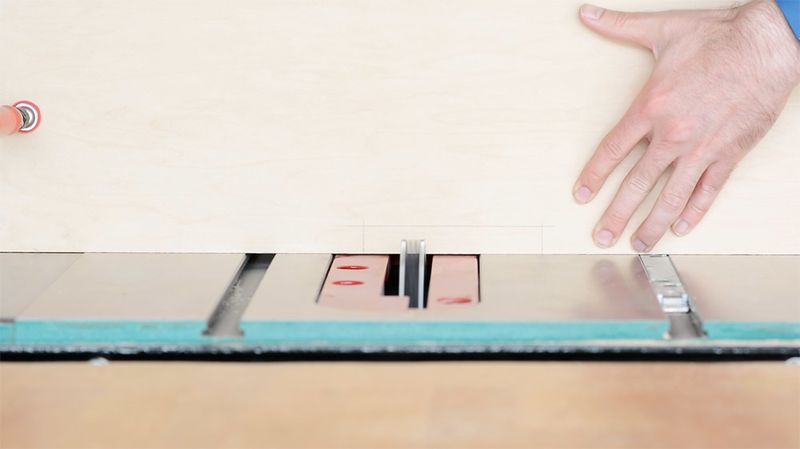
Then I cut a few grooves into the front of all of the pieces to hold some sliding doors.
Étape 8 - Cut in a dado to the top and bottom piece
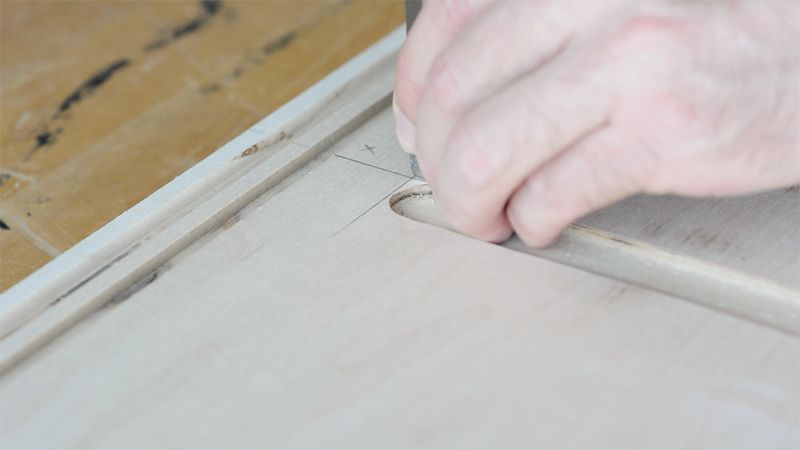
Finally I cut in a dado to the top and bottom piece to eventually insert a vertical partition. I use a router and then square up the cut using a chisel.
Étape 9 - Case assembly
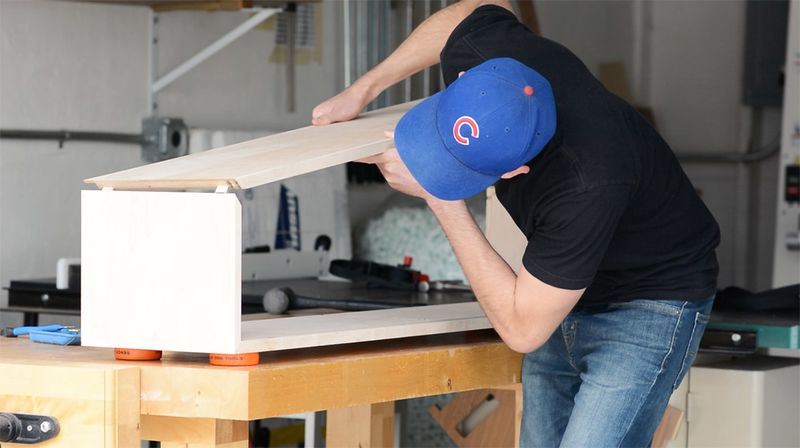
With every thing made, i assembled the case. I used a couple dominoes to make assembly easier and provide a bit of reinforcement.
Étape 10 - Make the doors
Here I'm making the doors fro the case out of 1/4" maple plywood. They don't have any handles, just a little negative space for a finger to grab.
Étape 11 - Frame
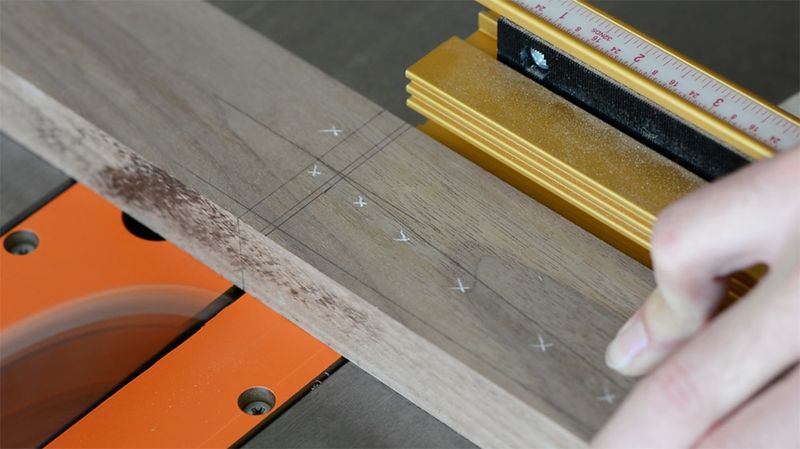
With the cabinet out of the way I turned my attention to the frame. First I milled and cut out blanks for all of the pieces. These are made from Walnut hardwood.
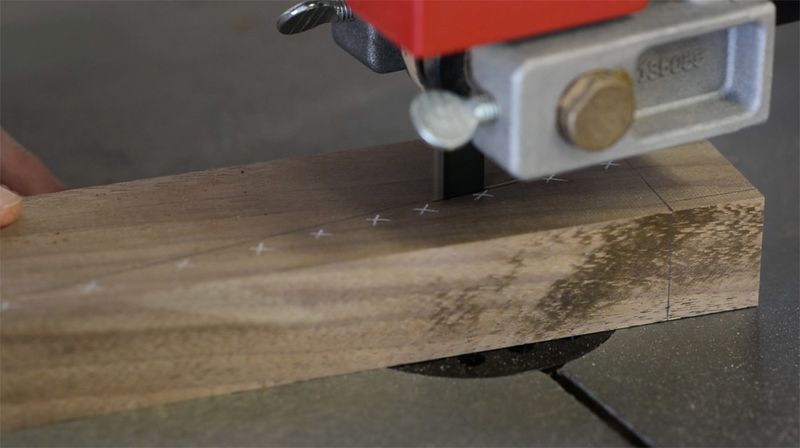
Étape 12 - Cutting a long taper on the bandsaw.
You can see I'm a big proponent of marking the hell out of things. Trying to avoid mistakes...thought I still make them.
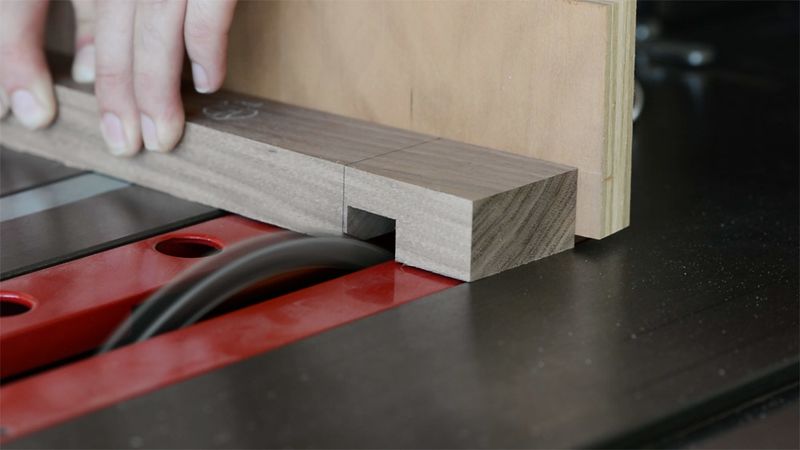
Étape 13 - Joinery
Then with all of the pieces to their proper dimensions I cut in some joinery, and some dados to hold the shelves.
Étape 17 - Tada!
This youtube video takes you through the design and build process.
It includes detailed builds, design-talk, 3D modeling, and more. Don't forget to subscribe!
Notes et références
- Check out my projects on my website : http://www.foureyesfurniture.com/
Check this box when the tutorial is complete
 Français
 English
 Deutsch
 Español
 Italiano
 Português