(Mise à jour pour être en accord avec la nouvelle version de la source de la page) |
(update property name) |
||
| (Une révision intermédiaire par un autre utilisateur non affichée) | |||
| Ligne 1 : | Ligne 1 : | ||
| − | {{ | + | {{Tuto Details |
|Main_Picture=Key_crack_activity_with_3D_printing_1.PNG | |Main_Picture=Key_crack_activity_with_3D_printing_1.PNG | ||
|Licences=Attribution (CC BY) | |Licences=Attribution (CC BY) | ||
| Ligne 15 : | Ligne 15 : | ||
|IsTranslation=1 | |IsTranslation=1 | ||
}} | }} | ||
| − | {{ | + | {{Introduction |
|Introduction=In this activity, kids will have to design and subsequently produce a key that is capable of accomplishing a 360° rotation inside a 3D printed keyhole. | |Introduction=In this activity, kids will have to design and subsequently produce a key that is capable of accomplishing a 360° rotation inside a 3D printed keyhole. | ||
Watch [https://media.giphy.com/media/lVm51GkiQ7JW8cA2S4/source.mp4 this] video to find out how it works. | Watch [https://media.giphy.com/media/lVm51GkiQ7JW8cA2S4/source.mp4 this] video to find out how it works. | ||
}} | }} | ||
| − | {{ | + | {{Materials |
| + | |Step_Picture_00=Piccolo_cnc_drawing_robot_Erasmus_logo.jpg | ||
|Material= | |Material= | ||
|Tools=* 3D printer, or 3D pens | |Tools=* 3D printer, or 3D pens | ||
| Ligne 27 : | Ligne 28 : | ||
* paper and pencils to sketch drawings | * paper and pencils to sketch drawings | ||
}} | }} | ||
| − | {{ | + | {{Separator}} |
| − | {{ | + | {{Tuto Step |
|Step_Title=Set up an account on Tinkercad | |Step_Title=Set up an account on Tinkercad | ||
|Step_Content=Once you're done, enter [https://www.tinkercad.com/things/2xddbnQ77OX this] address on your web browser. You will land on a tinkercad design that you will be able to customize. | |Step_Content=Once you're done, enter [https://www.tinkercad.com/things/2xddbnQ77OX this] address on your web browser. You will land on a tinkercad design that you will be able to customize. | ||
}} | }} | ||
| − | {{ | + | {{Tuto Step |
|Step_Title=Personalize the key crack design | |Step_Title=Personalize the key crack design | ||
|Step_Content=For example you may change the color. | |Step_Content=For example you may change the color. | ||
| Ligne 43 : | Ligne 44 : | ||
|Step_Picture_02=Key_crack_activity_with_3D_printing_4.PNG | |Step_Picture_02=Key_crack_activity_with_3D_printing_4.PNG | ||
}} | }} | ||
| − | {{ | + | {{Tuto Step |
|Step_Title=3D print the design | |Step_Title=3D print the design | ||
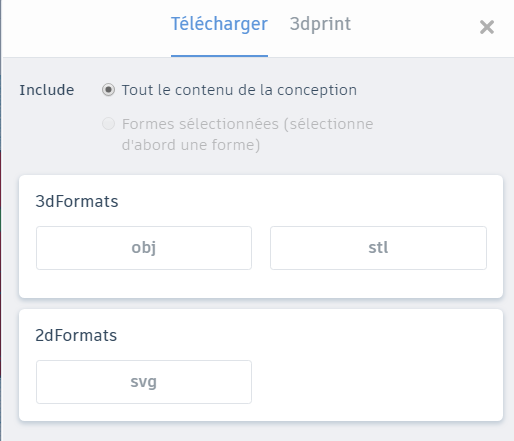
|Step_Content=Click on export | |Step_Content=Click on export | ||
| Ligne 50 : | Ligne 51 : | ||
|Step_Picture_00=Key_crack_activity_with_3D_printing_5.PNG | |Step_Picture_00=Key_crack_activity_with_3D_printing_5.PNG | ||
}} | }} | ||
| − | {{ | + | {{Tuto Step |
|Step_Title=Have the kids produce a key | |Step_Title=Have the kids produce a key | ||
|Step_Content=The key must be designed in such a way as to allow a 360° rotation inside the 3D design. | |Step_Content=The key must be designed in such a way as to allow a 360° rotation inside the 3D design. | ||
| Ligne 64 : | Ligne 65 : | ||
|Step_Picture_01=Key_crack_activity_with_3D_printing_6.PNG | |Step_Picture_01=Key_crack_activity_with_3D_printing_6.PNG | ||
}} | }} | ||
| − | {{ | + | {{Notes |
|Notes=This tutorial has been developed as part of the [http://www.digijeunes.com/projets/fabedu/ FabEdu] project, co-financed by the Erasmus+ Programme of the European Union. | |Notes=This tutorial has been developed as part of the [http://www.digijeunes.com/projets/fabedu/ FabEdu] project, co-financed by the Erasmus+ Programme of the European Union. | ||
| Ligne 73 : | Ligne 74 : | ||
For more details, contact info@digijeunes.com | For more details, contact info@digijeunes.com | ||
}} | }} | ||
| − | {{ | + | {{Tuto Status |
|Complete=Published | |Complete=Published | ||
}} | }} | ||
Version actuelle datée du 9 décembre 2019 à 11:38
Introduction
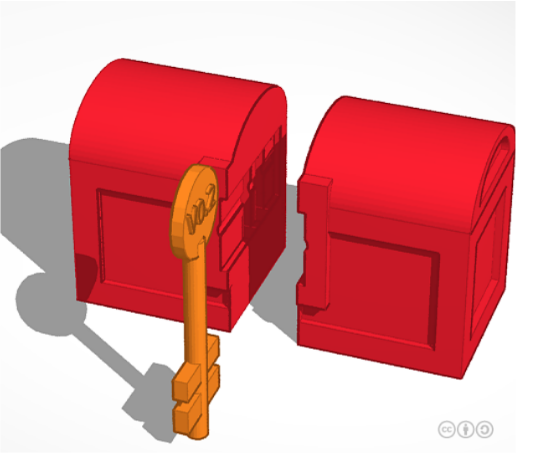
In this activity, kids will have to design and subsequently produce a key that is capable of accomplishing a 360° rotation inside a 3D printed keyhole.
Watch this video to find out how it works.Étape 1 - Set up an account on Tinkercad
Once you're done, enter this address on your web browser. You will land on a tinkercad design that you will be able to customize.
Étape 2 - Personalize the key crack design
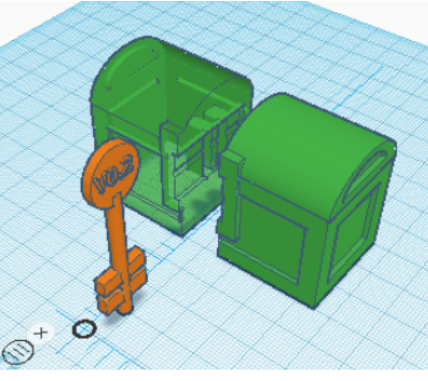
For example you may change the color.
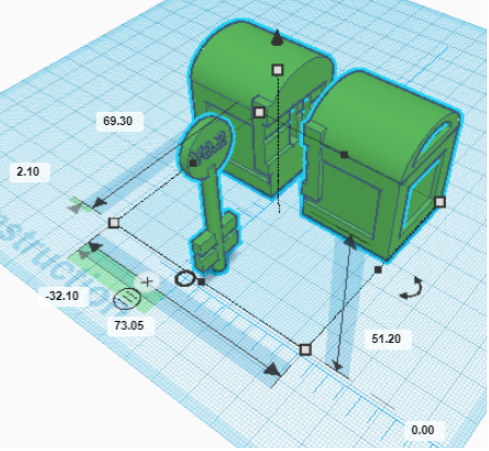
You may modify the size.
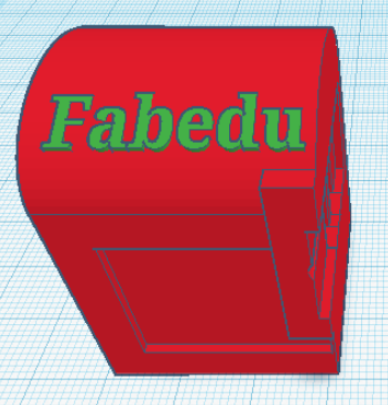
or add extra details, for example some text.
Étape 4 - Have the kids produce a key
The key must be designed in such a way as to allow a 360° rotation inside the 3D design.
Kids can produce the key either on tinkercad (it will need to be 3D printed afterwards) or via a 3D pen.
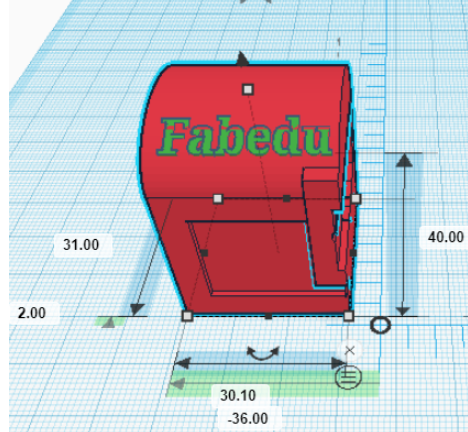
To figure out the correct size of the key, they will need to observe the size of the 3D design.
To do so on tinkercad, select the measuring tool, and place it anywhere on the plan.
After that, just left click on the object whose size you would like to measure.
Notes et références
This tutorial has been developed as part of the FabEdu project, co-financed by the Erasmus+ Programme of the European Union.
Project number: 2017-1-FR02-KA205-012767
The content of this publication does not reflect the official opinion of the European Union. Responsibility for the information and views expressed in the therein lies entirely with the author(s).
For more details, contact info@digijeunes.com
Published


 Français
 English
 Deutsch
 Español
 Italiano
 Português