m (Enregistré en utilisant le bouton "Sauvegarder et continuer" du formulaire) |
m (Enregistré en utilisant le bouton "Sauvegarder et continuer" du formulaire) |
||
| Ligne 25 : | Ligne 25 : | ||
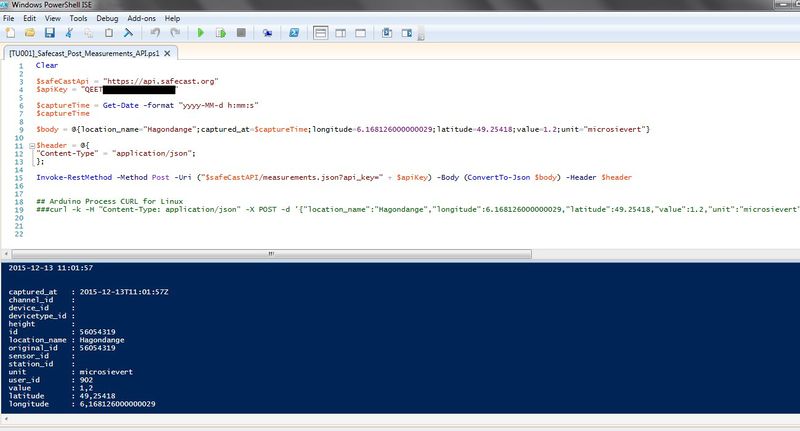
|Step_Title=Tester l'appel à l'API de Safecast | |Step_Title=Tester l'appel à l'API de Safecast | ||
|Step_Picture_00=InvokeSafecastAPI.jpg | |Step_Picture_00=InvokeSafecastAPI.jpg | ||
| + | |Step_Picture_01=No-image-yet.jpg | ||
| + | |Step_Picture_02=No-image-yet.jpg | ||
| + | |Step_Picture_03=No-image-yet.jpg | ||
| + | |Step_Picture_04=No-image-yet.jpg | ||
| + | |Step_Picture_05=No-image-yet.jpg | ||
| + | }} | ||
| + | {{Tuto Step | ||
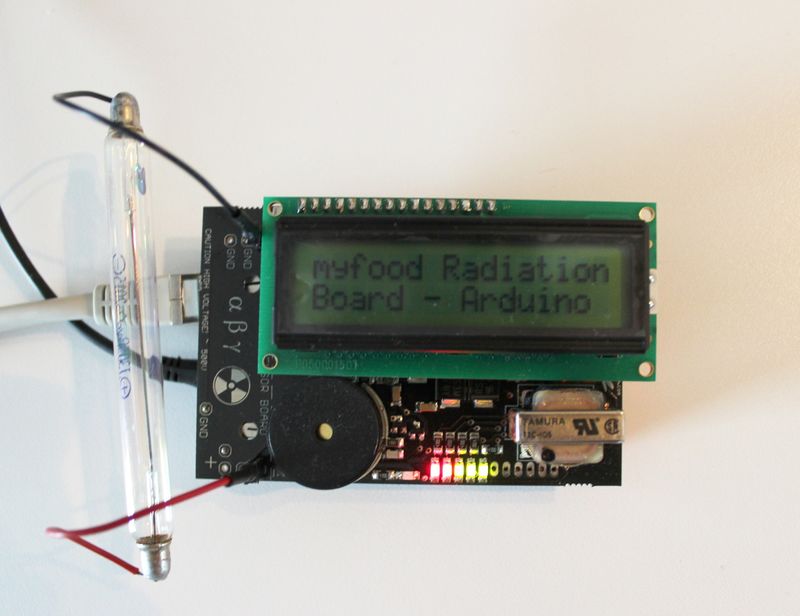
| + | |Step_Title=Assembler le YUN avec la carte de mesure de radiation | ||
| + | |Step_Picture_00=RadiationSensorOS Medium.JPG | ||
| + | |Step_Picture_01=No-image-yet.jpg | ||
| + | |Step_Picture_02=No-image-yet.jpg | ||
| + | |Step_Picture_03=No-image-yet.jpg | ||
| + | |Step_Picture_04=No-image-yet.jpg | ||
| + | |Step_Picture_05=No-image-yet.jpg | ||
| + | }} | ||
| + | {{Tuto Step | ||
| + | |Step_Title=Alimenter le YUN et se connecter à l'interface Linino | ||
| + | |Step_Picture_00=No-image-yet.jpg | ||
| + | |Step_Picture_01=No-image-yet.jpg | ||
| + | |Step_Picture_02=No-image-yet.jpg | ||
| + | |Step_Picture_03=No-image-yet.jpg | ||
| + | |Step_Picture_04=No-image-yet.jpg | ||
| + | |Step_Picture_05=No-image-yet.jpg | ||
| + | }} | ||
| + | {{Tuto Step | ||
| + | |Step_Title=Mettre à jour le YUN | ||
| + | |Step_Content=$ cd /tmp | ||
| + | $ wget http://download.linino.org/linino_distro/master/latest/openwrt-ar71xx-generic-linino-yun-16M-250k-squashfs-sysupgrade.bin | ||
| + | $ sysupgrade -v openwrt-ar71xx-generic-linino-yun-16M-250k-squashfs-sysupgrade.bin | ||
| + | after about 1 minute the board will reboot and the new image will be loaded on the board. | ||
| + | |||
| + | if you want to overwrite all the configuration settings present on the previous image, you have to add the -n option to the sysupgrade command | ||
| + | $ sysupgrade -v -n openwrt-ar71xx-generic-linino-yun-16M-250k-squashfs-sysupgrade.bin | ||
| + | |Step_Picture_00=No-image-yet.jpg | ||
| + | |Step_Picture_01=No-image-yet.jpg | ||
| + | |Step_Picture_02=No-image-yet.jpg | ||
| + | |Step_Picture_03=No-image-yet.jpg | ||
| + | |Step_Picture_04=No-image-yet.jpg | ||
| + | |Step_Picture_05=No-image-yet.jpg | ||
| + | }} | ||
| + | {{Tuto Step | ||
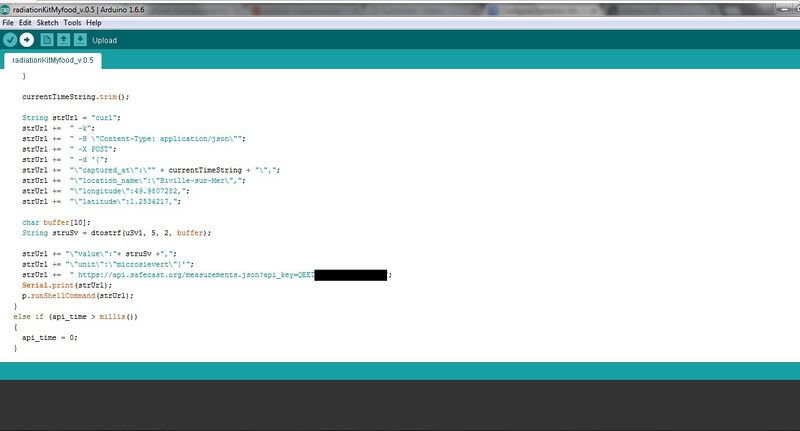
| + | |Step_Title=Démarrer l'outil de développement Arduino et adapter quelques variables | ||
| + | |Step_Picture_00=ArduinoProgram.jpg | ||
|Step_Picture_01=No-image-yet.jpg | |Step_Picture_01=No-image-yet.jpg | ||
|Step_Picture_02=No-image-yet.jpg | |Step_Picture_02=No-image-yet.jpg | ||
Version du 13 décembre 2015 à 13:46
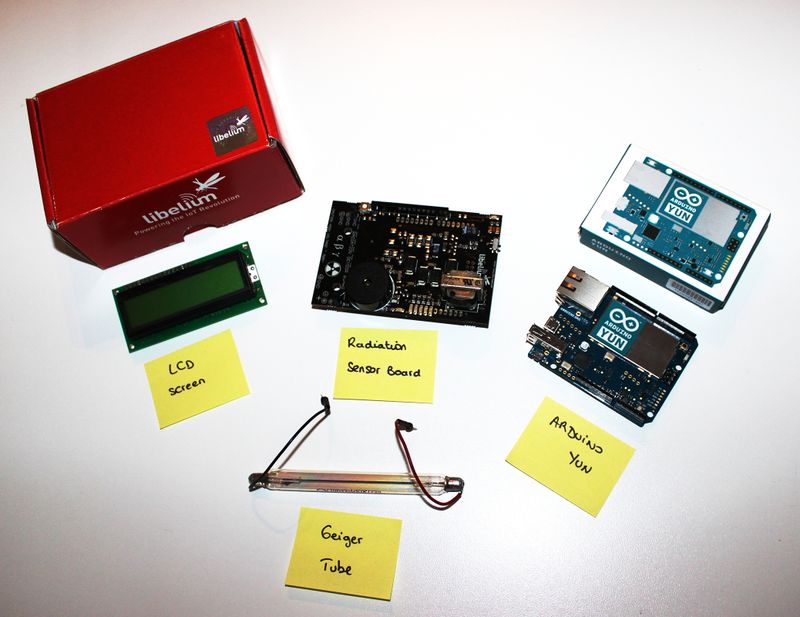
Nous allons utilisé un kit de mesure de radiation Libre pour envoyer les données vers une plateforme d'échange et de surveillance citoyenne.
Difficulté
⧼wf-propertyvalue-difficulty-Facile⧽
Durée
2 ⧼wf-propertyvalue-durationtype-heure(s)⧽
Catégories
⧼wf-propertyvalue-area-Science & Biologie⧽, ⧼wf-propertyvalue-area-Alimentation & Agriculture⧽
Coût
200
Sommaire
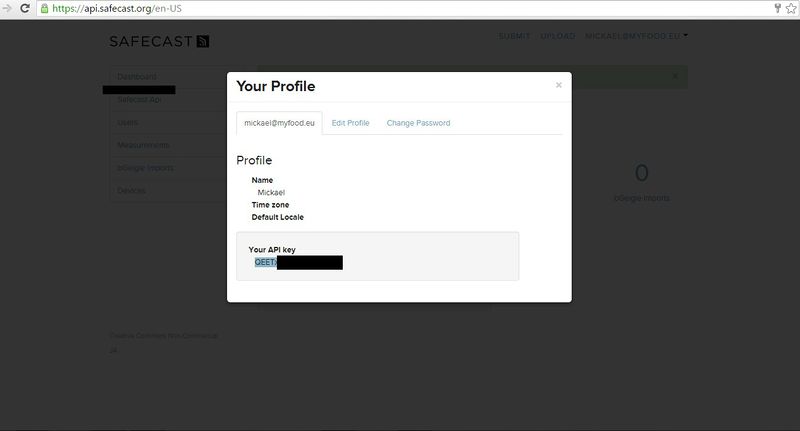
- 1 Étape 1 - Créer un compte sur Safecast et récupérer sa clé API
- 2 Étape 2 - Tester l'appel à l'API de Safecast
- 3 Étape 3 - Assembler le YUN avec la carte de mesure de radiation
- 4 Étape 4 - Alimenter le YUN et se connecter à l'interface Linino
- 5 Étape 5 - Mettre à jour le YUN
- 6 Étape 6 - Démarrer l'outil de développement Arduino et adapter quelques variables
- 7 Commentaires
Étape 5 - Mettre à jour le YUN
$ cd /tmp $ wget http://download.linino.org/linino_distro/master/latest/openwrt-ar71xx-generic-linino-yun-16M-250k-squashfs-sysupgrade.bin $ sysupgrade -v openwrt-ar71xx-generic-linino-yun-16M-250k-squashfs-sysupgrade.bin after about 1 minute the board will reboot and the new image will be loaded on the board.
if you want to overwrite all the configuration settings present on the previous image, you have to add the -n option to the sysupgrade command $ sysupgrade -v -n openwrt-ar71xx-generic-linino-yun-16M-250k-squashfs-sysupgrade.bin

 Français
 English
 Deutsch
 Español
 Italiano
 Português