m (Enregistré en utilisant le bouton "Sauvegarder et continuer" du formulaire) |
|||
| Ligne 40 : | Ligne 40 : | ||
}} | }} | ||
{{ {{tntn|Tuto Step}} | {{ {{tntn|Tuto Step}} | ||
| + | |Step_Picture_00=Un_badge_électronique_GPIO1.jpg | ||
| + | |Step_Picture_01=Un_badge_électronique_GPIO2.jpg | ||
| + | |Step_Picture_02=Un_badge_électronique_rpi2.jpg | ||
| + | |Step_Picture_03=Un_badge_électronique_rpi1.jpg | ||
|Step_Title=Brancher l'écran au Raspberry Pi | |Step_Title=Brancher l'écran au Raspberry Pi | ||
|Step_Content=L'écran discute avec le RaspberryPi via une interface SPI. | |Step_Content=L'écran discute avec le RaspberryPi via une interface SPI. | ||
Cette interface est composée des broches suivantes : | Cette interface est composée des broches suivantes : | ||
| − | * BUSY | + | * BUSY - Violet |
| − | * RST | + | * RST - Blanc |
| − | * DC | + | * DC - Vert |
| − | * CS | + | * CS - Orange |
| − | * CLK | + | * CLK - Jaune |
| − | * DIN | + | * DIN - Bleu |
| − | * GND | + | * GND - Noir |
| − | * 3.3V | + | * 3.3V - Rouge |
}} | }} | ||
{{ {{tntn|Tuto Step}} | {{ {{tntn|Tuto Step}} | ||
| Ligne 58 : | Ligne 62 : | ||
}} | }} | ||
{{ {{tntn|Tuto Step}} | {{ {{tntn|Tuto Step}} | ||
| + | |Step_Picture_00=Un_badge_électronique_Parts1.jpg | ||
| + | |Step_Picture_01=Un_badge_électronique_Parts2.jpg | ||
|Step_Title=Conception et impression du boitier | |Step_Title=Conception et impression du boitier | ||
| − | |Step_Content=Le fichier .stl du boitier est disponible à l'url suivante : https://github.com/domoenergytics/3D-objects/blob/master/ePaperBox/ePaperBox.stl | + | |Step_Content=Le fichier .stl du boitier est disponible sur GitHub à l'url suivante : https://github.com/domoenergytics/3D-objects/blob/master/ePaperBox/ePaperBox.stl |
| − | Le | + | Le code OpenSCAD est là : https://github.com/domoenergytics/3D-objects/blob/master/ePaperBox/ePaperBox.scad |
| + | |||
| + | Ne pas oublier le fichier "Cubo.scad" qui est utilisé. | ||
}} | }} | ||
{{ {{tntn|Notes}} | {{ {{tntn|Notes}} | ||
Version du 22 septembre 2017 à 18:02
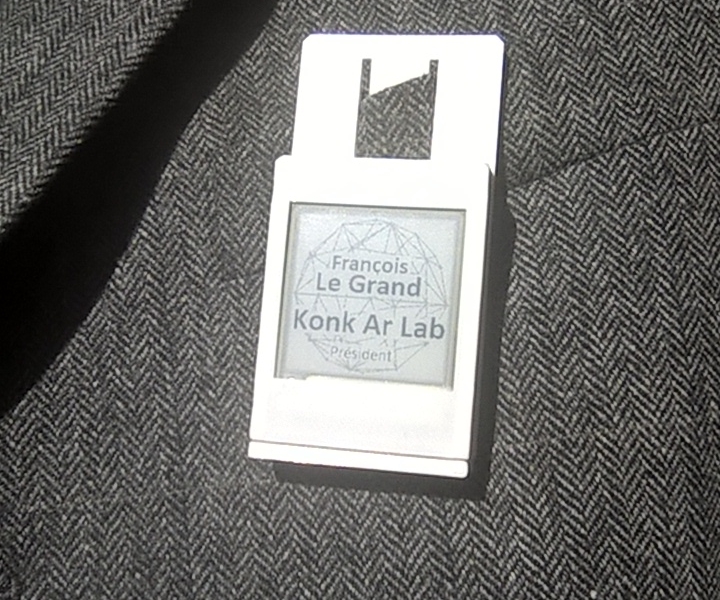
Étape 1 - Conception de l'image qui sera affichée
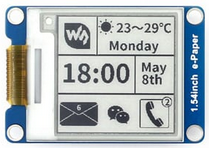
L'écran est carré et affiche 200 pixels par coté.
Il faut donc prévoir une image carré de 200 x 200 pixels
L'écran affiche en noir sur fond blanc.
Il faut donc préparer une image bitmap monochrome, donc avec 2 couleurs, noir & blanc.
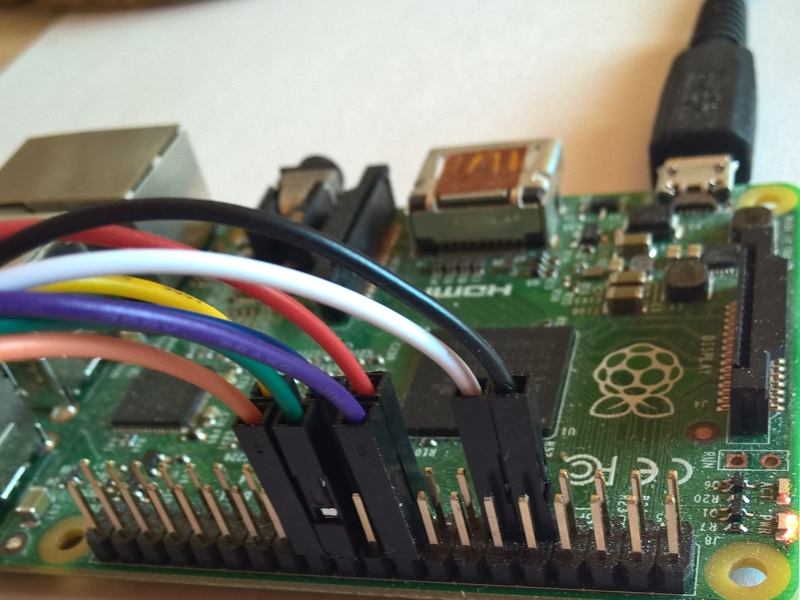
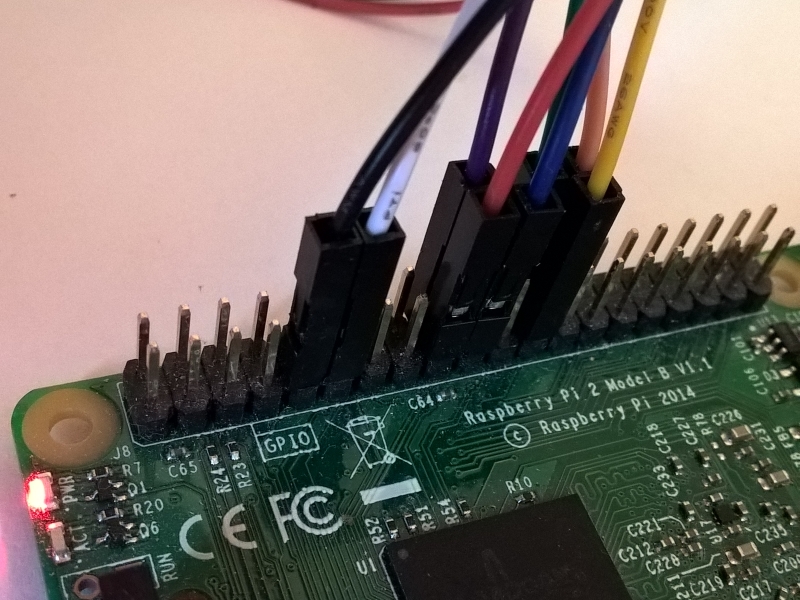
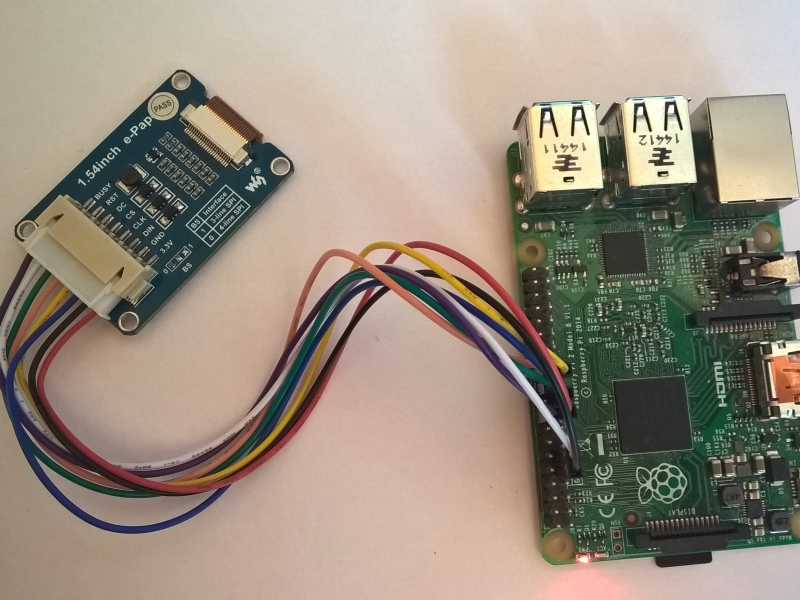
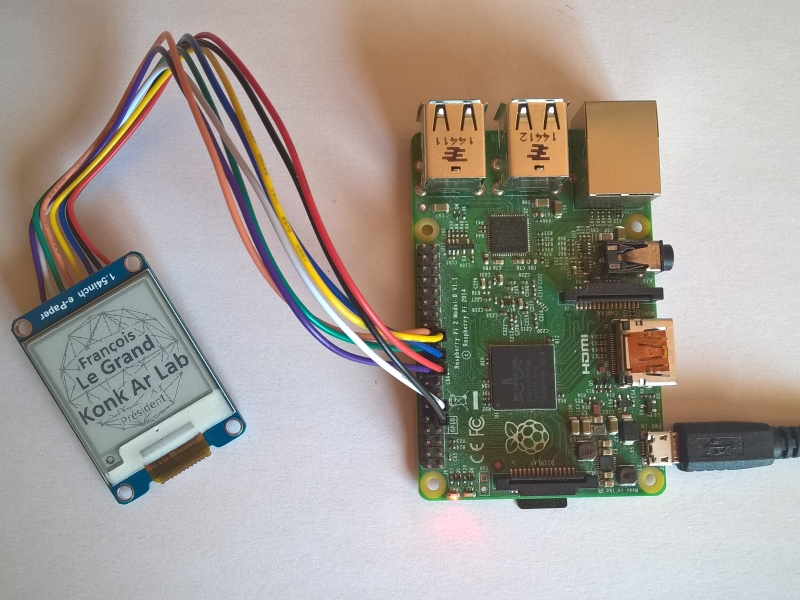
Étape 2 - Brancher l'écran au Raspberry Pi
L'écran discute avec le RaspberryPi via une interface SPI.
Cette interface est composée des broches suivantes :
- BUSY - Violet
- RST - Blanc
- DC - Vert
- CS - Orange
- CLK - Jaune
- DIN - Bleu
- GND - Noir
- 3.3V - Rouge
Étape 3 - Affichage de limage sur l'écran
Une fois l'image réalisée, il est nécessaire de l'insérer dans un bout de code pour l'afficher à l'écran.
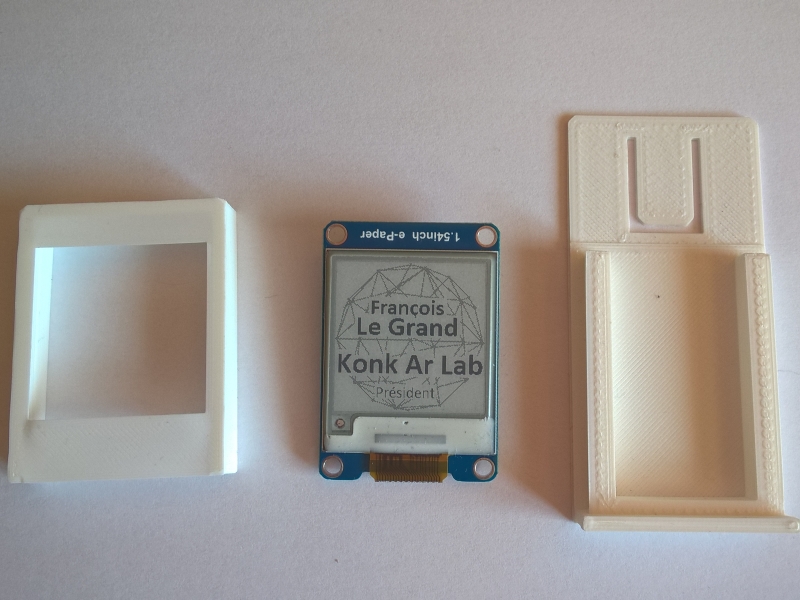
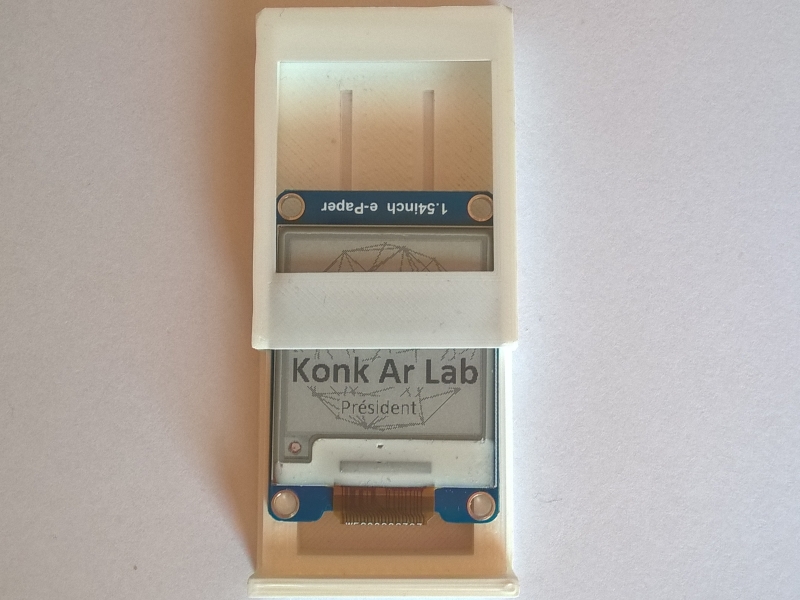
Étape 4 - Conception et impression du boitier
Le fichier .stl du boitier est disponible sur GitHub à l'url suivante : https://github.com/domoenergytics/3D-objects/blob/master/ePaperBox/ePaperBox.stl
Le code OpenSCAD est là : https://github.com/domoenergytics/3D-objects/blob/master/ePaperBox/ePaperBox.scad
Ne pas oublier le fichier "Cubo.scad" qui est utilisé.
 Français
 English
 Deutsch
 Español
 Italiano
 Português