

| Ligne 55 : | Ligne 55 : | ||
}}{{Tuto Attachments | }}{{Tuto Attachments | ||
|Attachment=Solar_System_Orrery_compl_planche_ep_3mm.svg | |Attachment=Solar_System_Orrery_compl_planche_ep_3mm.svg | ||
| + | }}{{Tuto Attachments | ||
| + | |Attachment=Solar_System_Orrery_Venus_Outside_50.stl | ||
| + | }}{{Tuto Attachments | ||
| + | |Attachment=Solar_System_Orrery_Sol_Outside_50.stl | ||
| + | }}{{Tuto Attachments | ||
| + | |Attachment=Solar_System_Orrery_Saturn_Outside_50.stl | ||
| + | }}{{Tuto Attachments | ||
| + | |Attachment=Solar_System_Orrery_Moon_Outside_50.stl | ||
| + | }}{{Tuto Attachments | ||
| + | |Attachment=Solar_System_Orrery_Mercury_Outside_50.stl | ||
| + | }}{{Tuto Attachments | ||
| + | |Attachment=Solar_System_Orrery_Mars_Outside_50.stl | ||
| + | }}{{Tuto Attachments | ||
| + | |Attachment=Solar_System_Orrery_Jupiter_Outside_50.stl | ||
| + | }}{{Tuto Attachments | ||
| + | |Attachment=Solar_System_Orrery_Earth_Outside_50.stl | ||
}} | }} | ||
}} | }} | ||
| Ligne 81 : | Ligne 97 : | ||
|Step_Picture_00=Solar_System_Orrery_sch_ma_bb.jpg | |Step_Picture_00=Solar_System_Orrery_sch_ma_bb.jpg | ||
|Step_Picture_01=Solar_System_Orrery_part_list.JPG | |Step_Picture_01=Solar_System_Orrery_part_list.JPG | ||
| + | |Step_Picture_02=Solar_System_Orrery_L293D.png | ||
| + | }} | ||
| + | {{Tuto Step | ||
| + | |Step_Title=<translate>Impression 3D</translate> | ||
| + | |Step_Content=<translate>Fichiers STL dans les fichiers joints.</translate> | ||
| + | |Step_Picture_00=Solar_System_Orrery_Earth_Outside_50.stl | ||
}} | }} | ||
{{Notes | {{Notes | ||
Version du 11 février 2020 à 17:10
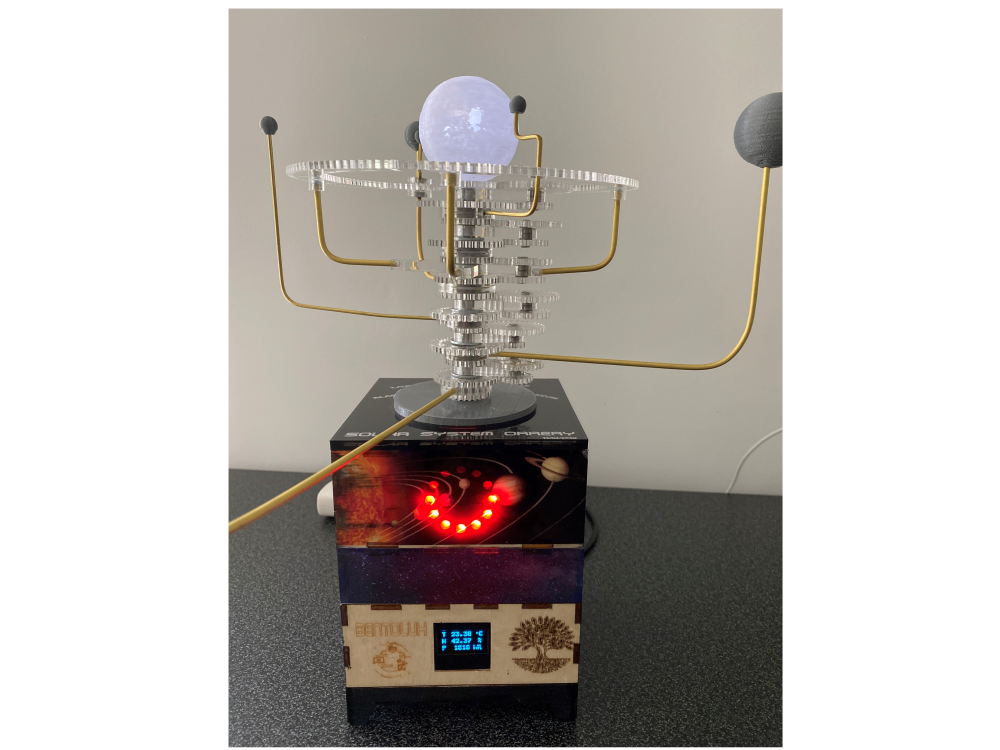
Un modèle mécanique du système solaire qui illustre ou prédit les positions et les mouvements relatifs des planètes et des lunes, généralement selon le modèle héliocentrique." -Wikipedia-
Difficulté
Difficile
Durée
20 jour(s)
Catégories
Décoration, Science & Biologie
Coût
100 EUR (€)
Introduction
projet original : https://www.instructables.com/id/Solar-System-Orrery-3D-Printed/ , modifié .
1 - Asservissement moteur par programme Arduino en complément de fonctions Température, Humidité , Pression et LED Ring.
2 - Découpe laser des engrenages.
3 - Impression 3D des planètes et liaisons avec tube laiton.Youtube
Matériaux
Outils
Étape 1 - Découpe laser
Fichiers dans le dossier pour découpe pléxi en 3mm et 5mm épaisseur.


Étape 2 - Assemblage

Étape 3 - Arduino
Programme Arduino à téléverser

Étape 4 - Câblage
Schéma de câblage des composants sur carte Arduino Uno


Étape 5 - Impression 3D
Fichiers STL dans les fichiers joints.
Erreur lors de la création de la miniature : module.js:681 return process.dlopen(module, path._makeLong(filename)); ^ Error: libpng12.so.0: cannot open shared object file: No such file or directory at Object.Module._extensions..node (module.js:681:18) at Module.load (module.js:565:32) at tryModuleLoad (module.js:505:12) at Function.Module._load (module.js:497:3) at Module.require (module.js:596:17) at require (internal/module.js:11:18) at Object.<anonymous> (/var/www/dokitfarm/mw/dokit-1.22.0/lib/3d2png/node_modules/canvas/lib/bindings.js:3:18) at Module._compile (module.js:652:30) at Object.Module._extensions..js (module.js:663:10) at Module.load (module.js:565:32)
Draft
 Français
 English
 Deutsch
 Español
 Italiano
 Português
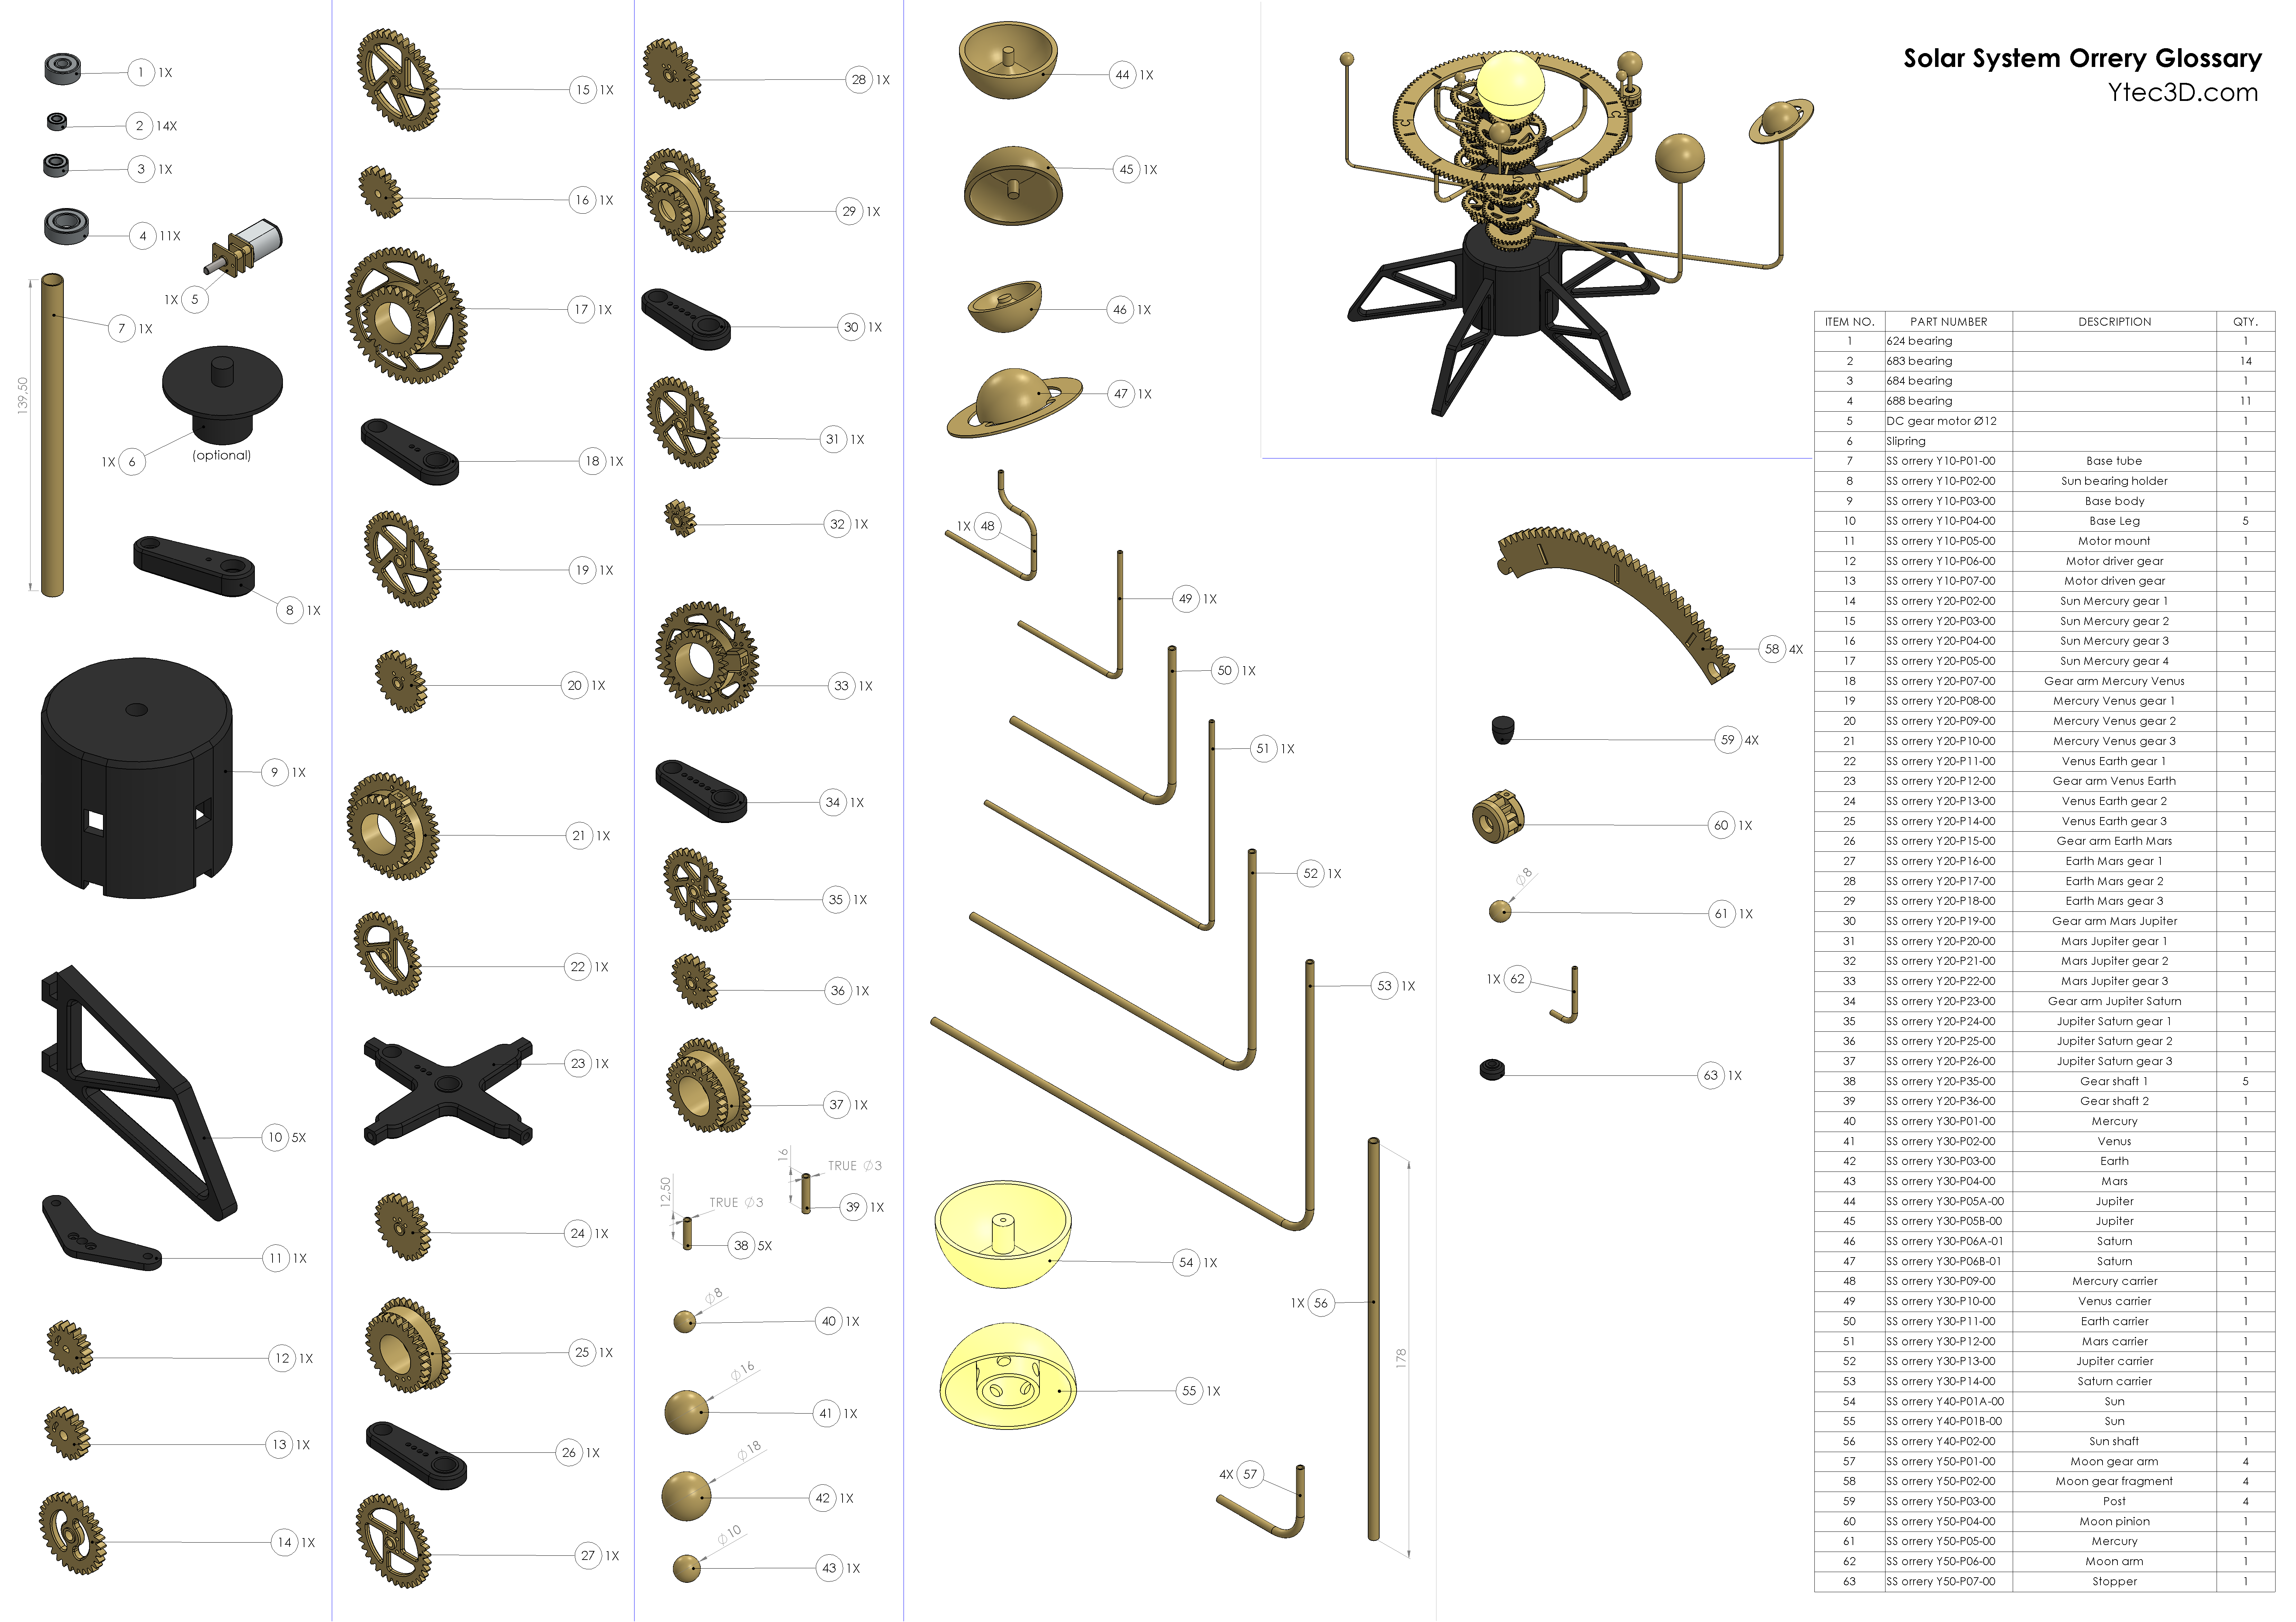