(Enregistré en utilisant le bouton "Sauvegarder et continuer" du formulaire) |
m (Enregistré en utilisant le bouton "Sauvegarder et continuer" du formulaire) |
||
| Ligne 75 : | Ligne 75 : | ||
* Slicer utilisé: | * Slicer utilisé: | ||
Cura 15.04.3 + profil Disco200 | Cura 15.04.3 + profil Disco200 | ||
| + | |||
| + | * Remplissage: 17% | ||
| + | |||
| + | * Vitesse d'impression recommandé: 50mm/s | ||
| + | |||
| + | * Support activé | ||
| + | |Step_Picture_00=Corps principal (2).png | ||
| + | }} | ||
| + | {{Tuto Step | ||
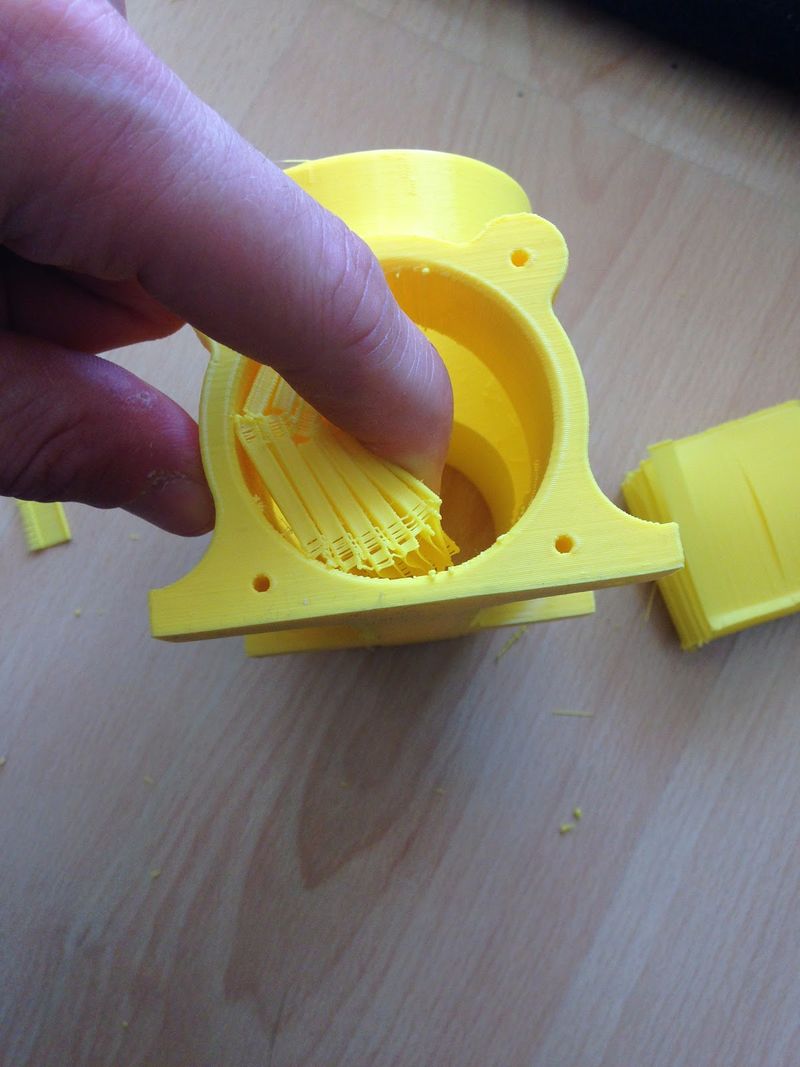
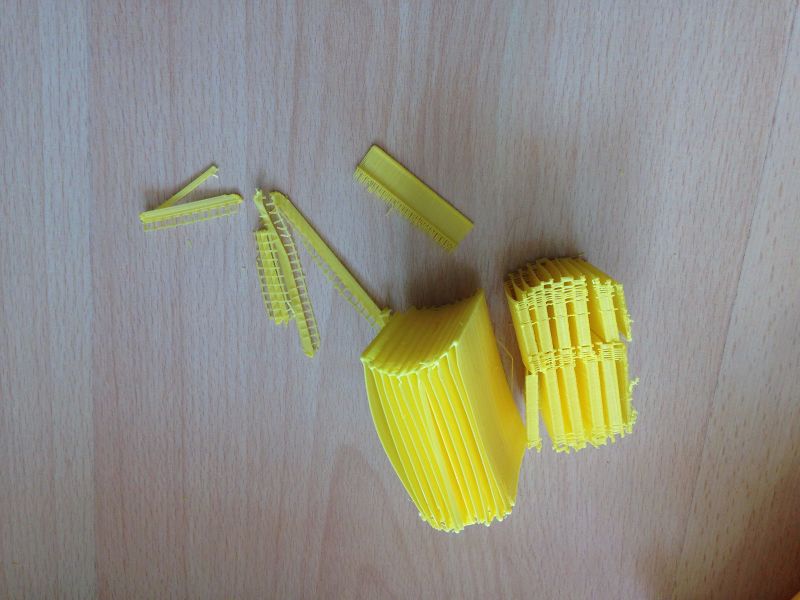
| + | |Step_Title=Corps principal, enlèvement du support | ||
| + | |Step_Picture_00=Corps principal (2).JPG | ||
| + | |Step_Picture_01=Corps principal (5).JPG | ||
| + | |Step_Picture_02=Corps principal (6).JPG | ||
| + | }} | ||
| + | {{Tuto Step | ||
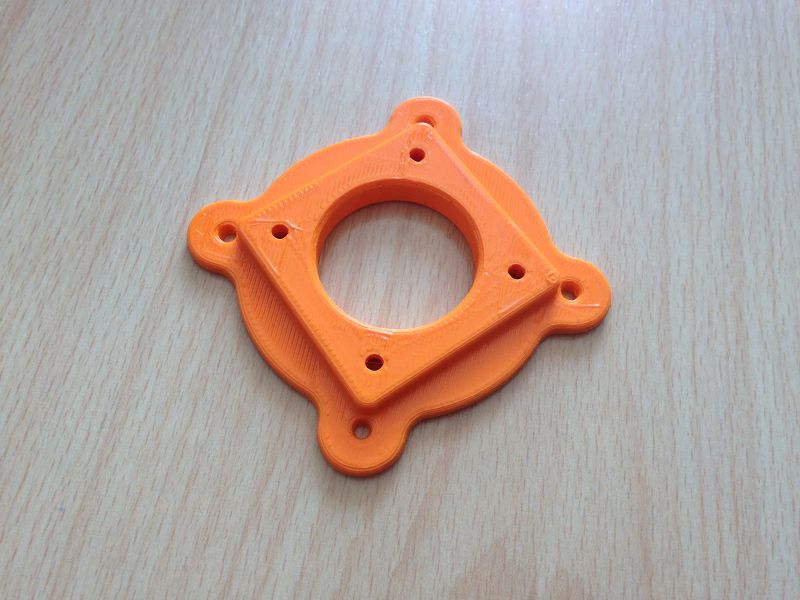
| + | |Step_Title=Cale moteur | ||
| + | |Step_Picture_00=Cale moteur.png | ||
| + | |Step_Picture_01=Cale moteur.JPG | ||
| + | }} | ||
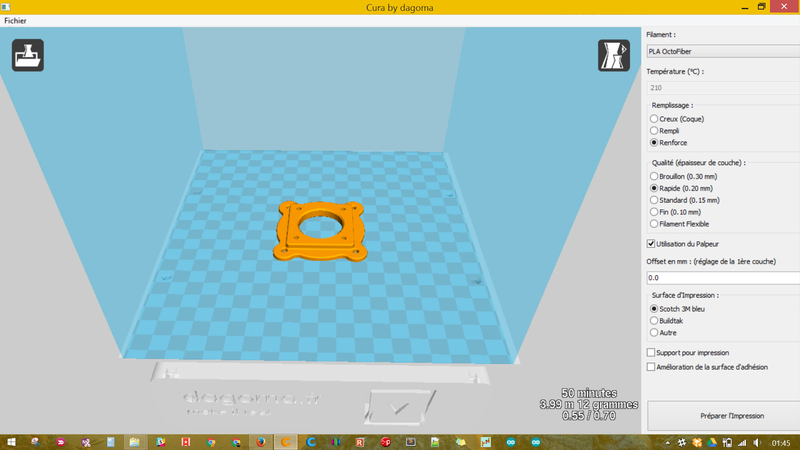
| + | {{Tuto Step | ||
| + | |Step_Title=Prépration de l'impression | ||
| + | |Step_Content=Zoom sur les réglages: | ||
| + | |||
| + | * Slicer utilisé: | ||
| + | Cura by dagoma | ||
* Remplissage: 17% | * Remplissage: 17% | ||
* Vitesse d'impression recommandée: 50mm/s | * Vitesse d'impression recommandée: 50mm/s | ||
| + | |Step_Picture_00=Cale moteur.png | ||
| + | }} | ||
| + | {{Tuto Step | ||
| + | |Step_Title=Boîtier (arduino) | ||
| + | |Step_Picture_00=Boitier (arduino).png | ||
| + | |Step_Picture_01=Arduino.jpg | ||
| + | }} | ||
| + | {{Tuto Step | ||
| + | |Step_Title=Prépration de l'impression | ||
| + | |Step_Content=Zoom sur les réglages: | ||
| + | |||
| + | * Slicer utilisé: | ||
| + | Cura by Dagoma | ||
| + | |||
| + | * Remplissage: 17% | ||
| + | |||
| + | * Vitesse d'impression recommandé: 50mm/s | ||
| + | |Step_Picture_00=Boitier (arduino).png | ||
| + | }} | ||
| + | {{Tuto Step | ||
| + | |Step_Title=Vis sans fin | ||
| + | |Step_Picture_00=Vis sans fin (1).png | ||
| + | |Step_Picture_01=Vis (1).JPG | ||
| + | }} | ||
| + | {{Tuto Step | ||
| + | |Step_Title=Préparation de l'impression | ||
| + | |Step_Content=Zoom sur les réglages: | ||
| + | |||
| + | * Slicer utilisé: | ||
| + | Cura 15.04.3 + profil Disco200 | ||
| + | |||
| + | * Remplissage: 17% | ||
| + | |||
| + | * Vitesse d'impression recommandé: 50mm/s | ||
| + | |||
| + | * Support activé | ||
| + | |Step_Picture_00=Vis sans fin (3).png | ||
| + | }} | ||
| + | {{Tuto Step | ||
| + | |Step_Title=Vis sans fin, enlèvement du support | ||
| + | |Step_Picture_00=Vis (4).JPG | ||
| + | |Step_Picture_01=Vis (5).JPG | ||
| + | |Step_Picture_02=Vis (7).JPG | ||
| + | }} | ||
| + | {{Tuto Step | ||
| + | |Step_Title=Coude | ||
| + | |Step_Picture_00=Coude (1).png | ||
| + | |Step_Picture_01=Coude.jpg | ||
| + | }} | ||
| + | {{Tuto Step | ||
| + | |Step_Title=Préparation de l'impression | ||
| + | |Step_Content=Zoom sur les réglages: | ||
| + | |||
| + | * Slicer utilisé: | ||
| + | Cura 15.04.3 + profil Disco200 | ||
| + | |||
| + | * Remplissage: 17% | ||
| + | |||
| + | * Vitesse d'impression recommandé: 50mm/s | ||
| + | |||
| + | * Support activé | ||
| + | |Step_Picture_00=Coude (2).png | ||
| + | }} | ||
| + | {{Tuto Step | ||
| + | |Step_Title=Coude, enlèvement du support | ||
| + | |Step_Picture_00=Coude (1).JPG | ||
| + | |Step_Picture_01=Coude (3).JPG | ||
| + | }} | ||
| + | {{Tuto Step | ||
| + | |Step_Title=Couvercle (Arduino) | ||
| + | |Step_Picture_00=Couvercle (arduino).png | ||
| + | |Step_Picture_01=Coucou.jpg | ||
| + | }} | ||
| + | {{Tuto Step | ||
| + | |Step_Title=Préparation de l'impression | ||
| + | |Step_Content=Zoom sur les réglages: | ||
| + | |||
| + | * Slicer sur les réglages: | ||
| + | Cura by Dagoma | ||
| + | |||
| + | * Remplissage: 17% | ||
| + | |||
| + | * Vitesse d'impression recommandé: 50mm/s | ||
| + | |Step_Picture_00=Couvercle (arduino).png | ||
| + | }} | ||
| + | {{Tuto Step | ||
| + | |Step_Title=Entonnoir | ||
| + | |Step_Picture_00=Entonoire.png | ||
| + | |Step_Picture_01=Ento.jpg | ||
| + | }} | ||
| + | {{Tuto Step | ||
| + | |Step_Title=Préparation de l'impression | ||
| + | |Step_Content=Zoom sur les réglages: | ||
| + | |||
| + | * Slicer utilisé: | ||
| + | Cura by Dagoma | ||
| + | |||
| + | * Remplissage: 17% | ||
| + | |||
| + | * Vitesse d'impression recommandé: 50mm/s | ||
| + | |Step_Picture_00=Entonoire.png | ||
| + | }} | ||
| + | {{Tuto Step | ||
| + | |Step_Title=2 x Pieds | ||
| + | |Step_Picture_00=Pied.png | ||
| + | |Step_Picture_01=Piedd.jpg | ||
| + | }} | ||
| + | {{Tuto Step | ||
| + | |Step_Title=Prépration de l'impression | ||
| + | |Step_Content=Zoom sur les réglages: | ||
| + | |||
| + | * Slicer utilisé: | ||
| + | Cura by Dagoma | ||
| + | |||
| + | * Remplissage: 17% | ||
| + | |||
| + | * Vitesse d'impression recommandé: 50mm/s | ||
| + | |Step_Picture_00=Pied.png | ||
| + | }} | ||
| + | {{Tuto Step | ||
| + | |Step_Title=2 x Pieds | ||
| + | |Step_Picture_00=Bouton x5.png | ||
| + | |Step_Picture_01=Boutons.jpg | ||
| + | }} | ||
| + | {{Tuto Step | ||
| + | |Step_Title=Prépration de l'impression | ||
| + | |Step_Content=Zoom sur les réglages: | ||
| + | |||
| + | * Slicer utilisé: | ||
| + | Cura by Dagoma | ||
| + | |||
| + | * Remplissage: 17% | ||
| + | |||
| + | * Vitesse d'impression recommandé: 50mm/s | ||
| + | |Step_Picture_00=Bouton x5.png | ||
| + | }} | ||
| + | {{Tuto Step | ||
| + | |Step_Title=Assemblage Pieds + Boîtier | ||
| + | |Step_Content='''Durée:''' 15min | ||
| + | |||
| + | '''Composants nécessaires:''' | ||
| + | * 2x Pieds | ||
| + | * 1x Boîtier | ||
| + | * 2x vis M3 x 12mm | ||
| + | |||
| + | '''Outils:''' | ||
| + | *Clef Allen 2.5mm | ||
| + | |Step_Picture_00=BON-15949.jpg | ||
| + | }} | ||
| + | {{Tuto Step | ||
| + | |Step_Title=Vissez votre pied sur le boîtier à l'aide de vos vis M3 x 12mm | ||
| + | |Step_Picture_00=IMG 3077.JPG | ||
| + | |Step_Picture_01=IMG 3078.JPG | ||
| + | }} | ||
| + | {{Tuto Step | ||
| + | |Step_Title=Vissez votre pied sur le boîtier à l'aide de vos 2 vis M3 x 12mm | ||
| + | |Step_Picture_00=IMG 3081.JPG | ||
| + | }} | ||
| + | {{Tuto Step | ||
| + | |Step_Title=Assemblage Cale Moteur + Moteur | ||
| + | |Step_Content='''Durée:''' 15minutes | ||
| + | |||
| + | '''Composants nécessaires:''' | ||
| + | * 1x cale moteur | ||
| + | * 1x moteur | ||
| + | * 4x vis M3 x 6mm | ||
| + | |||
| + | '''Outils:''' | ||
| + | * Clef Allen 2.5mm | ||
| + | |Step_Picture_00=BON-15949.jpg | ||
| + | }} | ||
| + | {{Tuto Step | ||
| + | |Step_Title=Vissez votre moteur sur la cale moteur à l'aide de vos 4 vis M3 x 6mm | ||
| + | |Step_Picture_00=IMG 3082.JPG | ||
| + | |Step_Picture_01=IMG 3083.JPG | ||
| + | }} | ||
| + | {{Tuto Step | ||
| + | |Step_Title=Assemblage Moteur + Vis sans fin | ||
| + | |Step_Content='''Durée:''' 15min | ||
| + | |||
| + | '''Composants nécessaires:''' | ||
| + | * 1x Bloc Cale moteur + moteur | ||
| + | * 1x vis sans fin | ||
| + | * 1x vis M3 x 12 mm | ||
| + | |||
| + | '''Outils:''' | ||
| + | *Clef Allen 2.5mm | ||
| + | |Step_Picture_00=BON-15949.jpg | ||
| + | }} | ||
| + | {{Tuto Step | ||
| + | |Step_Title=Enfoncez la Vis sans fin, sur votre moteur | ||
| + | |Step_Picture_00=IMG 3086 (1).JPG | ||
| + | }} | ||
| + | {{Tuto Step | ||
| + | |Step_Title=Vissez la vis sans fin à l'aide d'une vis M3 x 12mm | ||
| + | |Step_Content=Vérifiez que la vis sans fin tourne librement | ||
| + | |Step_Picture_00=IMG 3087.JPG | ||
| + | |Step_Picture_01=IMG 3088 (1).JPG | ||
| + | }} | ||
| + | {{Tuto Step | ||
| + | |Step_Title=Assemblage Moteur + Corps principal | ||
| + | |Step_Content='''Durée:''' 20 minutes | ||
| + | |||
| + | '''Composants nécessaires:''' | ||
| + | * 1x bloc moteur + Vis sans fin | ||
| + | * 1x Corps principal | ||
| + | * 4x vis M3 x 12 mm | ||
| + | |||
| + | '''Outils:''' | ||
| + | * Clef Allen 2.5mm | ||
| + | |Step_Picture_00=BON-15949.jpg | ||
| + | }} | ||
| + | {{Tuto Step | ||
| + | |Step_Title=Insérez le moteur dans le corps principal | ||
| + | |Step_Content=Ne pas mettre la prise moteur de ce coté. | ||
| + | |Step_Picture_00=IMG 3089.JPG | ||
| + | }} | ||
| + | {{Tuto Step | ||
| + | |Step_Title=Etape 1: Préparation de l'impression | ||
| + | |Step_Content='''Durée:''' 28h 49min | ||
| + | |||
| + | '''Composants nécessaires: ''' | ||
| + | * Les STLs de votre box | ||
| + | |||
| + | * Cura by dagoma | ||
| + | ou | ||
| + | * Cura 15.04.3 + profil de discovery 200 | ||
| + | ou | ||
| + | * Votre slicer préféré | ||
| + | |||
| + | '''Outils:''' | ||
| + | * Votre ordinateur | ||
| + | |||
| + | * Une imprimante 3D | ||
| + | }} | ||
| + | {{Tuto Step | ||
| + | |Step_Title=Corps Principal | ||
| + | |Step_Picture_00=Corps principal (1).png | ||
| + | |Step_Picture_01=Corps principal (1).JPG | ||
| + | }} | ||
| + | {{Tuto Step | ||
| + | |Step_Title=Zoom sur les réglages | ||
| + | |Step_Content='''Zoom sur les réglages:''' | ||
| + | |||
| + | * Slicer utilisé: | ||
| + | Cura 15.04.3 + profil Disco200 | ||
| + | |||
| + | * Remplissage: 17% | ||
| + | |||
| + | * Vitesse d'impression recommandé: 50mm/s | ||
* Support activé | * Support activé | ||
| Ligne 93 : | Ligne 368 : | ||
|Step_Picture_00=Cale moteur.png | |Step_Picture_00=Cale moteur.png | ||
|Step_Picture_01=Cale moteur.JPG | |Step_Picture_01=Cale moteur.JPG | ||
| + | }} | ||
| + | {{Tuto Step | ||
| + | |Step_Title=Prépration de l'impression | ||
| + | |Step_Content=Zoom sur les réglages: | ||
| + | |||
| + | * Slicer utilisé: | ||
| + | Cura by dagoma | ||
| + | |||
| + | * Remplissage: 17% | ||
| + | |||
| + | * Vitesse d'impression recommandée: 50mm/s | ||
| + | |Step_Picture_00=Cale moteur.png | ||
| + | }} | ||
| + | {{Tuto Step | ||
| + | |Step_Title=Boîtier (arduino) | ||
| + | |Step_Picture_00=Boitier (arduino).png | ||
| + | |Step_Picture_01=Arduino.jpg | ||
| + | }} | ||
| + | {{Tuto Step | ||
| + | |Step_Title=Prépration de l'impression | ||
| + | |Step_Content=Zoom sur les réglages: | ||
| + | |||
| + | * Slicer utilisé: | ||
| + | Cura by Dagoma | ||
| + | |||
| + | * Remplissage: 17% | ||
| + | |||
| + | * Vitesse d'impression recommandé: 50mm/s | ||
| + | |Step_Picture_00=Boitier (arduino).png | ||
| + | }} | ||
| + | {{Tuto Step | ||
| + | |Step_Title=Vis sans fin | ||
| + | |Step_Picture_00=Vis sans fin (1).png | ||
| + | |Step_Picture_01=Vis (1).JPG | ||
| + | }} | ||
| + | {{Tuto Step | ||
| + | |Step_Title=Préparation de l'impression | ||
| + | |Step_Content=Zoom sur les réglages: | ||
| + | |||
| + | * Slicer utilisé: | ||
| + | Cura 15.04.3 + profil Disco200 | ||
| + | |||
| + | * Remplissage: 17% | ||
| + | |||
| + | * Vitesse d'impression recommandé: 50mm/s | ||
| + | |||
| + | * Support activé | ||
| + | |Step_Picture_00=Vis sans fin (3).png | ||
| + | }} | ||
| + | {{Tuto Step | ||
| + | |Step_Title=Vis sans fin, enlèvement du support | ||
| + | |Step_Picture_00=Vis (4).JPG | ||
| + | |Step_Picture_01=Vis (5).JPG | ||
| + | |Step_Picture_02=Vis (7).JPG | ||
| + | }} | ||
| + | {{Tuto Step | ||
| + | |Step_Title=Coude | ||
| + | |Step_Picture_00=Coude (1).png | ||
| + | |Step_Picture_01=Coude.jpg | ||
| + | }} | ||
| + | {{Tuto Step | ||
| + | |Step_Title=Préparation de l'impression | ||
| + | |Step_Content=Zoom sur les réglages: | ||
| + | |||
| + | * Slicer utilisé: | ||
| + | Cura 15.04.3 + profil Disco200 | ||
| + | |||
| + | * Remplissage: 17% | ||
| + | |||
| + | * Vitesse d'impression recommandé: 50mm/s | ||
| + | |||
| + | * Support activé | ||
| + | |Step_Picture_00=Coude (2).png | ||
| + | }} | ||
| + | {{Tuto Step | ||
| + | |Step_Title=Coude, enlèvement du support | ||
| + | |Step_Picture_00=Coude (1).JPG | ||
| + | |Step_Picture_01=Coude (3).JPG | ||
| + | }} | ||
| + | {{Tuto Step | ||
| + | |Step_Title=Couvercle (Arduino) | ||
| + | |Step_Picture_00=Couvercle (arduino).png | ||
| + | |Step_Picture_01=Coucou.jpg | ||
| + | }} | ||
| + | {{Tuto Step | ||
| + | |Step_Title=Préparation de l'impression | ||
| + | |Step_Content=Zoom sur les réglages: | ||
| + | |||
| + | * Slicer sur les réglages: | ||
| + | Cura by Dagoma | ||
| + | |||
| + | * Remplissage: 17% | ||
| + | |||
| + | * Vitesse d'impression recommandé: 50mm/s | ||
| + | |Step_Picture_00=Couvercle (arduino).png | ||
| + | }} | ||
| + | {{Tuto Step | ||
| + | |Step_Title=Entonnoir | ||
| + | |Step_Picture_00=Entonoire.png | ||
| + | |Step_Picture_01=Ento.jpg | ||
| + | }} | ||
| + | {{Tuto Step | ||
| + | |Step_Title=Préparation de l'impression | ||
| + | |Step_Content=Zoom sur les réglages: | ||
| + | |||
| + | * Slicer utilisé: | ||
| + | Cura by Dagoma | ||
| + | |||
| + | * Remplissage: 17% | ||
| + | |||
| + | * Vitesse d'impression recommandé: 50mm/s | ||
| + | |Step_Picture_00=Entonoire.png | ||
| + | }} | ||
| + | {{Tuto Step | ||
| + | |Step_Title=2 x Pieds | ||
| + | |Step_Picture_00=Pied.png | ||
| + | |Step_Picture_01=Piedd.jpg | ||
| + | }} | ||
| + | {{Tuto Step | ||
| + | |Step_Title=Prépration de l'impression | ||
| + | |Step_Content=Zoom sur les réglages: | ||
| + | |||
| + | * Slicer utilisé: | ||
| + | Cura by Dagoma | ||
| + | |||
| + | * Remplissage: 17% | ||
| + | |||
| + | * Vitesse d'impression recommandé: 50mm/s | ||
| + | |Step_Picture_00=Pied.png | ||
| + | }} | ||
| + | {{Tuto Step | ||
| + | |Step_Title=2 x Pieds | ||
| + | |Step_Picture_00=Bouton x5.png | ||
| + | |Step_Picture_01=Boutons.jpg | ||
| + | }} | ||
| + | {{Tuto Step | ||
| + | |Step_Title=Prépration de l'impression | ||
| + | |Step_Content=Zoom sur les réglages: | ||
| + | |||
| + | * Slicer utilisé: | ||
| + | Cura by Dagoma | ||
| + | |||
| + | * Remplissage: 17% | ||
| + | |||
| + | * Vitesse d'impression recommandé: 50mm/s | ||
| + | |Step_Picture_00=Bouton x5.png | ||
| + | }} | ||
| + | {{Tuto Step | ||
| + | |Step_Title=Assemblage Pieds + Boîtier | ||
| + | |Step_Content='''Durée:''' 15min | ||
| + | |||
| + | '''Composants nécessaires:''' | ||
| + | * 2x Pieds | ||
| + | * 1x Boîtier | ||
| + | * 2x vis M3 x 12mm | ||
| + | |||
| + | '''Outils:''' | ||
| + | *Clef Allen 2.5mm | ||
| + | |Step_Picture_00=BON-15949.jpg | ||
| + | }} | ||
| + | {{Tuto Step | ||
| + | |Step_Title=Vissez votre pied sur le boîtier à l'aide de vos vis M3 x 12mm | ||
| + | |Step_Picture_00=IMG 3077.JPG | ||
| + | |Step_Picture_01=IMG 3078.JPG | ||
| + | }} | ||
| + | {{Tuto Step | ||
| + | |Step_Title=Vissez votre pied sur le boîtier à l'aide de vos 2 vis M3 x 12mm | ||
| + | |Step_Picture_00=IMG 3081.JPG | ||
| + | }} | ||
| + | {{Tuto Step | ||
| + | |Step_Title=Assemblage Cale Moteur + Moteur | ||
| + | |Step_Content='''Durée:''' 15minutes | ||
| + | |||
| + | '''Composants nécessaires:''' | ||
| + | * 1x cale moteur | ||
| + | * 1x moteur | ||
| + | * 4x vis M3 x 6mm | ||
| + | |||
| + | '''Outils:''' | ||
| + | * Clef Allen 2.5mm | ||
| + | |Step_Picture_00=BON-15949.jpg | ||
| + | }} | ||
| + | {{Tuto Step | ||
| + | |Step_Title=Vissez votre moteur sur la cale moteur à l'aide de vos 4 vis M3 x 6mm | ||
| + | |Step_Picture_00=IMG 3082.JPG | ||
| + | |Step_Picture_01=IMG 3083.JPG | ||
| + | }} | ||
| + | {{Tuto Step | ||
| + | |Step_Title=Assemblage Moteur + Vis sans fin | ||
| + | |Step_Content='''Durée:''' 15min | ||
| + | |||
| + | '''Composants nécessaires:''' | ||
| + | * 1x Bloc Cale moteur + moteur | ||
| + | * 1x vis sans fin | ||
| + | * 1x vis M3 x 12 mm | ||
| + | |||
| + | '''Outils:''' | ||
| + | *Clef Allen 2.5mm | ||
| + | |Step_Picture_00=BON-15949.jpg | ||
| + | }} | ||
| + | {{Tuto Step | ||
| + | |Step_Title=Enfoncez la Vis sans fin, sur votre moteur | ||
| + | |Step_Picture_00=IMG 3086 (1).JPG | ||
| + | }} | ||
| + | {{Tuto Step | ||
| + | |Step_Title=Vissez la vis sans fin à l'aide d'une vis M3 x 12mm | ||
| + | |Step_Content=Vérifiez que la vis sans fin tourne librement | ||
| + | |Step_Picture_00=IMG 3087.JPG | ||
| + | |Step_Picture_01=IMG 3088 (1).JPG | ||
| + | }} | ||
| + | {{Tuto Step | ||
| + | |Step_Title=Assemblage Moteur + Corps principal | ||
| + | |Step_Content='''Durée:''' 20 minutes | ||
| + | |||
| + | '''Composants nécessaires:''' | ||
| + | * 1x bloc moteur + Vis sans fin | ||
| + | * 1x Corps principal | ||
| + | * 4x vis M3 x 12 mm | ||
| + | |||
| + | '''Outils:''' | ||
| + | * Clef Allen 2.5mm | ||
| + | |Step_Picture_00=BON-15949.jpg | ||
| + | }} | ||
| + | {{Tuto Step | ||
| + | |Step_Title=Insérez le moteur dans le corps principal | ||
| + | |Step_Content=Ne pas mettre la prise moteur de ce coté. | ||
| + | |Step_Picture_00=IMG 3089.JPG | ||
}} | }} | ||
{{Notes}} | {{Notes}} | ||
{{Tuto Status}} | {{Tuto Status}} | ||
Version du 25 juillet 2016 à 15:29
Sommaire
- 1 Introduction
- 2 Étape 1 - Nomenclature
- 3 Étape 2 - Etape 1: Préparation de l'impression
- 4 Étape 3 - Corps Principal
- 5 Étape 4 - Zoom sur les réglages
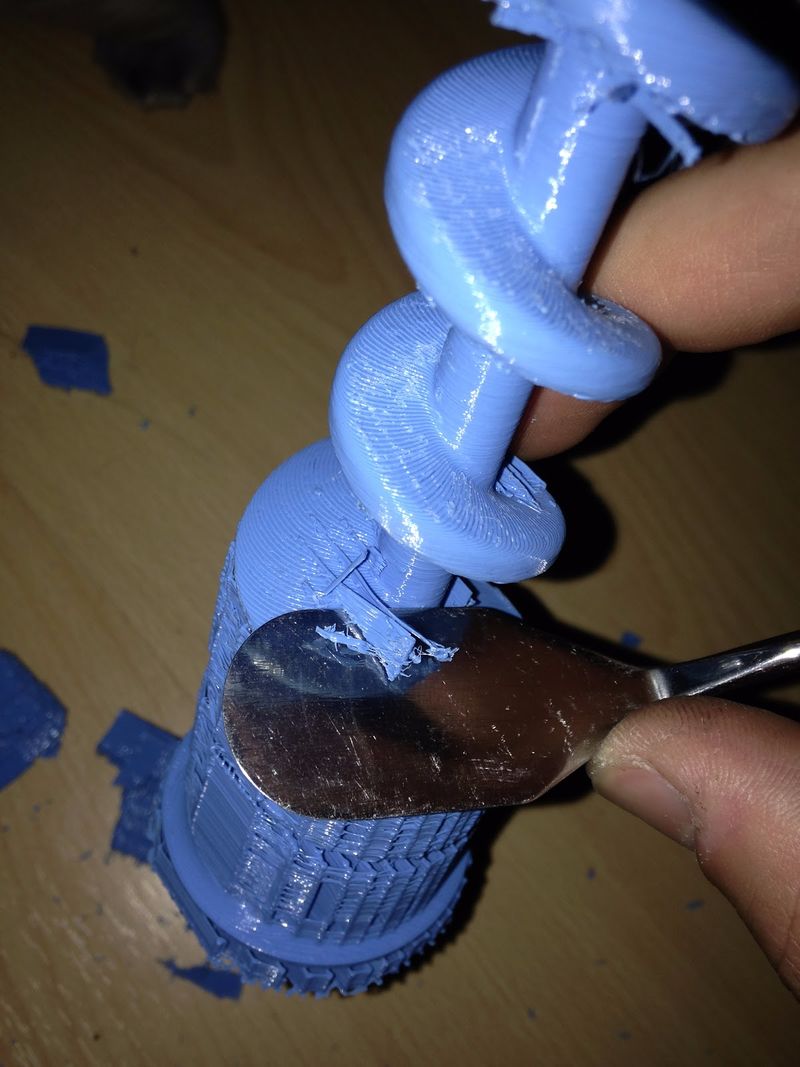
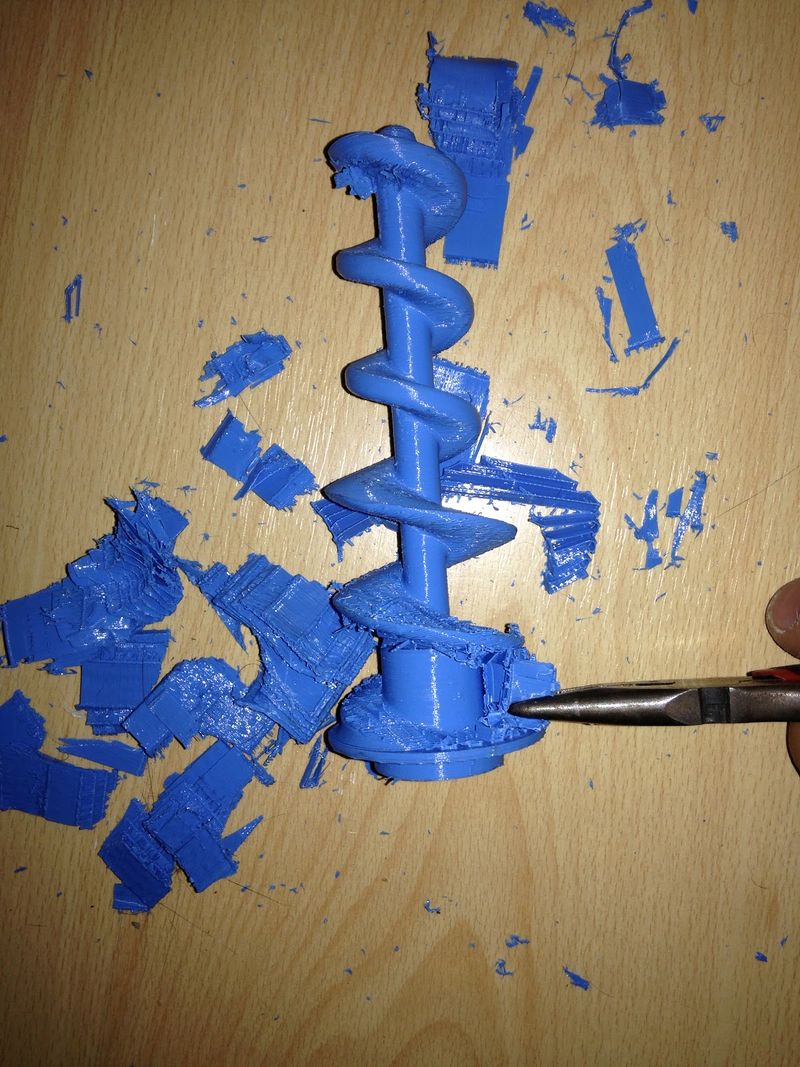
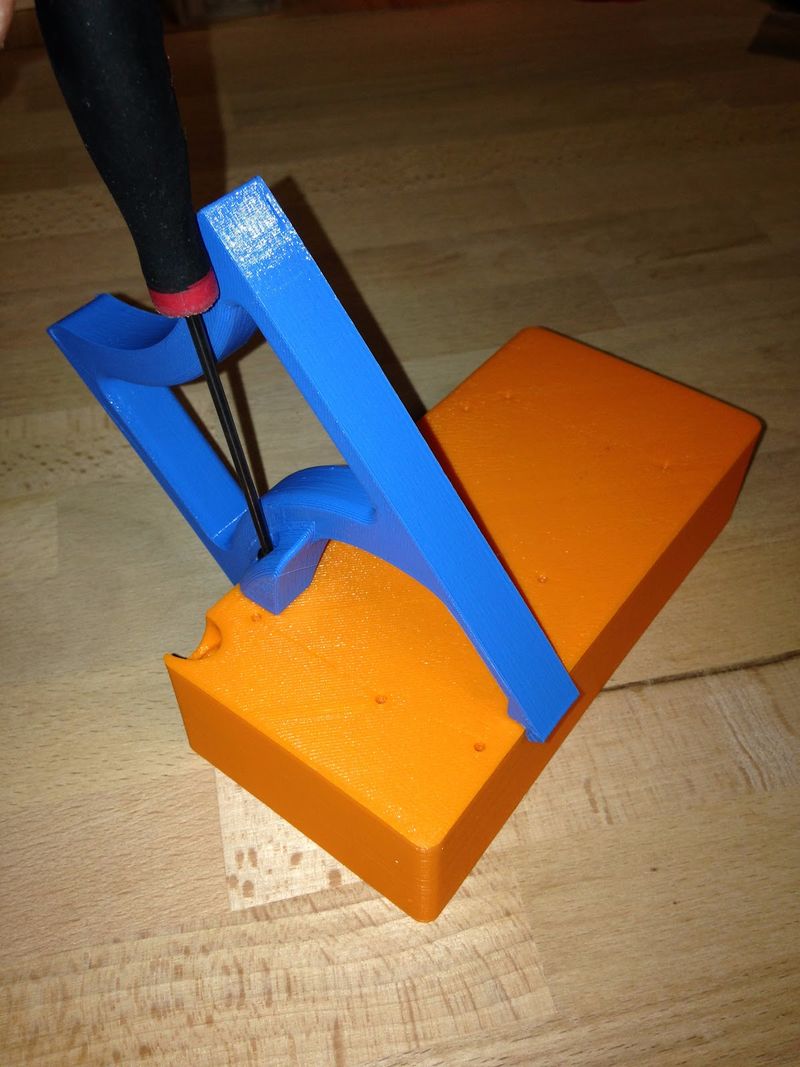
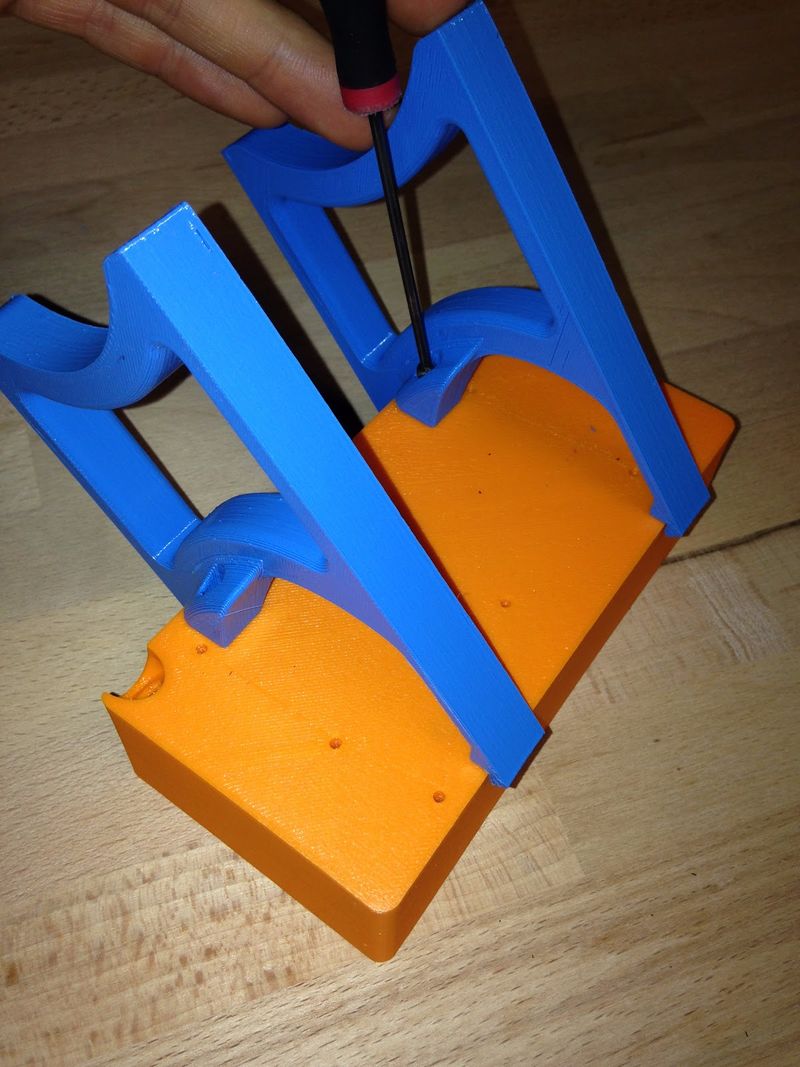
- 6 Étape 5 - Corps principal, enlèvement du support
- 7 Étape 6 - Cale moteur
- 8 Étape 7 - Prépration de l'impression
- 9 Étape 8 - Boîtier (arduino)
- 10 Étape 9 - Prépration de l'impression
- 11 Étape 10 - Vis sans fin
- 12 Étape 11 - Préparation de l'impression
- 13 Étape 12 - Vis sans fin, enlèvement du support
- 14 Étape 13 - Coude
- 15 Étape 14 - Préparation de l'impression
- 16 Étape 15 - Coude, enlèvement du support
- 17 Étape 16 - Couvercle (Arduino)
- 18 Étape 17 - Préparation de l'impression
- 19 Étape 18 - Entonnoir
- 20 Étape 19 - Préparation de l'impression
- 21 Étape 20 - 2 x Pieds
- 22 Étape 21 - Prépration de l'impression
- 23 Étape 22 - 2 x Pieds
- 24 Étape 23 - Prépration de l'impression
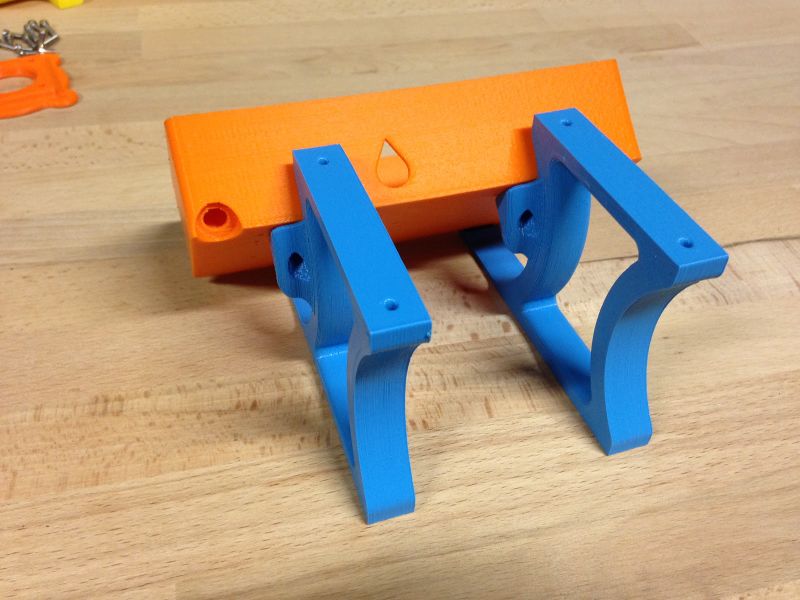
- 25 Étape 24 - Assemblage Pieds + Boîtier
- 26 Étape 25 - Vissez votre pied sur le boîtier à l'aide de vos vis M3 x 12mm
- 27 Étape 26 - Vissez votre pied sur le boîtier à l'aide de vos 2 vis M3 x 12mm
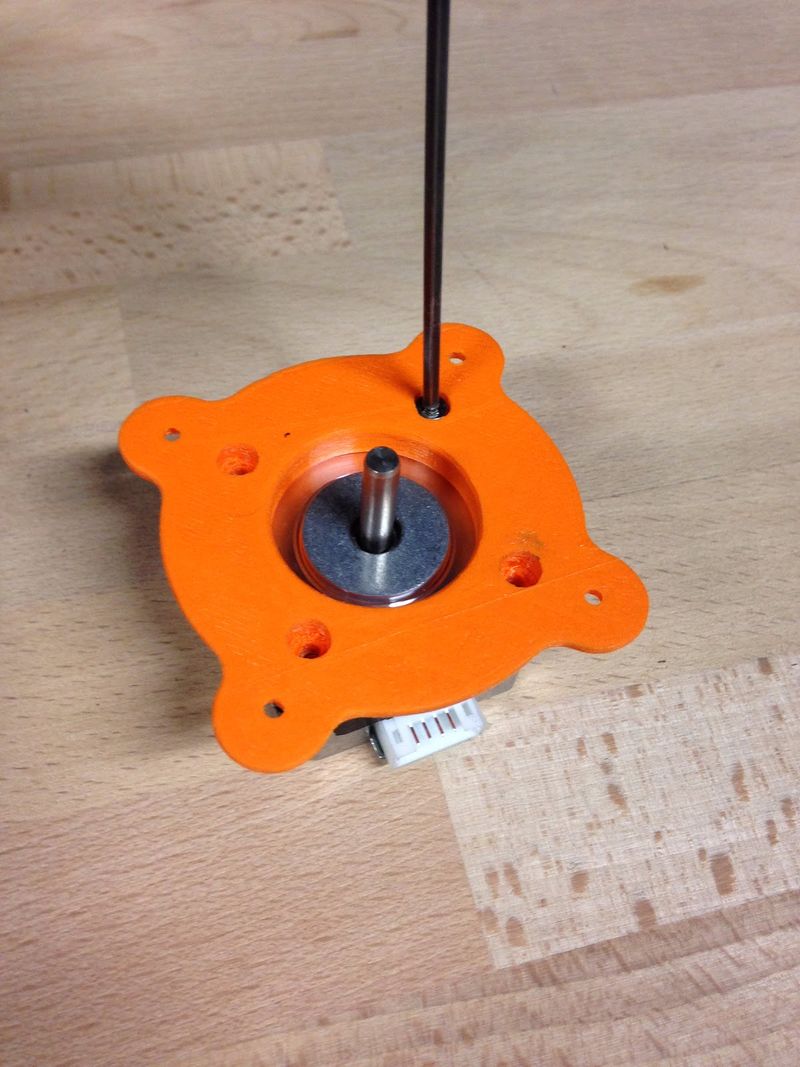
- 28 Étape 27 - Assemblage Cale Moteur + Moteur
- 29 Étape 28 - Vissez votre moteur sur la cale moteur à l'aide de vos 4 vis M3 x 6mm
- 30 Étape 29 - Assemblage Moteur + Vis sans fin
- 31 Étape 30 - Enfoncez la Vis sans fin, sur votre moteur
- 32 Étape 31 - Vissez la vis sans fin à l'aide d'une vis M3 x 12mm
- 33 Étape 32 - Assemblage Moteur + Corps principal
- 34 Étape 33 - Insérez le moteur dans le corps principal
- 35 Étape 34 - Etape 1: Préparation de l'impression
- 36 Étape 35 - Corps Principal
- 37 Étape 36 - Zoom sur les réglages
- 38 Étape 37 - Corps principal, enlèvement du support
- 39 Étape 38 - Cale moteur
- 40 Étape 39 - Prépration de l'impression
- 41 Étape 40 - Boîtier (arduino)
- 42 Étape 41 - Prépration de l'impression
- 43 Étape 42 - Vis sans fin
- 44 Étape 43 - Préparation de l'impression
- 45 Étape 44 - Vis sans fin, enlèvement du support
- 46 Étape 45 - Coude
- 47 Étape 46 - Préparation de l'impression
- 48 Étape 47 - Coude, enlèvement du support
- 49 Étape 48 - Couvercle (Arduino)
- 50 Étape 49 - Préparation de l'impression
- 51 Étape 50 - Entonnoir
- 52 Étape 51 - Préparation de l'impression
- 53 Étape 52 - 2 x Pieds
- 54 Étape 53 - Prépration de l'impression
- 55 Étape 54 - 2 x Pieds
- 56 Étape 55 - Prépration de l'impression
- 57 Étape 56 - Assemblage Pieds + Boîtier
- 58 Étape 57 - Vissez votre pied sur le boîtier à l'aide de vos vis M3 x 12mm
- 59 Étape 58 - Vissez votre pied sur le boîtier à l'aide de vos 2 vis M3 x 12mm
- 60 Étape 59 - Assemblage Cale Moteur + Moteur
- 61 Étape 60 - Vissez votre moteur sur la cale moteur à l'aide de vos 4 vis M3 x 6mm
- 62 Étape 61 - Assemblage Moteur + Vis sans fin
- 63 Étape 62 - Enfoncez la Vis sans fin, sur votre moteur
- 64 Étape 63 - Vissez la vis sans fin à l'aide d'une vis M3 x 12mm
- 65 Étape 64 - Assemblage Moteur + Corps principal
- 66 Étape 65 - Insérez le moteur dans le corps principal
- 67 Commentaires
Introduction
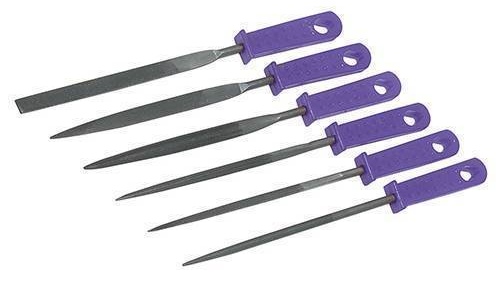
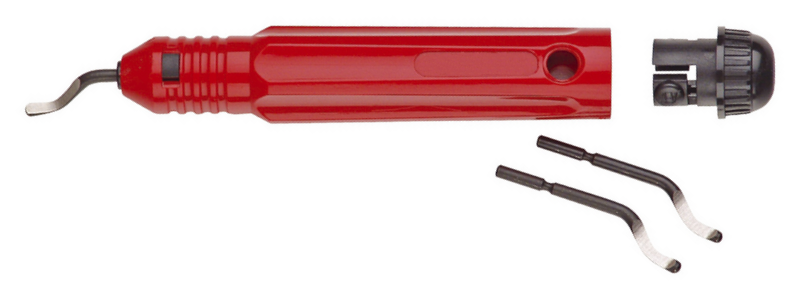
Poids de plastique nécessaire : 500 grammes (Besoin de filaments ? C’est par ici) Délai de livraison: 1 semaine Temps de montage : 2 heures Difficulté de montage : facile Outils : clé Allen 2.5 mm, set de lime, tournevis plat 2.0mm, ébavurer
Couleur d’impression standard pour les pièces: marron.
Matériaux
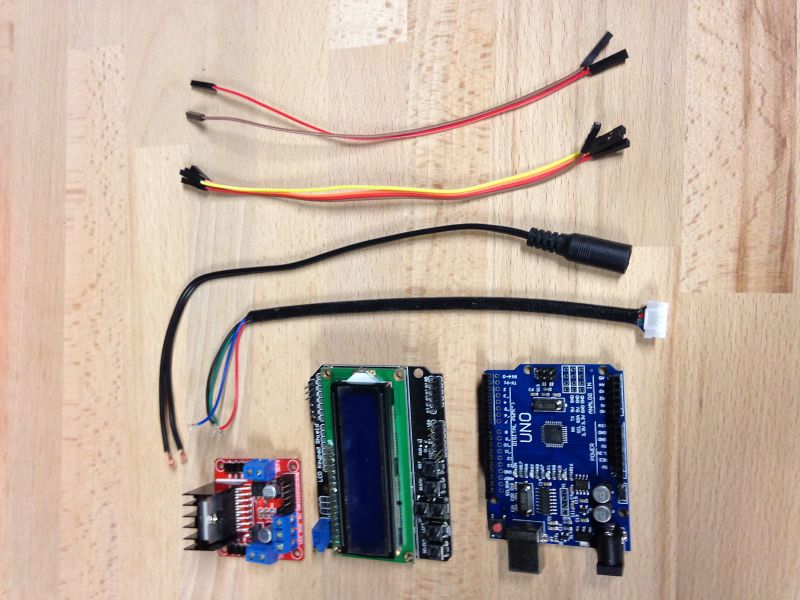
- 1 x L298N Dual H Bridge Stepper Motor Driver Board For Arduino
- 1 x LCD1602 LCD characters input/output expansion board LCD Keypad Shield
* 1 x carte de contrôle (arduino)
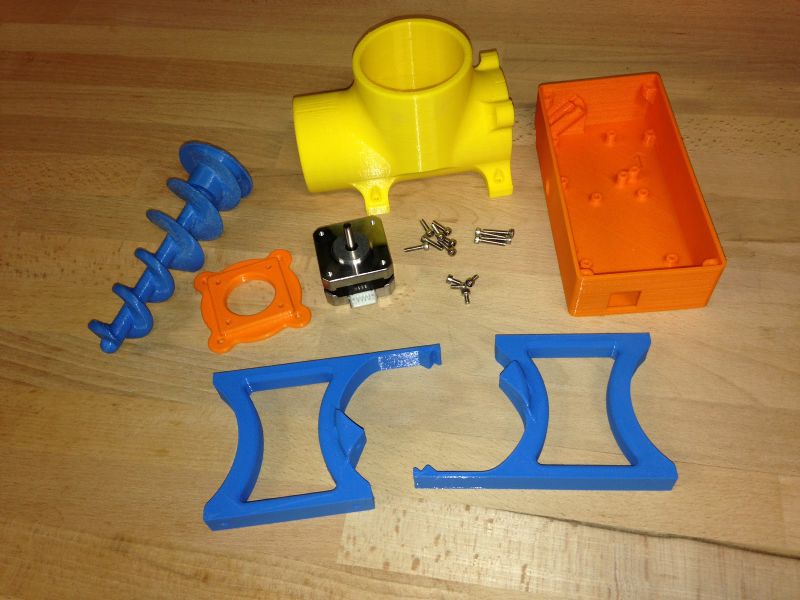
* 1 x moteur NEMA 17, 25mm de corps
* 6 x fils Dupont (femelle / femelle)
* 1 x câble d’alimentation
* 1 x câble pour moteur
* 1 x alimentation 12V et 4.2A
* 1 x set de quincaillerie
Outils
- Clef Allen 2.5mm
- Tournevis plat 2.0mm
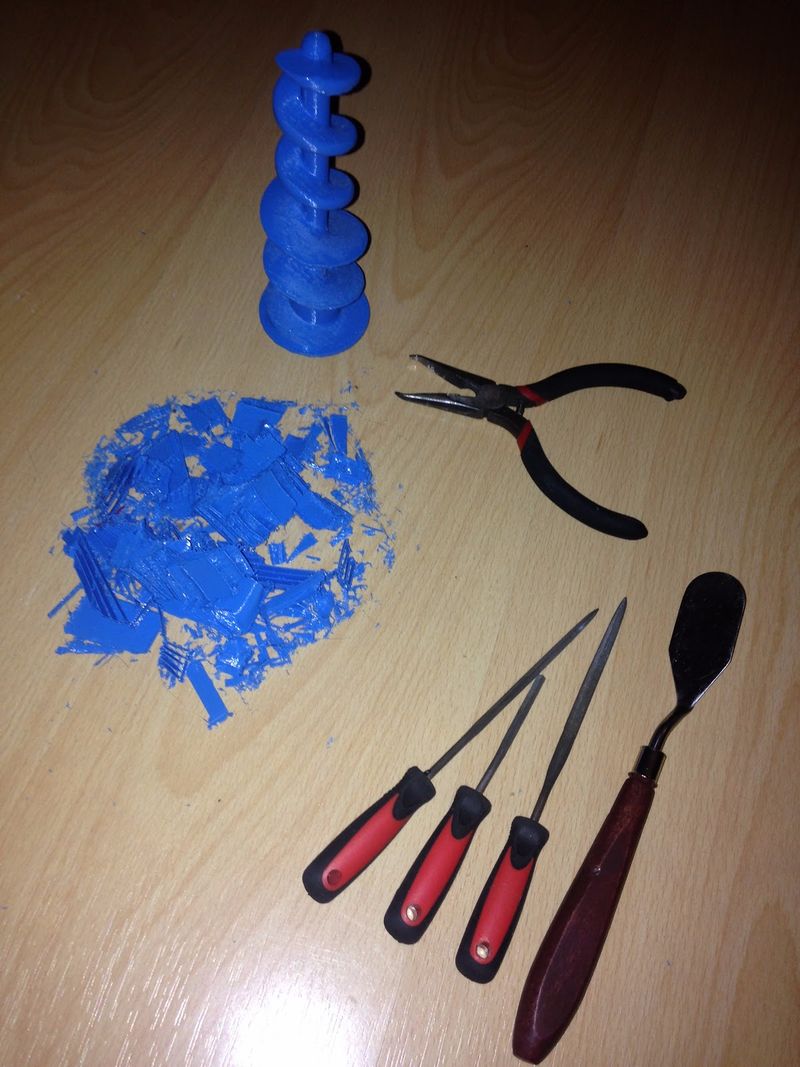
- Set de lime
- Ebavureur
Étape 2 - Etape 1: Préparation de l'impression
Durée: 28h 49min
Composants nécessaires:
- Les STLs de votre box
- Cura by dagoma
ou
- Cura 15.04.3 + profil de discovery 200
ou
- Votre slicer préféré
Outils:
- Votre ordinateur
- Une imprimante 3D
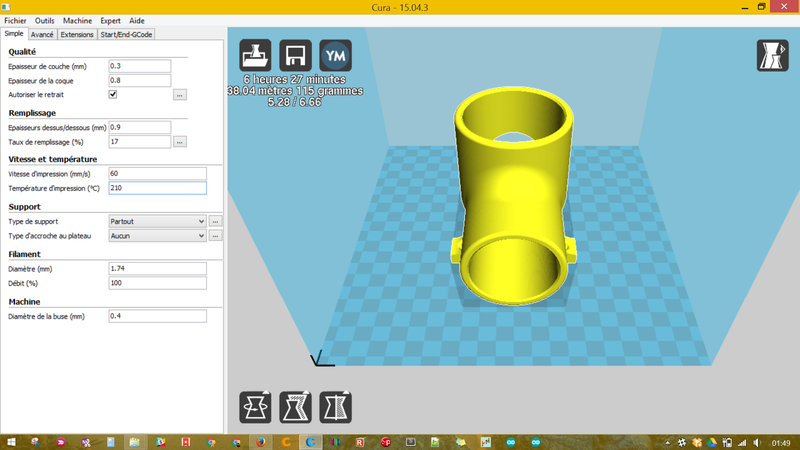
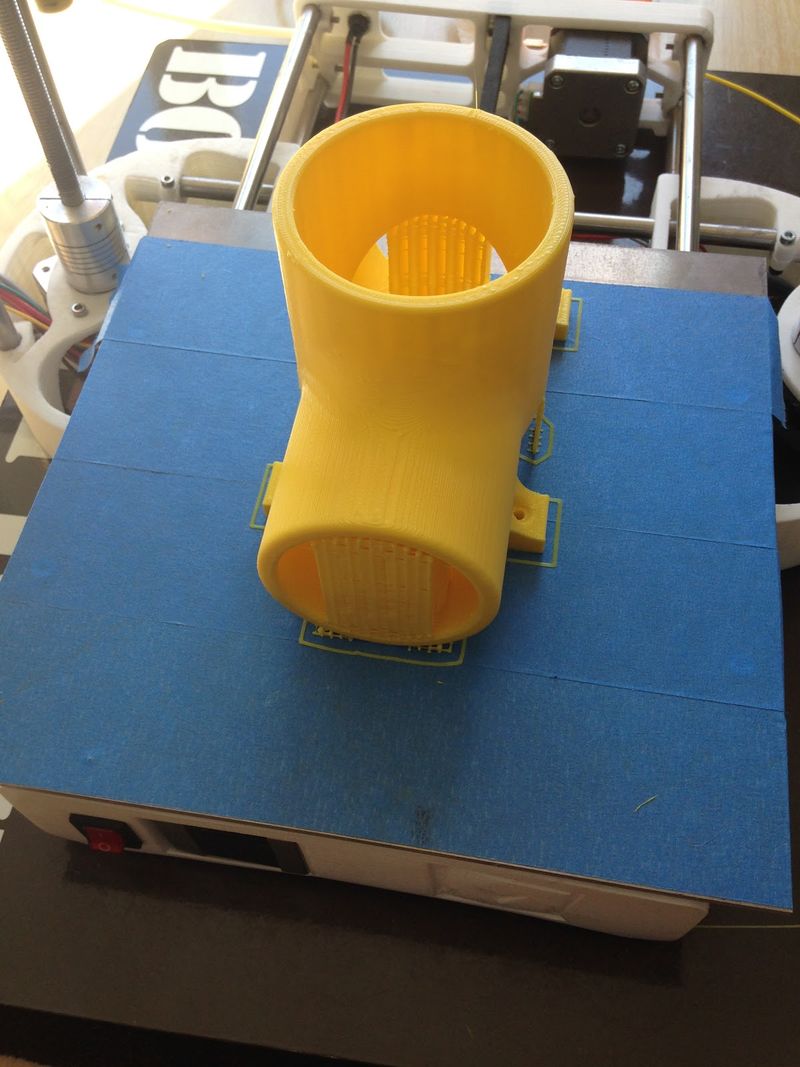
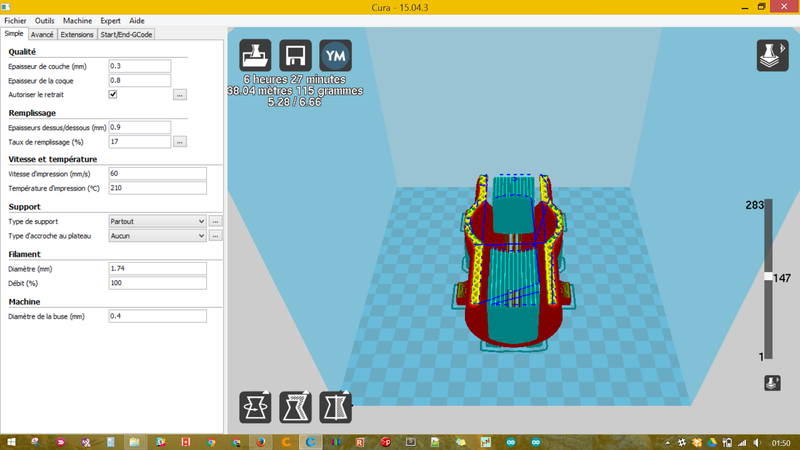
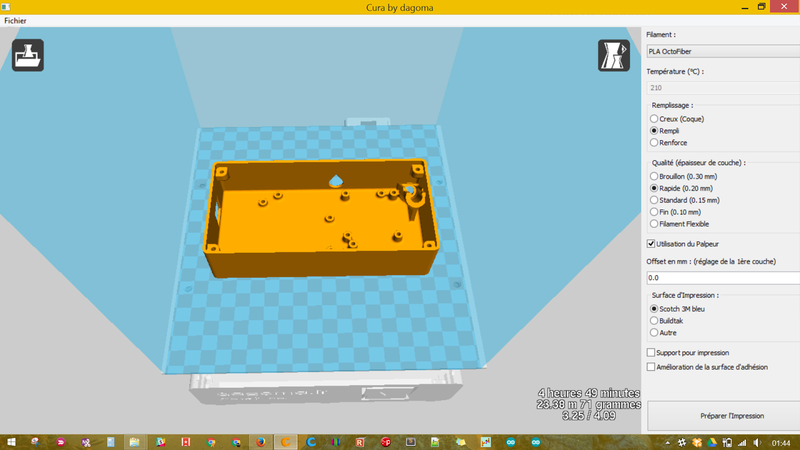
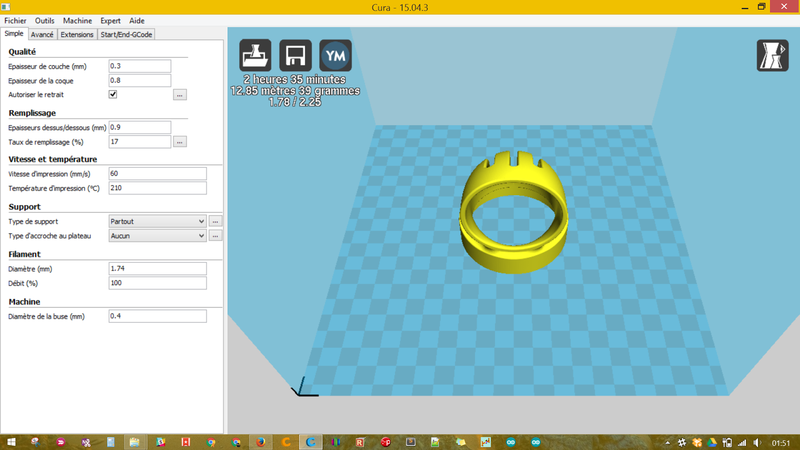
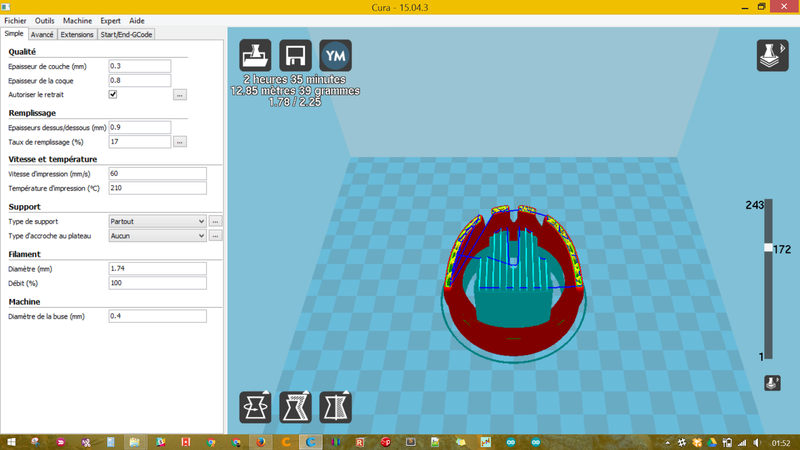
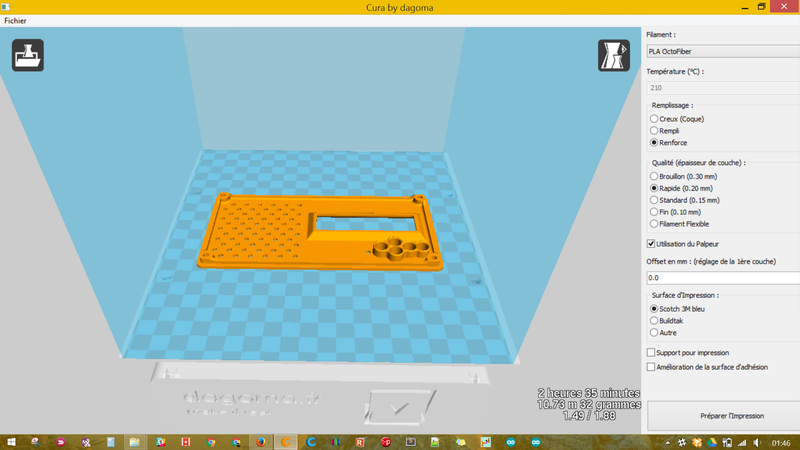
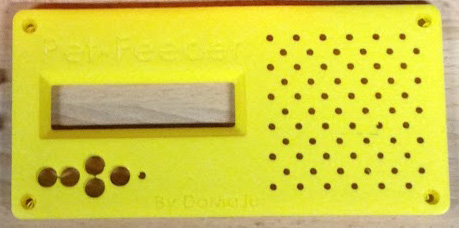
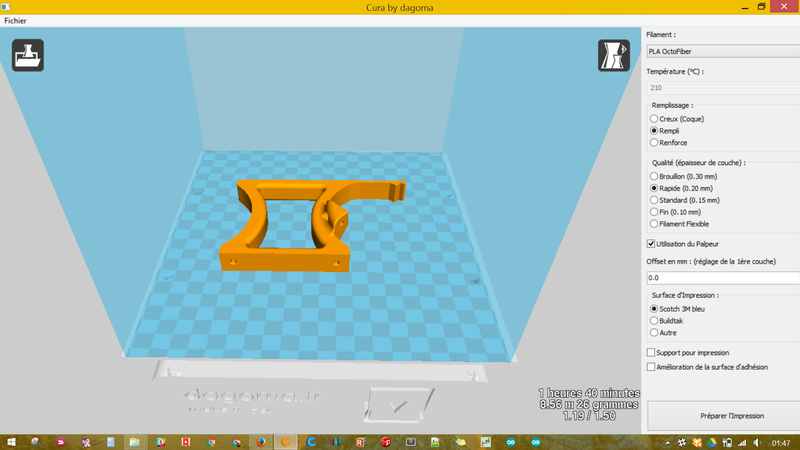
Étape 4 - Zoom sur les réglages
Zoom sur les réglages:
- Slicer utilisé:
Cura 15.04.3 + profil Disco200
- Remplissage: 17%
- Vitesse d'impression recommandé: 50mm/s
- Support activé
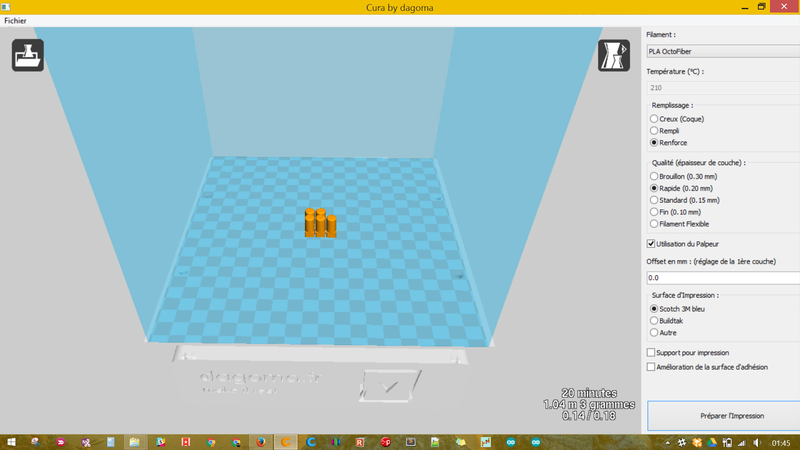
Étape 7 - Prépration de l'impression
Zoom sur les réglages:
- Slicer utilisé:
Cura by dagoma
- Remplissage: 17%
- Vitesse d'impression recommandée: 50mm/s
Étape 9 - Prépration de l'impression
Zoom sur les réglages:
- Slicer utilisé:
Cura by Dagoma
- Remplissage: 17%
- Vitesse d'impression recommandé: 50mm/s
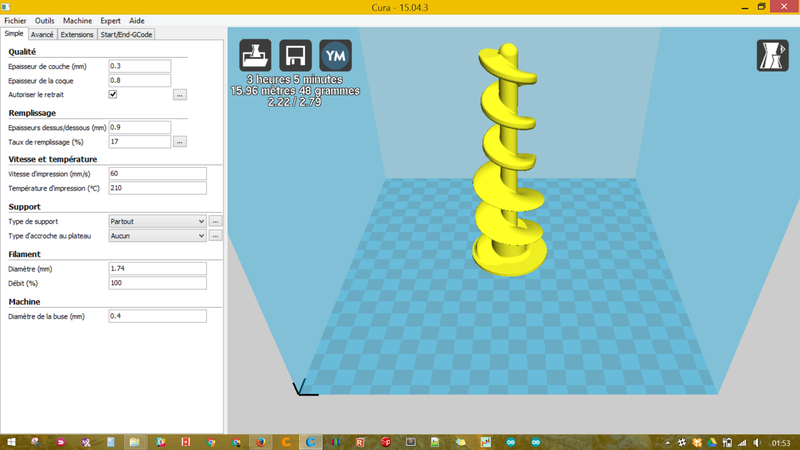
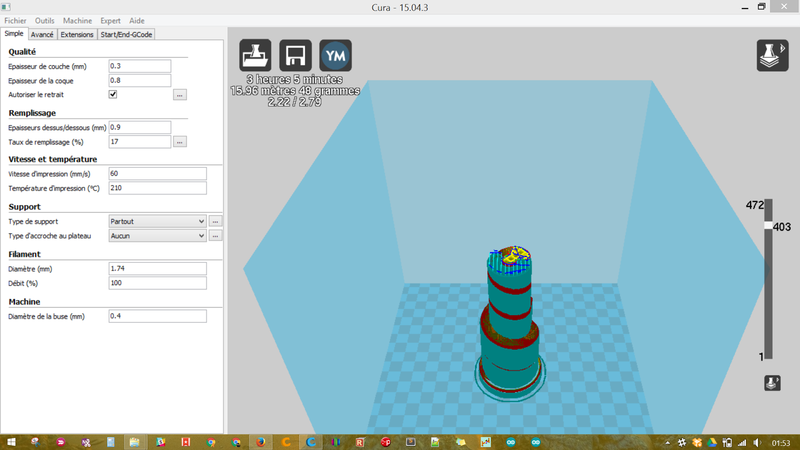
Étape 11 - Préparation de l'impression
Zoom sur les réglages:
- Slicer utilisé:
Cura 15.04.3 + profil Disco200
- Remplissage: 17%
- Vitesse d'impression recommandé: 50mm/s
- Support activé
Étape 14 - Préparation de l'impression
Zoom sur les réglages:
- Slicer utilisé:
Cura 15.04.3 + profil Disco200
- Remplissage: 17%
- Vitesse d'impression recommandé: 50mm/s
- Support activé
Étape 17 - Préparation de l'impression
Zoom sur les réglages:
- Slicer sur les réglages:
Cura by Dagoma
- Remplissage: 17%
- Vitesse d'impression recommandé: 50mm/s
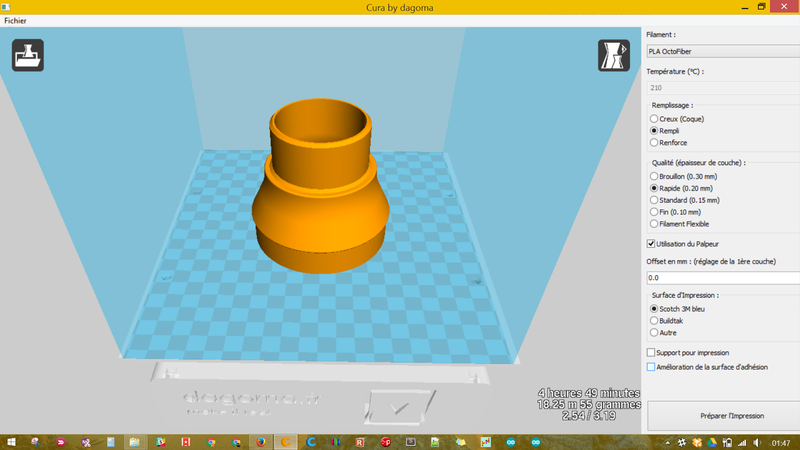
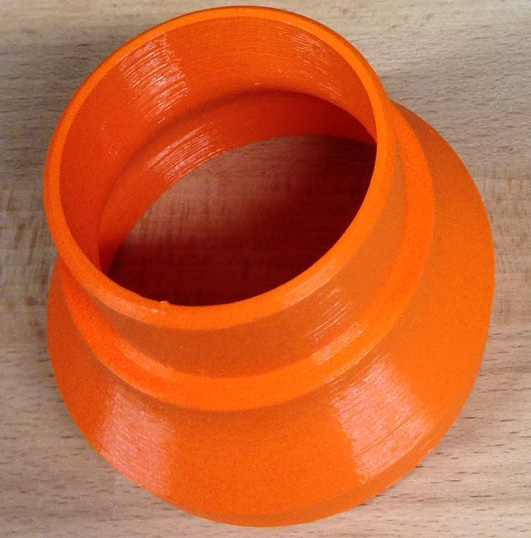
Étape 19 - Préparation de l'impression
Zoom sur les réglages:
- Slicer utilisé:
Cura by Dagoma
- Remplissage: 17%
- Vitesse d'impression recommandé: 50mm/s
Étape 21 - Prépration de l'impression
Zoom sur les réglages:
- Slicer utilisé:
Cura by Dagoma
- Remplissage: 17%
- Vitesse d'impression recommandé: 50mm/s
Étape 23 - Prépration de l'impression
Zoom sur les réglages:
- Slicer utilisé:
Cura by Dagoma
- Remplissage: 17%
- Vitesse d'impression recommandé: 50mm/s
Étape 24 - Assemblage Pieds + Boîtier
Durée: 15min
Composants nécessaires:
- 2x Pieds
- 1x Boîtier
- 2x vis M3 x 12mm
Outils:
- Clef Allen 2.5mm
Étape 27 - Assemblage Cale Moteur + Moteur
Durée: 15minutes
Composants nécessaires:
- 1x cale moteur
- 1x moteur
- 4x vis M3 x 6mm
Outils:
- Clef Allen 2.5mm
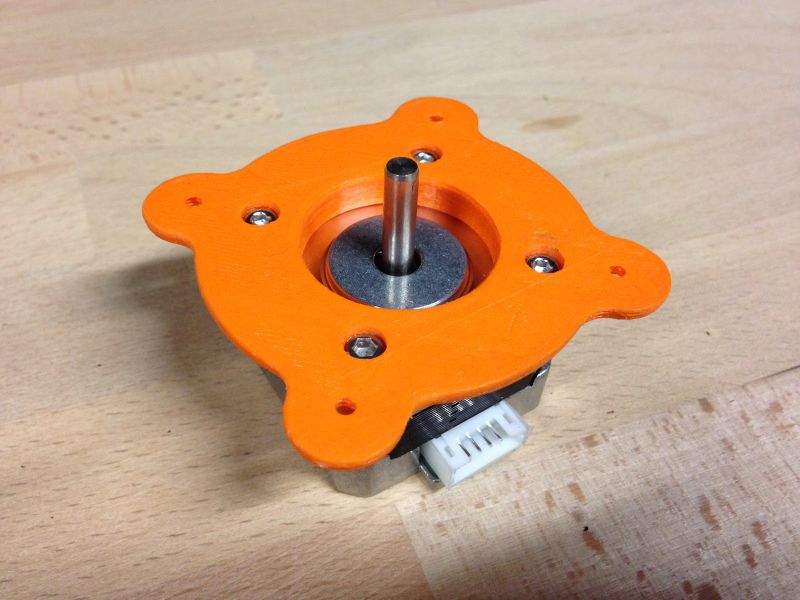
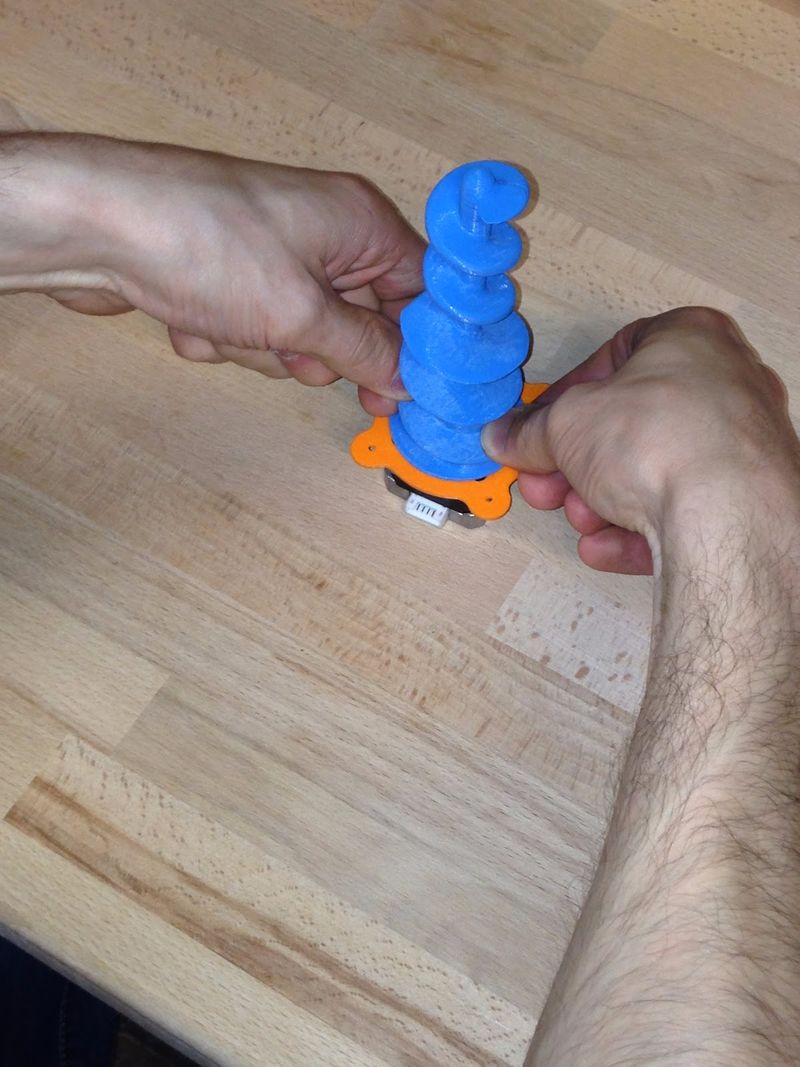
Étape 29 - Assemblage Moteur + Vis sans fin
Durée: 15min
Composants nécessaires:
- 1x Bloc Cale moteur + moteur
- 1x vis sans fin
- 1x vis M3 x 12 mm
Outils:
- Clef Allen 2.5mm
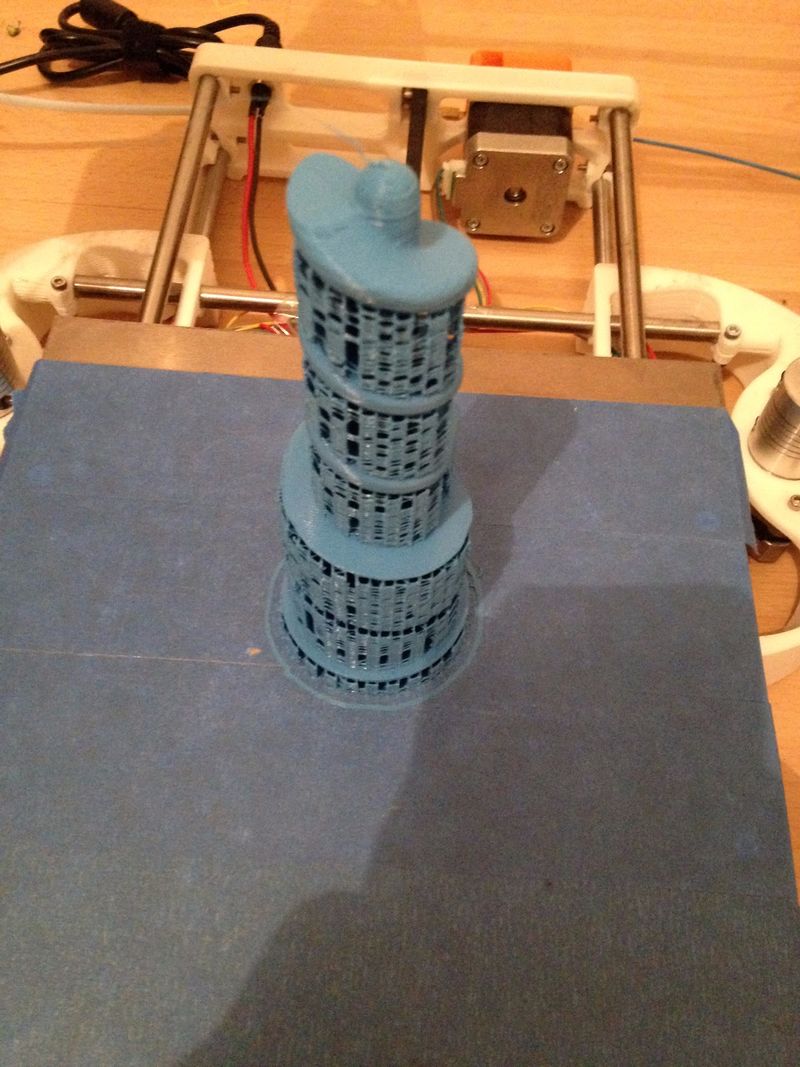
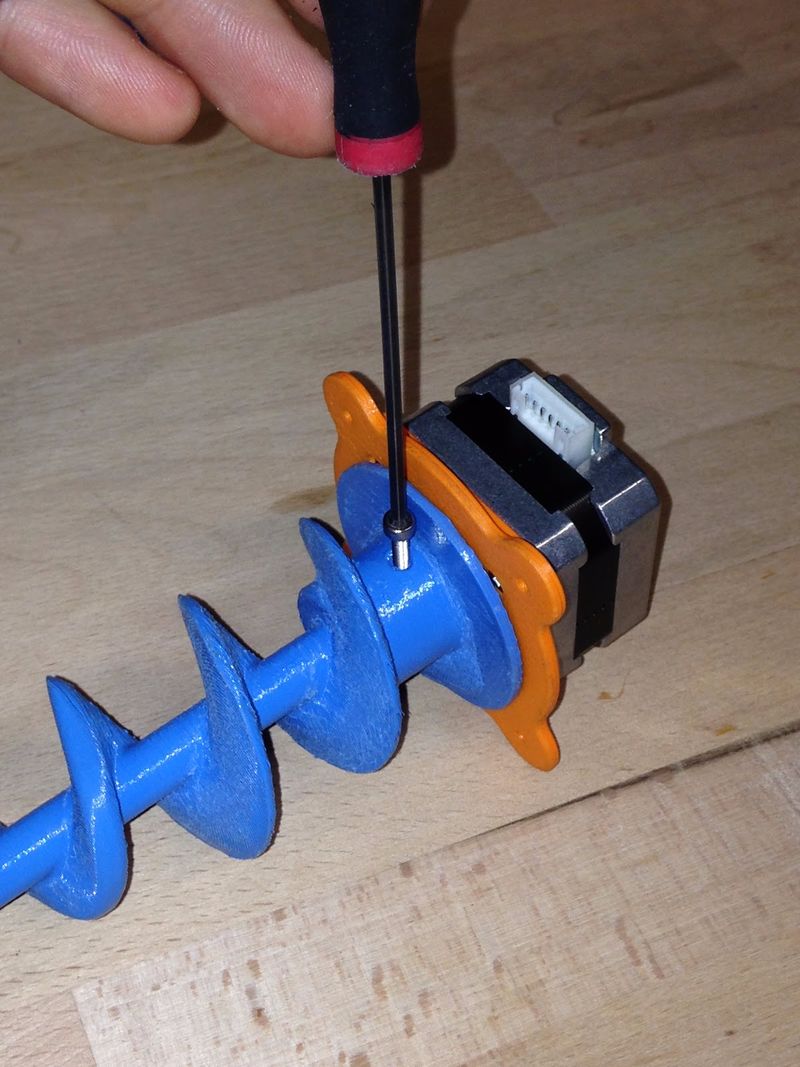
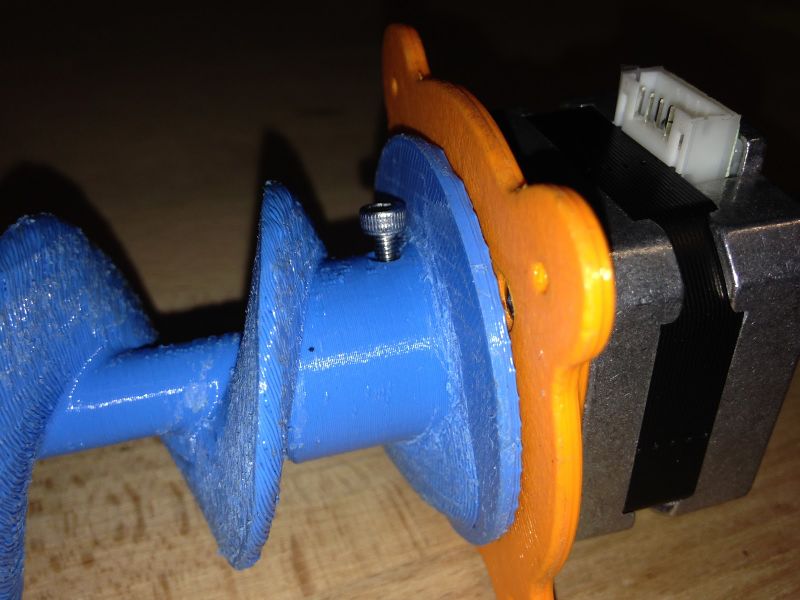
Étape 31 - Vissez la vis sans fin à l'aide d'une vis M3 x 12mm
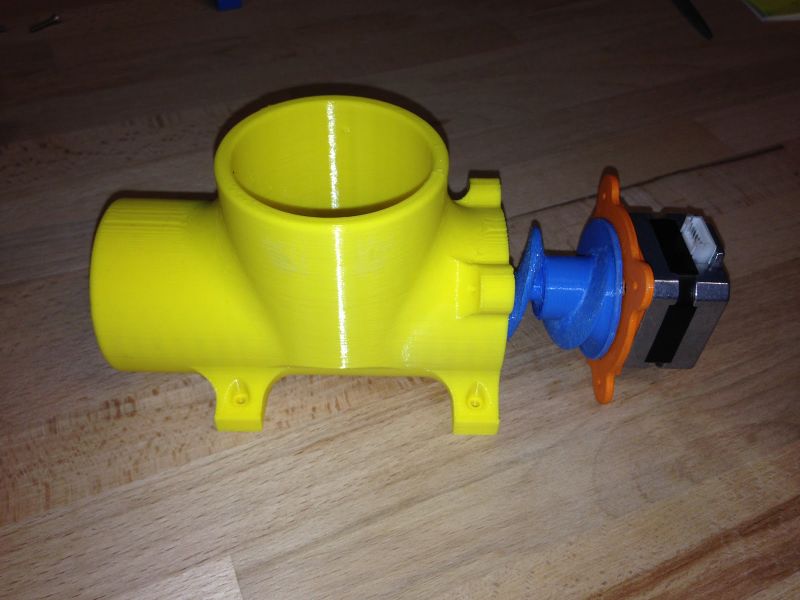
Vérifiez que la vis sans fin tourne librement
Étape 32 - Assemblage Moteur + Corps principal
Durée: 20 minutes
Composants nécessaires:
- 1x bloc moteur + Vis sans fin
- 1x Corps principal
- 4x vis M3 x 12 mm
Outils:
- Clef Allen 2.5mm
Étape 34 - Etape 1: Préparation de l'impression
Durée: 28h 49min
Composants nécessaires:
- Les STLs de votre box
- Cura by dagoma
ou
- Cura 15.04.3 + profil de discovery 200
ou
- Votre slicer préféré
Outils:
- Votre ordinateur
- Une imprimante 3D
Étape 36 - Zoom sur les réglages
Zoom sur les réglages:
- Slicer utilisé:
Cura 15.04.3 + profil Disco200
- Remplissage: 17%
- Vitesse d'impression recommandé: 50mm/s
- Support activé
Étape 39 - Prépration de l'impression
Zoom sur les réglages:
- Slicer utilisé:
Cura by dagoma
- Remplissage: 17%
- Vitesse d'impression recommandée: 50mm/s
Étape 41 - Prépration de l'impression
Zoom sur les réglages:
- Slicer utilisé:
Cura by Dagoma
- Remplissage: 17%
- Vitesse d'impression recommandé: 50mm/s
Étape 43 - Préparation de l'impression
Zoom sur les réglages:
- Slicer utilisé:
Cura 15.04.3 + profil Disco200
- Remplissage: 17%
- Vitesse d'impression recommandé: 50mm/s
- Support activé
Étape 46 - Préparation de l'impression
Zoom sur les réglages:
- Slicer utilisé:
Cura 15.04.3 + profil Disco200
- Remplissage: 17%
- Vitesse d'impression recommandé: 50mm/s
- Support activé
Étape 49 - Préparation de l'impression
Zoom sur les réglages:
- Slicer sur les réglages:
Cura by Dagoma
- Remplissage: 17%
- Vitesse d'impression recommandé: 50mm/s
Étape 51 - Préparation de l'impression
Zoom sur les réglages:
- Slicer utilisé:
Cura by Dagoma
- Remplissage: 17%
- Vitesse d'impression recommandé: 50mm/s
Étape 53 - Prépration de l'impression
Zoom sur les réglages:
- Slicer utilisé:
Cura by Dagoma
- Remplissage: 17%
- Vitesse d'impression recommandé: 50mm/s
Étape 55 - Prépration de l'impression
Zoom sur les réglages:
- Slicer utilisé:
Cura by Dagoma
- Remplissage: 17%
- Vitesse d'impression recommandé: 50mm/s
Étape 56 - Assemblage Pieds + Boîtier
Durée: 15min
Composants nécessaires:
- 2x Pieds
- 1x Boîtier
- 2x vis M3 x 12mm
Outils:
- Clef Allen 2.5mm
Étape 59 - Assemblage Cale Moteur + Moteur
Durée: 15minutes
Composants nécessaires:
- 1x cale moteur
- 1x moteur
- 4x vis M3 x 6mm
Outils:
- Clef Allen 2.5mm
Étape 61 - Assemblage Moteur + Vis sans fin
Durée: 15min
Composants nécessaires:
- 1x Bloc Cale moteur + moteur
- 1x vis sans fin
- 1x vis M3 x 12 mm
Outils:
- Clef Allen 2.5mm
Étape 63 - Vissez la vis sans fin à l'aide d'une vis M3 x 12mm
Vérifiez que la vis sans fin tourne librement
Étape 64 - Assemblage Moteur + Corps principal
Durée: 20 minutes
Composants nécessaires:
- 1x bloc moteur + Vis sans fin
- 1x Corps principal
- 4x vis M3 x 12 mm
Outils:
- Clef Allen 2.5mm



 Français
 English
 Deutsch
 Español
 Italiano
 Português