| Ligne 1 : | Ligne 1 : | ||
{{ {{tntn|Tuto Details}} | {{ {{tntn|Tuto Details}} | ||
| − | |||
| − | |||
| − | |||
|Main_Picture=People_pedal_powered_computer_charger_IMG_9907c.JPG | |Main_Picture=People_pedal_powered_computer_charger_IMG_9907c.JPG | ||
|Licences=Attribution-ShareAlike (CC BY-SA) | |Licences=Attribution-ShareAlike (CC BY-SA) | ||
| Ligne 14 : | Ligne 11 : | ||
|Currency=EUR (€) | |Currency=EUR (€) | ||
|Tags=energy, bicycle, computer, autonomy, | |Tags=energy, bicycle, computer, autonomy, | ||
| + | |SourceLanguage=none | ||
| + | |Language=en | ||
| + | |IsTranslation=0 | ||
}} | }} | ||
{{ {{tntn|Introduction}} | {{ {{tntn|Introduction}} | ||
| Ligne 35 : | Ligne 35 : | ||
(see below in the instructions to learn more about the material) | (see below in the instructions to learn more about the material) | ||
| − | |Tools=- woodworking tools | + | |Tools=- woodworking tools : saw, vertical drill |
| − | - metalworking tools | + | - metalworking tools : cutting tools, making holes, treading |
| − | - soldering material | + | - soldering material : soldering iron, soldering wire |
- multimeter | - multimeter | ||
| Ligne 110 : | Ligne 110 : | ||
https://www.benl.ebay.be/itm/8A-DC-DC-BUCK-CONVERTER-STEP-DOWN-8-40V-TO-1-25-36V-WITH-CURRENT-CONTROL-XL4016-/181653531755? | https://www.benl.ebay.be/itm/8A-DC-DC-BUCK-CONVERTER-STEP-DOWN-8-40V-TO-1-25-36V-WITH-CURRENT-CONTROL-XL4016-/181653531755? | ||
| + | |Step_Picture_00=People_pedal_powered_computer_charger_Screenshot-2017-11-16_8A_DC-DC_BUCK_CONVERTER_STEP_DOWN_8-40V_TO_1_25-36V_WITH_CURRENT_CONTROL_XL4016_eBay.png | ||
| + | |Step_Picture_01=People_pedal_powered_computer_charger_F0405590-01.jpg | ||
| + | }} | ||
| + | {{ {{tntn|Tuto Step}} | ||
| + | |Step_Title=Back to the bicycle stand | ||
| + | |Step_Content=We start with the bicycle stand. First remove the roller of the stand. We will make a new roller that can be put on the generator. Keep the bold and nut that hold the moving part to the bike stand. | ||
| + | |||
| + | <br /> | ||
| + | }} | ||
| + | {{ {{tntn|Tuto Step}} | ||
| + | |Step_Title=Mounting the generator to the bike stand | ||
| + | |Step_Content=Then we will make our own fixation for the generator. Find a metal joiner that can make a piece that can hold the generator. We're using a steel tube of 40x80mm. | ||
| + | |||
| + | Follow the plan if you happen to have the same bicycle generator. If not, verify the measures! | ||
| + | |||
| + | The two first horizontal holes are there for the axle of the old bicycle roller. The second vertical hole leaves place for the adjusting screw. This allows to adjust the tension of the bicycle wheel. The last four holes are there to hold the generator. Check this with the generator you have. | ||
| − | + | Now make a part in wood. Use a vertical drill for the holes, it will make them more precise. | |
| − | - | + | Note : we changed the model afterwards and we removed a part of the metal so we could adjust the position more easily. |
| + | }} | ||
| + | {{ {{tntn|Tuto Step}} | ||
| + | |Step_Title=Roller : slow- to fast-rotation mechanical energy | ||
| + | |Step_Content=We're making a new roller for the generator. The roller is converting the slow-turning mechanical energy of the bicycle wheel to a fast-turning mechanical energy. Electric generators like high speeds. | ||
| + | |||
| + | Material : | ||
| − | + | - steel bar of 40mm diameter | |
| − | + | Instructions : | |
| − | - | + | - find a metal joiner or a lathe to make the piece. |
| − | + | Make the metal piece based on the plan. We found that a roller diameter of 40mm gives good results. The center hole should be the same diameter as the axle of the generator. | |
| − | |Step_Picture_00= | + | |Step_Picture_00=People_pedal_powered_computer_charger_20170505_213825.jpg |
| − | |Step_Picture_01= | + | |Step_Picture_01=People_pedal_powered_computer_charger_PPP_computer_charger_6-1.png |
}} | }} | ||
{{ {{tntn|Tuto Step}} | {{ {{tntn|Tuto Step}} | ||
| − | |Step_Title= | + | |Step_Title=Testing the stand and generator |
| − | |Step_Content= | + | |Step_Content=Fix the roller on the generator. |
| − | + | Gently hit the roller on the axle of the generator and fix the roller with a M4 screw. If the roller doesn't fit you can heat the piece so the hole becomes bigger. | |
| − | + | Verify the regular turning of the roller.. Test if the roller is centered and is turning regular. This is to avoid vibrations an wear of the bicycle. | |
| − | + | Mount the generator with its roller to the bicycle stan | |
| − | |||
| − | |||
}} | }} | ||
{{ {{tntn|Tuto Step}} | {{ {{tntn|Tuto Step}} | ||
|Step_Title=Making the circuit | |Step_Title=Making the circuit | ||
| − | |Step_Content= | + | |Step_Content=Instructions : |
| + | |||
| + | - solder the converter into the circuit. | ||
| + | |||
| + | Screw the output to a pair of cables that is convenient for you, say 1m of 1.5mm2. Solder/screw the same female plug as above to the other end of the cable. This is the point where you can connect your computer plug. | ||
| + | |||
| + | Screw the input to a pair of cables, again 1m of 1.5mm2. This is the point where the display will be connected. | ||
| + | |||
| + | - protect the converter. | ||
| + | |||
| + | You may want to protect the converter ant put it in a box of a non-conducting material. | ||
}} | }} | ||
{{ {{tntn|Tuto Step}} | {{ {{tntn|Tuto Step}} | ||
| Ligne 194 : | Ligne 224 : | ||
|Step_Picture_00=People_pedal_powered_computer_charger_0019Pecha_Kucha_V_lo_M_.jpg | |Step_Picture_00=People_pedal_powered_computer_charger_0019Pecha_Kucha_V_lo_M_.jpg | ||
|Step_Picture_01=People_pedal_powered_computer_charger_s-l500.jpg | |Step_Picture_01=People_pedal_powered_computer_charger_s-l500.jpg | ||
| − | |||
| − | |||
| − | |||
| − | |||
| − | |||
| − | |||
| − | |||
| − | |||
| − | |||
| − | |||
| − | |||
| − | |||
| − | |||
| − | |||
| − | |||
| − | |||
| − | |||
| − | |||
| − | |||
| − | |||
| − | |||
| − | |||
| − | |||
| − | |||
}} | }} | ||
{{ {{tntn|Tuto Step}} | {{ {{tntn|Tuto Step}} | ||
Version du 11 septembre 2019 à 21:55
Sommaire
- 1 Introduction
- 2 Étape 1 - People Pedal Power
- 3 Étape 2 - Overview
- 4 Étape 3 - Generator : mechanical to electric energy
- 5 Étape 4 - Back to the generator
- 6 Étape 5 - Bicycle stand : dynamic energy to static energy
- 7 Étape 6 - Conversion : messy DC power to flat DC voltage
- 8 Étape 7 - Back to the bicycle stand
- 9 Étape 8 - Mounting the generator to the bike stand
- 10 Étape 9 - Roller : slow- to fast-rotation mechanical energy
- 11 Étape 10 - Testing the stand and generator
- 12 Étape 11 - Making the circuit
- 13 Étape 12 - Charging : adapting to the computer voltage
- 14 Étape 13 - Energy monitoring
- 15 Étape 14 - Bicycle : human energy to mechanical energy
- 16 Étape 15 - Charging more than a computer
- 17 Notes et références
- 18 Commentaires
Introduction
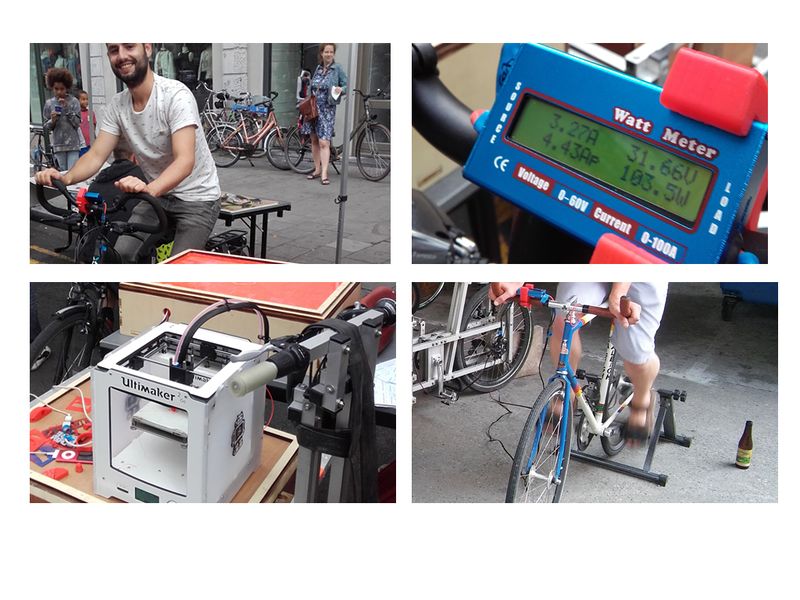
The project Vélo M2 plays with PPP (people pedal power) applications. In Brussels we're having PPP open-air cinéma projections, PPP mobile fablab workshops and PPP music scenes and DJ sets. www.velom2.be
This projects takes people pedal power to a smaller scale. We will be charging a computer or phone. In order to demonstrate the accessibility, we're construction the device in a remote town in Sweden, Torsby.
Matériaux
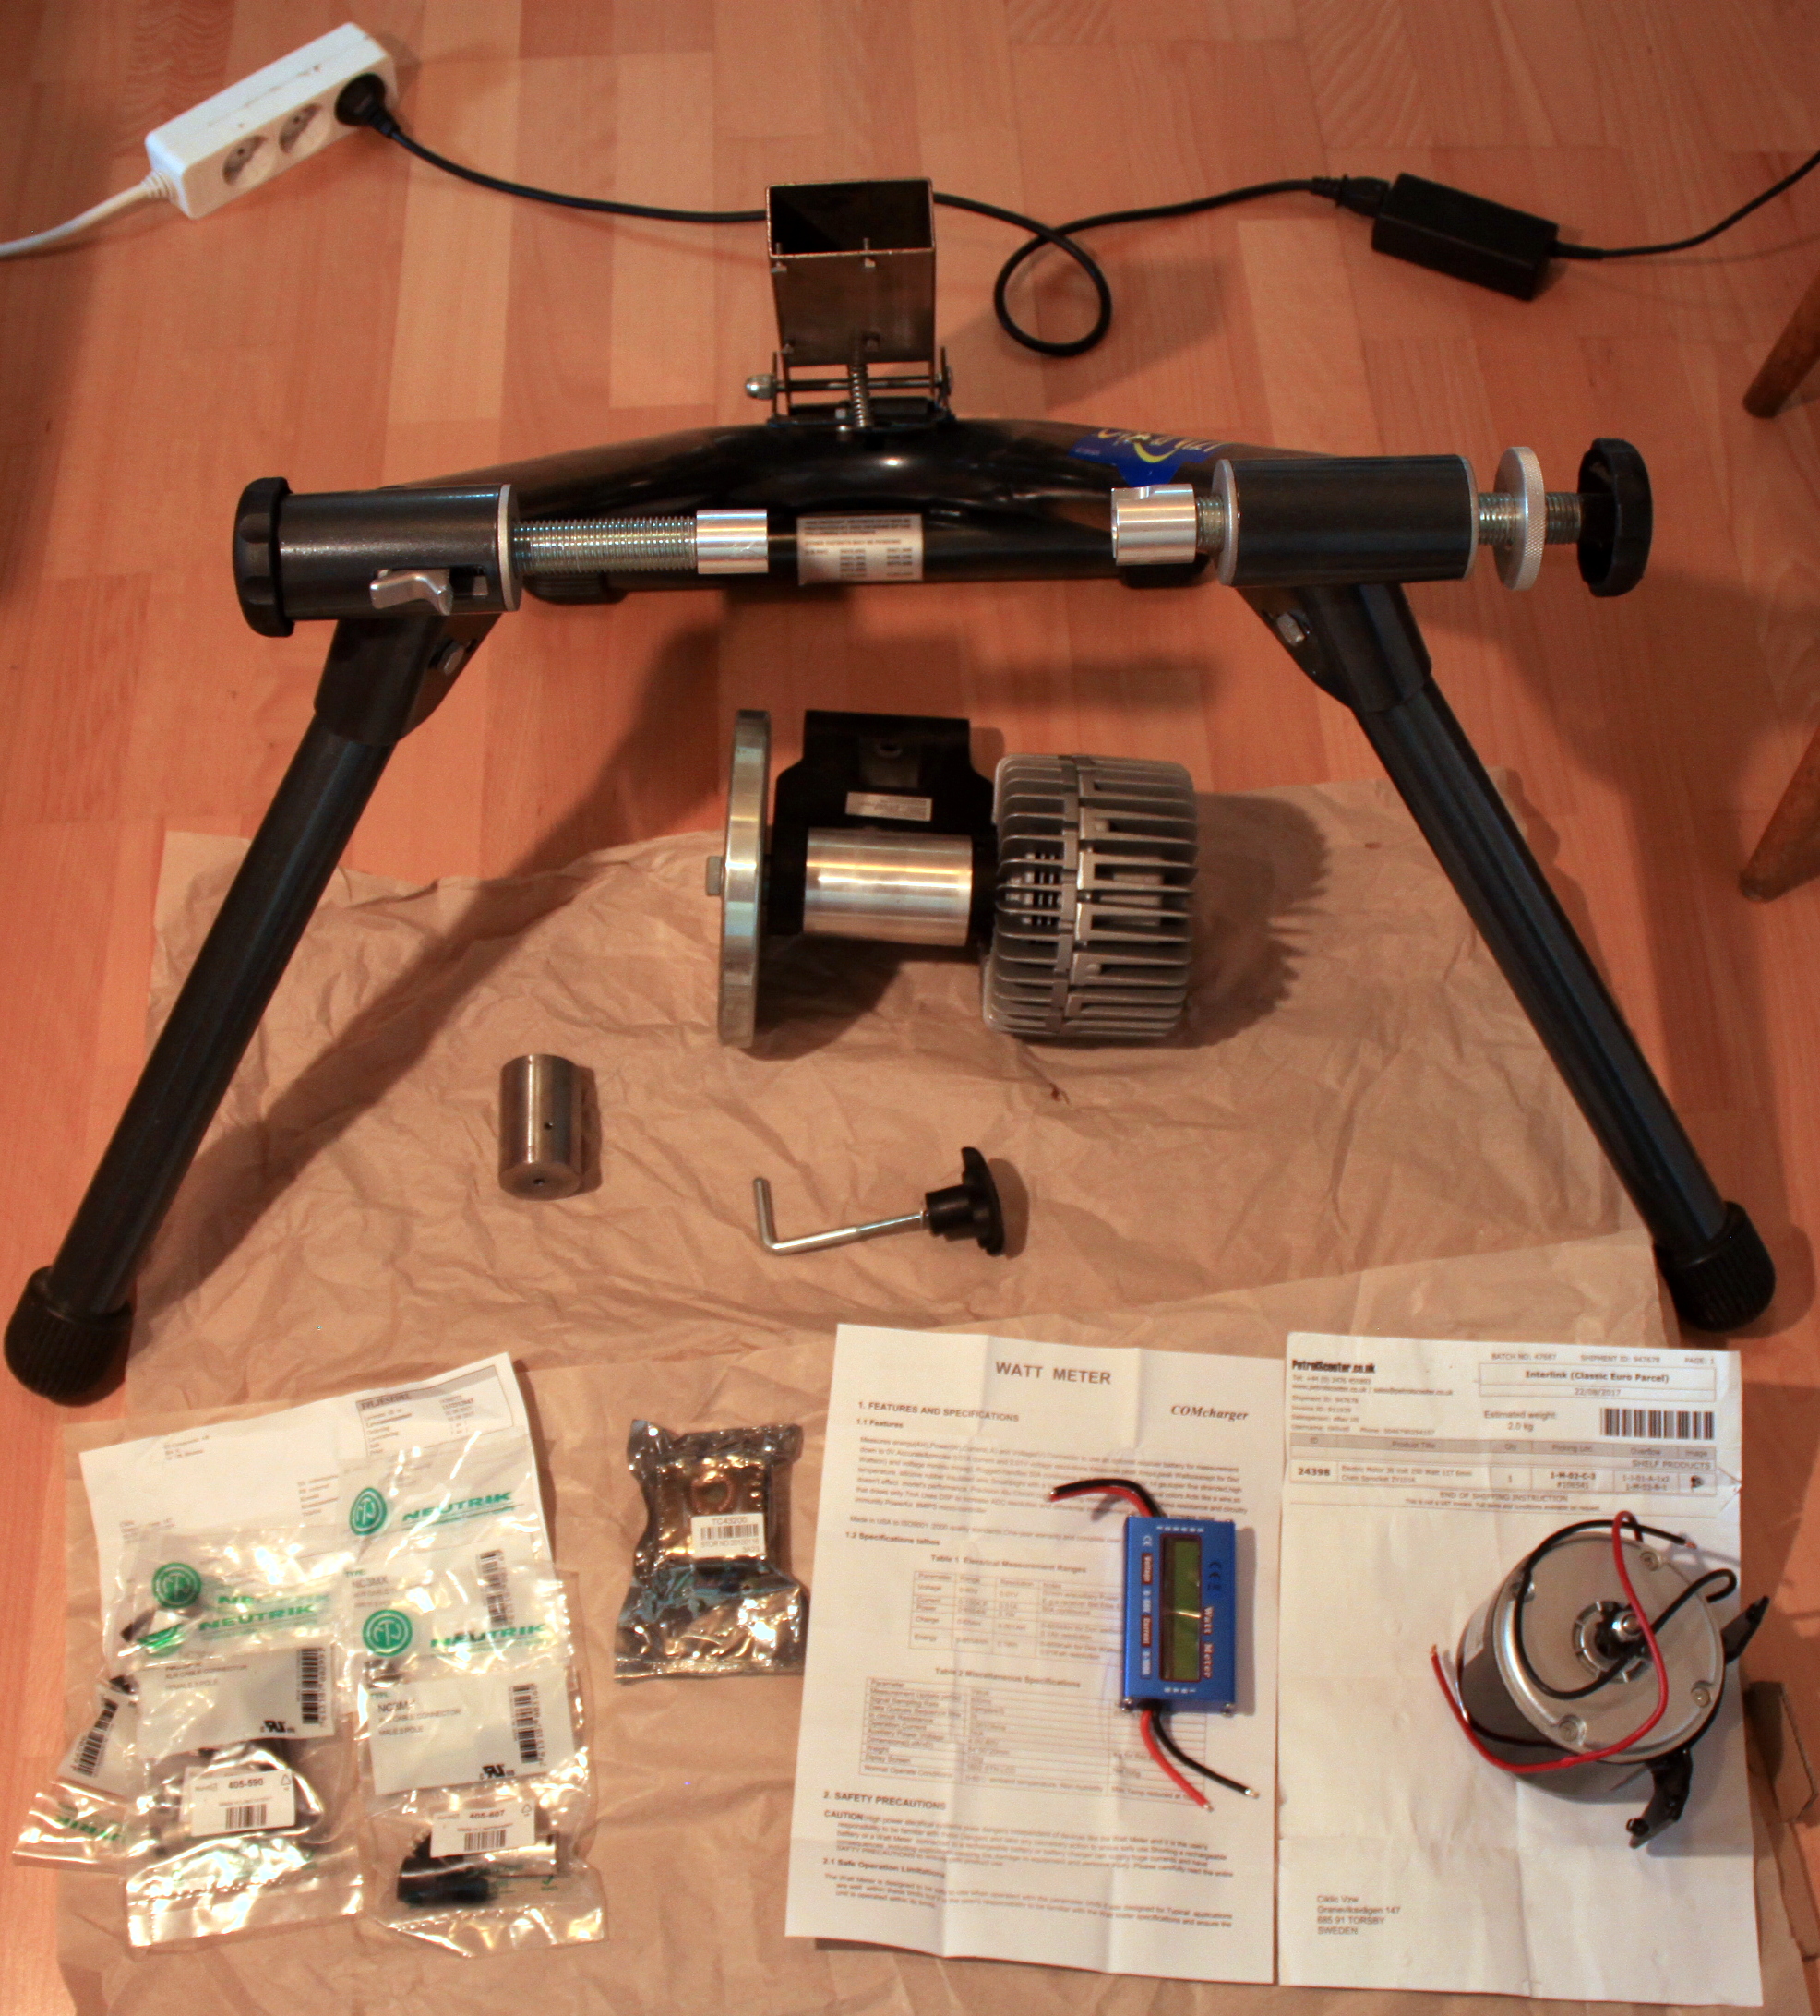
- bicycle stand
- wood
- DC generator
- power display
- DC/DC converter
- cables, connectors and plugs
(see below in the instructions to learn more about the material)
Outils
- woodworking tools : saw, vertical drill
- metalworking tools : cutting tools, making holes, treading
- soldering material : soldering iron, soldering wire
- multimeter
Étape 1 - People Pedal Power
People pedal power is a form of renewable energy. One human can produce around 75W electric power sustained for about 15min, or 50W during a longer period. This is enough power to be able to charge an average laptop. This energy can be harvested on a PPP device.
To find out more about People Pedal Power, visit our site https://ciklic.wordpress.com/2017/08/05/renewable-energy-what-can-you-expect/
Étape 2 - Overview
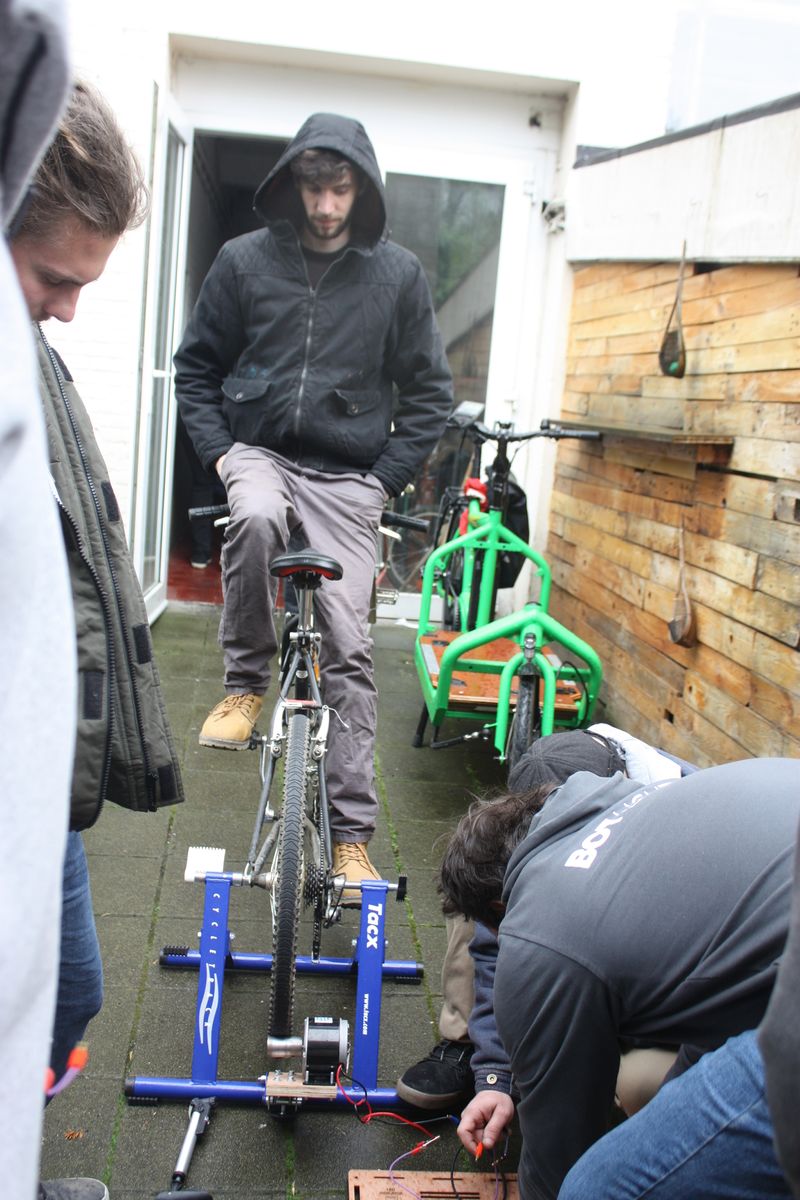
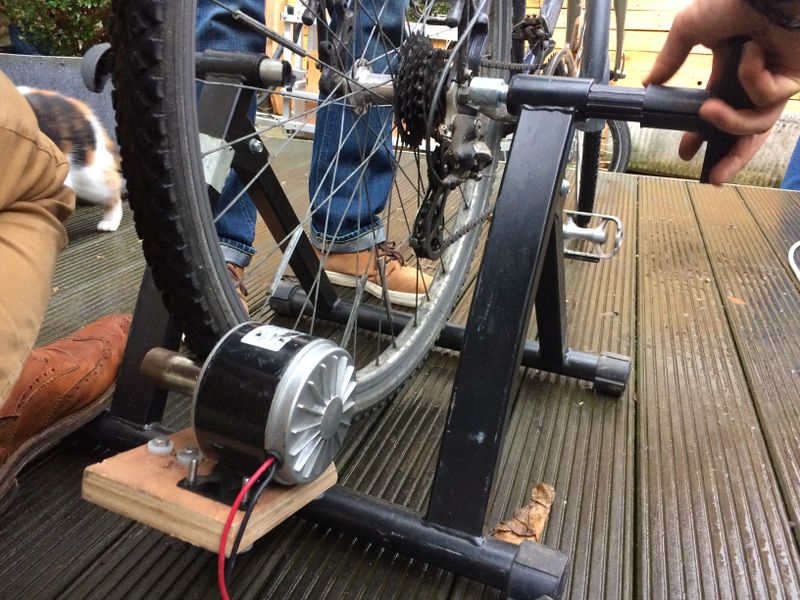
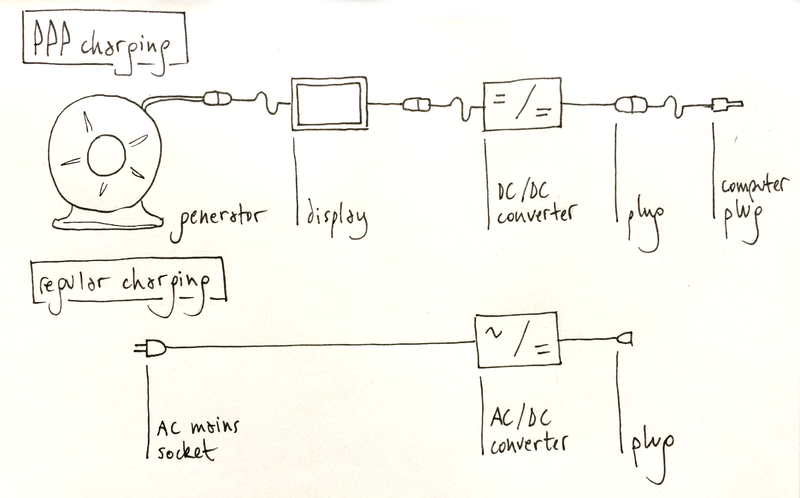
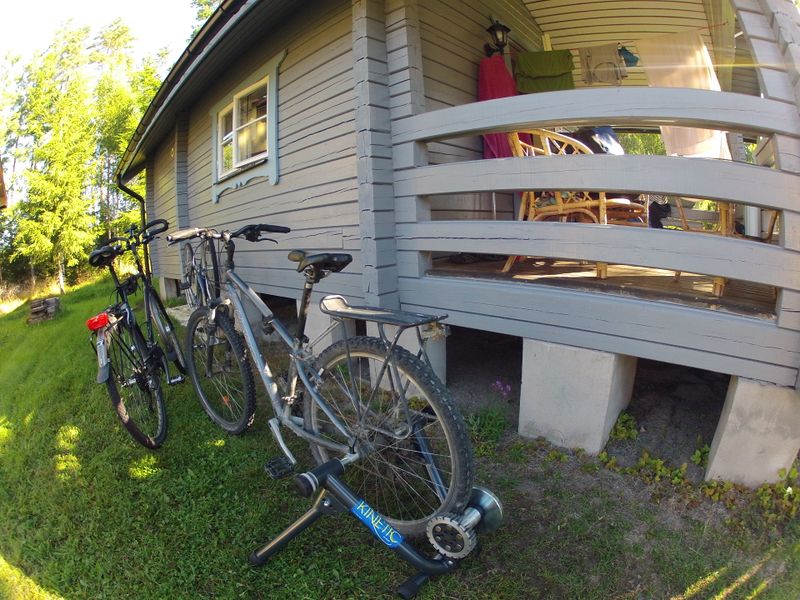
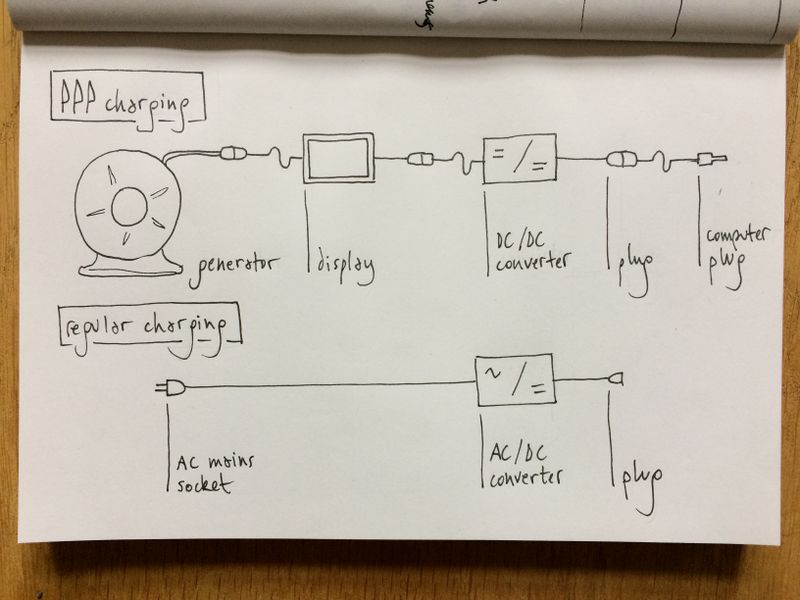
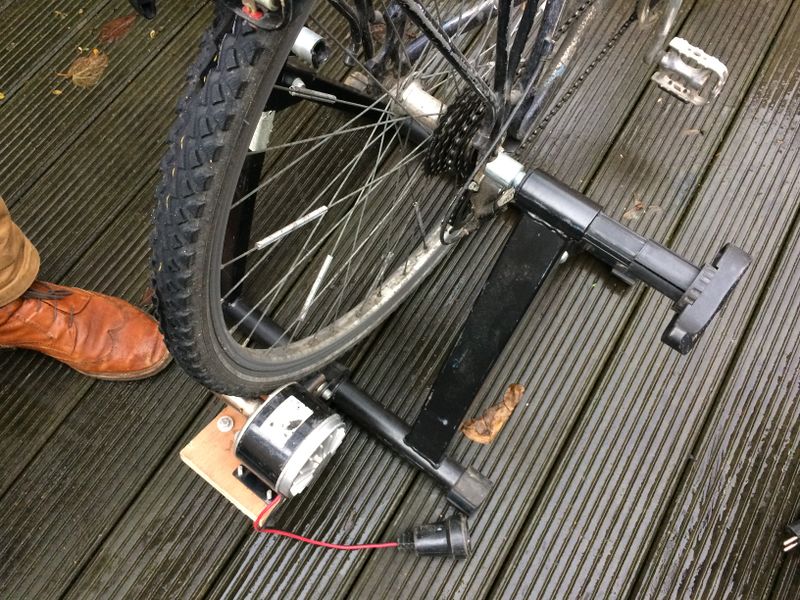
The PPP charging device gives an alternative for charging your computer. You will be pedaling on your ordinary bicycle while on a bike stand. The bike stand has a generator that is turned by the bicycle wheel by a roller. The power coming from the generator is converted to the DC voltage your computer needs to charge. We are adding a display in between to monitor the production.
Étape 3 - Generator : mechanical to electric energy
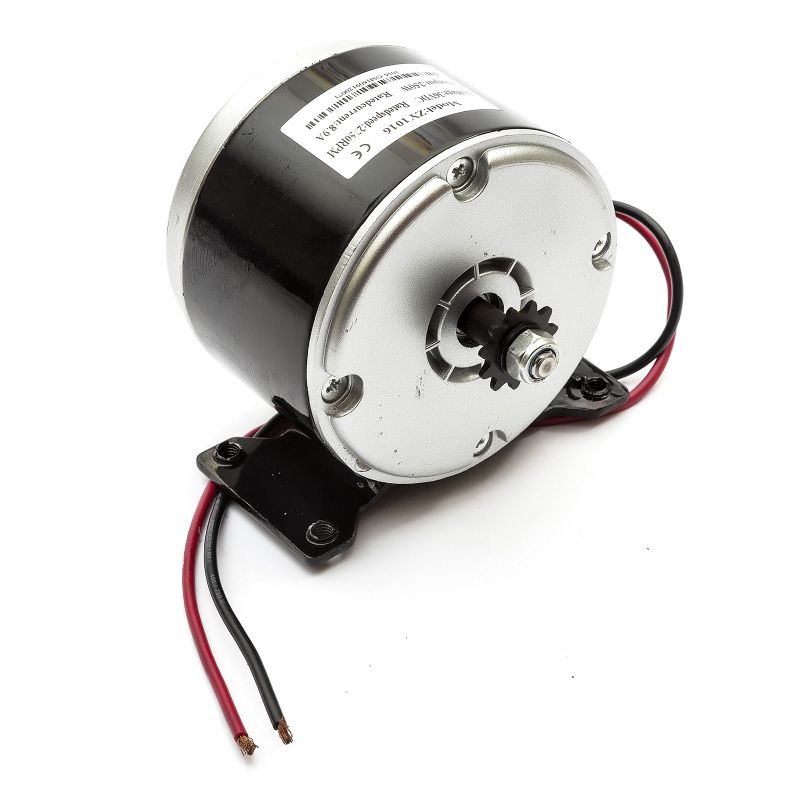
the generator makes energy when you roll it. It is converting the movement of rotation to electricity.
DC generator / electrical scooter
Voltage : 24V or 36V
Power : 100-250W
You can find any electric motor with the same specifications to do the job. The motor drives a scooter when powered. When used the other way round it generates electricity when turned at a high speed.
Étape 4 - Back to the generator
Wire up the generator to the circuit.
Solder/screw the generator to a pair of cables, 2m 1.5mm2. Solder/screw the cable end to the display. You can choose to use the same plugs as before to be able to disconnect the bicycle stand from the electronics. Female to the generator side, male to the display side.
Étape 5 - Bicycle stand : dynamic energy to static energy
The bicycle stand keeps your bike into place. It is rather critical. It carries your bike while it drives the generator. In stead of putting your energy in transporting yourself, you are putting energy in the generation of electricity.
Look for a bicycle stand that has :
- Tightening screws that fit your bike axle.
- A roller that can be removed.
- Search for second hand bicycle stands.
- It should fit your bicycle and it should hold the generator at a good tension to your wheel.
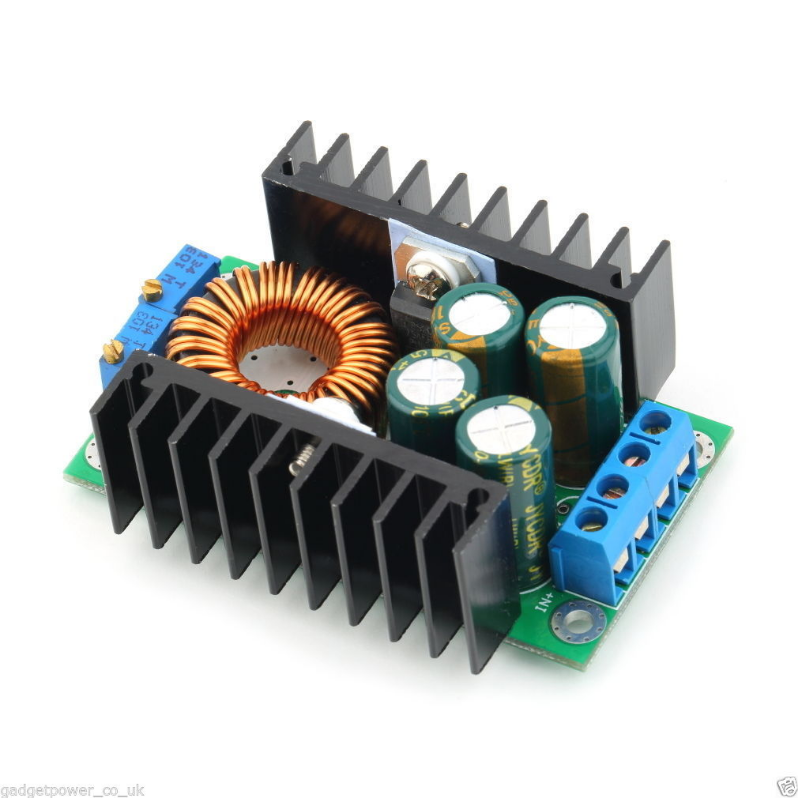
Étape 6 - Conversion : messy DC power to flat DC voltage
The power that will be generated is a messy DC voltage. We want to flatten this out to the charging voltage of your computer.
Material :
- DC/DC converter
Input : min computer voltage (20V) to min 40V
Output : min computer voltage (20V)
Current : min computer current (4.5V)
Étape 7 - Back to the bicycle stand
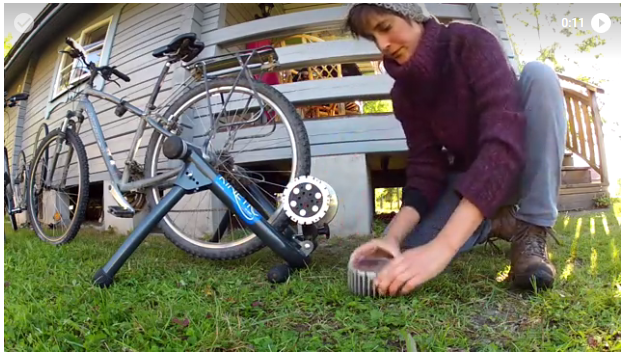
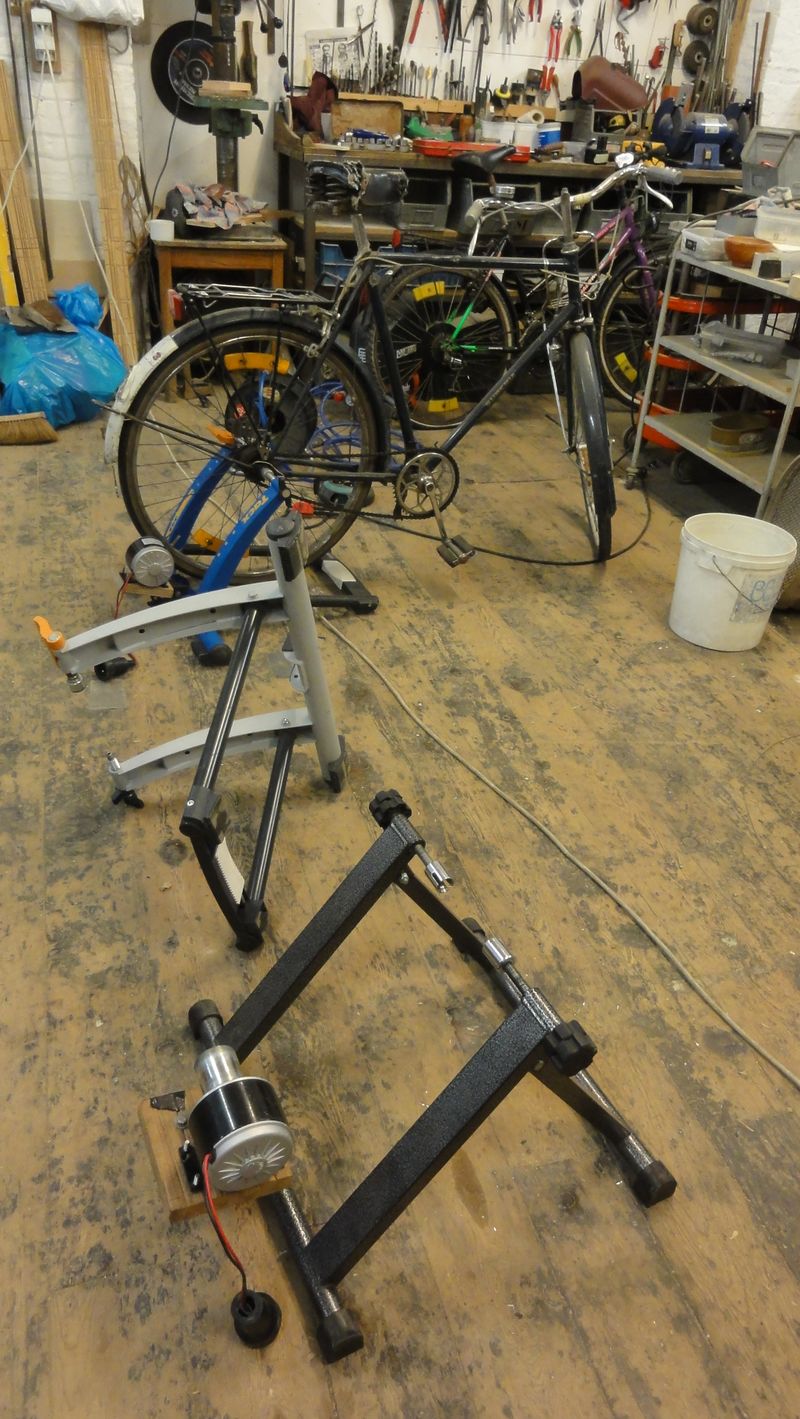
We start with the bicycle stand. First remove the roller of the stand. We will make a new roller that can be put on the generator. Keep the bold and nut that hold the moving part to the bike stand.
Étape 8 - Mounting the generator to the bike stand
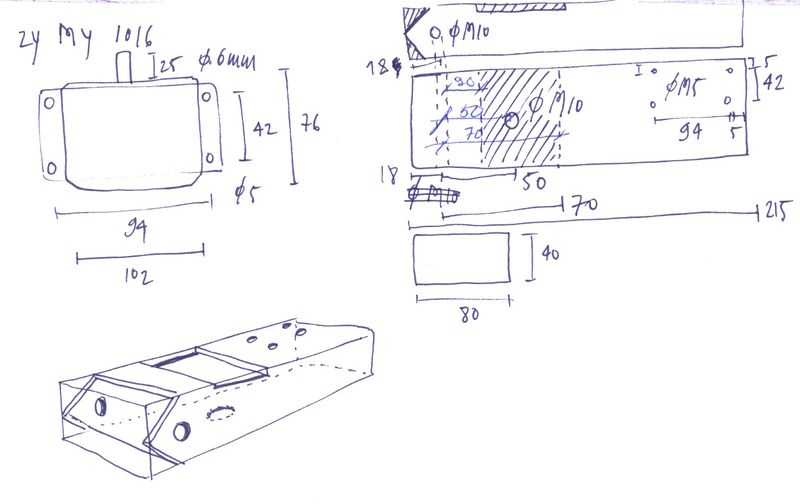
Then we will make our own fixation for the generator. Find a metal joiner that can make a piece that can hold the generator. We're using a steel tube of 40x80mm.
Follow the plan if you happen to have the same bicycle generator. If not, verify the measures!
The two first horizontal holes are there for the axle of the old bicycle roller. The second vertical hole leaves place for the adjusting screw. This allows to adjust the tension of the bicycle wheel. The last four holes are there to hold the generator. Check this with the generator you have.
Now make a part in wood. Use a vertical drill for the holes, it will make them more precise.
Note : we changed the model afterwards and we removed a part of the metal so we could adjust the position more easily.
Étape 9 - Roller : slow- to fast-rotation mechanical energy
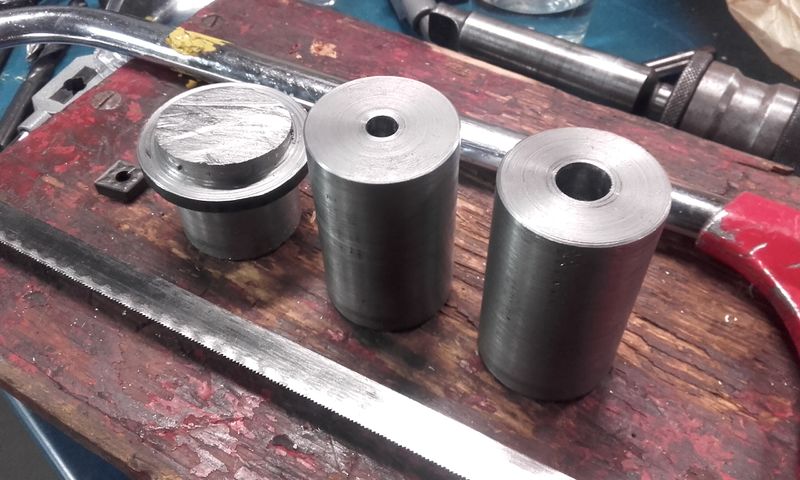
We're making a new roller for the generator. The roller is converting the slow-turning mechanical energy of the bicycle wheel to a fast-turning mechanical energy. Electric generators like high speeds.
Material :
- steel bar of 40mm diameter
Instructions :
- find a metal joiner or a lathe to make the piece.
Make the metal piece based on the plan. We found that a roller diameter of 40mm gives good results. The center hole should be the same diameter as the axle of the generator.
Étape 10 - Testing the stand and generator
Fix the roller on the generator.
Gently hit the roller on the axle of the generator and fix the roller with a M4 screw. If the roller doesn't fit you can heat the piece so the hole becomes bigger.
Verify the regular turning of the roller.. Test if the roller is centered and is turning regular. This is to avoid vibrations an wear of the bicycle.
Mount the generator with its roller to the bicycle stan
Étape 11 - Making the circuit
Instructions :
- solder the converter into the circuit.
Screw the output to a pair of cables that is convenient for you, say 1m of 1.5mm2. Solder/screw the same female plug as above to the other end of the cable. This is the point where you can connect your computer plug.
Screw the input to a pair of cables, again 1m of 1.5mm2. This is the point where the display will be connected.
- protect the converter.
You may want to protect the converter ant put it in a box of a non-conducting material.
Étape 12 - Charging : adapting to the computer voltage
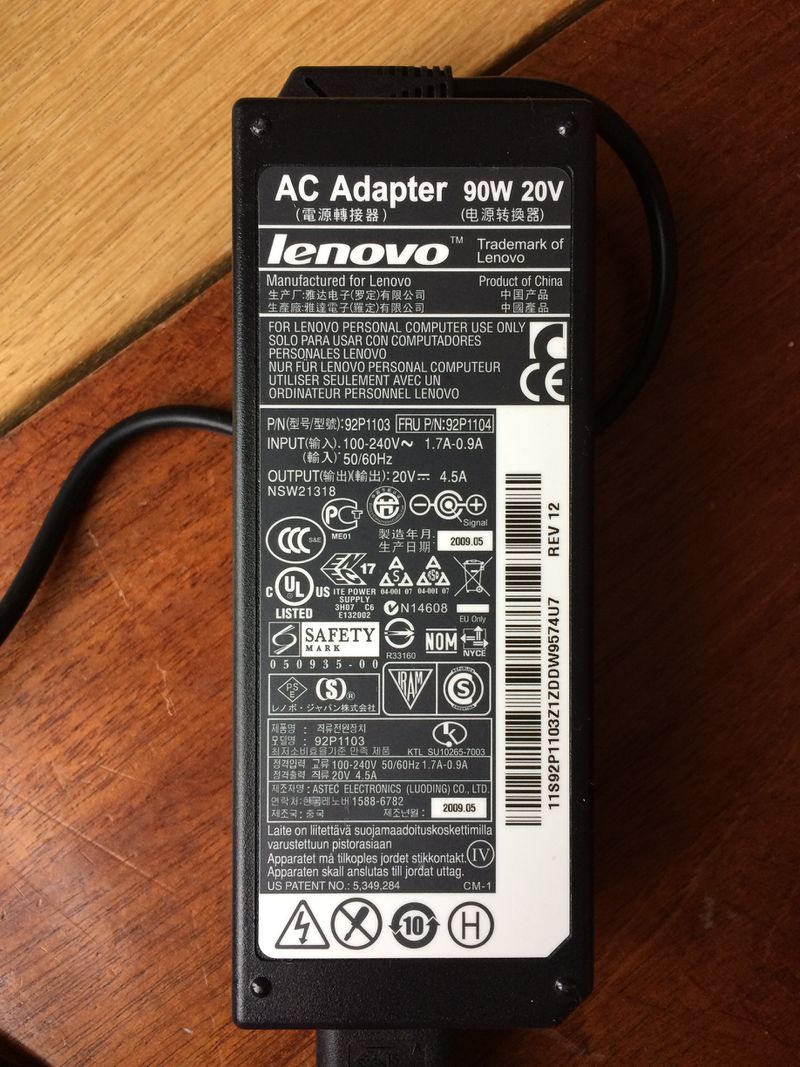
The aim of the people pedal power is to charge a computer. A computer battery is normally charges by an adapter that converts AC mains power to DC power. This charger will be only for YOUR computer.
Material :
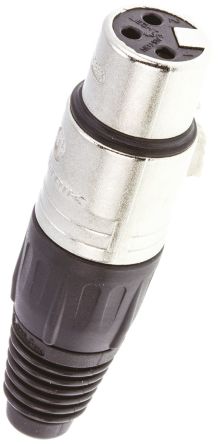
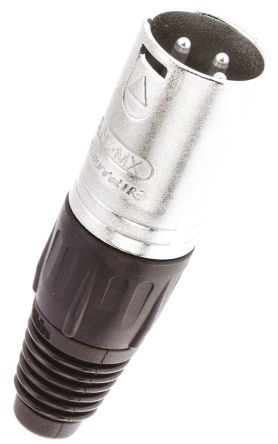
- touch-safe connectors with locking
female http://se.rs-online.com/web/p/xlr-connectors/0405590/
male http://se.rs-online.com/web/p/xlr-connectors/0405607/
Instructions :
- we want to charge with the same power as the adapter does.
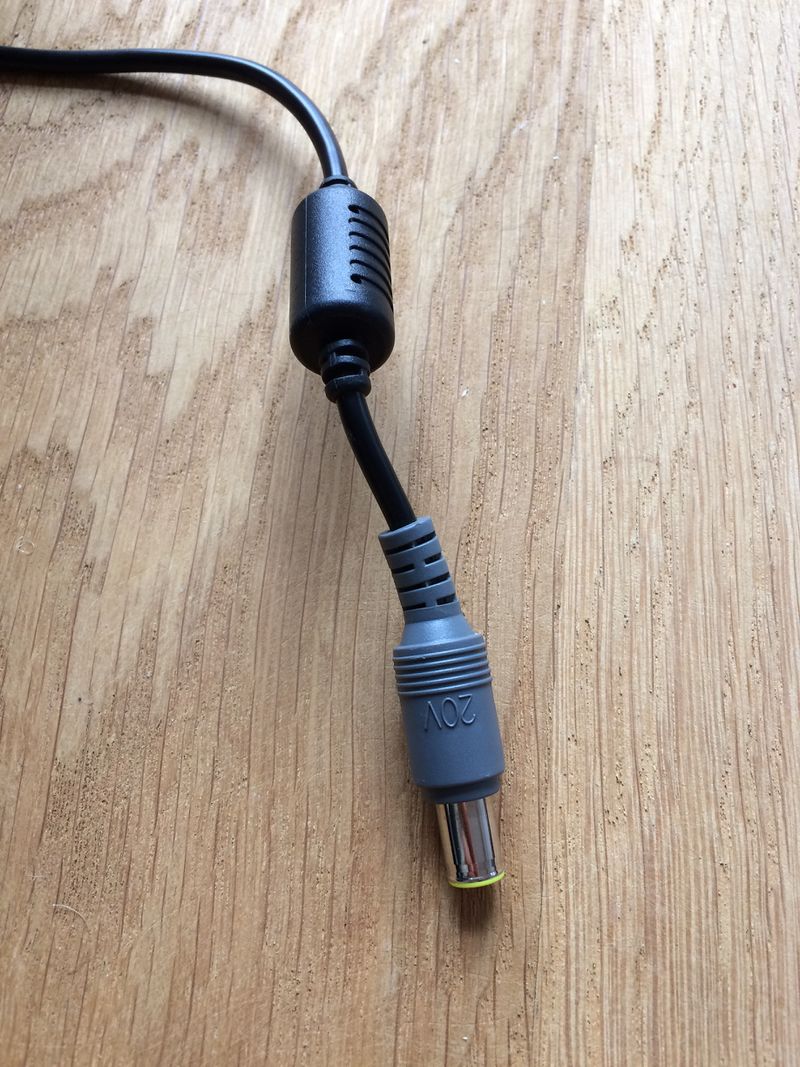
Check the voltage and the current at which the adapter charges your computer. Mine charges at 20V and 4.5A.
- you will be cutting your power cable.
The PPP device will charge your computer in stead of the adapter. Cut the cable in between the adapter and the computer plug. Solder/screw the new plugs to the cut wires. Female to the adapter side, male to the computer plug side.
You can also chose to buy a new computer plug separately and assemble a new cable for the PPP device.
Étape 13 - Energy monitoring
We will be monitoring the power and energy production of the device.
Material :
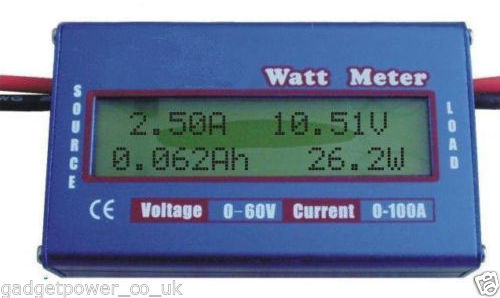
- power display
Instructions :
- connect the display to the converter.
Solder/screw the display to the cable end of the input of the converter. You can choose the connector type. (For some inspiration in Dutch)
- don't overcharge your computer.
When you are approaching 100% charge you should be extremely careful to not put too much power. The current must AT ALL TIMES stay lower than the current indicated on your adapter.
- don't blow up the converter.
Again when you approach full charge be careful to not put too much power. The voltage should AT ALL TIMES stay lower than the 40V that is indicated on the converter.
Étape 14 - Bicycle : human energy to mechanical energy
This etape is the conversion of the human energy to slow-rotating mechanical energy. We are using an ordinary bicycle to harvest the energy.
Material :
- ordinary bicycle
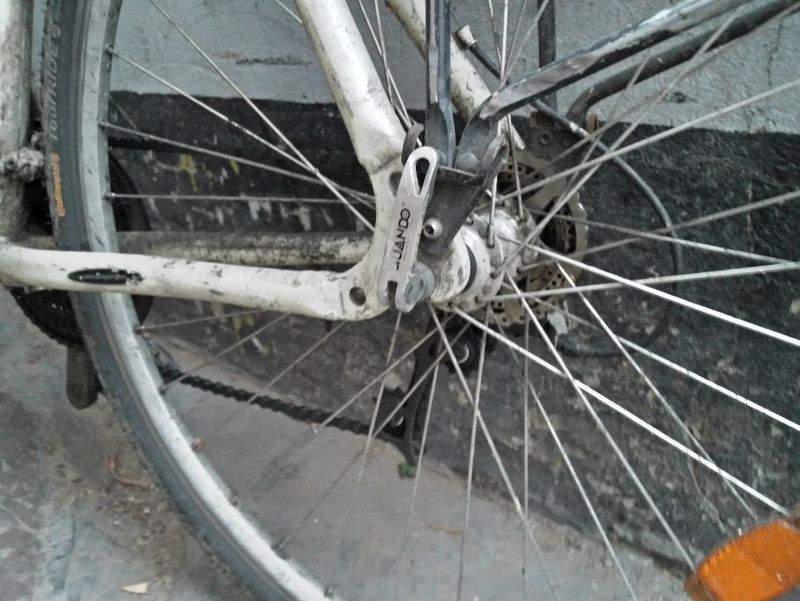
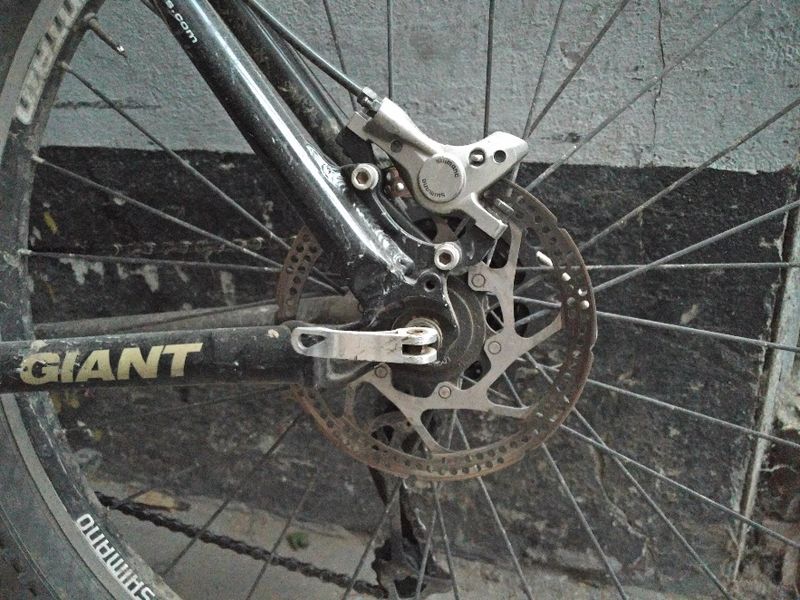
Your bike should have low-profile tires. When the profile is too important (see picture) there will be a large energy loss due to vibrations. You will also have more noise when pedaling.
The fixation of the axis should be not of the fast-release type. The fast-release-type with flat end (se picture) is often not compatible with the bike stands. You can easily change the axle with another (second hand) axle.
Étape 15 - Charging more than a computer
PS :
If you want to charge other batteries than that of your computer, you can make more electronics circuits. Repeat the steps until the step of conversion. You can than plug the converter you need to the PPP device.
Notes et références
Magnificent revolution http://www.magnificentrevolution.org/diy/single-bike-generator/
Vélo M² project www.velom2.be www.velom2.be
Draft

 Français
 English
 Deutsch
 Español
 Italiano
 Português