| Ligne 150 : | Ligne 150 : | ||
#Stand one leg unit upward, so you can see down the 1200mm section. Slide 4 T-nuts total (2 in each rail) up to the corner joint. (image 2) | #Stand one leg unit upward, so you can see down the 1200mm section. Slide 4 T-nuts total (2 in each rail) up to the corner joint. (image 2) | ||
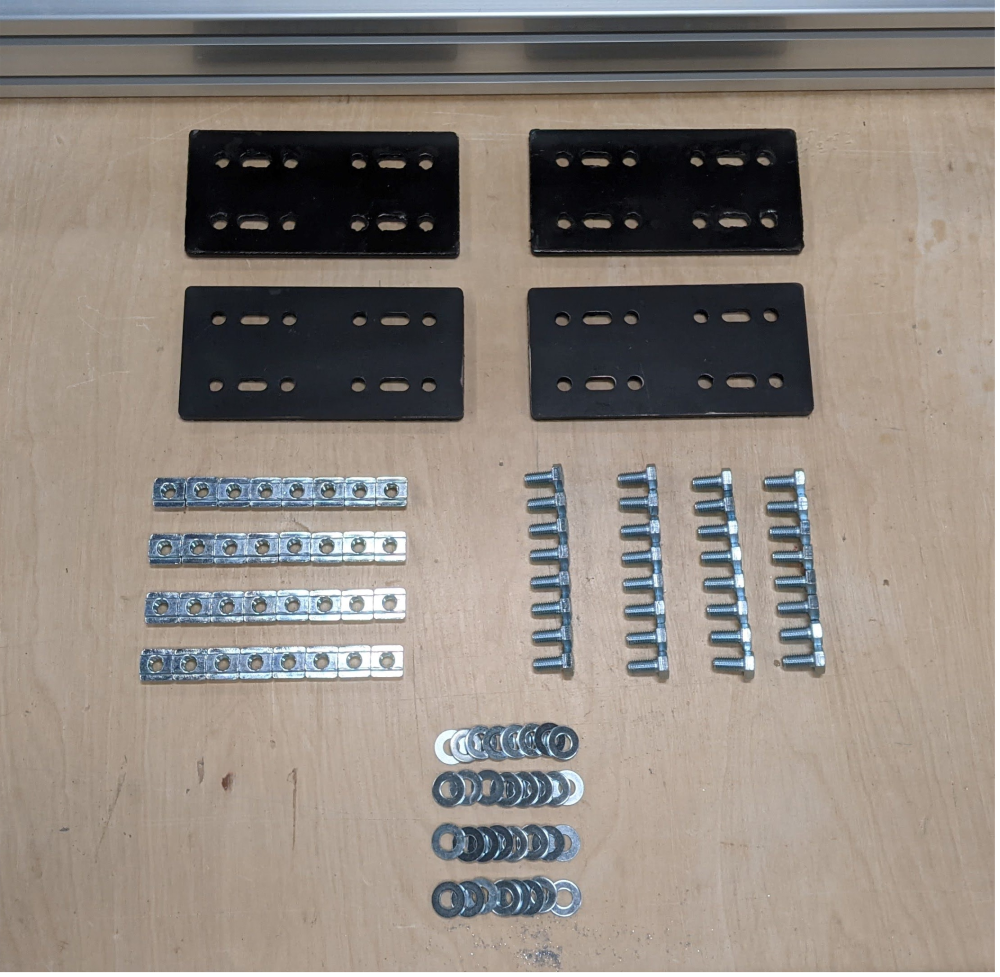
#Attach the side plate (image 3) using 4 M8x16 Bolts with 4 washers. | #Attach the side plate (image 3) using 4 M8x16 Bolts with 4 washers. | ||
| − | ##NOTE: the 45° side should face the "bottom" of the eventual table. | + | ##NOTE: the 45° side should face the "bottom" of the eventual table. |
#Repeat on the remaining three 600mm legs. | #Repeat on the remaining three 600mm legs. | ||
| − | ##NOTE: ensure that each corner | + | ##NOTE: ensure that each corner plate '''mirrors''' each other across the 1200mm beam axis. They should be facing the same direction and away from the side plate from the previous step. |
#Slide 8 total T-nuts into a 520mm beam. They should be split in half, 4 at one end, and 4 at the other. (Image 4) | #Slide 8 total T-nuts into a 520mm beam. They should be split in half, 4 at one end, and 4 at the other. (Image 4) | ||
#Combine the two "'''staple'''" sections by adding the 520mm beam (pre-loaded with T-nuts) using the same M8x16mm, washer combination as before. (image 5) | #Combine the two "'''staple'''" sections by adding the 520mm beam (pre-loaded with T-nuts) using the same M8x16mm, washer combination as before. (image 5) | ||
| Ligne 161 : | Ligne 161 : | ||
|Step_Picture_01=PP_Shredder_Pro_1PXL_20210913_184210669.MP.jpg | |Step_Picture_01=PP_Shredder_Pro_1PXL_20210913_184210669.MP.jpg | ||
|Step_Picture_02=PP_Shredder_Pro_1PXL_20210913_184439835.MP.jpg | |Step_Picture_02=PP_Shredder_Pro_1PXL_20210913_184439835.MP.jpg | ||
| − | |Step_Picture_03= | + | |Step_Picture_03=PP_Shredder_Pro_1PXL_20210913_184424674.MP.jpg |
|Step_Picture_04=PP_Shredder_Pro_PXL_20210913_190202336.MP.jpg | |Step_Picture_04=PP_Shredder_Pro_PXL_20210913_190202336.MP.jpg | ||
|Step_Picture_05=PP_Shredder_Pro_PXL_20210913_190407012.MP.jpg | |Step_Picture_05=PP_Shredder_Pro_PXL_20210913_190407012.MP.jpg | ||
Version du 13 octobre 2021 à 00:01
This tutorial documents the build process of Precious Plastic Pro Shredder, as supplied by Citizen Scientific for the North American context.

Difficulté
Difficile
Durée
5 jour(s)
Catégories
Machines & Outils, Recyclage & Upcycling, Robotique
Coût
5000 USD ($)
Matériaux
Outils
Étape 1 - Tools
Hammer
(punch) for knocking out leftover metal slugs
Files
Mallet
Socket wrench( 2x)
Tape measure
Screwdriver (directing the slide nuts)
Marker
Étape 2 - Table Parts
Parts Needed:
Aluminum Extrusion
| Profile | Length (mm) | Quantity |
|---|---|---|
| 8080 | 520 | 4 |
| 8080 | 600 | 4 |
| 8080 | 1200 | 2 |
| 4080 | 520 | 1 |
| 4080 | 455 | 1 |
| data-sheets-value="{"1":2,"2":"Corner Plates"}"
Étape 3 - Table Construction - LegsToolsXX Socket Wrench Screwdriver Parts4x 8080*600mm 2x 8080*1200mm 4x Side Plates 32x T nuts 32x Washers 32x M8x16mm Bolts Steps
   
Étape 4 - Table Construction - Side JointsToolsXX Socket Wrench Screwdriver Parts2x 8080*520mm 4x Corner Plates 32x T nuts 32x Washers 32x M8x16mm Bolts Steps
You should now have a very solid table base!      
Draft |
 Français
 English
 Deutsch
 Español
 Italiano
 Português