Sommaire
- 1 Introduction
- 2 Étape 1 - Create Temporary Tester Circuit
- 3 Étape 2 - Code Arduino
- 4 Étape 3 - Add Battery
- 5 Étape 4 - Change Your Code for Your Belt to Be the Correct Colour
- 6 Étape 5 - Create Your Permanent Circuit: Step 1 - Attach Pin Headers
- 7 Étape 6 - Create Your Permanent Circuit: Step 2 - Attach Transistors and Ground
- 8 Étape 7 - Create Your Permanent Circuit: Step 3 - Connect Resistors and Connecting Wires
- 9 Étape 8 - Test RGB Strips for Belt
- 10 Étape 9 - Attach Your Battery and Label Your Wires
- 11 Étape 10 - Create the Pouch for the Arduino
- 12 Étape 11 - Insert Your Arduino Board
- 13 Étape 12 - Connect You Wires to the RGB Strips
- 14 Étape 13 - Create Correct Size Pieces for the Belt
- 15 Étape 14 - Connect Your RGB Strips to the Belt
- 16 Étape 15 - Stitch Together the Belt
- 17 Étape 16 - Add Velcro
- 18 Étape 17 - Check It Works, Watch It Glow and Decorate!
- 19 Commentaires
Introduction
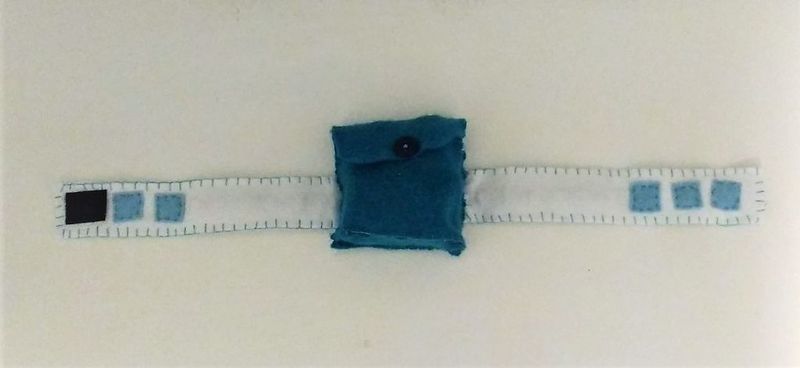
There are two options to this activity where the belt can either the mountable by creating a 3D printed component to support it or creating a holder and physical belt out of fabric.
This activity allows participants to create something to help them record what they have achieved whilst at the Makerspace.
The idea behind the level belt is that the participants are able to code the belt to be a particular colour depending on what level they have reached. Each colour corresponds to improvements in skills that can be developed in the Makerspace environment.
This is a project with a slightly higher level of difficulty, where the participant will have to face some problem solving situations and learn how to integrate different components so that they create a finished working product.
AGES: 11 to 18 years
TIME: 4 to 5 hours (including 3D printing time)
Activity's Aims and Learning Objectives:
- To create something that they value
- To help aid self-evaluation
- To encourage a reward system and enable facilitators to provide positive feedback and encouragement
- To enable conversations about how makers can improve and encourage self-motivation
- To create something that combines different skills, materials and techniques from multiple disciplines.
- To allow flexibility in design and encourage personalisation
- Build confidence with electronic prototyping
- Learn and practise soldering
- Experiment with 3D printing and designing for 3D printing
- Opportunity to develop Computer Aided Design skills using TinkerCAD
- Develop sewing and fabrication skills using more traditional materials
- Combining different materials, disciplines and techniques
- To learn about different circuit components
- Gain confidence with Arduino programming and having the opportunity to experiment
- Making something that is meant to be longer lasting
- Learn about electronic prototyping
- Experiment with electronic soldering
- Experiment with 3D printing
- Experiment with 3D modeling
- Experiment with programming with Arduino
Supplies:
For the programmed RGB strip
- Computer with Arduino installed
- Arduino Uno board or equivalent
- RGB LED strips
- 3 x [100 to 220 ohm resistors]
- 3 x [NPN transistors such as TIP120]
- Multiple male to male solderless breadboard jumper cables
- Breadboard
- Wire
- Wire strippers
- Soldering iron
- Solder
- 9V battery
- 9V battery strap
- Small prototyping printed circuit board (PCB)
- Header pins (breakaway male)
- Switch (in this example we use a slide switch)
- Heat shrink wrapping tubes (not necessary but are advised!)
- Glue gun
- Small stickers/tape you can write on to use as labels
Creating fabric belt
- Thread
- Felt
- Velcro and/or buttons
- Stanley knife
For 3D printed mount
- 3D printer
- Computer with access to TinkerCAD
Matériaux
Outils
Étape 1 - Create Temporary Tester Circuit
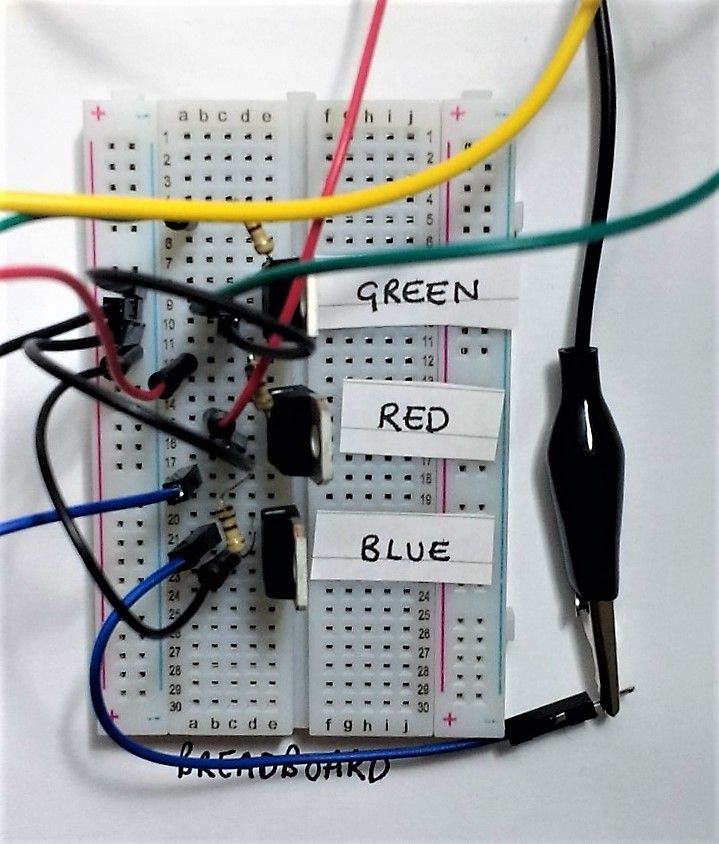
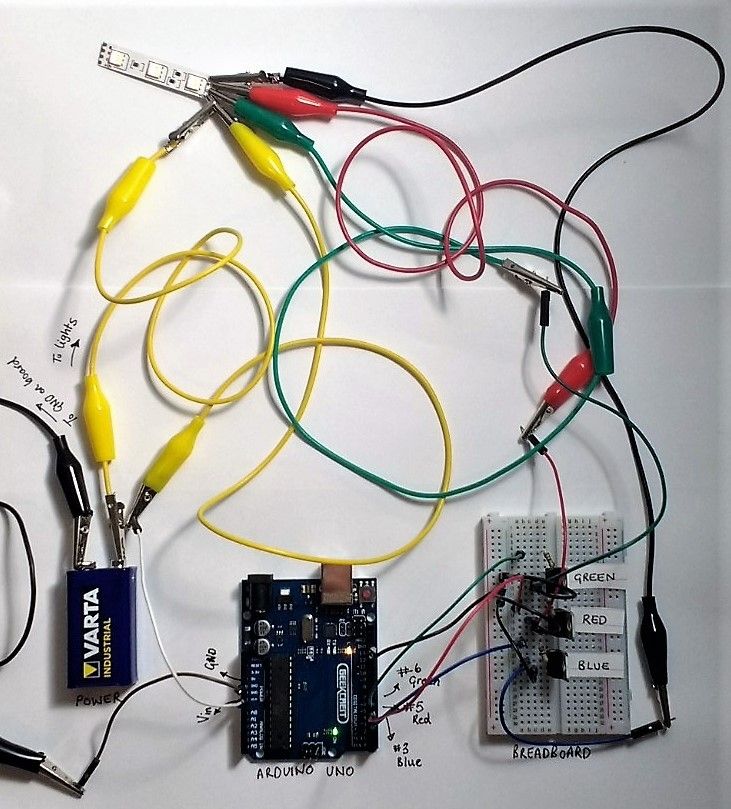
Set up a temporary circuit using a bread board and solderless jumper cables.
Set up your circuit as shown in the diagram
Things to note:
- There is a transistor for each of the Red, Blue and Green inputs of the RGB strip
- Each transistor has 3 pins, one for GROUND, one for SIGNAL INPUT and one for SIGNAL OUTPUT
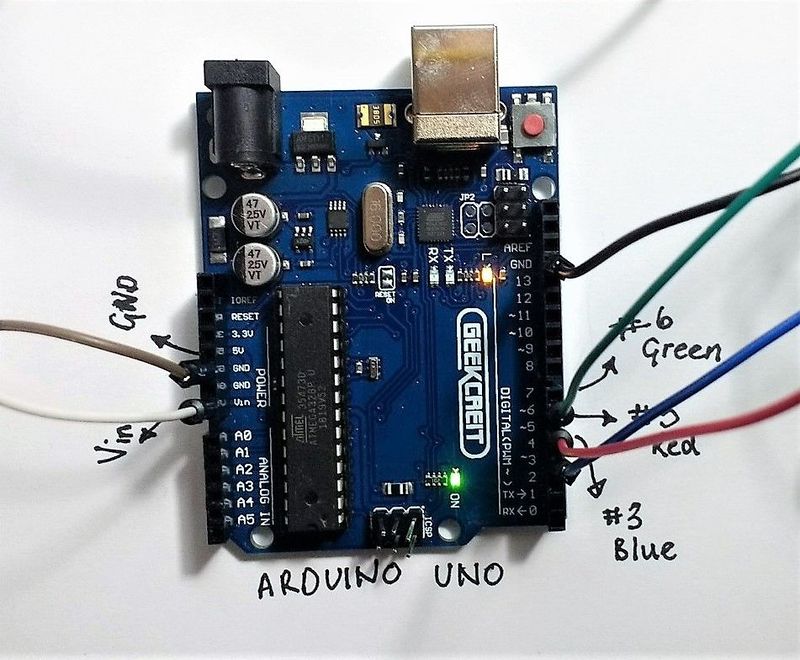
- The signal input pin of each transistor is connected to a pin on the Arduino which will be controlled by the Arduino code - this will tell it whether this colour should illuminate or not.
- The signal output pin of each transistor is connected to the corresponding connection on the RGB strip.
- The Vin pin from the Arduino is connected to the 12V+ connection point on the RGB strip. This means that the power source is coming the computer when it is connected rather than a battery.
Étape 2 - Code Arduino
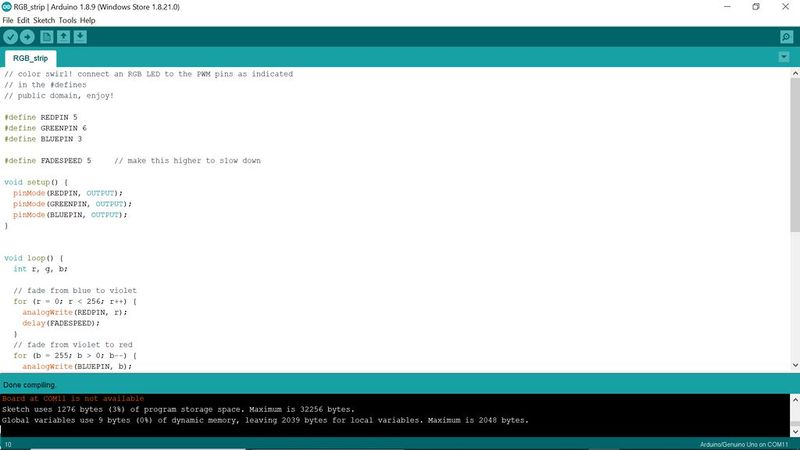
To check that your new temporary circuit works, you need to code your Arduino.
Insert this basic code into your Arduino window and upload it to the board. If uploaded successfully, your RGB strip should start to glow.
https://drive.google.com/open?id=1rZtoLFaFxtY8v7YHRDu3PIaNRMttoTj4iQjpBXmjFxM
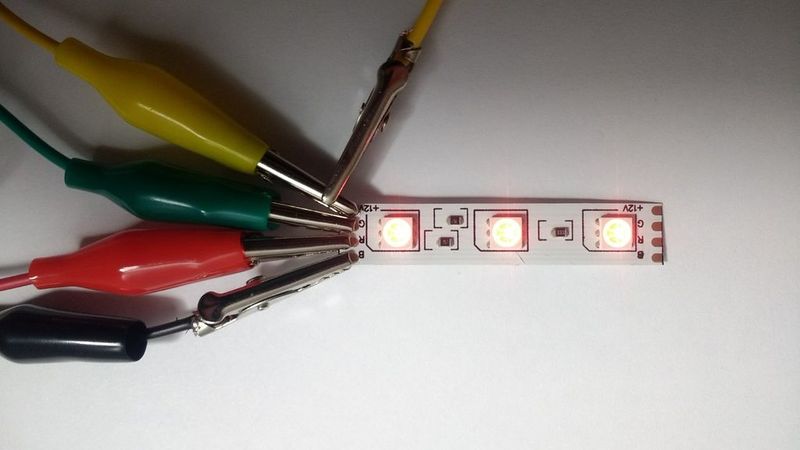
IMPORTANT: Because the voltage the strip is receiving is much lower than 12V, the LEDs will not be very bright. Pay close attention to see if they are working or not!
ARDUINO TIPS:
1. Make sure you have selected the correct board [Tools > Board > ...]
2. Make sure you have selected the correct port that your board is connected to [Tools > Port > ...]
Étape 3 - Add Battery
Now you know the code on the board is uploaded and working, you need to get more power to the RGB strip by using the 9V battery.
Insert the battery into the circuit by:
Connecting the negative port to a ground pin on the Arduino
Connecting positive port (via crocodile clip cable) to the crocodile clip which is connecting the Vin of the Arduino board to the 12V connection on the RGB strip (as shown in the picture). NOTE: This connection is so that the battery supplies energy to the Arduino board and the RGB strip.
Once all attached, your strip should light up a lot brighter!
Étape 4 - Change Your Code for Your Belt to Be the Correct Colour
Now you have that all this working you can go back to Arduino and start to understand the code.
Here you can modify the code so that your belt illuminates as the correct colour.
Some extra explanation of part of the example code is given, to help you adapt it! But you will have to play around with the values to make sure it illuminates at the right colour for you!
You should think about:
- Does the lights need to fade or stay on all the time?
- Should your belt change colour or stay one colour all the time?
- How can you simplify this code if the belt is not fading or changing colour?
- How does this code set the colour for the belt?
- What values for each coloured pin correspond to which colours when the lights glow?
To test your code, make sure to re-plug in your board to the computer and upload it, then reconnect the board with the temporary circuit and watch your light show!
https://drive.google.com/open?id=1fXWUy9m0RPEqkevXnIGKaKGncNX9yEHOybdK3mUmc48
Étape 5 - Create Your Permanent Circuit: Step 1 - Attach Pin Headers
Now you know that everything works and your happy with your code, you can make everything more permanent by getting rid of the big crocodile clips and jumper cables and move onto a prototyping circuit board.
You can gradually transfer you circuit from your breadboard onto your circuit board as you wish, but here are the steps we recommend you follow:
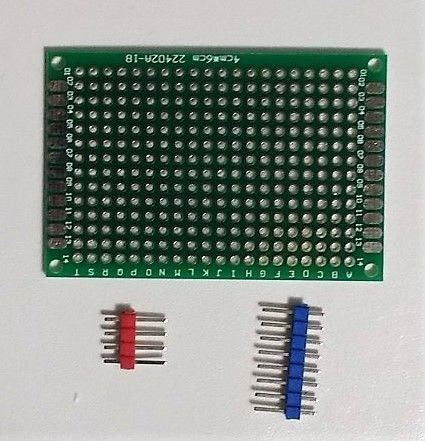
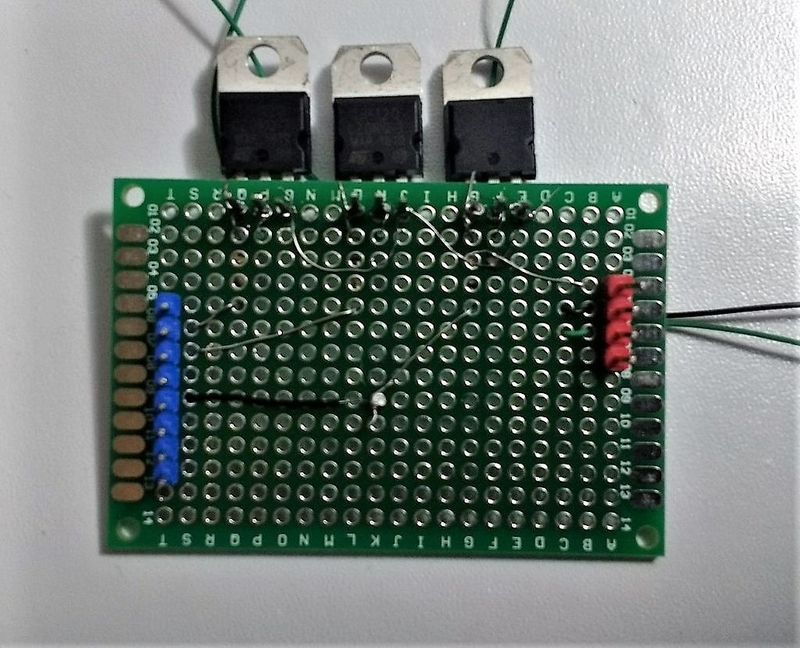
- Attach a 4 pin header and 8 pin header in the correct places to line up with the Vin, ground, ground pins and numbered pins (most importantly 3, 5 and 6) on the other side. Solder these into place.
Étape 6 - Create Your Permanent Circuit: Step 2 - Attach Transistors and Ground
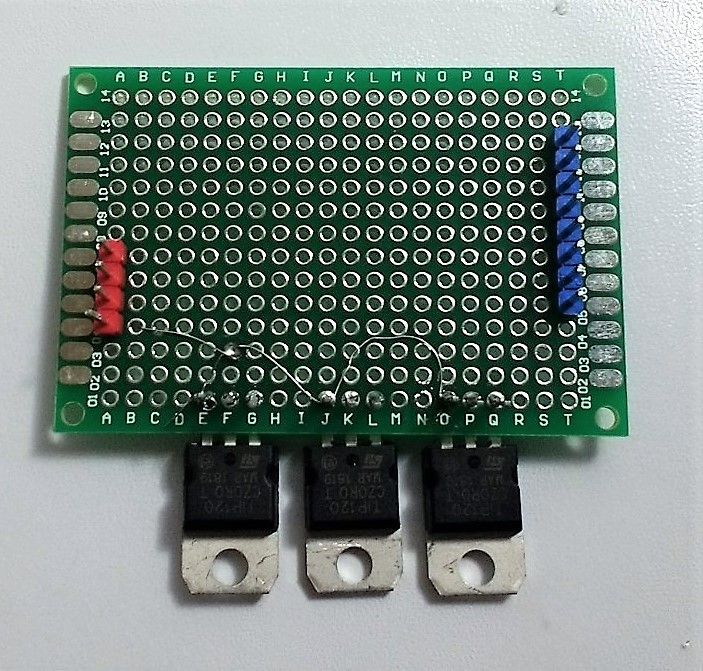
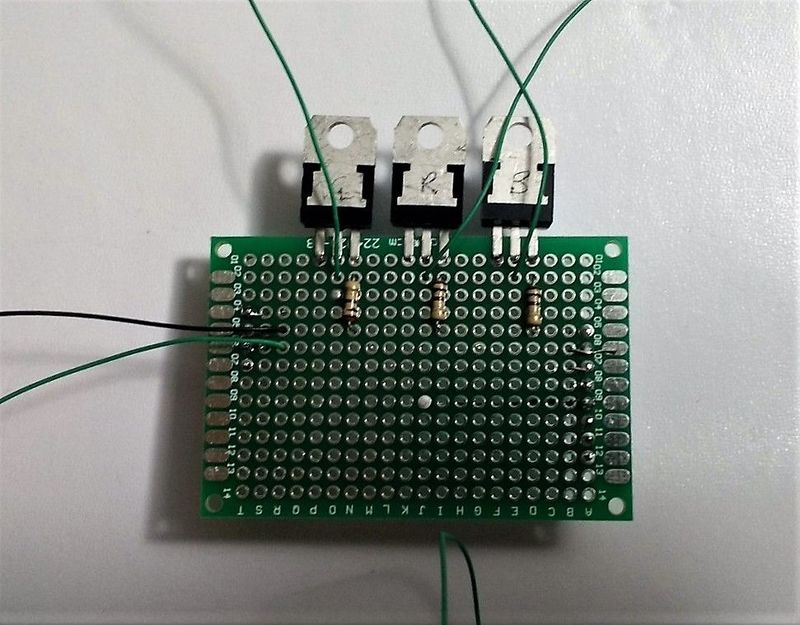
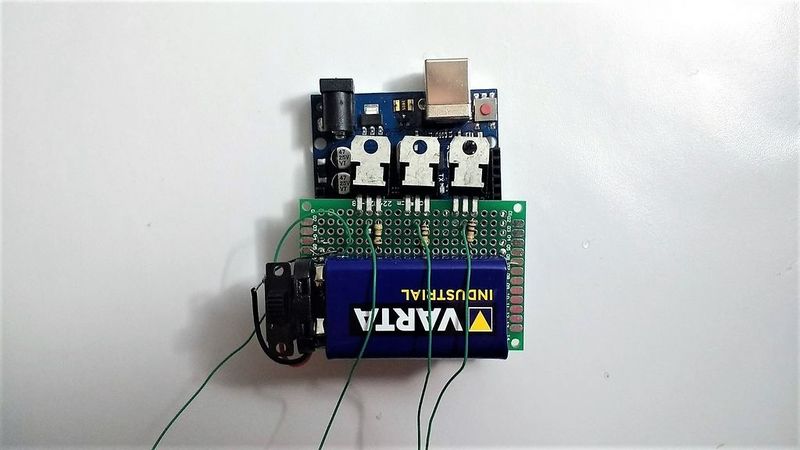
- Attach the 3 transistors at the top of the circuit board. Solder these into place.
- Ground the 3rd pin of each transistor by taking a wire from the header pin connected with the ground pin of the Arduino and connecting it to the 3rd pin of each transistor.
Make sure good connections are made with the solder. You should be able to do this with 2 pieces of wire as shown in the image.
Étape 7 - Create Your Permanent Circuit: Step 3 - Connect Resistors and Connecting Wires
- Connect resistors between the input pin of the transistor and the corresponding header pin.
These header pins should be the pins connected to the numbered pins on the Arduino board. It is important that these match up with the pin numbers you assigned in the code. (e.g 3 = blue, 5 = red, 6 = green)
- Add wires to the transistor output pins, which will later connect to the RGB strip. As you will have two RGB strips attached to create your belt, you will need to attach 2 wires to each central pin of the transistors.
NOTE: best to keep these wires long, to make sure they reach the connections later on and length can be removed after.
- Add 1 long wires to the header pin at Vin (this will be connected to the switch)
- Connect a long wire to the header pin at a 2nd ground pin of the Arduino Board.
These will be connected to the 12V connections on the RGB strips and battery later on.
NOTE: again, its best to keep these wires long so that they can reach their connections and the length can be removed after.
You should now have:
- 2 wires coming of each transistor
- 1 wire coming off the Vin header pin
- 1 wire coming off the 2nd ground pin
Étape 8 - Test RGB Strips for Belt
Cut out 2 strips of RGB LED strip, one for each side of your belt.
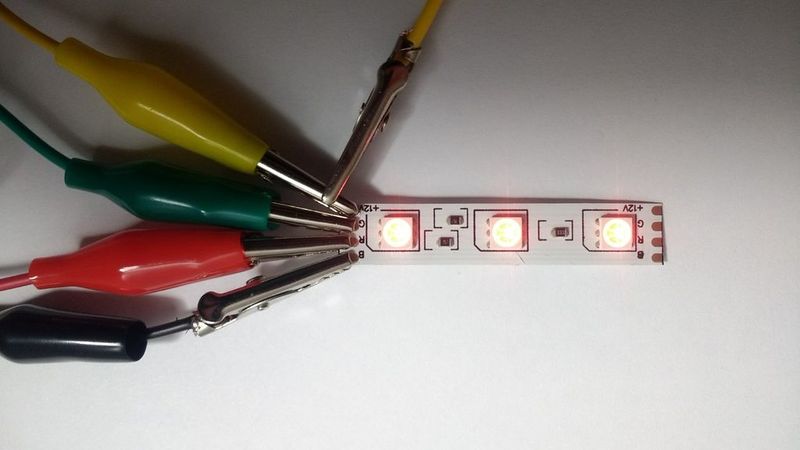
Test your prototype circuit using crocodile clips, connecting the long wires to each of the correct connections (the 12V connection on RGB strip, the battery and the R, G and B connections on the RGB strip).
Both belts should glow!
Étape 9 - Attach Your Battery and Label Your Wires
Now you need to mount your battery.
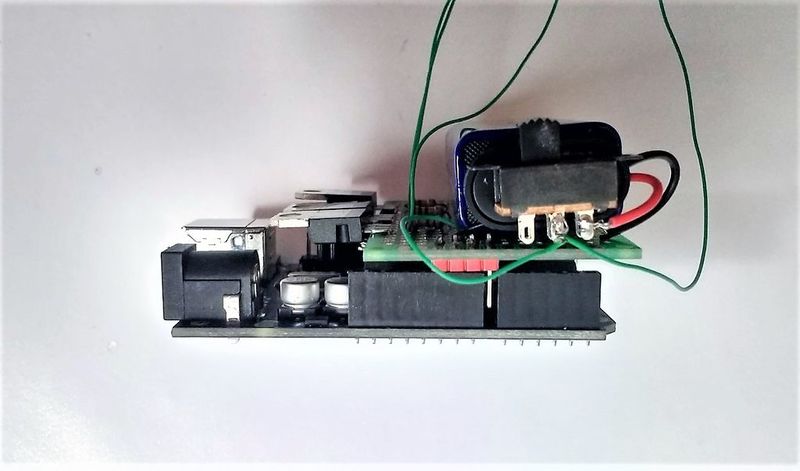
Attach the battery to the bottom of the circuit board using a glue gun.
Attach the battery strap to the head of the battery.
Using a glue gun attach a switch to the top of the battery strap
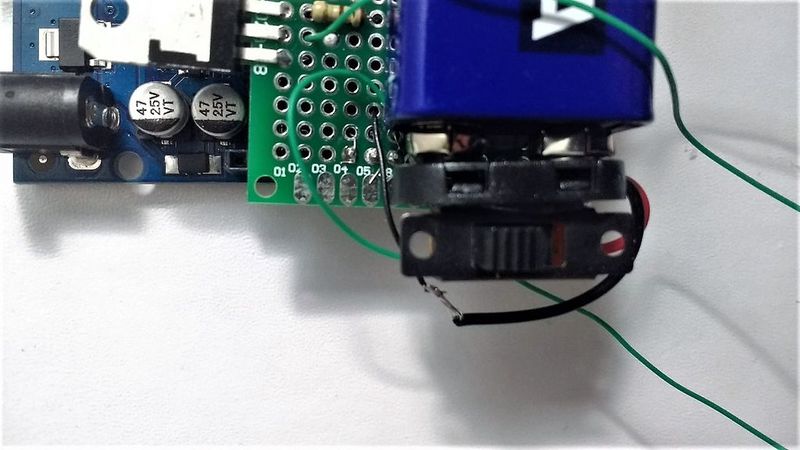
Connect the black wire (negative), from the battery strap, to the long wire coming from the ground pin of the Arduino (via the circuit board and header pin), making sure to remove length if necessary.
Connect the red wire (positive), from the battery strap, to the first pin of the switch.
Take the long wire connected to the Vin pin of the Arduino board (via the circuit board), cut to length and solder to the middle pin of the switch.
Where you have this wire from Vin connected to the middle pin of the switch, you need 2 wires (one for each RGB strip) to leave the switch. These will be the wires that supply the voltage to the RGB strips when they are switched on.
Check all your soldered connections work by using crocodile clips to connect up your RGB strips with the circuit board, Arduino and battery.
Now you have all your connections working, you should label each of your wires with a small sticker so that you know later on which connection to solder each one to - DO NOT SKIP THIS!
Étape 10 - Create the Pouch for the Arduino
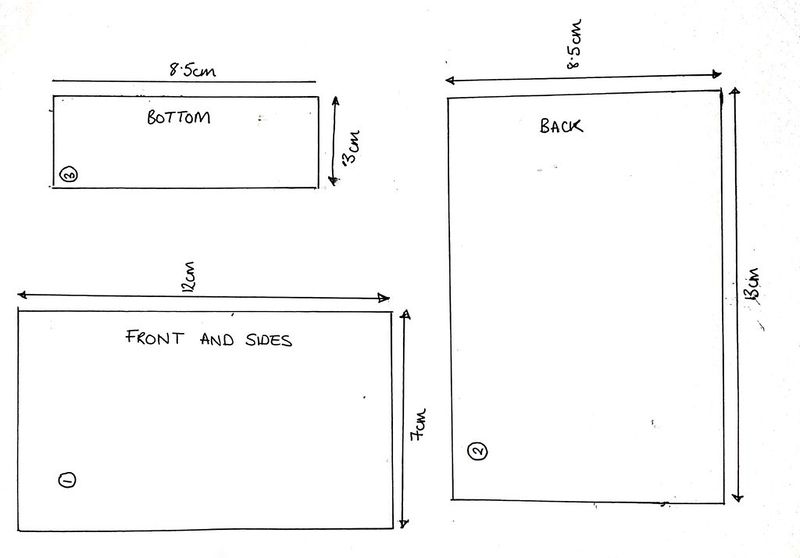
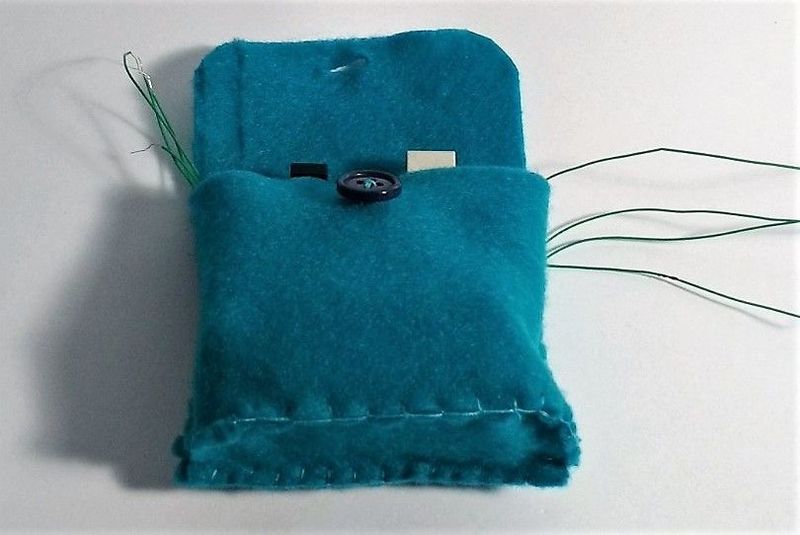
To create the pocket pouch that the Arduino will sit in, use the template given to cut out 3 pieces of felt to size.
First sew the front piece to the bottom piece, in the example a simple blanket stich was used.
Next, sew the back piece on, leaving a large amount free at the top for the lid.
Check that your Arduino and board fits in comfortably.
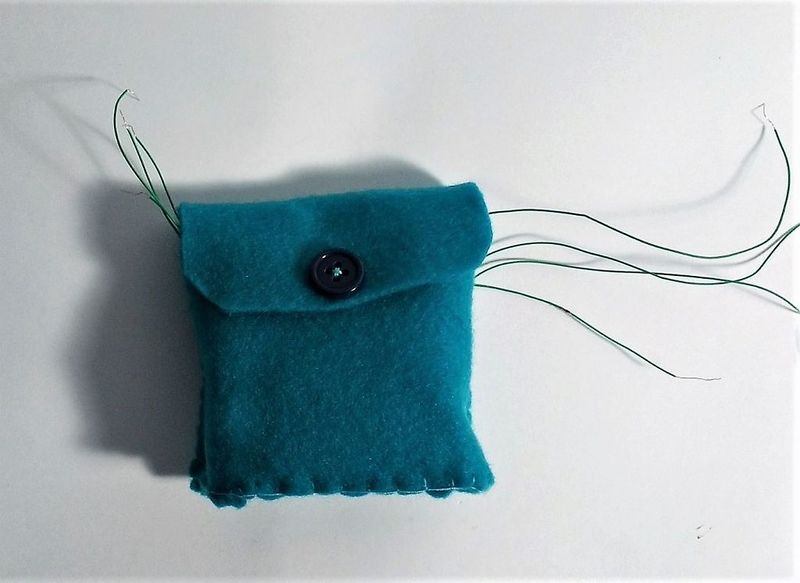
Now attach a button or Velcro on to the lid so that it can stay closed. If you are using a button, use a Stanley knife to make a slit in the lid for the button to go through.
Étape 11 - Insert Your Arduino Board
Turning the pouch over, create two slits in the back piece along the centre line of the pouch. This will be where the wires can feed through to be connected to the RGB strips.
NOTE: Be careful not to cut through the front piece of felt by accident.
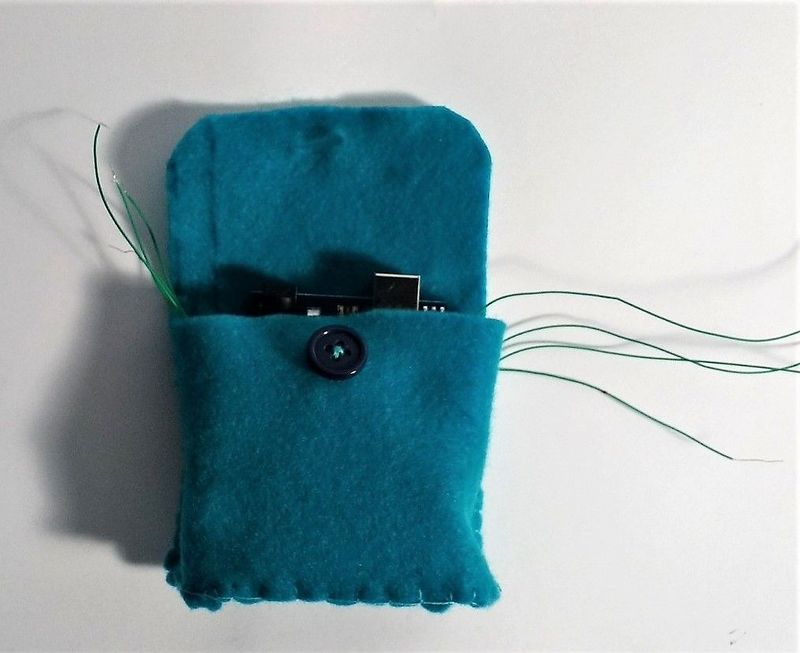
Insert your Arduino and board, carefully feed the two sets of wires for each RGB strip (which should be labeled, so you know how to connect them later on) through the two slits in the back.
Étape 12 - Connect You Wires to the RGB Strips
Now you need to solder all your wires to connect with the RGB strips.
Make sure to take note of the labels and make the right connections!
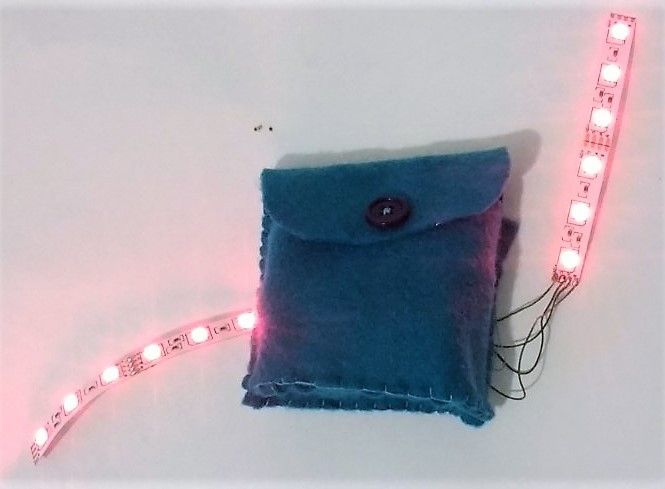
Make sure to remove any length from the wires so that there isn't too much excess as the RGB strip will be positioned next to the pouch.
Make sure to switch your switch to see if it works before moving onto the next steps!
Étape 13 - Create Correct Size Pieces for the Belt
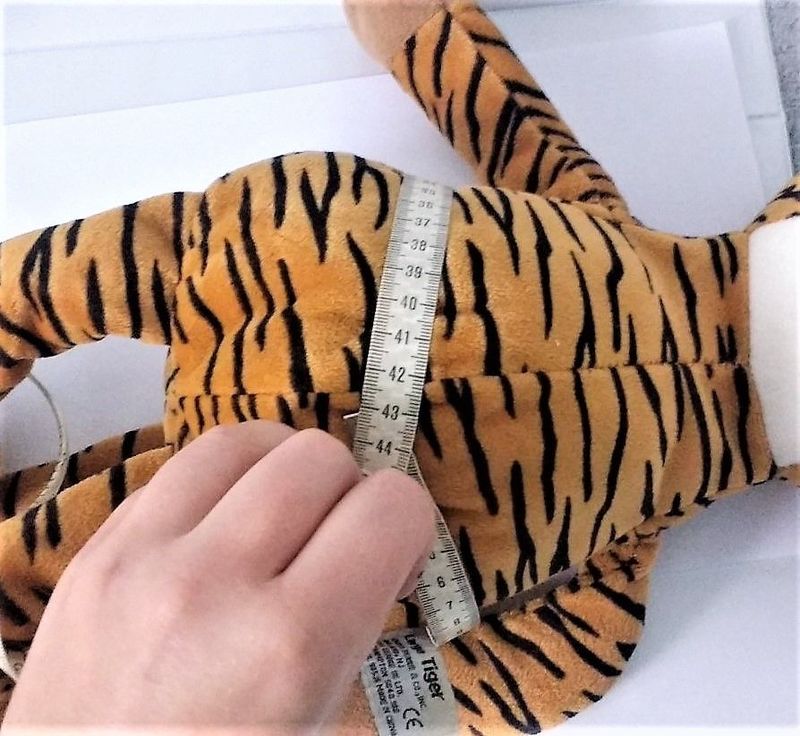
Take the distance measured around where you belt will be worn and divide it by 2, then add 5cm.
Cut out 4 pieces of felt (ideally light colours, such as white or cream) which are this length and 5cm in width.
Étape 14 - Connect Your RGB Strips to the Belt
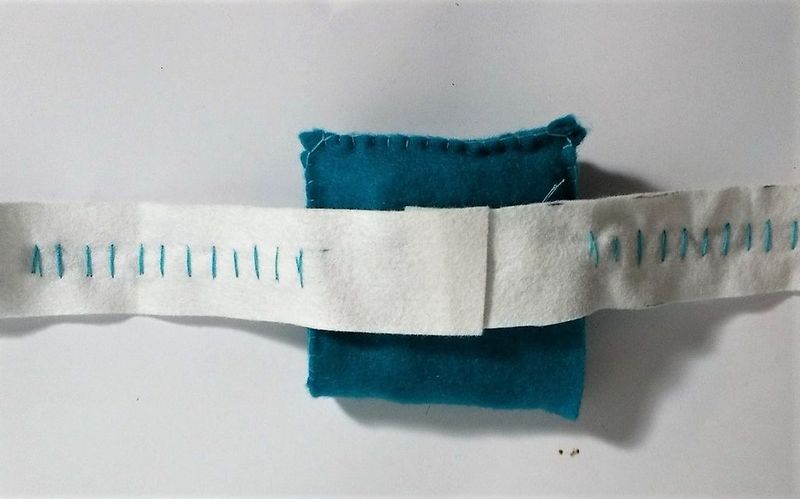
Position the longer pieces of felt behind the RGB strip and the back of the pouch. They should cross over the pouch to about half way.
Stitch on the RGB strip to the long piece of felt so that it holds in place.
Do the same for the opposite side.
Étape 15 - Stitch Together the Belt
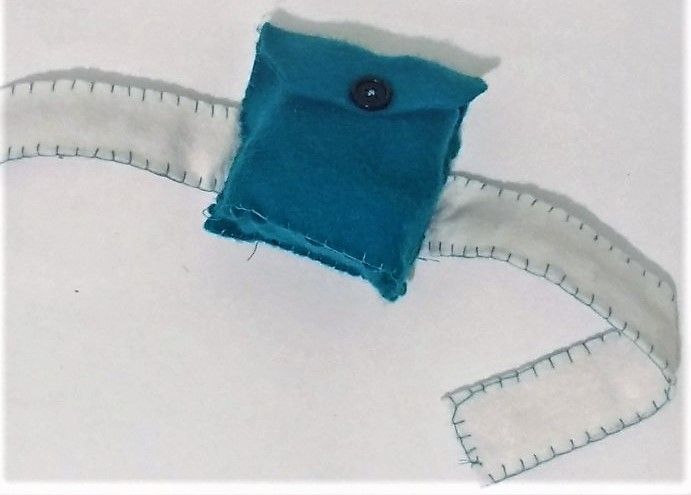
Position another long strip over the top of the RGB strip and tuck under the pouch as much as you can.
Sew the two pieces together using a blanket stitch. (You made need to cut off some length so that the pieces are the same length.)
Repeat for the other side.
Strengthen the connection between the belt and the pouch by re-sewing around where they connect together (particularly on the side of the pouch).
Étape 16 - Add Velcro
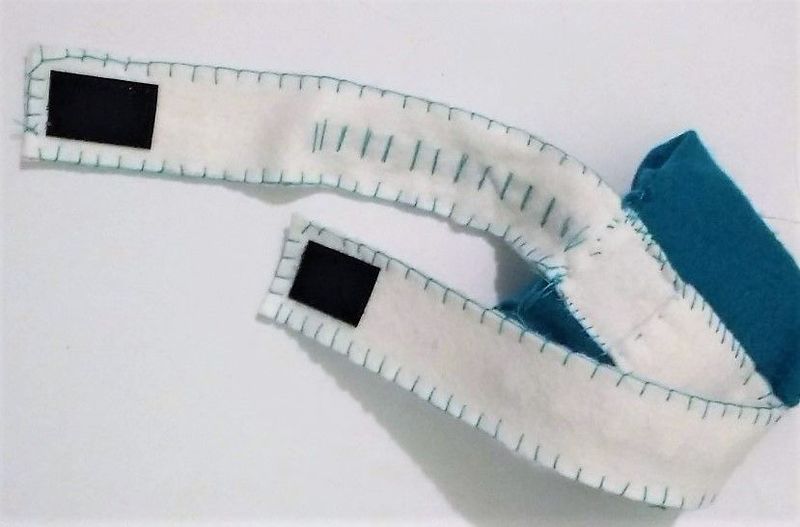
Check that it fits around the waist.
Attach the velcro to the end (or buttons) so that the belt can be done up and fits securely.
Étape 17 - Check It Works, Watch It Glow and Decorate!
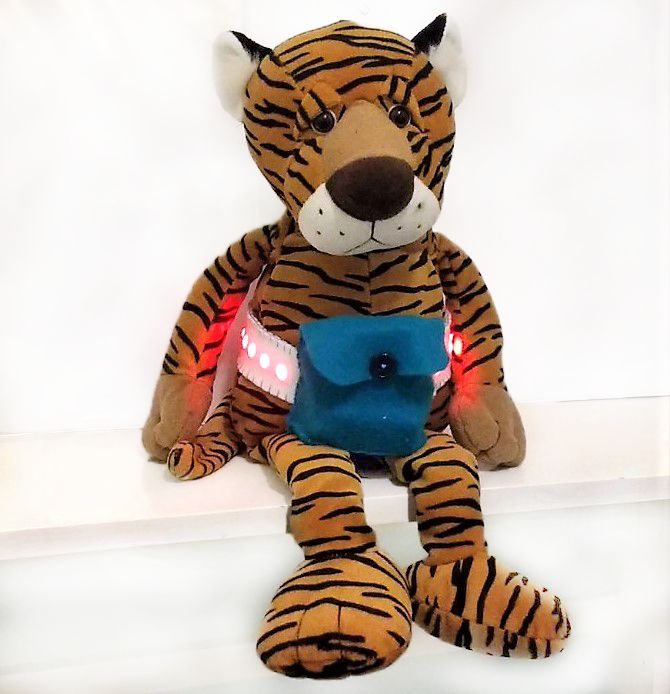
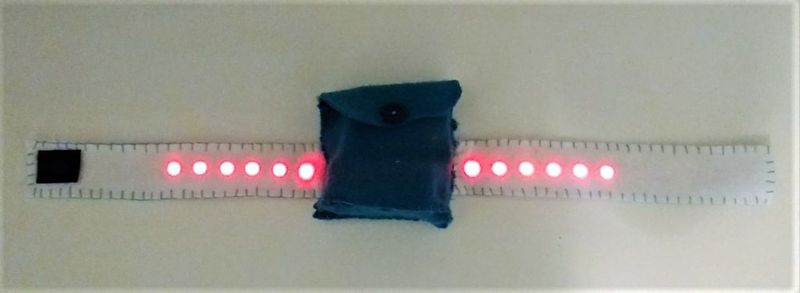
Now you can switch on your belt, watch it glow and wear it with pride!!
It can be reprogrammed to a different colour whilst remaining in the pouch as the USB port should be accessible from the top.
You can decorate your belt with shapes and patches. You could also sew on extra patches where you can pin on your reward pins once you have achieved them!
TIP: Some elements could be completed by the educator before the workshop, such as the pouch, to help children if there is not so much time or if they are less confident with sewing.
TIP: Some elements could be glued rather than sewed, but sewing is better so that the belt will last longer.
Draft


 Français
 English
 Deutsch
 Español
 Italiano
 Português