Introduction
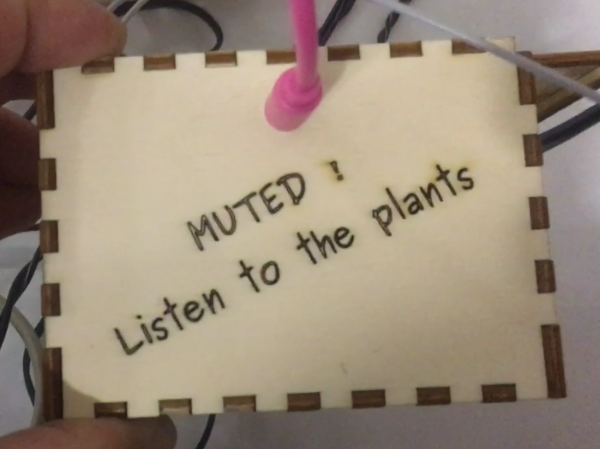
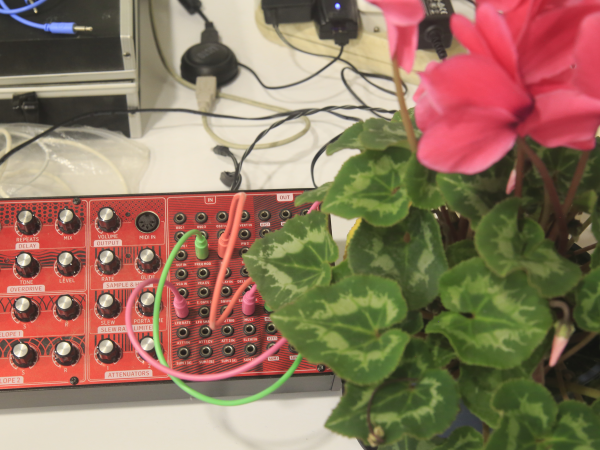
Ce prototype a été réalisé en deux jours à Janzé près de Rennes par l'équipe MUTED lors d'un hackathon visant à transformer de l'activité biologique détectée dans une plante en installation musicale. Il nécessite pour être répliqué : de réaliser d'abord le capteur documenté dans le tutoriel pré-requis.
Puis une jack 3.5 à souder (ou récupérée sur un ancien cable de casque audio), et une boîte pour intégrer le dispositif.
Attention il fonctionnera sur tout dispositif acceptant une tension de contrôle comprise entre 0 et 3V (tout synthétiseur analogique notamment).Youtube
Matériaux
Outils
Étape 1 - Réalisez d'abord le tuto "capteur biodata avec esp32"
Attention, il faut d'abord être capable de brancher une plante sur une carte électronique pour capter et transformer de minuscules variations électriques.
Ceci vous prendra entre deux heures et une demi-journée en suivant le tuto de Stéphane Godin.
Étape 2 - Intégrer le code source arduino
Le code source compatible pour faire fonctionner le capteur est rappelé ici.
Il faut le compiler et l'envoyer dans le module ESP32 à l'aide de l'outil arduino.
/*
 MIT License

Copyright (c) 2016 electricityforprogress

Permission is hereby granted, free of charge, to any person obtaining a copy
of this software and associated documentation files (the "Software"), to deal
in the Software without restriction, including without limitation the rights
to use, copy, modify, merge, publish, distribute, sublicense, and/or sell
copies of the Software, and to permit persons to whom the Software is
furnished to do so, subject to the following conditions:

The above copyright notice and this permission notice shall be included in all
copies or substantial portions of the Software.

THE SOFTWARE IS PROVIDED "AS IS", WITHOUT WARRANTY OF ANY KIND, EXPRESS OR
IMPLIED, INCLUDING BUT NOT LIMITED TO THE WARRANTIES OF MERCHANTABILITY,
FITNESS FOR A PARTICULAR PURPOSE AND NONINFRINGEMENT. IN NO EVENT SHALL THE
AUTHORS OR COPYRIGHT HOLDERS BE LIABLE FOR ANY CLAIM, DAMAGES OR OTHER
LIABILITY, WHETHER IN AN ACTION OF CONTRACT, TORT OR OTHERWISE, ARISING FROM,
OUT OF OR IN CONNECTION WITH THE SOFTWARE OR THE USE OR OTHER DEALINGS IN THE
SOFTWARE.


This project is based on https://github.com/electricityforprogress/MIDIsprout great work about biodata sonification
*/

#include <Arduino.h>

#define SAMPLESIZE  32
#define LED 5
#define DAC1 25

#define DESIRED_EVENT 6
#define ARRAYLEN(a) ((sizeof(a))/(sizeof(a[0])))

//manage LEDs without delay() jgillick/arduino-LEDFader https://github.com/jgillick/arduino-LEDFader.git
void sample();
float mapfloat(float x, float in_min, float in_max, float out_min, float out_max);
void analyzeSample();


//******************************
static byte state;
//*******************************

const byte interruptPin = 12; //galvanometer input

byte samplesize = SAMPLESIZE / 2; //set sample array size
//const byte analysize = SAMPLESIZE - 1;  //trim for analysis array


int CVmod = 0;


volatile unsigned long microseconds; //sampling timer
volatile byte sindex = 0;
volatile unsigned long samples[SAMPLESIZE];

float threshold = 1;  //change threshold multiplier


unsigned long previousMillis = 0;
unsigned long currentMillis = 1;
unsigned long batteryCheck = 0; //battery check delay timer

uint32_t threshold_last_millis = 0;
unsigned int  threshold_evt = 0;


//std::vector<CSequence*> psequences;

uint32_t sequence_time = 0;
uint16_t sequence_index = 0;
uint32_t chipId = 0;

char bleserverid[64] = "";
void setup()
{

  for(int i=0; i<17; i=i+8) {
    chipId |= ((ESP.getEfuseMac() >> (40 - i)) & 0xff) << i;
  }


  pinMode (LED, OUTPUT);    // initilize led output
  digitalWrite(LED, HIGH);   // set led ON

  sprintf (bleserverid, "BioData_%08lx MIDI device", chipId);
 // BLEMidiServer.begin(bleserverid); // initialize bluetooth midi
  Serial.begin(115200);                       //initialize Serial for debug


  attachInterrupt(interruptPin, sample, RISING);  //begin sampling data from interrupt

}

void loop()
{
  currentMillis = millis();   //manage time

  if(sindex >= samplesize)  { analyzeSample(); }  //if samples array full, also checked in analyzeSample(), call sample analysis


  if (currentMillis - threshold_last_millis > 15000)
  {

      if (threshold_evt < DESIRED_EVENT)
      {
        if (threshold > 0.001)
          threshold /= 1.4;
      }
      else
      {
        if (threshold < 10)
          threshold *= 1.4;
      }
      threshold_last_millis = currentMillis;
      threshold_evt = 0;
      //Serial.println(threshold);
  }


}


//interrupt timing sample array
void sample()
{
  if(sindex < samplesize) {
    samples[sindex] = micros() - microseconds;
    microseconds = samples[sindex] + microseconds; //rebuild micros() value w/o recalling
    //micros() is very slow
    //try a higher precision counter
    //samples[sindex] = ((timer0_overflow_count << 8) + TCNT0) - microseconds;
    sindex += 1;
  }
  digitalWrite(LED, ((state) & 0x01) == 0 ? HIGH : LOW);
  state++;


}


void analyzeSample()
{

  //eating up memory, one long at a time!
  unsigned long averg = 0;
  unsigned long maxim = 0;
  unsigned long minim = 10000000;
  float stdevi = 0;
  unsigned long delta = 0;
  byte change = 0;

   digitalWrite(LED, ((state) & 0x01) == 0 ? HIGH : LOW);
  state++;
  if (sindex >= samplesize) { //array is full
    unsigned long sampanalysis[SAMPLESIZE];
    for (byte i=0; i < samplesize; i++){
      //skip first element in the array
      sampanalysis[i] = samples[i];  //load analysis table (due to volitle)
      //manual calculation
      if(sampanalysis[i] > maxim) { maxim = sampanalysis[i]; }
      if(sampanalysis[i] < minim) { minim = sampanalysis[i]; }
      averg += sampanalysis[i];

    }
    averg = averg / (samplesize);
    for (byte i = 0; i < samplesize; i++)
    {
      stdevi += (sampanalysis[i] - averg) * (sampanalysis[i] - averg) ;  //prep stdevi
    }

    //manual calculation

    stdevi = stdevi / (samplesize);
    if (stdevi < 1) { stdevi = 1.0; } //min stdevi of 1

    stdevi = sqrt(stdevi); //calculate stdevu

    delta = maxim - minim;


    //Serial.printf("%ld %ld %ld %ld %f %f\r\n", minim, maxim, averg, delta, stdevi, stdevi * threshold);
    Serial.printf("%ld", delta);
    //Serial.print(averg);
    Serial.println(",");
    CVmod = map(delta, 0, 20000, 0, 255);
    Serial.println(CVmod);

    int data2 = delta % 255;
    Serial.println(data2);
    dacWrite(DAC1, data2);

    sindex = 0;

  }
}
Étape 3 - Vérifier les branchements
La masse de votre câble audio doit être branchée sur la broche xx de l'ESP32.
L'autre fil doit être branché sur la broche XXX.
Pour tester le fonctionnement, vous pouvez prendre un multimètre et l'appliquer sur deux sections de la fiche jack.
Étape 4 - Brancher le module sur un synthétiseur
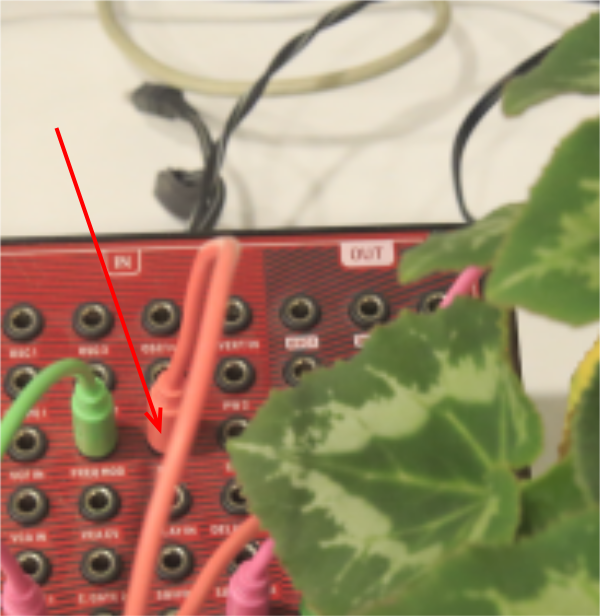
Il vous suffit maintenant d'alimenter le boitier relié à une plante (deux câbles dénudés sur deux tiges) et d'enficher la prise jack pour avoir un module vivant intervenant dans votre synthétiseur.
Un grand merci à Simon Lamy pour la vidéo de démonstration.
Notes et références
Biodata/sound/exemples
https://electricityforprogress.com/biodata-sonification/
Multiples ressources Labomedia
https://ressources.labomedia.org/capteurs_environnementaux_biofeedback
Midi + arduino
http://www.planetarduino.org/?cat=5499
MIDI/notes
https://newt.phys.unsw.edu.au/jw/notes.html
Midi packets logger
Draft


 Français
 English
 Deutsch
 Español
 Italiano
 Português