(Cette version a été marquée pour être traduite) |
|||
| Ligne 146 : | Ligne 146 : | ||
}} | }} | ||
{{ {{tntn|Notes}} | {{ {{tntn|Notes}} | ||
| − | |Notes=<translate>For more information on this and other chicken coops visit the <a href="https://www.somerzby.com.au/">Somerzby</a> website.</translate> | + | |Notes=<translate><!--T:44--> For more information on this and other chicken coops visit the <a href="https://www.somerzby.com.au/">Somerzby</a> website.</translate> |
}} | }} | ||
{{ {{tntn|Tuto Status}} | {{ {{tntn|Tuto Status}} | ||
|Complete=Published | |Complete=Published | ||
}} | }} | ||
Version du 16 octobre 2018 à 04:02
Step by step tutorial on building a Somerzby Chicken Coop
Difficulté
Facile
Durée
2 heure(s)
Catégories
Bien-être & Santé, Maison, Sport & Extérieur, Jeux & Loisirs
Coût
300 USD ($)
Sommaire
- 1 Étape 1 - Getting the Foundation
- 2 Étape 2 - Squaring the Corners
- 3 Étape 3 - Assembling the Walls for Your Chicken Coop
- 4 Étape 4 - Attaching the Nesting Box to Your Chicken Coop
- 5 Étape 5 - Ramps & Ladders
- 6 Étape 6 - Attaching Mesh Walls to Your Chicken Coop
- 7 Étape 7 - Chicken Coop Walls & Door
- 8 Étape 8 - Fitting the Roofing Panels to Your Chicken Coop
- 9 Étape 9 - Check All Is Working OK
- 10 Étape 10 - Finished Building Your Chicken Coop!
- 11 Étape 11 - Your Chooks Will Love Their New Home!
- 12 Notes et références
- 13 Commentaires

Matériaux
200mm x 70mm treated pine timber - optional
Pavers - 300mm x 300mm (if you prefer)
Somerzby Homestead Chicken Coop (kit)
Outils
Hammer
Allen Key (provided)
Shovel
Étape 1 - Getting the Foundation
Mark out the area in your yard and using either timber or pavers set out a firm foundation for the frame to stand on.
Make sure its level and all the corners are square.
If using timber make sure it's treated, that will prevent it from rotting.
Keeping the chicken coop off the ground is not essential, but it is a good idea,
We've used a 200mm x 70mm treated pine timber section from Bunnings, and please note these timber sections are not included with the Somerzby Chicken Coops.

Étape 2 - Squaring the Corners
All the corners should be fixed together well using a corner bracket or screws.
It’s important that the base is level, walls, floors and roofing will be fit and work much better sitting on a level base / foundation.

Étape 3 - Assembling the Walls for Your Chicken Coop
Position and attach the external wall panels making sure all corners are square and are on a level base / foundation.
The internal wall and coop flooring is then attached to the external walls

Étape 4 - Attaching the Nesting Box to Your Chicken Coop
Fix the nesting box walls and floor to the side wall panel.
Once walls are attached, fix the hinged opening roof assembly to the nesting box.

Étape 5 - Ramps & Ladders
Attach the pre-made ramp and ladder to the bottom rail of the interior wall panel.

Étape 6 - Attaching Mesh Walls to Your Chicken Coop
Attach the mesh walls to the side panels using the fasteners supplied.
Ensure the walls sit firmly on the ground, pavers or timber foundation.

Étape 7 - Chicken Coop Walls & Door
Finally, attach the end panel and door assembly to the two side panels.
Having a plumb / level wall assembly will ensure an optimal door swing action.

Étape 8 - Fitting the Roofing Panels to Your Chicken Coop
Once all four walls are assembled the roof can then be attached.
A properly squared and well aligned frame will help to ensure the correct positioning of the roofing panels.

Étape 9 - Check All Is Working OK
Once all the wall and roofing panels have been fastened, it’s time to test all the doors and openings are working.
Also, check to make sure all screws and fasteners have been properly secured.

Étape 10 - Finished Building Your Chicken Coop!
Time to admire your handy work!
Take a photo and post on Facebook, Instagram or Snapchat…

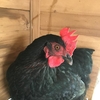
Étape 11 - Your Chooks Will Love Their New Home!
Your chickens will love their brand-new home; the kids will have a great time playing with the chooks and helping to keep the chicken coop clean.
You might even get a few freshly laid eggs…
If you'd like to get started building your own Chicken Coop, you can find more information on the Somerzby Homestead Chicken Coop!

Notes et références
For more information on this and other chicken coops visit the <a href="https://www.somerzby.com.au/">Somerzby</a> website.
Published
 Français
 English
 Deutsch
 Español
 Italiano
 Português