preciousplastic, recycling, Open Source, plastic, shredderCreation
Matériaux
Outils
Étape 1 - Tools
Hammer
(punch) for knocking out leftover metal slugs
Files
Mallet
Socket wrench( 2x)
Tape measure
Screwdriver (directing the slide nuts)
Marker
Étape 2 - Table Parts
Parts Needed:
Aluminum Extrusion
Profile
Length (mm)
Quantity
8080
520
4
8080
600
4
8080
1200
2
4080
520
1
4080
455
1
data-sheets-value="{"1":2,"2":"Corner Plates"}"
Étape 3 - Table Construction
Tools:
XX Socket Wrench
Screwdriver
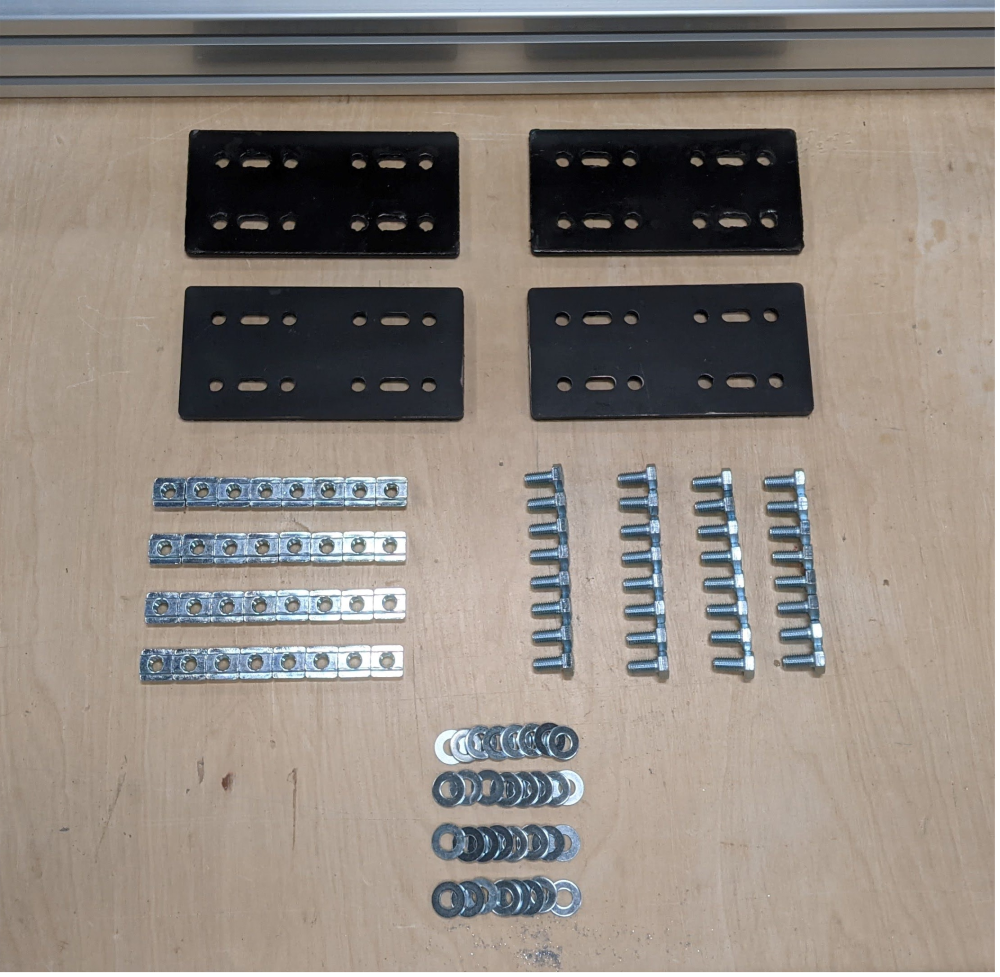
Parts:
4x 8080*600mm
2x 8080*1200mm
4x Side Plates
32x T nuts
32x Washers
32x M8x16mm Bolts
Steps
Lay one 1200mm beam horizontally in your workspace. Add a 600mm beam perpendicular at each end, forming a staple shape. (see image 5 for final shape reference)
Using 8 total washers, slide 2 at a time into each rail at the corner, approximating the hole pattern on the side plates. (image 2)
Using a screwdriver to position the T-nuts, add an M8x16 Bolt and washer through the side plate into each T nut. (images 3 and 4)
Secure with a socket wrench. Repeat on the other side of the 1200mm beam.
Commentaires
ennone0Draft
×
Erreur de saisie dans le nom du tutoriel
Vous avez entré un nom de page invalide, avec un ou plusieurs caractères suivants :
< > @ ~ : * € £ ` + = / \ | [ ] { } ; ? #
Connexion
Pas encore enregistré ? Créez un compte pour profiter de toutes les fonctionnalités du service !


 Français
 English
 Deutsch
 Español
 Italiano
 Português